


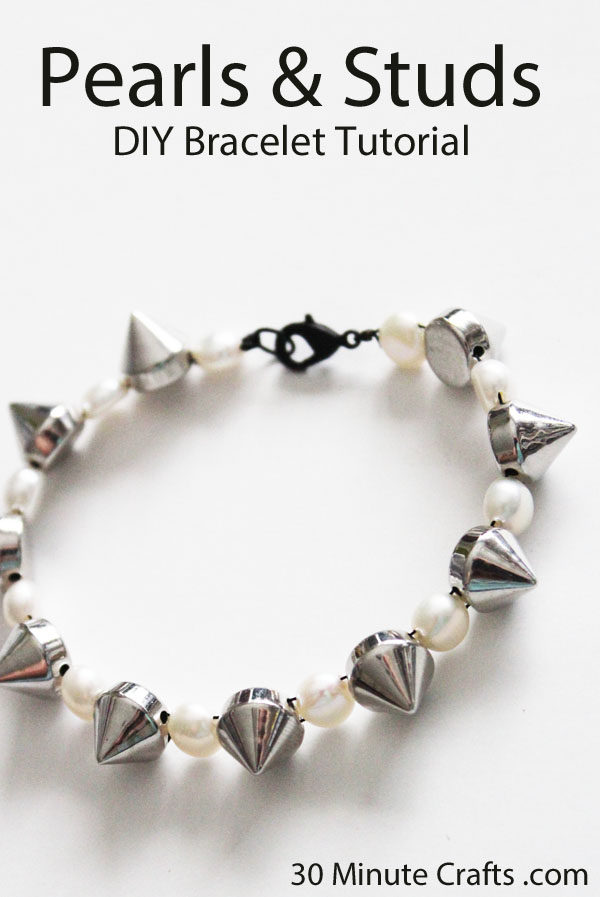
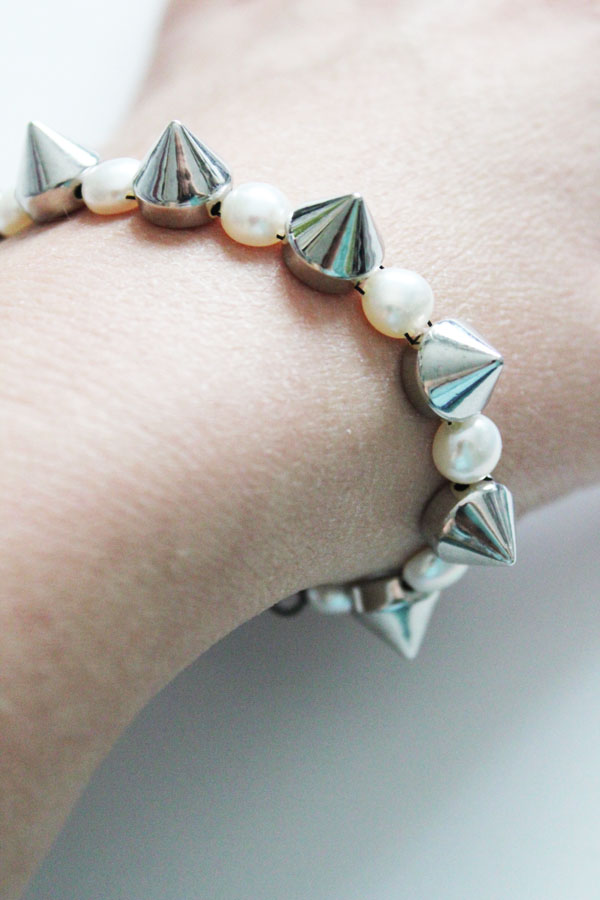
I love combining textures, like hard and soft. And this pearls and studs bracelet does exactly that, by combining studs and pearls. Hard, fierce studs with soft, round pearls. It makes for a friendly combination of rocker and 1950s mom. Like the mom who has chocolate chip cookies fresh out of the oven… but serves them while the stereo is blasting. And not with regular milk. Chocolate milk. Because chocolate milk is so much more rock star than regular milk. And even rockstar moms want our kids to get their calcium. While wearing studs.
To make this pearls and studs bracelet, you’ll need some basic jewelry supplies… but even if this is your first ever jewelry craft, you should do fine. There is nothing fancy going on here, just threading some beads and using some crimp beads. Which, if you’ve never used them, you’ll fall in love with. They’re like magic.
If you didn’t catch yesterday’s stud craft, I added colorful studs to a shirt. And I didn’t stop there. Because if we’re crafting with studs, we should really craft with studs, right? Here is a little Stud Crafting on CraftSnark from yesterday. And I didn’t leave you hanging… there’s some Craft Snark Stud Crafting for today, too. You’re welcome.
But, if you’re here for the crafts and not the eye candy, then I’ve got you covered there, too. I’ve put together a supply list with affiliate links for you. Buy the supplies with the links, and I get a little cash to help support the site.
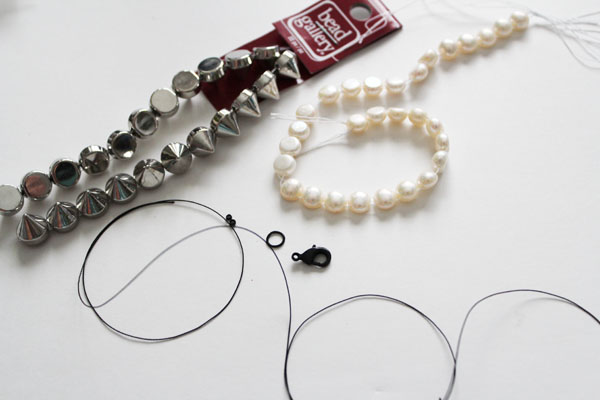
Nylon Beading Thread
Two-hole stud beads (similar here: 2-Hole Pyramid Studs)
Two-hole pearl beads (I bought mine at a specialty bead shop, but you could use these rosettes, these squares
, or these freeform shapes
, if you really like round, use these single-hole beads
, and I’ll give you alternate directions in the comments.
1-Step Crimping Pliers
black jump ring
Black Lobster Clasp
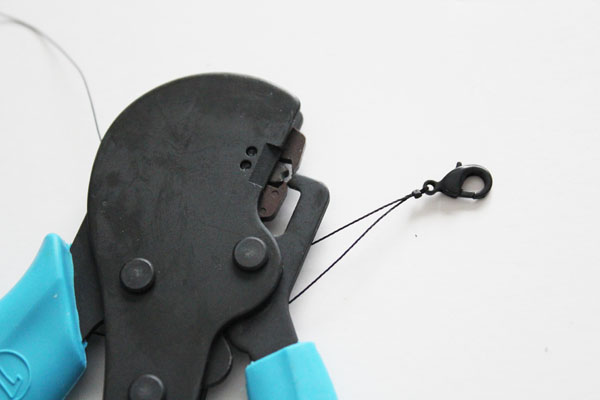
Start by cutting a 2-foot length of the beading cord. String a crimp bead and the lobster clasp on, and bring to the middle. Use the 1-step crimp tool to clamp down the crimp bead. This will secure everything in place.
Start threading the studs and pearls. I went for an alternating pattern, but you can make whatever design or pattern you like – one of the perks of making your own jewelry! Don’t cross the threads, just keep the right on the right and the left on the left. This will keep the beads all facing up.
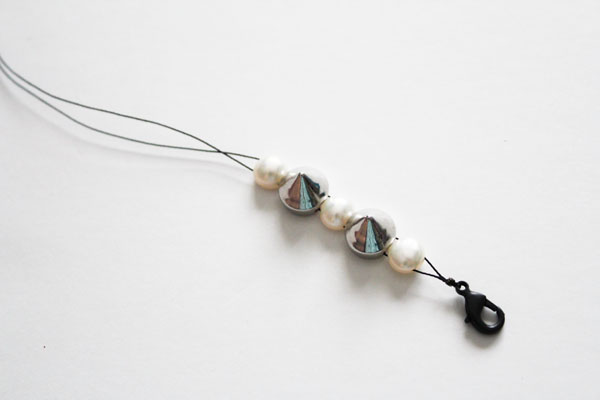
If you’re using a single-hole pearl, thread both threads through the single hole, then split to go through the stud. You might get some twisting when you wear the bracelet, if you don’t wear it snug.
When your bracelet is the right length, thread both threads through a crimp bead, then through a jump ring, then back through the crimp bead. Then tuck the ends into the last bead.
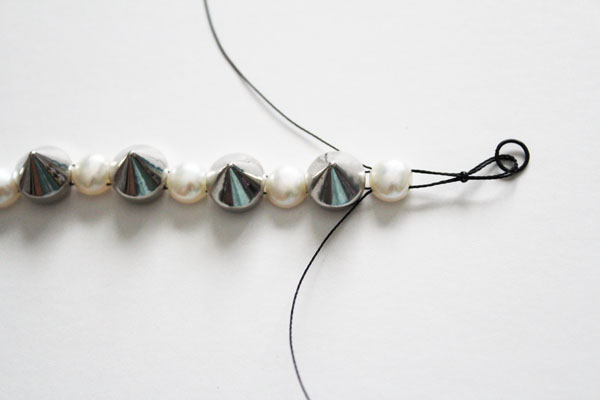
Pull snug, then use the crimping pliers to squeeze shut the crimp bead. This will keep everything in place.
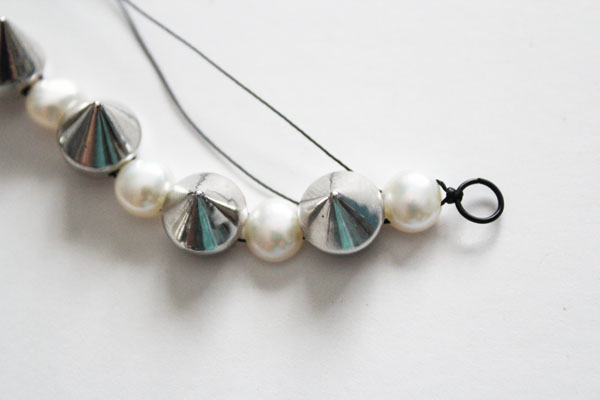
Trim the extra thread, and your bracelet is done!
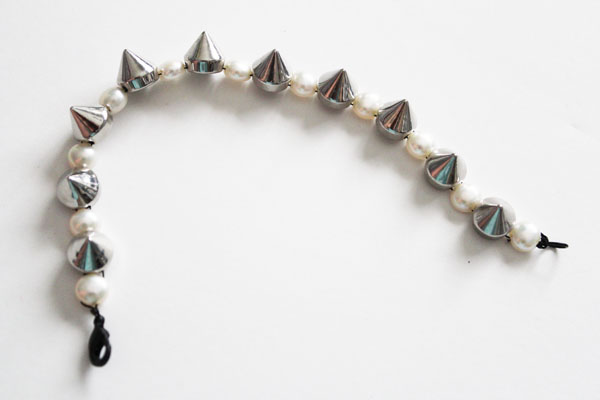
Super simple, fast, and stylish. This studs and pearls bracelet is a must for any rockstar mom.
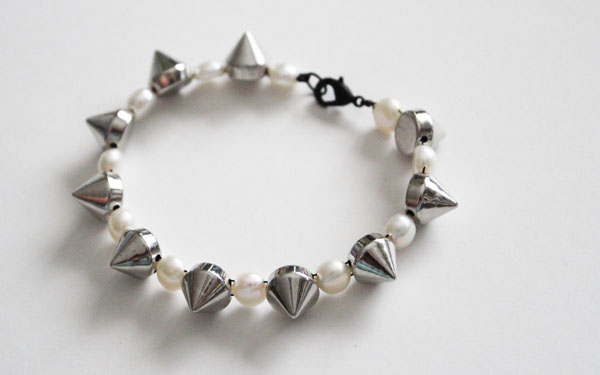
Wear it with pride as you wipe away chocolate milk mustaches.


This is a really modern and eye-catching design Carolina, great work!