Printable Envelopes

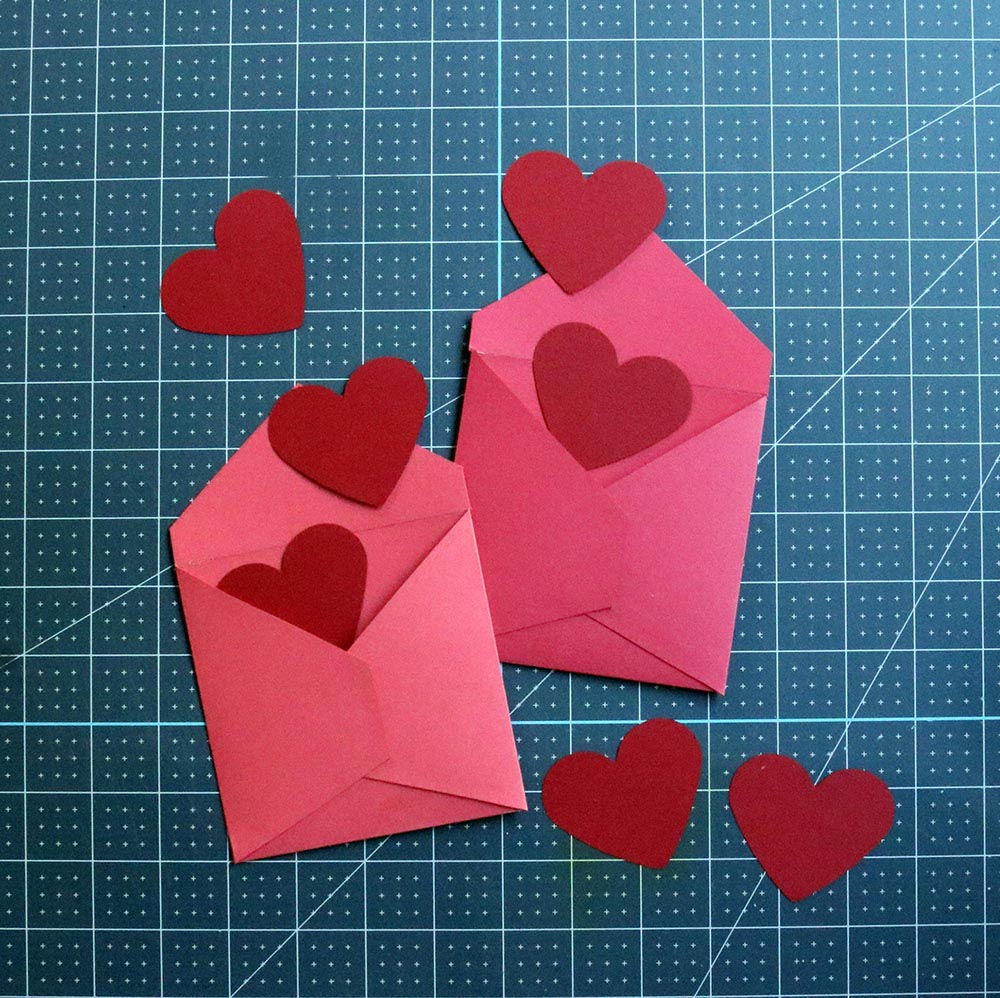
These printable envelopes are an easy kid craft and fun for adults to make as well! Just print out these envelopes, cut them out, put them together… making these printable envelopes is super simple! And, go ahead and scroll all the way down to the bottom to check out more free Valentine’s printables!

Just a quick heads-up that these envelopes are square. And square envelopes do require more postage here in the US. If you’re in a country where square envelopes don’t require more postage leave me a comment so I can dream of moving there. Anyway, they require more postage here. Which is probably worth it. But if you feel like it isn’t, then I totally recommend that you hand deliver these cards. Because hand-delivered cards are the best. Just saying.

To make your printable envelopes, the first thing you’re going to need is the printable file. I’ve got that completely sorted for you. Just drop your email address below and I’ll send you the download link. By the time you’re done reading how to put them together, it should be waiting in your inbox (but be sure to check your spam folder – sometimes email programs get confused and think I’m spamming you when I’m actually sending all the goodness your way).


The printables are free!

Sign up for our email list to get your free Printable files!

You’ve successfully signed up! Check your email for details.

Start by grabbing your supplies. You’ll need paper, scissors, a ruler, a scoring tool, and some kind of adhesive – a good double-stick tape or glue will work.

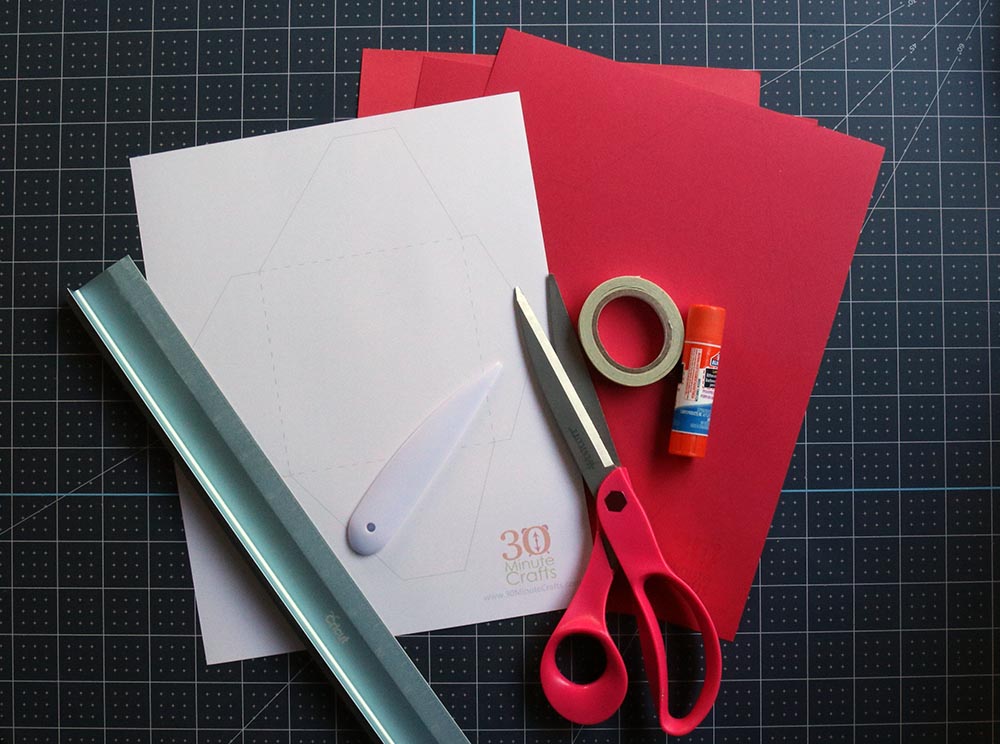
Once you have your file, print it out. You can print it out on regular copy paper or some colored cardstock. There are really fun colored cardstock options available, so I vote you go for colored cardstock. But you do you.

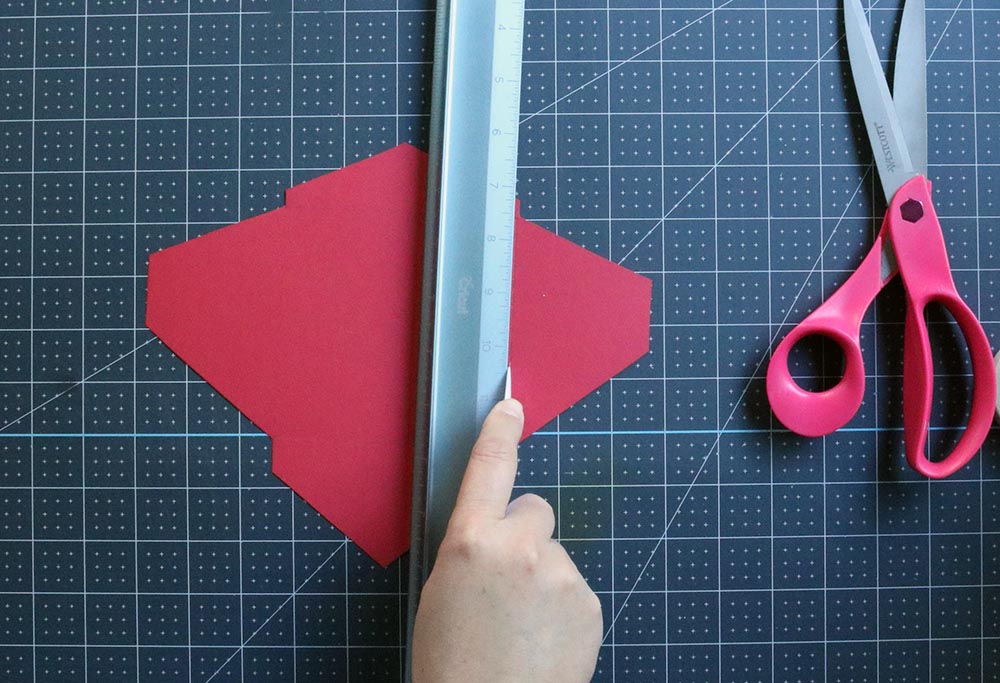
Once you have it printed out, cut around the outline. The outline was made a really light grey so that if you’re not perfect at cutting nobody will notice. Probably.

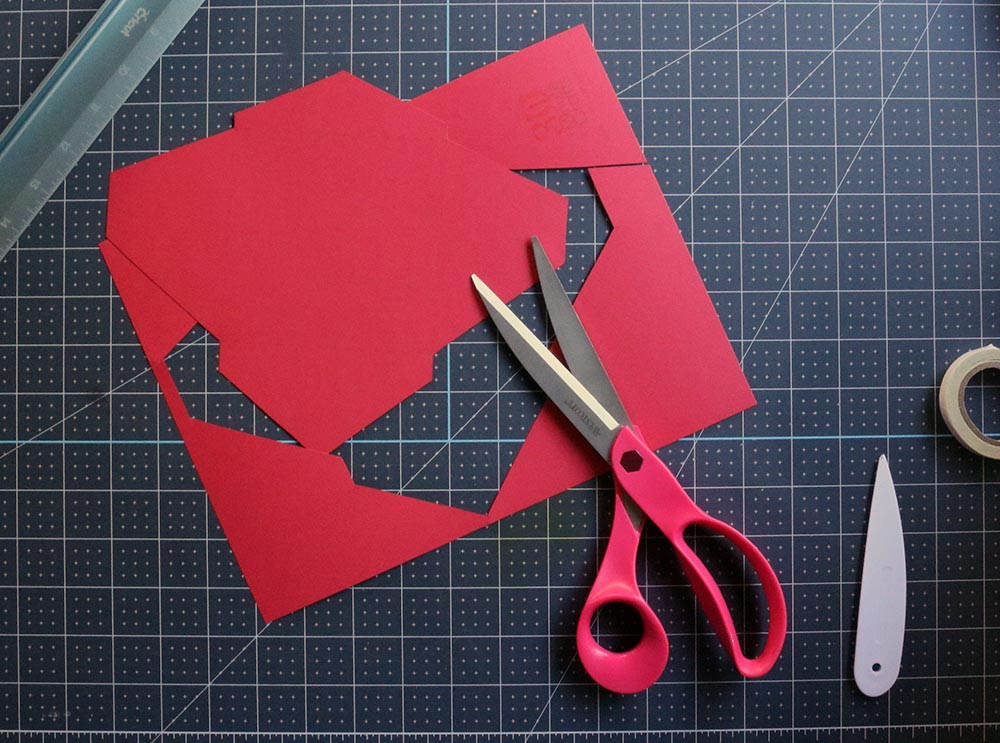
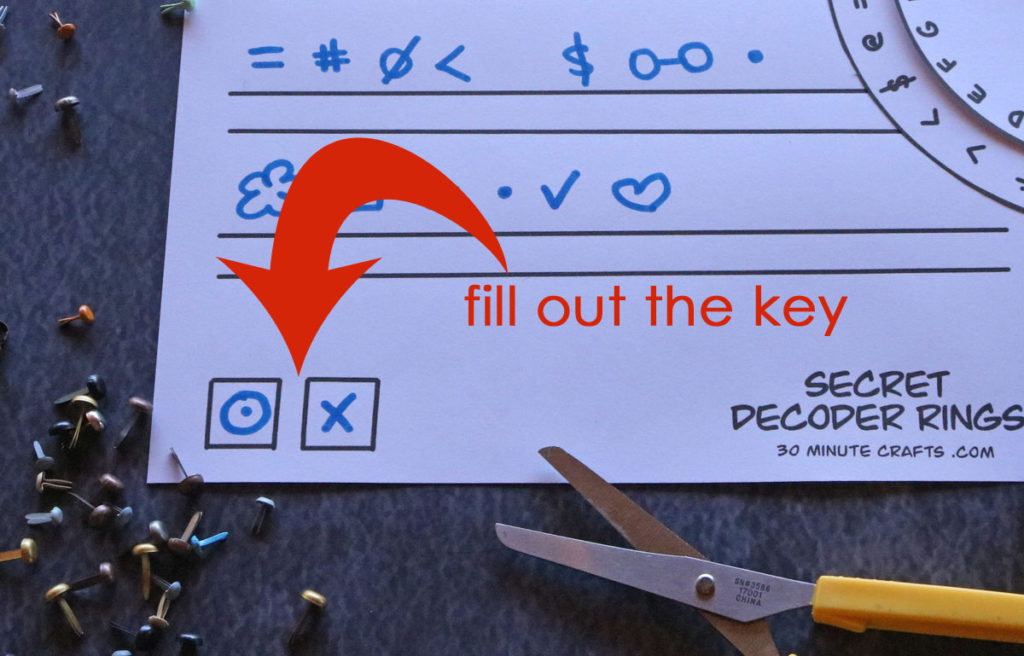
After you’ve cut, use the ruler and scoring tool to mark the scoring lines. If you don’t have a scoring tool you can just fold on the dotted lines and it will work just fine.

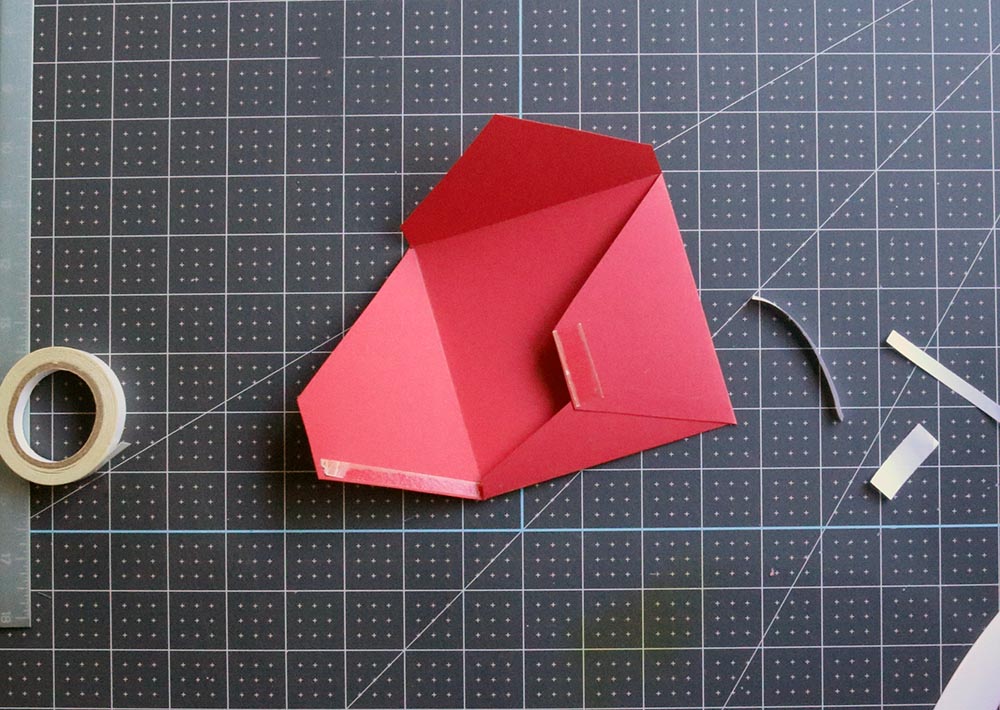
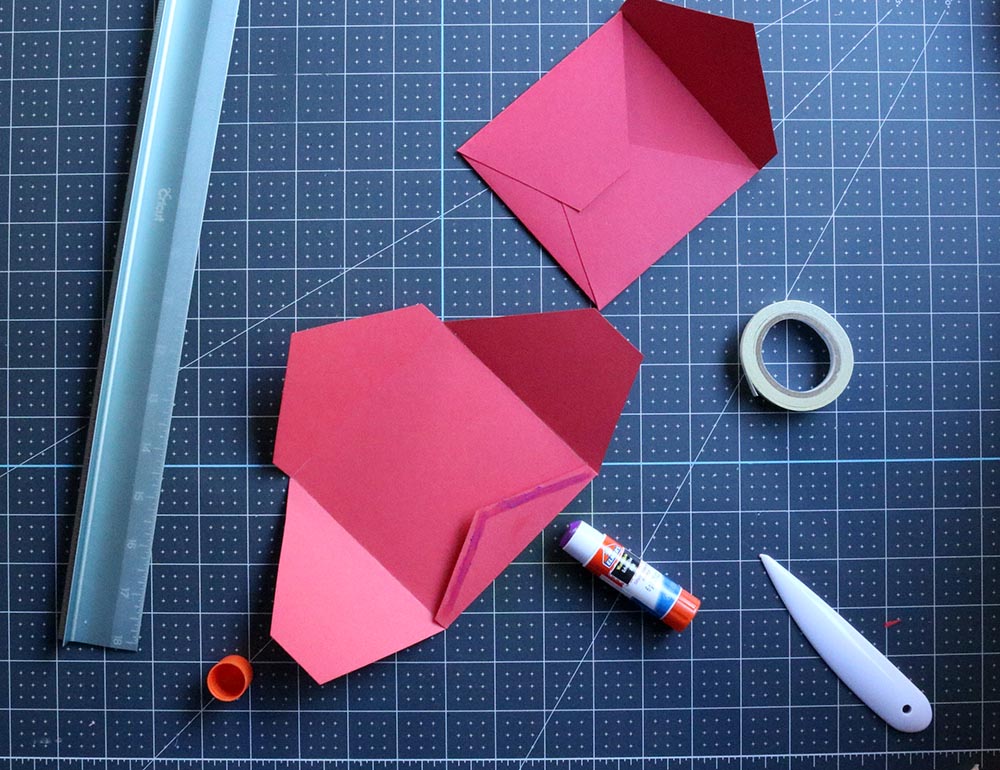
Use glue or your double-stick tape on the sides to secure them to the bottom flap.

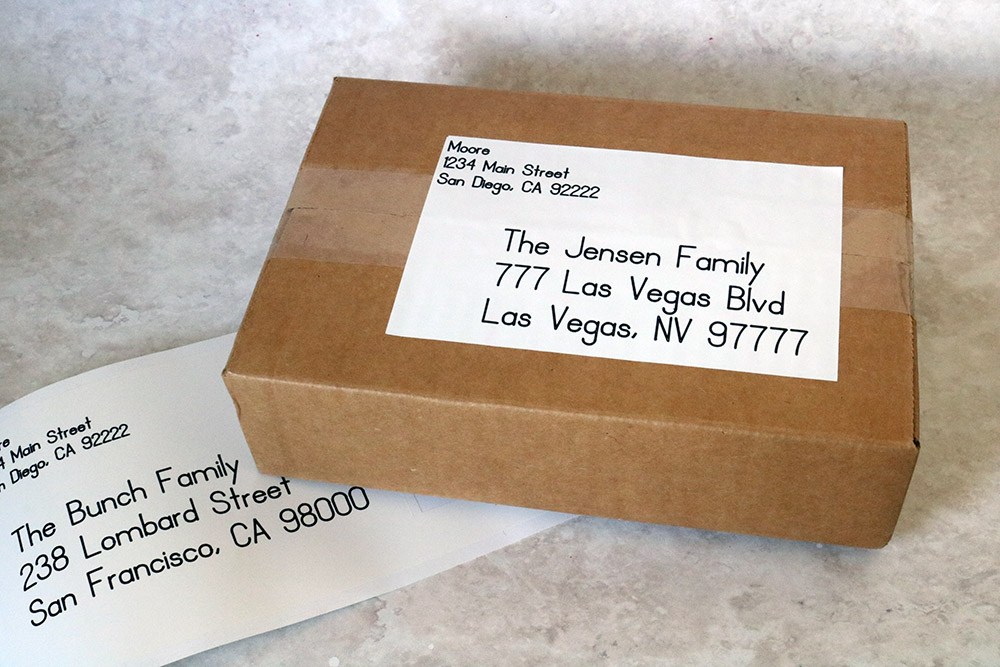
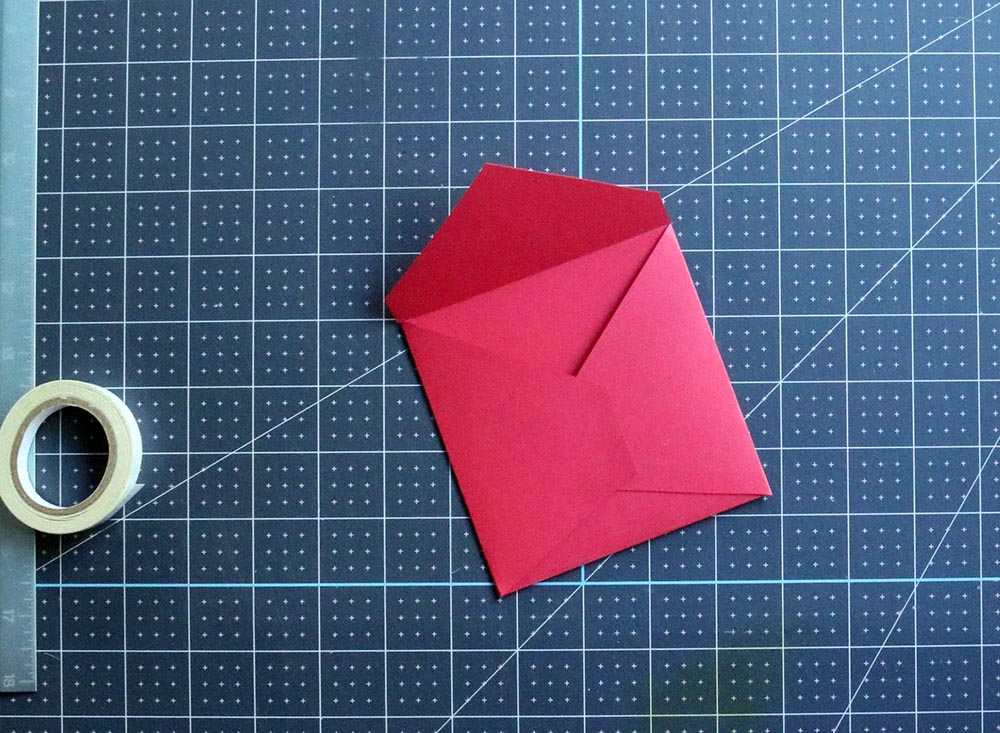
That’s it! Your envelope is ready for sending!

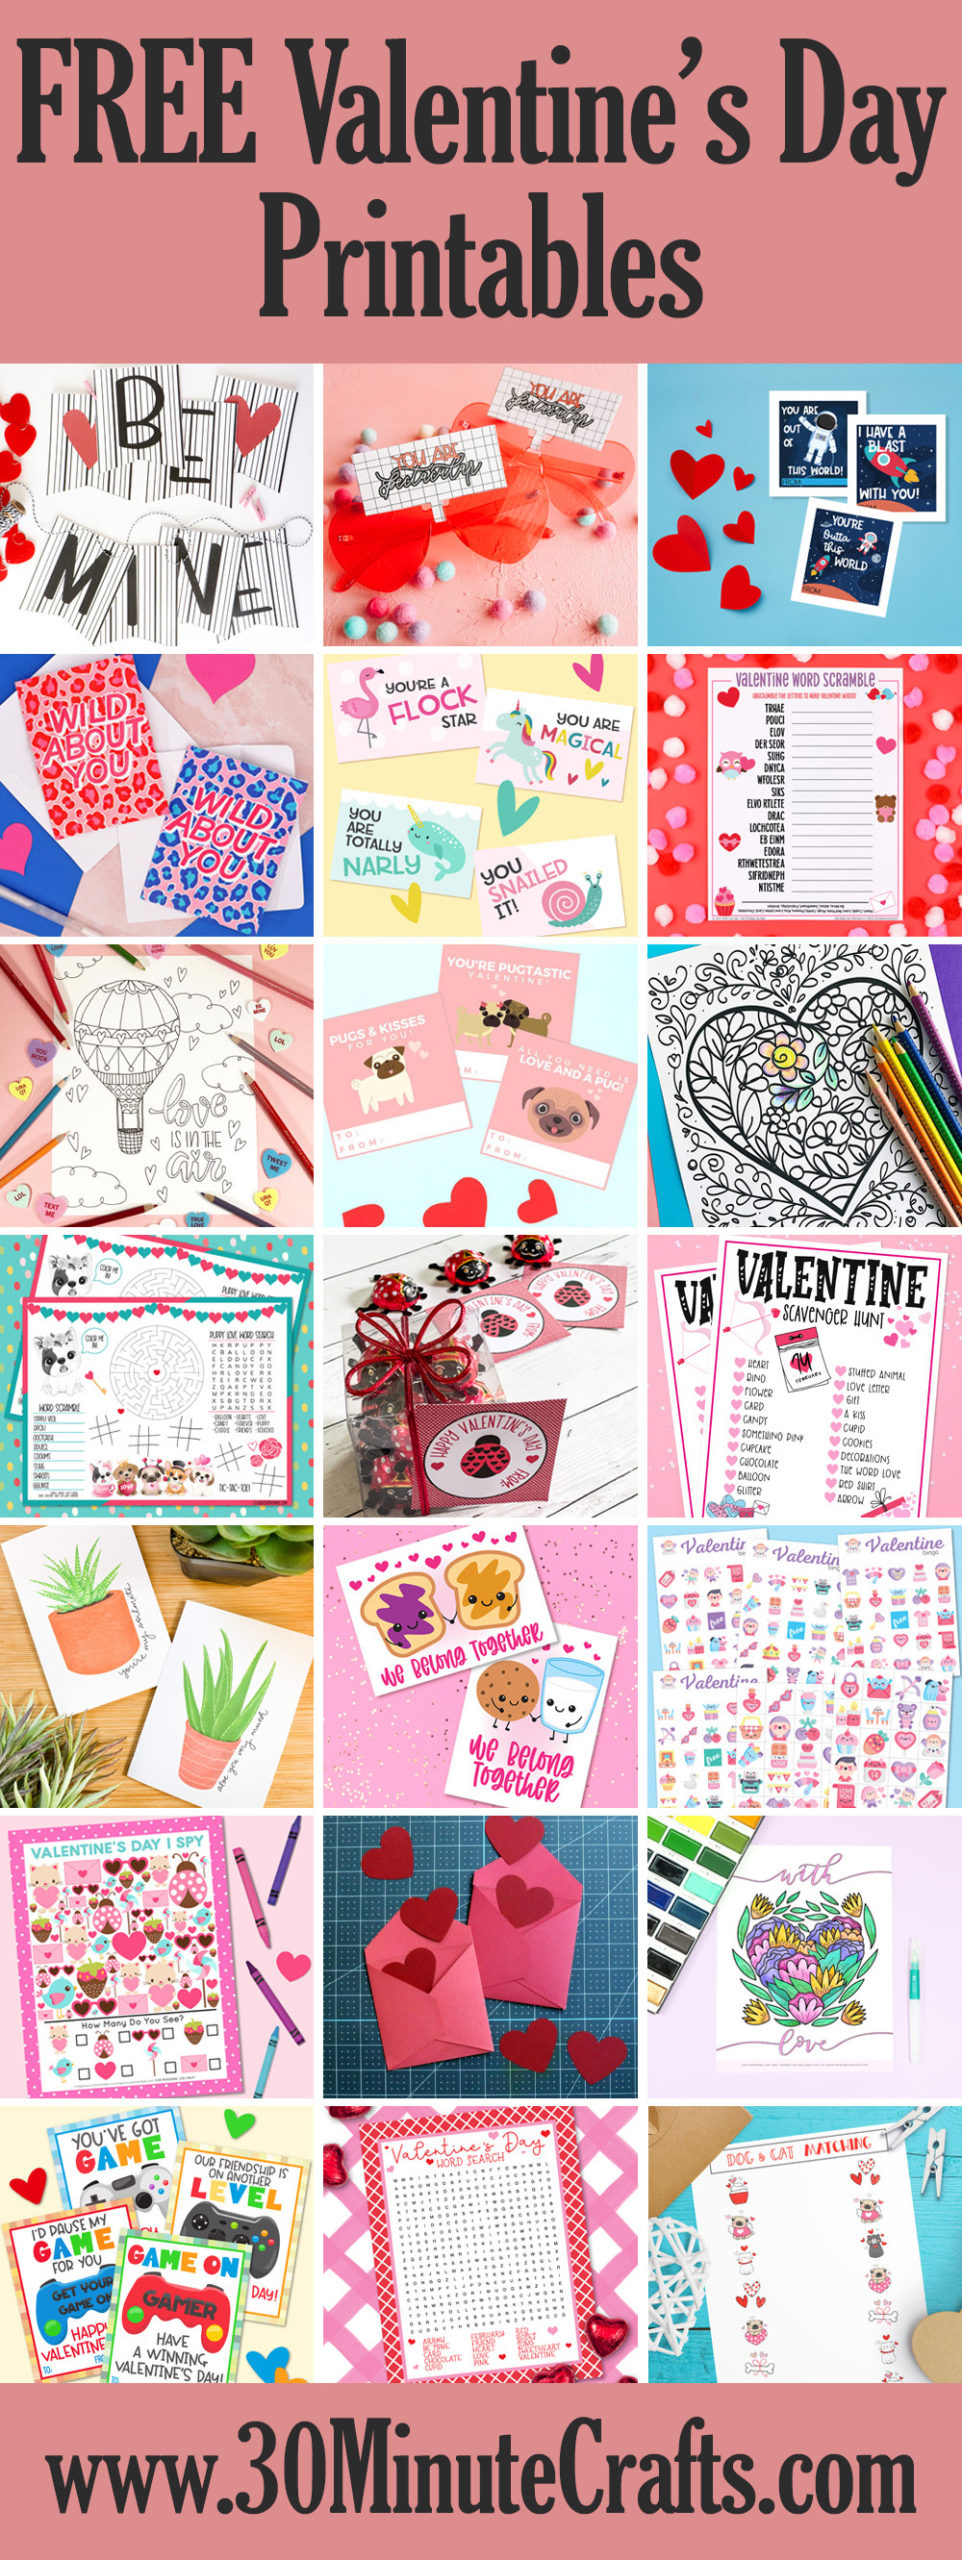
Be sure to check out all these other Valentine’s themed FREE printables!

Crown Monogram SVG

Get this crown monogram perfect for customizing however you like! I used the “Sarina” font to add “Princess” to this monogram that has a tiara look to it. It has some great filigree and would look fabulous cut out of glitter, metallic, or shimmer vinyl.

Perfect for making your own “Princess,” “Queen,” or “Royalty” tee, you can add a name instead to personalize just about anything – mugs, cups, binders, backpacks … whatever you can get your vinyl to stick to you can personalize with a little touch of royalty!

You can get your Free SVG file ready for customizing (font not included) by signing up for our newsletter below:


The files are free!

Sign up for our email list to get your free SVG files!

You’ve successfully signed up! Check your email for details.

Check out all these other awesome FREE decorative monogram SVG files:

Rainbow Monogram Frame
Heart Name Monogram
Pineapple Monogram Frame
Circle Monogram Borders
Flamingo Monogram
Cat Monogram
Apple Monogram Frame
Floral Fancy Cut Monogram
Scalloped Monogram Frame
Flower Frame
Laurel Wreath Frame
Unicorn Frame
Potted Plant Monogram
Graduation Monogram
Crown Name Monogram
Hammer Monogram

Free Christmas SVG

Are you ready for Christmas? What about some Christmas crafting?? I love making handmade gifts, and this free SVG file is perfect for the holidays! Use this free “Its Beginning to smell a lot like Christmas” SVG file to make fun holiday shirts, aprons, and tea towels! If you are looking for the perfect neighbor gift, teacher gift, and hostess gift this year – custom holiday tea towels are where it is at! Find some festive tea towels, cut out some iron on vinyl (make sure that you mirror the design before cutting!), and you’ve got the perfect holiday gift.

You can make a whole stack of tea towels in an afternoon – faster than you could have baked them yourself! But, you can always pair the towel with a plate of cookies, your favorite cookie recipe, or a cookie-scented candle, if you want to go the extra mile.

Get your free SVG file by signing up here:


The files are free!

Sign up for our email list to get your free SVG files!

You’ve successfully signed up! Check your email for details.

Check out all these other fabulous (and free!) SVG files:

Holiday Ready with Cricut Joy

Yes, you could absolutely put the Cricut Joy on your holiday wishlist. And after playing with the Cricut Joy and the toys and tools that Cricut sent me, I would totally recommend that. If you don’t buy it for yourself before the holidays. Because this tiny machine is exactly what you need to be holiday ready this year! You have every excuse to splurge on Cricut’s latest toy because it is also a tool that is going to help you get through all the holiday craziness! From making gift tags and labels to ribbons to making the gifts themselves, the Cricut Joy is your elf-sized holiday sidekick … let me show you what it can do to get you ready for the Holidays!

This post contains affiliate links which provide a small commission to this site when you make a purchase through these links. There is no surcharge to you for using these links.

First, let me share with you the unboxing of the Cricut Joy and some of the fabulous (and SMART) materials that you can use with the Joy. Spoiler: SMART materials don’t need a mat to cut them on the Joy! And while that doesn’t seem like a big thing, it is actually a fabulous time saver! No need to find the right mat, make sure that this is the sticky one (and not the old one you keep meaning to throw away), line up your vinyl, and smooth it all down.

Here are the different materials shared in the video, with affiliate links to make it easy for you to purchase them:

Cricut Joy: http://shrsl.com/2l0wg
Cricut Joy Bag: http://shrsl.com/2l0wi
Joy Cards: http://shrsl.com/2l0wj
Cricut Joy Pens: http://shrsl.com/2l0wo
Infusible Ink: http://shrsl.com/2l0wq
Smart Iron on: http://shrsl.com/2l0ww
Smart Vinyl: http://shrsl.com/2l0wx
Smart Label Vinyl: http://shrsl.com/2l0x0
Cricut Tools: http://shrsl.com/2l0x9
Deluxe Papers: http://shrsl.com/2l0xd
Patterned Smart Iron on: http://shrsl.com/2l0xf
Cricut Joy Mats: http://shrsl.com/2l0xi
Cricut Joy Card Mat: http://shrsl.com/2l0xk

Cricut Joy Cards

We’ll start with talking about card making, since this is something the Cricut Joy does really, really well. The Joy has a card mat, and pre-packaged sets of cards with inserts. There are tons of ready-made card designs that you can purchase in Cricut Design Space (some are free if you have Cricut Access). What is special about the card mat is that you can cut already-folded cards without cutting through the double layer. So smart!

If you’d like to make the Noel card that I created you can use this link to get the Noel Card in Cricut Design Space.

Cricut Joy Gift Tag

I love easy-to-use gift tags. These tags are made using the Cricut Premium Paper for the Joy … which has an adhesive back! So, these are gift tags that stick right to the gift! You could also cut them out of cardstock if you prefer. If you cut them out of the Premium Paper with the adhesive back, you can omit the circle cut-out for the hang tag … or you can use it to add a fun ribbon embellishment like I have!

Here is the Design Space link for the Cricut Joy Gift Tags.

Custom Ribbon

Adding custom ribbon to your gifts gives them a real “wow” factor! How much fun would it be to wrap gifts using ribbon that has the recipient’s name on it?? Use Cricut Joy Smart Iron On (making sure to mirror the design) to cut out your design. Fuse it on to the front of your ribbon for a super custom gift. We won’t be celebrating the holidays with family, so this “Miles Apart – Close at Heart” ribbon is perfect!

Get the Cricut Joy Miles Apart Close at Heart Cricut Design Space file here.

Package Labels

Since we don’t live close to family, I send out lots (and lots) of packages around the holidays! Just packing and labeling these boxes will take me a whole evening. I love that the Cricut Joy will make that easier this year! Use Cricut Joy Smart Label Vinyl to write out and cut out all your labels while you are wrapping gifts. When you’re ready to seal the boxes, your custom labels will be ready for you!

You can use the Package Label Template that I created in Cricut Design Space to get you started.

Gifts with the Joy

And, I can’t forget that the Cricut Joy can actually help make custom gifts as well! Cut out the Smart Iron On to fuse to an apron, tea towel, wine bag, or some other object ready for customizing! The options are limitless! You can add the recipient’s name, the year, or a basic message like on the wine bag below.

Get the Design Space file for the Merry and Bright Iron On here – just make sure to mirror the image before you cut!

While the Cricut Joy would absolutely be a great gift to get this year, I suggest you get it for yourself as an early holiday gift that will help you make this season extra special!

Zoom Meeting Costumes

Wearing a Halloween Costume to work can be super fun – but when your work or classes are digital, it takes a little extra creativity. But you can absolutely make a last-minute costume for your digital meeting! You can enhance any of these costumes with some makeup, or you can just wear them at the beginning of the meeting, and take them off when you feel done with wearing the costume.

Spider Headband Costume

To make the spider headband, you’ll need:

  • Two craft foam balls
  • Paintbrush
  • Black Paint
  • Hot Glue
  • Googly Eyes
  • Pipe Cleaners

Glue the two balls together to make the head and the body.

Black pipe cleaners are best, but if you don’t have any handy, white pipe cleaners will work in a pinch. Cut 4 pipe cleaners in half, and insert into the larger styrofoam ball.

Press the headband into the body to make an indentation. Use this indentation to glue the headband into place.

Paint the spider’s body black. Paint the legs if needed.

Once the paint is dry, you can glue the eyes in place, and bend the spider’s legs.

Cat Ear Headband Costume

To make the cat ears you’ll need:

  • Headband
  • Black and pink felt
  • Scissors
  • Hot Glue
  • Binder Clips

Cut triangles from the pink felt. Place on the black felt, cut the black felt with a 1/4″ border on the sides of the triangles, and a 1″ border on the bottom.

Glue the pink felt to the black felt.

Cut notches in the bottom of the black felt to make the ears more 3D.

Fold at the notches. Use a little glue to secure.

Line up the headband with the ears. Fold the bottom of the ears to the back. Secure with plenty of hot glue. Use a binder clip to secure the ears in place while the glue cools.

Pumpkin Headband Costume

To make the pumpkin headband costume, you’ll need:

  • Craft Foam ball
  • Orange and brown paint
  • Paintbrush
  • Green and tan pipecleaners
  • Headband
  • Hot Glue

Use a pipe cleaner to mark the circumference of the foam ball. Use the handle of the paintbrush to make an indentation along this line. Repeat, making three lines around the ball to mark the segments of the pumpkin.

Glue the pumpkin to the headband. Make an indentation into the bottom of the styrofoam for the headband to lie flat when glued in, just like with the spider costume.

Paint the pumpkin orange. Use the brown paint (mixed with orange as needed) in the crevices made in the last step to give them more definition.

Twist the brown pipe cleaner around the paintbrush handle to make the vines. Fold the green pipe cleaner in half several times and twist to make the stem.

Use the back end of the paintbrush to make an indentation, then glue the vine and stem in place.

Slipped Halo Costume

To make the slipped halo costume, you’ll need:

  • Gold star garland
  • Headband
  • Wire
  • Wire cutters & Pliers

Wrap the gold star garland into a circle. Wrap the end to secure the layers together.

Cut two piece of wire, each six inches long. Twist them onto the headband.

Secure the halo to the other end of each wires. Secure it close to the headband on one side to make the halo look as though it is slipping.

Witch Hat Headband

To make the witch hat headband, you’ll need:

  • Black patterned felt
  • Styrofoam cone
  • Hot Glue
  • Scissors
  • Ribbon
  • Headband
  • Wire

Cut the styrofoam cone down to size.

Wrap the cone with the black patterned felt. Glue in place and trim off extra felt.

Trace a circle onto the felt to cut out the base of the witch hat.

Glue the top of the hat to the bottom.

Tie on a ribbon for decoration.

Cut two pieces of wire, each three inches long. Bend into U shapes and use to secure the headband to the bottom of the hat. Add hot glue to keep it all together.

Olympian Costume

This costume could be a statue, or an olympian… you can interpret this crown of leaves however you like. And you can pair it with a bedsheet tied like a toga if you like.

To make the Olympian Costume, you’ll need:

  • Faux Ivy
  • Brown pipe cleaner or headband

Fold the ivy back and forth on itself, then bend it into a U shape. You can glue it to the headband or wrap with a brown pipe cleaner to secure.

You can pin the crown of leaves to your hair with bobby pins, or just place it on your head.

Unicorn Horn

The Unicorn Horn is super fun to make! Here is a step-by-step video that shows you how to make it.

You’ve Been Booed Foiled Tag

You don’t have to get dressed in a costume and go trick or treating to enjoy Halloween fun! I’m not sure who came up with the idea to “Boo” friends and neighbors, but they are a low-key genius and I hope this tradition continues forever.

To create a Boo bag, you just need some kind of bag (a plain gift bag works great), some fabulous treats (I’ve got a list of ideas for you down below), and some kind of tag to let your unsuspecting neighbors know they have been booed. Cute ribbon to tie the tag in place, and some coordinating tissue paper is a bonus.

This post contains affiliate links which provide a small commission to this site at no additional cost to you.

I foiled this fun gift tag using my Cricut and Cricut Foil Transfer Tool. If you’ve used your Cricut before, the Foil Transfer tool is pretty easy to use. There are a couple things you’ll want to know:

  • Currently, the foil transfer tool will only work when operating your Cricut from a computer – not a tablet or phone.
  • The Foil Transfer Tool doesn’t require any heat to operate.
  • Make sure to tape all edges of your foil well, using the included tape in the foil kit.

If you’d like to make this “You’ve been Booed” gift tag, which will foil the tag and cut out the tag (and the hole), you can use this Cricut Design Space Link.

I Miss the Carpool Line Free SVG

I never would have bet that I’d be saying the words “I miss the Carpool Line.” But this is 2020, Covid has upended our lives, and all bets are off. While dealing with the parents who thought they were busier, more important, and not subject to the same rules as the rest of us was never my favorite part of my day, I certainly didn’t know how good I had it before. So for all you parents and caretakers who dreaded the chaos of drop off and pick up, I have a free SVG file for you!

To download your SVG, enter your email address below. If you’re not already on our mailing list, we’ll get you added!


The files are free!

Sign up for our email list to get your free SVG files!

You’ve successfully signed up! Check your email for details.

Check out all these other fabulous homeschool and back-to-virtual-school SVGs!

Secret Decoder Ring

Have some STEM fun with your kids using these DIY Secret Decoder Rings! While they don’t fit on a ring finger, the two rings are put together to help you “unlock” the code and read and write your own secret messages. There is even a blank version so that you can make up your own secret code. And, if you love STEM projects, check out the whole list of STEM printables down below!

This post contains affiliate links that provide a commission to this site at no extra cost to you.

To get your STEM printable, sign up for our mailing list. You’ll get the link to all three files – the secret decoder rings with our code, the blank decoder rings where you can make your own code, and the sheets for writing to make it easy for you to write a code that your fellow secret agent can decode.

If your kids discover that they love playing around with “secret” codes, there are lots of codes they can learn about – Morse Code, which is made with Dots and Dashes, and Semaphore which is done with visual signals like flags. And while it isn’t a “code,” they may enjoy learning about Braille, which is how many visually impaired are able to read using touch!

These Secret Decoder rings take very few supplies to make. Just download the printables and print them out. You then cut out the circles and put them together with a brad. If you don’t have a brad, just line up a letter and a symbol and secure with a paper clip. In a real pinch, you can staple it in place with a stapler, but then you can’t change up the code without removing the staple.

To use the Secret Decoder ring to decode a message, you need to know the key. So if you’re writing someone a message, make sure that you’ve put the key in the boxes at the bottom of the page. This key shows how to line up the rings to decode the message. To decode our message, line up the bullseye with the letter X, and you’ll be able to decode what we wrote!

This is a great way to not only get kids interested in the very beginnings of code (that symbols can create new meanings), and in writing, but it also uses some great motor skills. The circles don’t need to be perfect at all, so kids can absolutely cut them out themselves. We used these scissors that are great for beginners because they spring back open after cutting, making them ideal for young children learning how to grip and squeeze.

Get your free files by signing up here:


The printables are free!

Sign up for our email list to get your free Printable files!

You’ve successfully signed up! Check your email for details.

Check out all these other fabulous STEM printables:

Printable Tangram Puzzle – Brooklyn Berry Designs
Steam Maker Space Lists & Observations – Hello Creative Family
Color Wheel & Walking Rainbow – Happiness is Homemade
Science Lab Matching Game – Crafting In The Rain
Straw Rockets – The Country Chic Cottage
Space Activity Sheet – Everyday Party Magazine
STEM Challenge Cards – Happy Go Lucky
Coloring Bugs Printable – 100 Directions
Science is Rad Poster – seeLINDSAY
Secret Decoder Rings – 30 Minute Crafts
28 Day Lego STEM Challenge – Mad in Crafts
Solar System Bingo – Artsy Fartsy Mama
Science Notebook Covers – Pineapple Paper Co.
Robots in Space Coloring Page – Fun For Little Ones
Space Rocket Coloring Page – Liz On Call
Math Coloring Worksheets – Printable Crush

Sparkle To Do List

Looking for a way to break the monotony of your to do list? Add a little Sparkle! On a recent visit through Target’s Dollar Spot, I found a plain wooden framed to-do list. And that wouldn’t do. So I pulled out some paint and paintbrushes and did a quick makeover.

I used glitter paint designed for fabric, and it worked totally fine. The thing to remember when working with a glitter paint is that you want to start with a good base coat to get a fuller look. I used a multi-surface paint.

Paint a coat of the base color. Allow it to dry. Then paint two layers of the fantasy glitter. And you’re done. That simple!

Here for the Snacks Free SVG File

Hi friends! If you’re like me, your favorite thing about Football is the snacks! While the football season may look a little different this year, we can still snack like we’re having a regular season, right? And we can totally make ourselves a cute shirt to wear while doing it!

Sign up here to get your free SVG file!


The files are free!

Sign up for our email list to get your free SVG files!

You’ve successfully signed up! Check your email for details.

And if you’re looking for some other fabulous football SVG files, check out these free football SVGs my friends designed!

Food Family Football from The Country Chic Cottage
Friday Night Under the Lights from Brooklyn Berry Designs
Just Here for the Tailgate from Pineapple Paper Co.
Sunday Funday from That’s What Che Said
It’s Game Day Y’all! from Hello Creative Family
Touch Down from Hey Let’s Make Stuff
Sundays are for Football from Happiness is Homemade
Saturdays in the South from Everyday Party Magazine
It’s a Touchdown Kinda Day from Happy Go Lucky
Football Star from seeLINDSAY
Tailgates Tackles Touchdowns from Artsy-Fartsy Mama
Cheering for the winning team from Crafting in the Rain
I Just Hope Everyone Has Fun from Mad in Crafts
I’m here for the SNACKS from 30 Minute Crafts