


Hey! I’m a guest over on Newlyweds on a Budget today – want to learn a little more about me (sordid secrets and all)? Go check out what she asked, and how I answered!

About a week ago I saw this collection of bags, totes, and clutches over on Paper & Stitch. Second row, right side – a circle clutch! How great is that! I love the idea of making a clutch in the shape of a circle, and I just knew I could whip one up in 30 minutes or less.

Want to make your own circle clutch? Here is what you need
Fat Quarter of Fabric
Coordinating 8″ Zipper
Stabilizer (affiliate link: I used ByAnnie Soft and Stable)
Small Plate
Chalk pencil
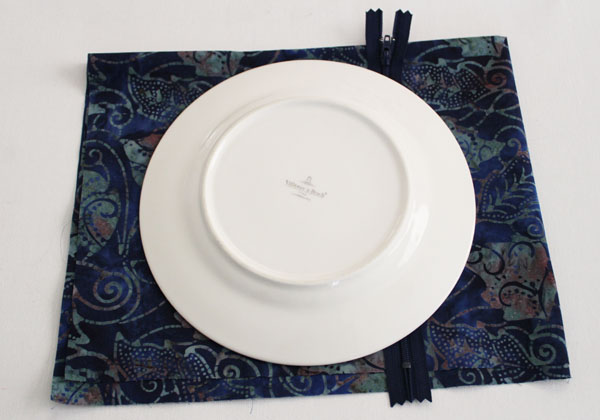
Fold the fat quarter into quarters. Put your plate on top to make sure that it is the right size. You want about 1/4 inch on all sides. Then cut the fat quarter into quarters. Put aside two pieces for later.
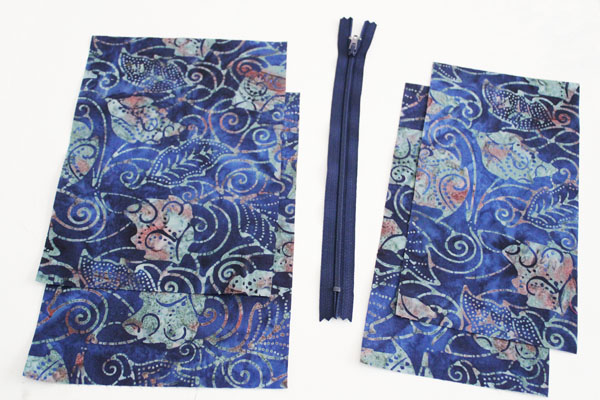
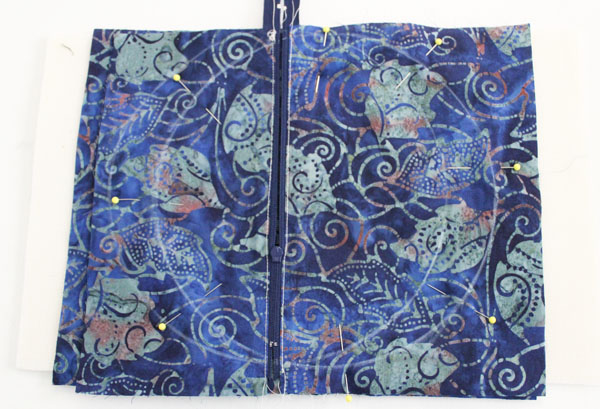
Now cut the remaining two layers where you want the zipper to go. I wanted my zipper off-center.
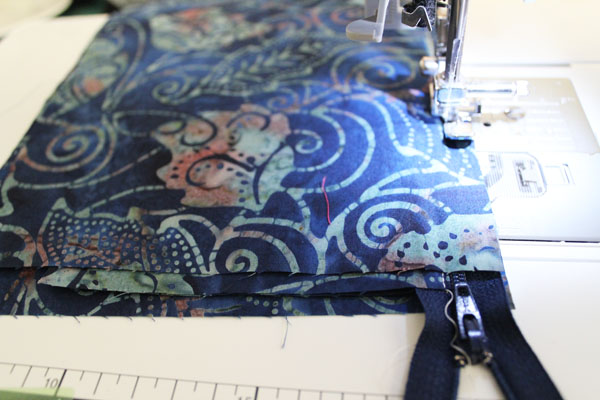
Attach the zipper. Put the zipper foot on your sewing machine, and stitch the two small pieces to one side of the zipper by laying them right sides together with the zipper in between. Press the fabric open to the opposite side and top stitch down.
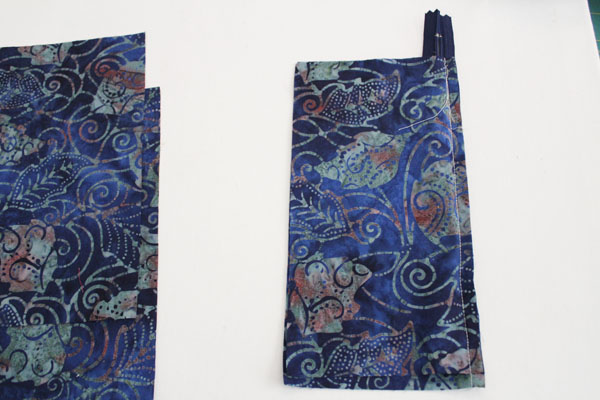
Repeat with the fabric on the other side, attaching it to the opposite side of the zipper.
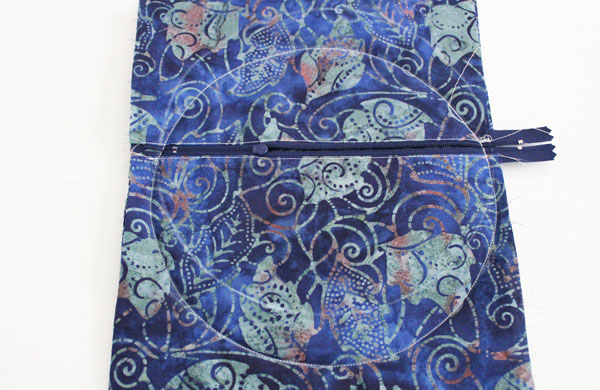
Put the plate on top again, and trace with a chalk pencil. You can see below that I traced it twice – the first time the zipper was more centered than I would like, so I just re-traced.
Stack the pieces: One of the pieces you reserved on the bottom (right side down). Then the Stabilizer. Then the other extra piece that you put aside in the first step (right side up). Then the zippered piece on top of that. Pin through all the layers.
I use the Soft and Stable because it adds a little structure as well as stability. It is a foam/batting/stabilizer that is made to use in purses.
STOP HERE: Make sure to open the zipper at least halfway open. If you don’t open the zipper at this point, you’ll have a tough time turning the purse right side out!
Stitch on the line, all the way around. Be extra careful when stitching over the zipper.
Trim the circle about 1/4″ from the stitching.
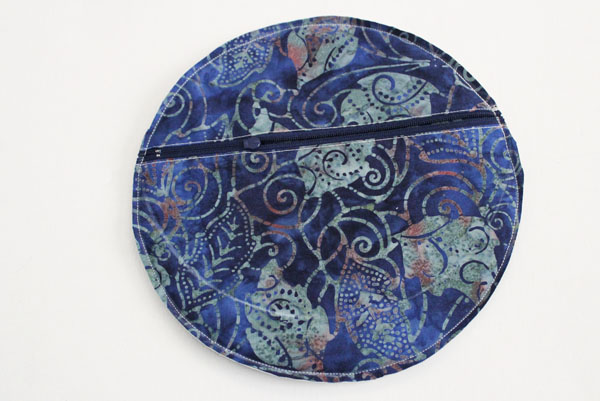
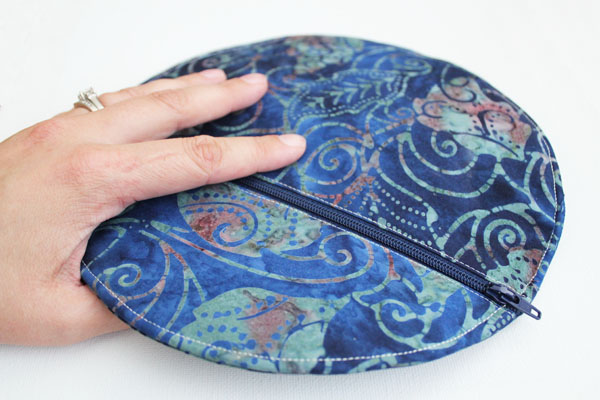
Turn the purse right side out through the open zipper. You could have a finished clutch at this point, but I wanted mine to look completely finished, so I put the walking foot on my sewing machine, and stitched all the way around to secure the purse and give it a finished look.
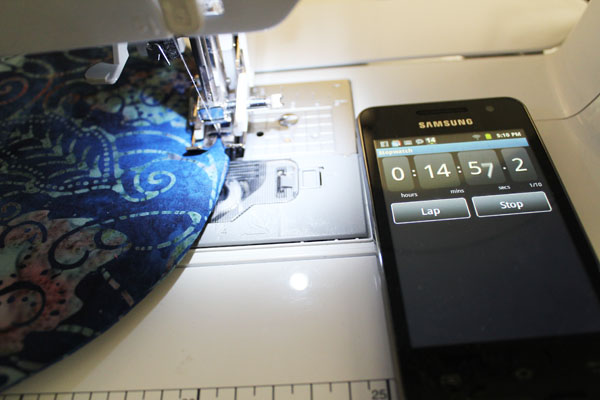
Yes. That is my timer. I wanted to see how long it took to make this project… I can’t believe I whipped this up so quickly!
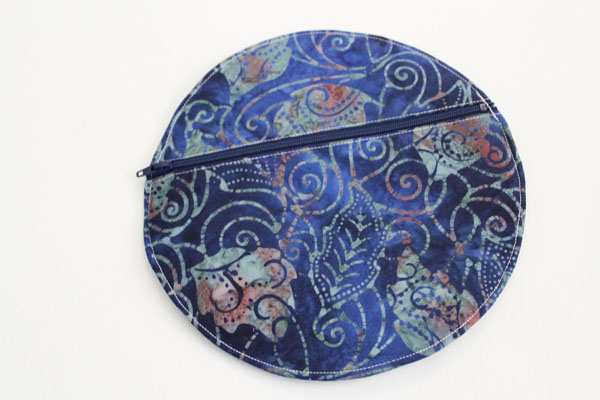
After adding the top stitching, I was all done! Just need to toss in my keys and phone, and maybe a lip gloss… and I’ve got the perfect grab and go purse to go with any outfit!
Yup. This clutch is perfect to pair with a dress, or to dress up a pair of jeans! And it was super simple to make!


You could even add a wrist handle. So cute, thanks for sharing.
Oh! What a great idea! I LOVE the idea of adding a handle! THANKS!
I make bags to sell ar local market and this is one I make and it is a seller. I make all sorts of bags and pursesnd put one of these inside as a bonus. love it
This is really a cute and easy idea! I will make one, the minit I have come over my ulster (nasty, but I have got medicine treatment now!)……Thanks for sharing!!
Is the stabelizer only on the bottom circle of the purse? Is it fused between the two layers?
There is just one layer of stabilizer, I used “By Annie Soft and Stable”. It is like a thin layer of memory foam – it adds stability without the stiffness of a heavy-weight stabilizer. It isn’t fused in, just layered in, then stitched between the layers.
Really cute! Thanks for the pattern. Will make these for Christmas presents.
Cute little purse, I love that it’s so quick to make! Thanks for sharing this tutorial.
I linked to your post on my blog, see it here: http://www.sewingshop.net/blog/elegant-circle-clutch/
I did not understand the instructions. Why would I cut the fat quarter into quarters? Am I supposed to cut the fabric before placing the plate or after? Wouldn’t I want one full circle for the “back side” of the pattern and two halves for the zipper side? The photos don’t match the instructions. I found the directions confusing. I usually don’t have problems getting the gist of patterns but this one didn’t make sense to me. Sorry about that. It’s a neat idea and I’d like to make the coin purse.
Sorry you were confused! Let me see if I can clear some things up…
Cutting the fat quarter into quarters just makes it easier to manage. And if you’re using a woven fabric that has a true “right side” and “wrong side”, it will help you flip your fabrics to the correct side easier. But, if you prefer, you could just cut the FQ in half.
You don’t need two half circles for the zipper side, you actually need four (two halves for the outside, and two halves for the lining). I have you cut your two pieces and insert the zipper BEFORE cutting them into a circle shape. This is because if you cut the circle shape first, you’ll have the challenge of trying to line up the curved edges so they line up on either side of the zipper – yikes! Inserting the zipper first, then cutting the circle shape completely removes this challenge. 😀
I followed through the instuctions, and it looks like they match up with the photos… maybe I can create a video to show you the steps, and that will help?
is there a video???
Not yet… maybe I will make one in the future?
Is there a video yet?
I would definitely want a wrist strap. These will be good for my granddaughters. I can’t imagine how anyone got confused with these instructions. Very pretty project.
Agree with Denna of Oct 7 post. Have been sewing for 60 years, including teaching. Instructions do not explain that second half cut circle is actually lining but gives the impression that it is the back of the purse. Your reply does clear that up, and thank you for e planning.
Plan to make several from recycled fabric.
Js
Hi All. I am a beginning sewer and found the instructions absolutely clear. Thanks for the pattern. 🙂 My mother, an experienced sewer, told me it seems vague to experienced sewers because they’re expecting the pattern to be more complex than it is😉. Great purse and I’m going to make some for my sisters and nieces.
Thanks for sharing.
Helen
I’m glad you enjoyed it! 😀
I make bags and have made quite a few of these but find that at craft shows people want them at give away prices even though mine are lined and some embroidered. Maybe I live in the wrong part of the country. I use one I made for myself all the time and it has so much room for credit cards and cash and that all important trolley token everything in one place.
shirley
Making a living selling handmade items can be rough! I hope you’re able to find the right mix of items your customers will love!
Seriously cute!!! The color also was just perfect, along with the design of the fabric. You did such a good job! Bravo!!
I had to go back to see about the extra pieces after reading the comments. Now I see where it is lined. I appreciate. Love to sew and make new craft projects. I do sell some at craft shows and this is a good idea for those that do not want to spend much on gifts. Thanks for sharing this. This is going to be my next project.
This is a very cute little “bag”.
Maybe you should have used a different color for lining so they could see what you meant. I didn’t have issues and have sewn for 50+ years. Love the quick-made items for craft shows and gifts.
It’s lovely
Am going to sew it and give it as a gift to my sister.
Thanks a lot.
Thanks for a great project! Hope to make a few to have on hand for last minute gifts for my BFFs. Yes, I am lucky to have a few! I’ll def add wrist strap. Thanks, again.
Thank you very much for sharing this with us. You did a Awesome job. I love the size. I will be making at lease 2 or more. I can see it in so many colors.
Try making these in quilted fabric and put a wrist strap or even a crossbody strap my granddaughters are always carrying their bags like this.
I have a mustard yellow piece of suede, and I think this would be perfect for it!
I just love your circle clutch! I am going to make some for gifts. I have been sewing for about 9 to 10 years and never thought of doing a circle clutch. Thank you for the tutorial.
Thanks! I’m glad you like it. I hope you have fun making yours!
I brought this to our group making handmade gifts for our home-bound members. Seven of us had a blast cutting, choosing the fabrics (we made them two-toned), tracing and sewing. I can tell you that this project has inspired several of the girls to learn to sew, and one even bought a new machine,. Each one brought joy – the recipients of the bags let us know they loved them and appreciated the unique design. Thank you so much for the pattern!
Oh my! This comment made my day! Thanks so much! <3
I’ve been sewing 55 years or so and I can see the confusion. If I’m interpreting it correctly, folding the fat quarter and putting the plate on is for making sure you have the right size fabric pieces for the size plate you are using. Even as an experienced sewer, I would find it more helpful to say, “Cut four pieces “x” amount bigger than your plate.