


This is a Sponsored post written by me on behalf of FrogTape Brand Painter’s Tape for SocialSpark. All opinions are 100% mine.
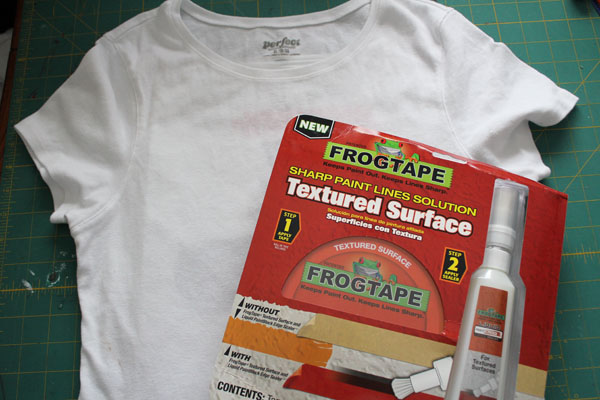
When I was asked to create a project using Frog Tape and fabric I was skeptical. I've used Frog Tape, with the amazing paint-block technology on a holiday project last winter, but it was on bricks. I was doubtful about how successful a product I associate with painting walls would be on fabric.
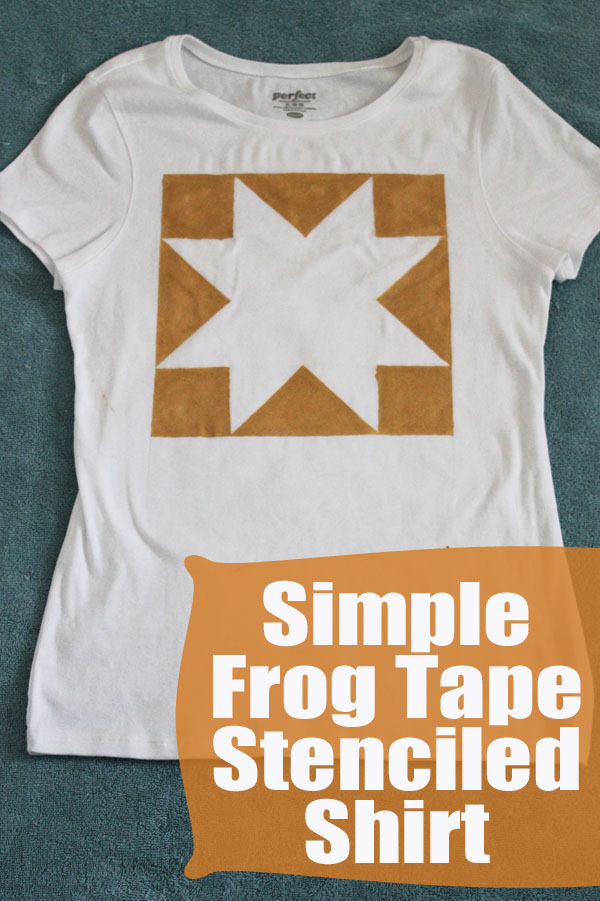
To test out the Frog Tape on fabric, I decided to paint a shirt. I'm a quilter, and I've been wanting to put a quilt block on a shirt. I've been creating several projects lately using the sawtooth star block, so it was an obvious choice. You could make a different design, but I'm in love with this block!
To make your star stenciled quilt block shirt, you'll need:
Frog Tape with Paint block
Plain Shirt (something that fits well and is comfy!)
Fabric Paint (I went with gold)
Paintbrush
Ruler
Pencil
Scissors
Large Plastic Bag
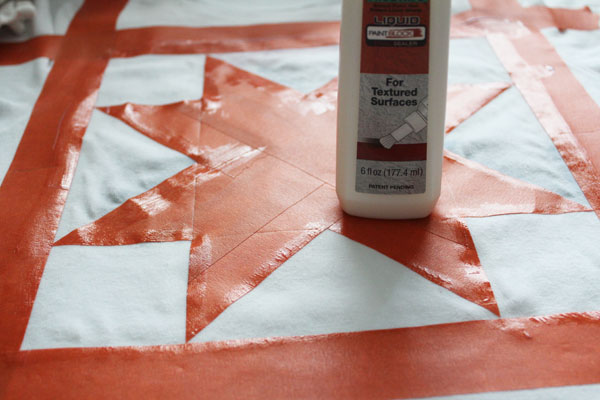
Use the ruler and pencil to mark off your painting area. I chose a 10" square. Use the Frog Tape to outline the area.
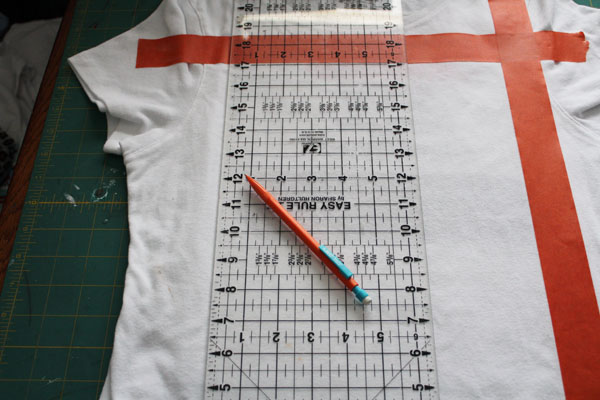
You might be able to see through the shirt fabric that I already inserted the plastic bag between the layers of the shirt. You can do this now, or later… just make sure to do it before you apply the paint block to the shirt.
Mark the square into a 4×4 grid – each square is 2.5"x2.5". Using the points where the grid meets the tape around the square, mark off the center of the star.
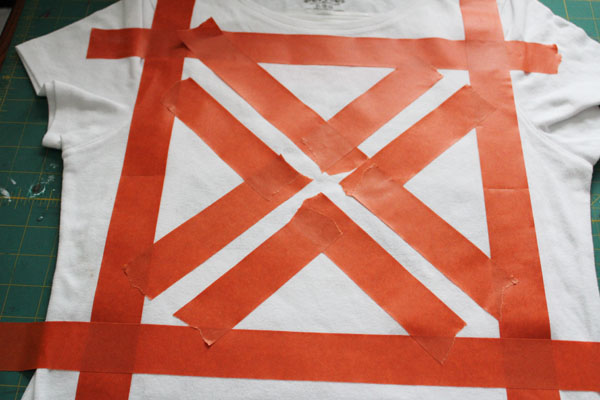
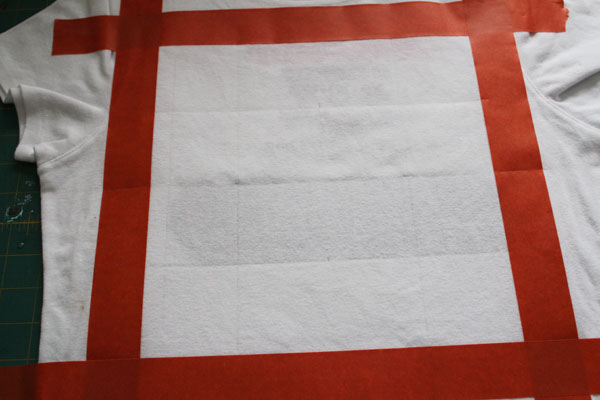
Fill in the center, then mark on the tape the areas that need to be cut away to create the star shape.
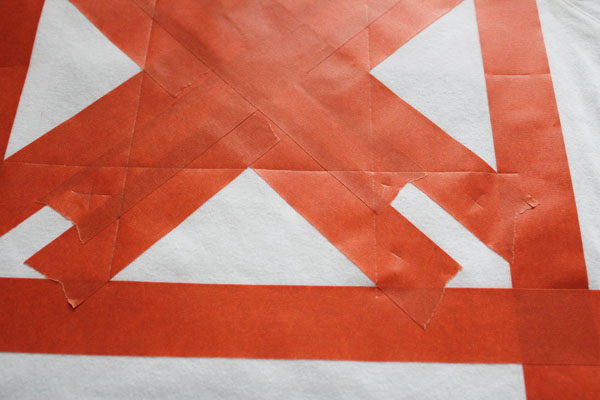
Trim away excess tape using scissors.
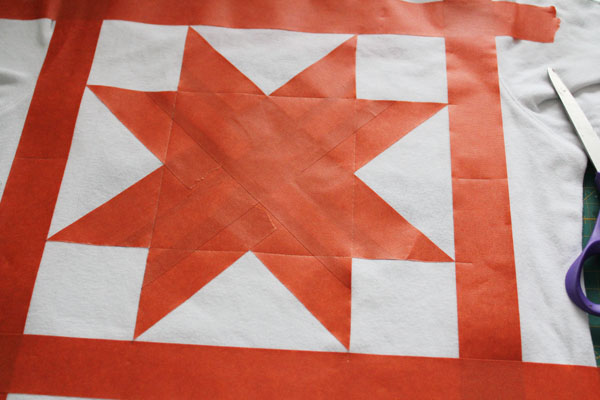
Use a wet rag around the edges of the Frog Tape as directed on the package.
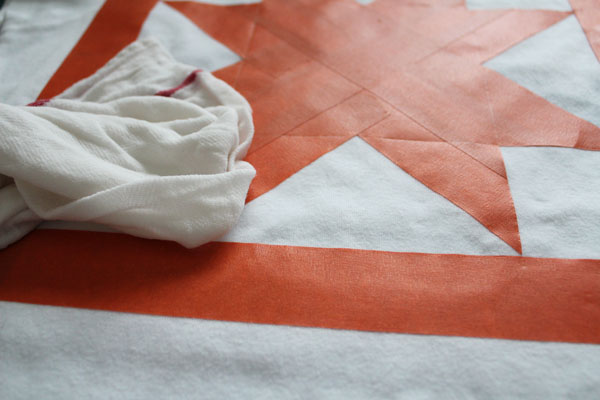
Follow the directions on the package to apply the paint block.
Once the paint block has set, use the fabric paint.
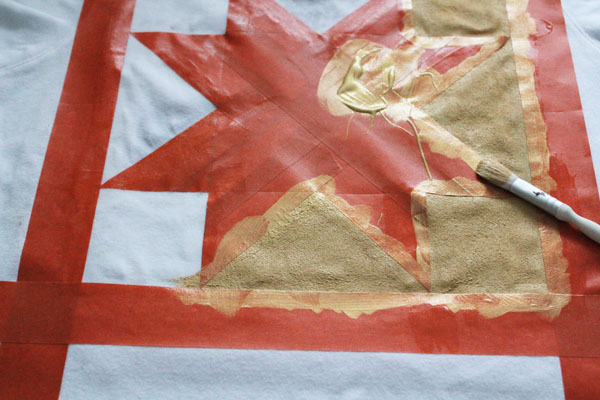
Fill in all the areas, then allow to dry.
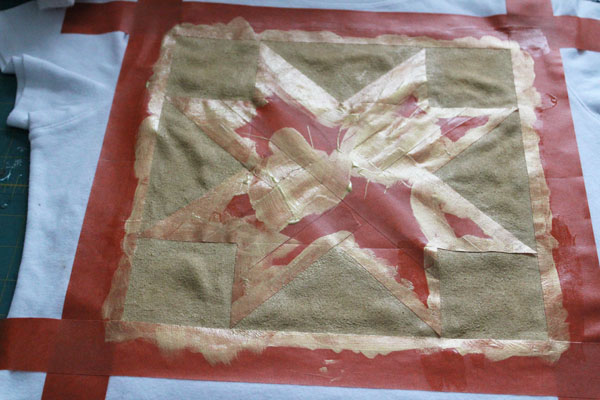
Once dry, peel away tape. Your shirt is complete!

To set the paint, I tossed my shirt in the dryer for about 15 minutes. I've since worn (and washed) the shirt twice. This was what I was most skeptical about. I thought that the paint block would wash right out of the shirt… and I was wrong! The paint block has held up fantastically!
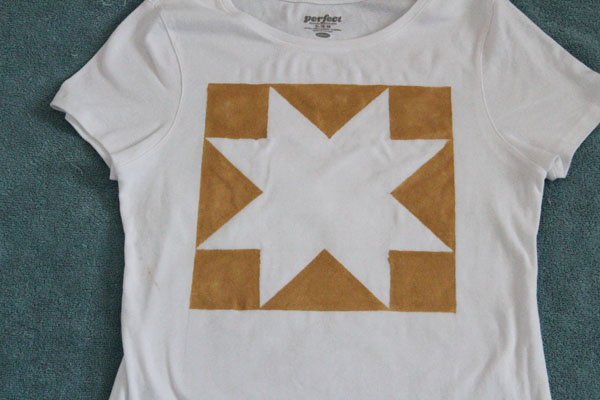
I will absolutely use Frog Tape again for stenciling a shirt – I think I need a tiny bit more practice to get the most crisp lines – but of all the techniques I've used, I think this has been among the most successful.
If you're interested in playing with Frog Tape, be sure to check out this FrogTape how-to and follow Frog Tape on Twitter.


Leave a Comment