


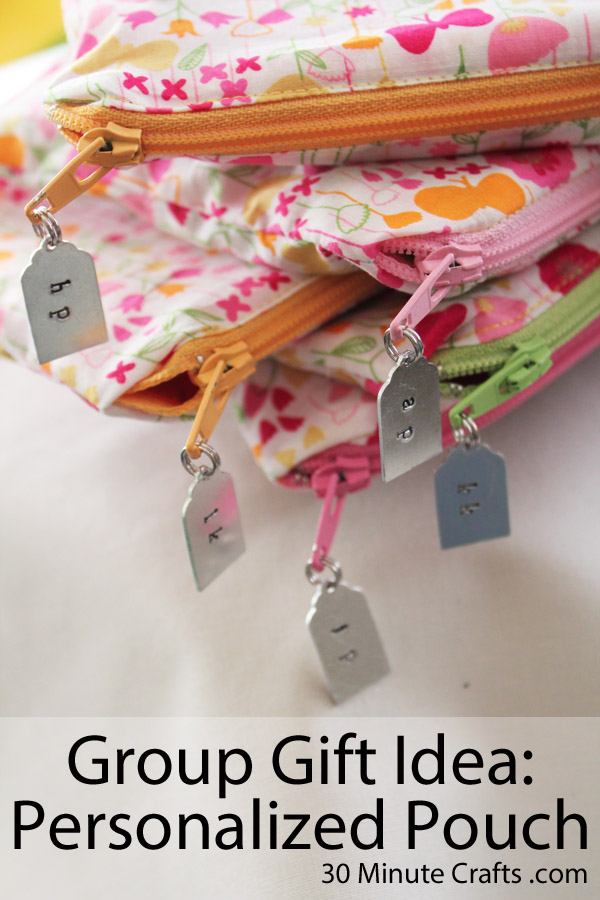
A couple times a year I get together with various groups of friends for various events. I like to bring little gifts along for my friends, and one of my favorite is a zippered pouch. They are inexpensive to make, don’t take a lot of time, and are a great all-around gift. Anybody can enjoy a zippered pouch – for holding business cards, makeup, sewing notions, pens and pencils… the uses are endless! I like to find fun ways to personalize them or make them unique. Impress Art sent me some supplies to play with, giving me the perfect opportunity to dress up this simple gift by adding tags with hand-stamped initials.
Start by making a simple zippered pouch. If you have never made one before, they are easy! I’ll show you how, and then we’ll add the cute metal stamped zipper pulls.
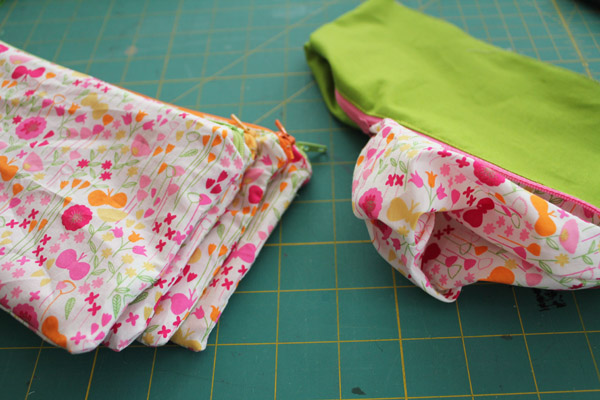
Cut the fabric. I cut my pieces 5″x10″. You’ll need two pieces for the outside, and two pieces for the lining.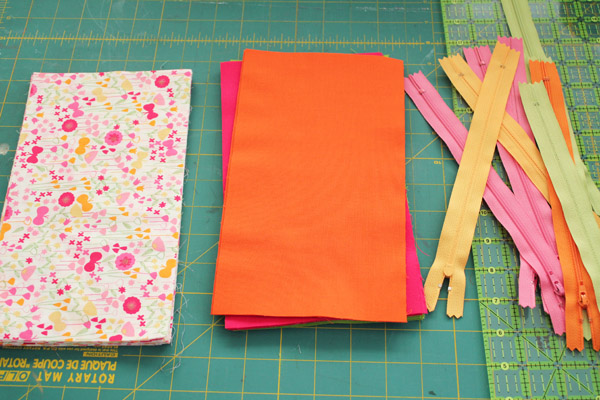
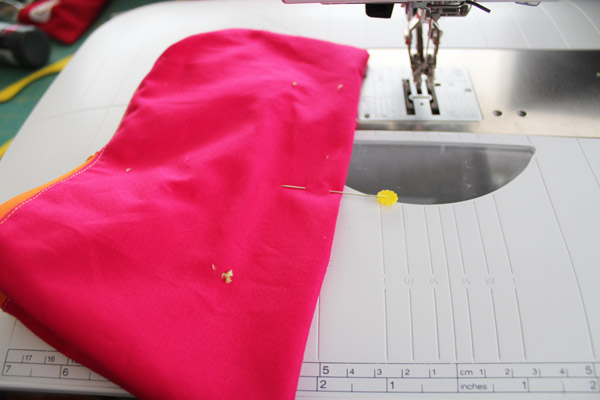
Sandwich the zipper against the raw edge of the fabric, with a lining piece on the bottom, right side up, and an outside piece on the top, right side down.
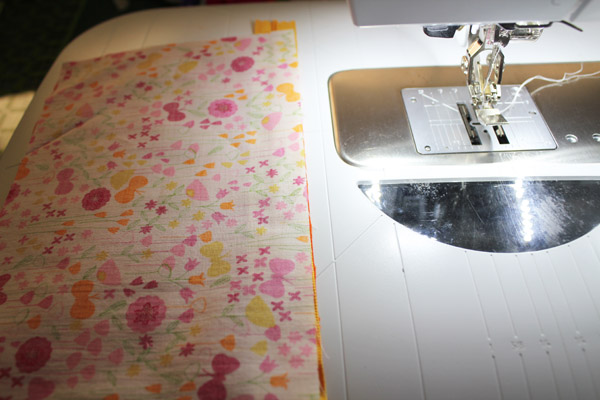
Using the zipper foot on your sewing machine, stitch the zipper in place. Open up the two pieces of fabric, exposing the zipper, then top stitch the fabric down to keep it in place. When you reach the zipper pull, stop. It will get in the way. Lift up your presser foot, turn the fabric so you have access to the zipper, then zip open partway. You can then put the presser foot back down and keep stitching.
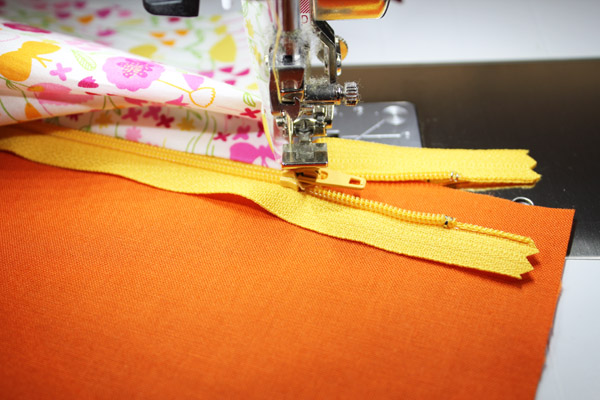
Repeat with the other side of the zipper.

Put the two top layers right sides together, and the two lining layers right sides together.
VERY IMPORTANT: Leave the zipper at least part way open, or your bag will be sealed shut (the good news is that most people only make this mistake once!)
Pin and stitch all the way around, leaving a 3″ hole in the bottom of the lining to turn. Then, through the hole, turn the bag right side out.
Stitch the bottom hole closed. You can hand stitch for a more finished look, or run it through the sewing machine.
Turn the bag all the way right-side-out, and your little zipper bag is complete! I love making these assembly-line style.
Now for the fun part! Let’s personalize them with little tags.
You’ll need:
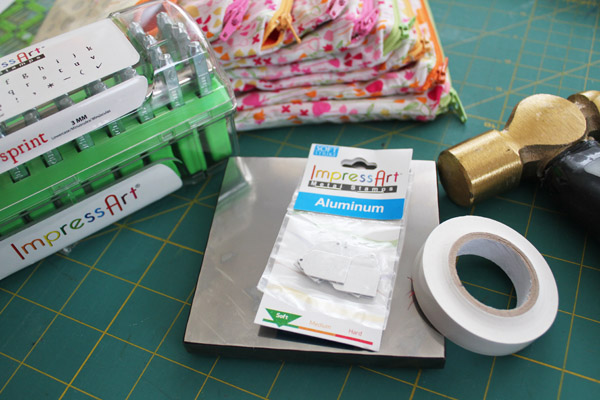
Impress Art Letter Stamps (I used the “Newsprint” font)
Impress Art 7/8″ Tag Stamping Blank
Stamping Block
Hammer
Stamp Straight Tape
Split rings or regular jump rings
Jewelry pliers
List with recipient names
Place a blank on the stamping block. Use some Stamp Straight Tape to keep your stamping all lined up.
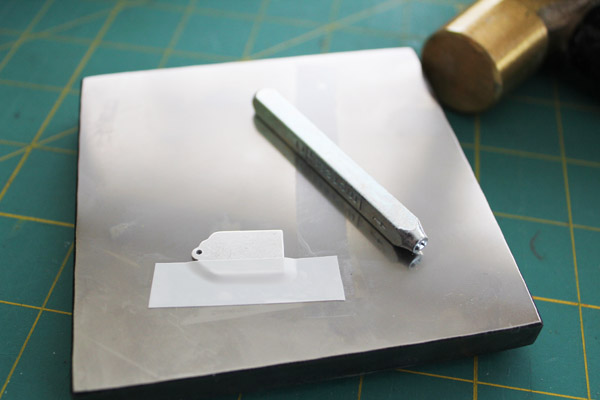
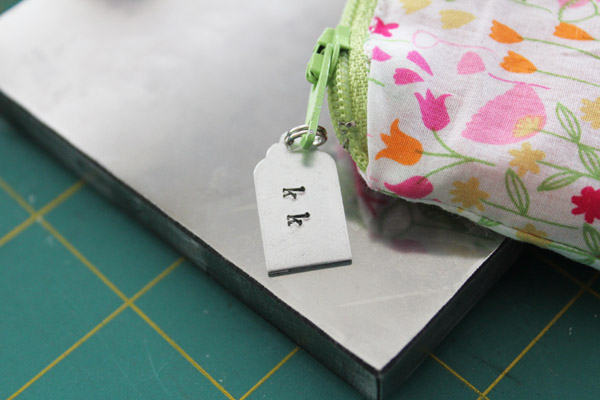
Stamp your letters, remove the tape.

Use a Sharpie to rub ink into the stamped letters. This will help them stand out more. Attach with your jump ring. Because the zipper pull will see a lot of use, a split ring is a good choice, instead of a standard jump ring.
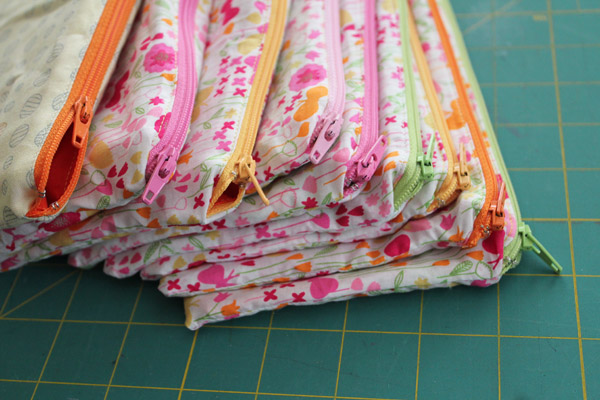
Repeat for all your bags.
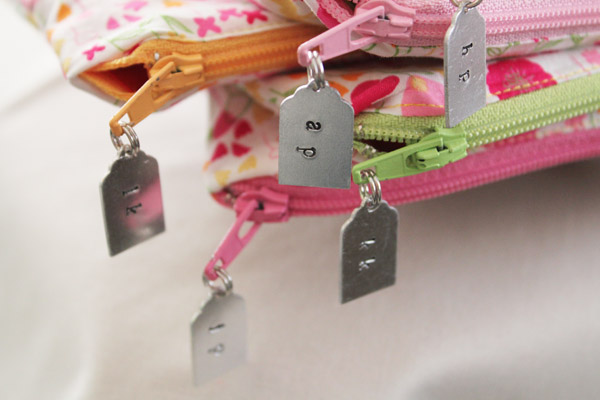
These little personalized gifts are almost as fun to give out as they are to make!


Just ran into this Personalized Pouch pattern. It’s so cute and looks easy to do. At first, I thought these were small, like coin purse size. However, when I read the tutorial, I see that they are much bigger. I like the idea to use it as a group gift. My friends would love one of these. Can’t wait to try.