


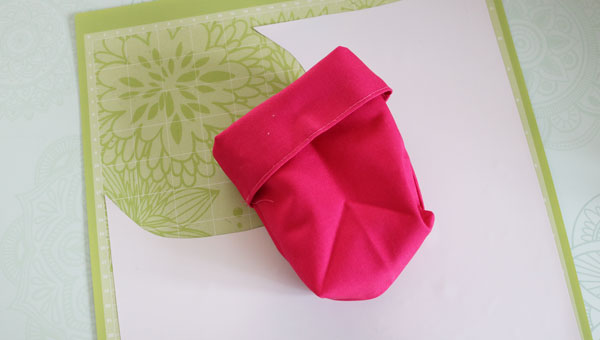
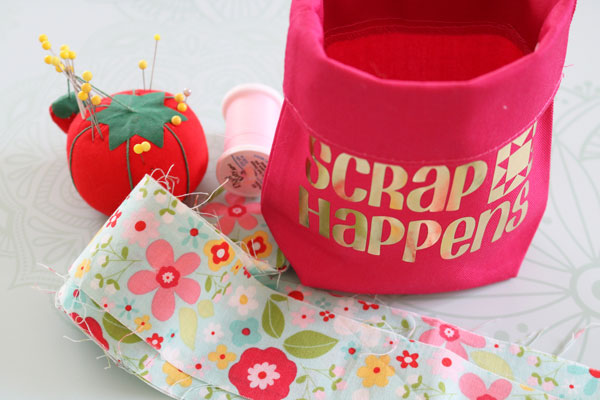
Having a small spot to put loose threads or small snips of fabric can help to keep a sewing area more tidy. And it absolutely saves time – no need to get up and walk to the garbage can for each thread snip. So when I saw this cute scrap bin, I knew I wanted to customize it to use on my sewing table! You can customize your own scrap bin following these instructions!

This project is part of a whole week of Cricut Iron-On crafts. All week long my friends and I are sharing fun crafts that you can make using all the different kinds of Cricut Iron-On! Be sure to scroll all the way down to check out all the awesome ideas we’ve come up with!
To make your Scrap Happens Customized Scrap Bin, you’ll need:
Cricut Machine
Fabric Scrap Bin (I got mine from Canvas Corp)
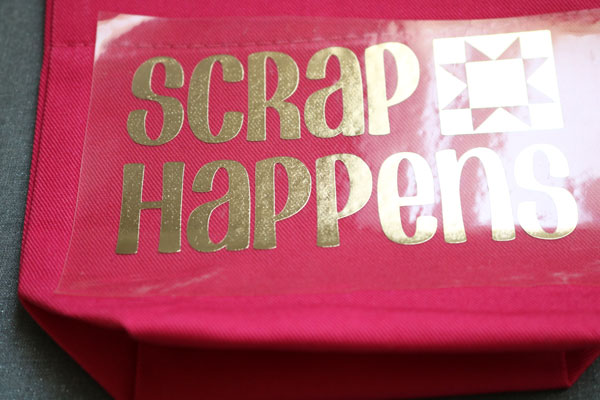
Scrap of Iron-on (I had this gold foil iron-on that was perfect)
Weeding Tools
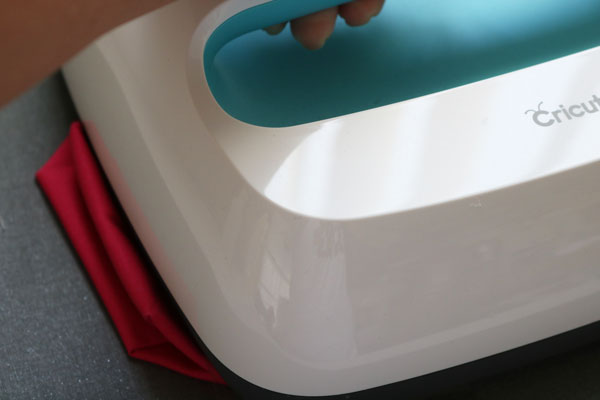
Iron or Easy Press and Mat
You can see that there is a large piece cut out of the iron-on that I used. This project only takes a small amount of iron-on to make, so I was happy to re-use this piece. But if I left the design as-is, the Cricut would have cut in the area where the iron-on has been cut away already. To prevent this, once I moved from the design screen to the mat view (this happens after you press “Make It”), I was able to tap on the design and move it to the right. That way, I was able to use the upper right corner of this piece of iron-on, and get the most use out of it!
Use this cut file to cut the “Scrap Happens” from the iron-on. You can re-size it to fit your bin if your bin is a different size. When using iron-on always remember to mirror your image! You’re cutting the back of the material, not the front. To make sure that you don’t get your words in mirror-image (a la DaVinci), you need to toggle the “mirror” switch.
Weed the vinyl. This just means peel away any parts of the vinyl that won’t be needed in the finished project. All of the background parts, and insides of letters like R, e, and A.

Flatten the scrap bin, then place the design.
Press using your EasyPress or Iron.
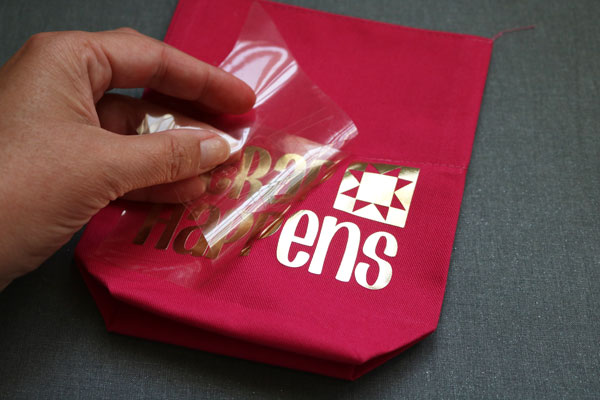
Peel away the transfer plastic.
All done! The perfect place to tuck your scrappy bits!
Check out all these awesome crafts you can make with Cricut Iron-On!


Leave a Comment