


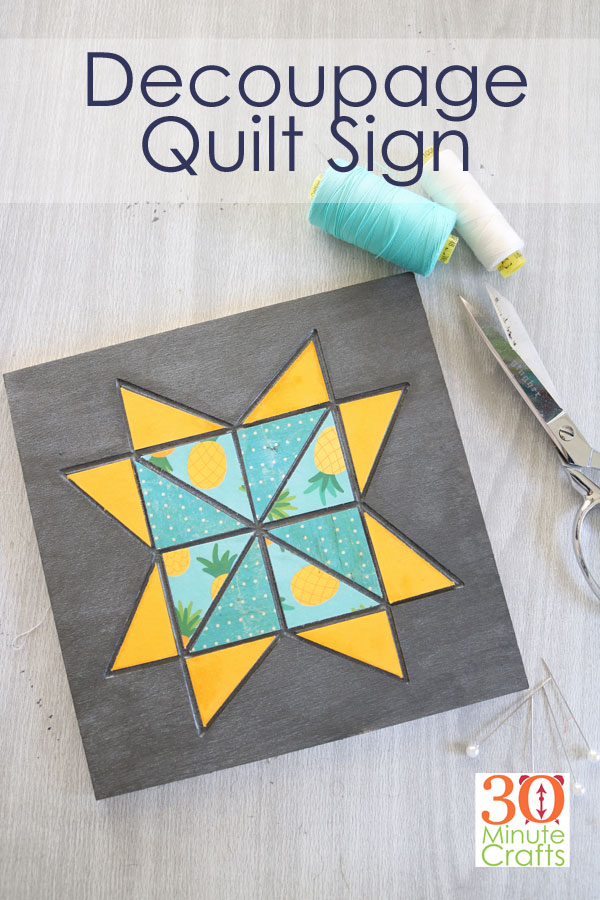
No need to be an expert quilter to whip up this fun and fast decoupage quilt sign! In fact, there isn’t a stitch in sight (or any fabric)! Using paper, paint, and a wooden sign, you can decoupage yourself a fun quilt sign to hang in your home!
This quilt sign is part of Craft Lightning Decoupage Week! All week long I’m joining in with my friends Angie and Stephanie to share fast and fun decoupage projects that can be made in 15 minutes or less! Be sure to scroll down to check out all their great decoupage craft ideas!
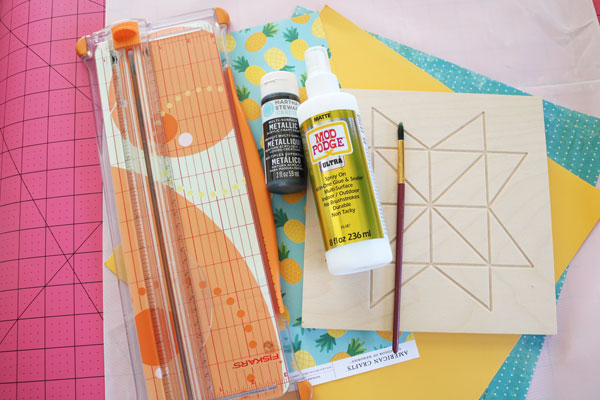
To make your own Decoupage Quilt Sign, you’ll need:
Wooden sign (found at JoAnns)
Scrapbook Paper of your choice
Paper Trimmer
Paint and Paintbrush
Mod Podge Spray (I used Matte)
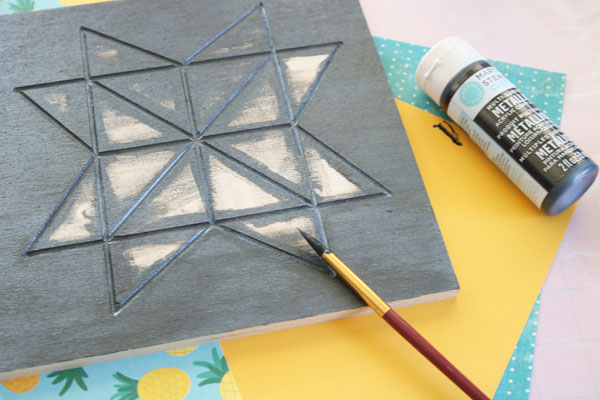
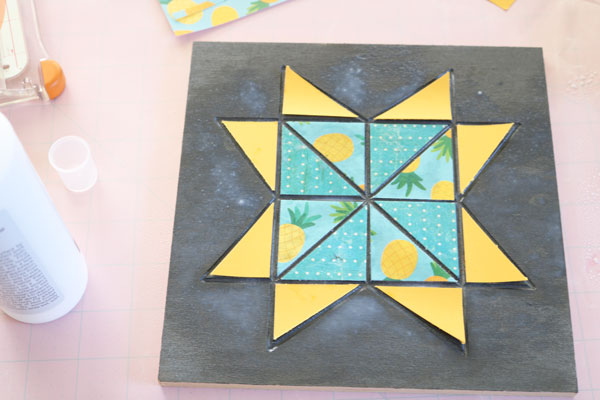
Start by painting your sign, You don’t need to paint in the spots that will be covered by paper.
While the paint dries, cut your paper pieces. Note that the star points are half-rectangles, and not half-squares. Spray your sign with Mod Podge (make sure to shake the Mod Podge Spray first). Then place the pieces.
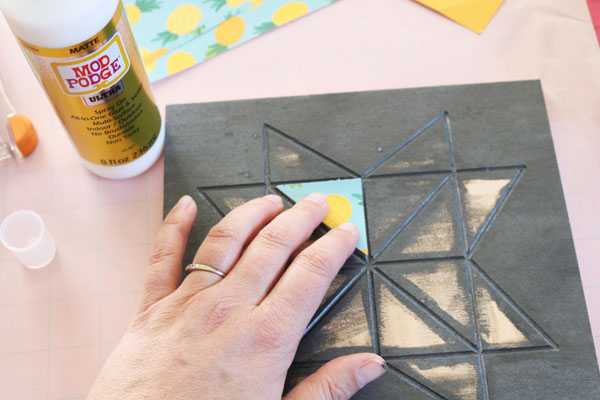
Place all the pieces as you want them.
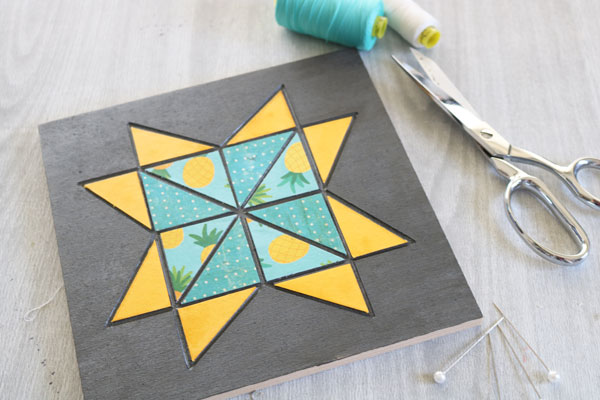
Then spray with a generous coat of Mod Podge and allow to dry.

Once it is all dry, you can hang it up or give it as a gift!
And check out all these other great Decoupage Ideas!
Over at Me and My Inklings, Laura Decopaged this cute bunny jar!
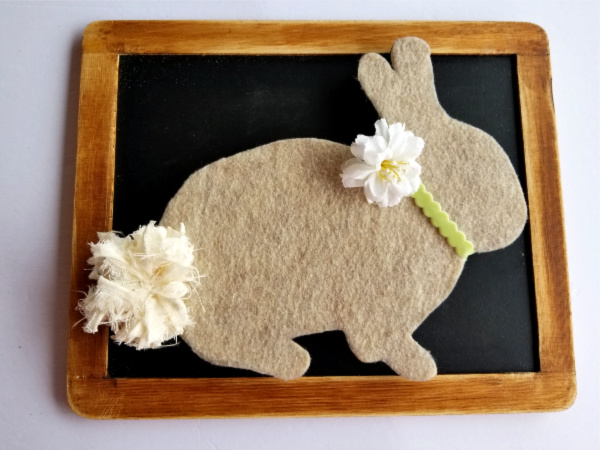
Love this simple Bunny craft idea from Polka Dot Poplars!
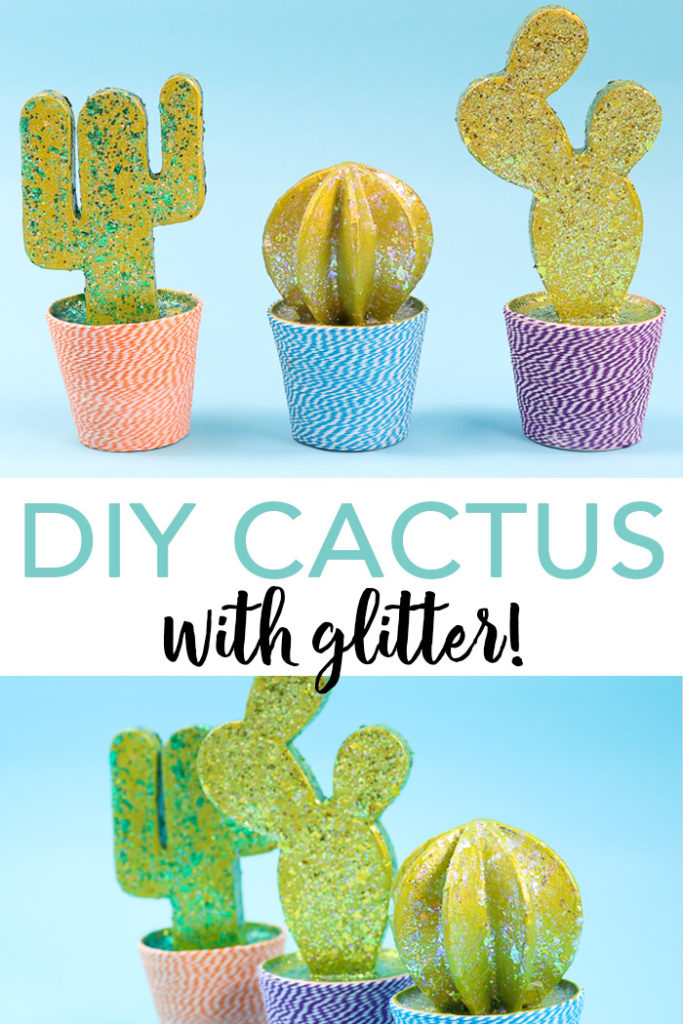
Angie made these cute glittery Cacti!
Stephanie created this bunny art!


Leave a Comment