


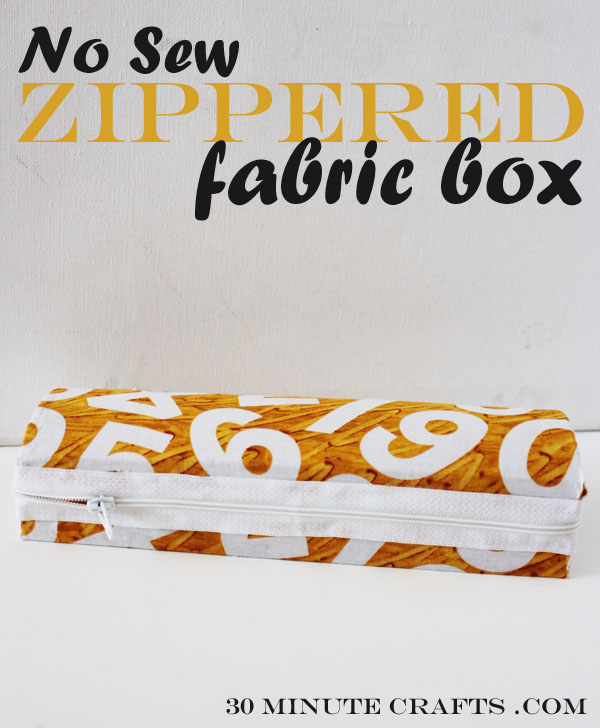
I whipped up this zippered fabric box because I’ve recently developed a passion for zippers. So much fun to add to projects! I even wrote a series on Answers.com about zippers that includes 3 ways to attach a zipper, 7 fun zippered projects, and 5 No-Sew ways to Craft with Zippers. I was inspired after writing that last article to create a no-sew zipper project. I stitch zippers in all the time, gluing on a zipper seems like a fun way to change it up – and a great fast craft!
It is already the fourth day of Craft Lightning week! Angie from The Country Chic Cottage and I are sharing a fun, fast craft tutorial that takes 15 minutes or less each morning, and each evening, we’re rounding up fast crafts from our friends around blogland – that’s right, we’ve pulled our blogging friends in on this fast crafting trend, and we have over 20 other bloggers sharing their own fast crafting tutorials. You can join in too – share your own fast crafts tutorial in the Craft Lightning Linky.
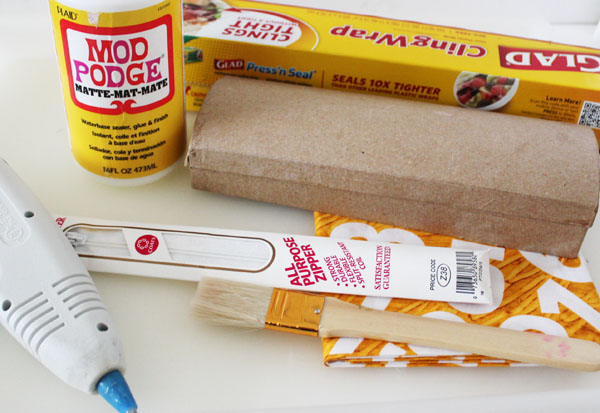 If you want to make your own no-sew zippered fabric box, here is what you need:
Fabric (I used a fat quarter and had plenty left over)
Cardboard box (I used this one from Consumer Crafts)
Matte Mod Podge (you can use gloss, but I find that matte works better on fabric)
Long zipper (this one is 24″)
Scissors
Hot Glue
Large Paintbrush
Plastic Wrap
Start by applying the matte Mod Podge to the front edge of the box.
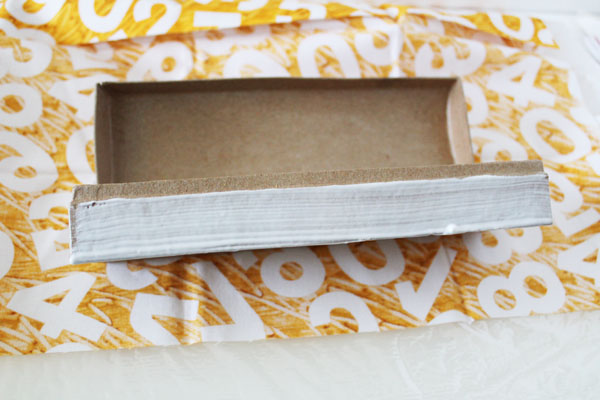
Secure the raw edge of your fabric to this edge. If your fabric doesn’t line up completely, that is ok. It will be covered by the zipper later.
If you haven’t already, at this point trim down your fabric. Make sure to give yourself an inch or so extra fabric on all sides, just to be safe.
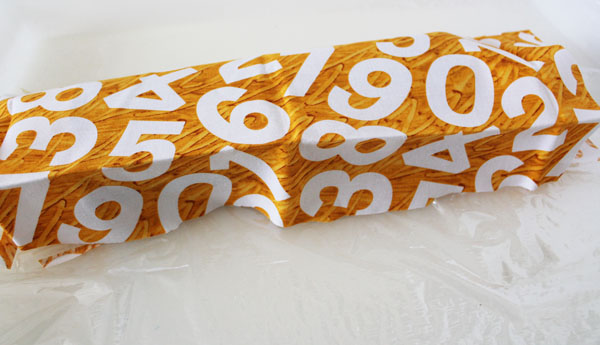
Continue securing the fabric to the box all the way around with Mod Podge. Trim off the excess fabric flush with the box.

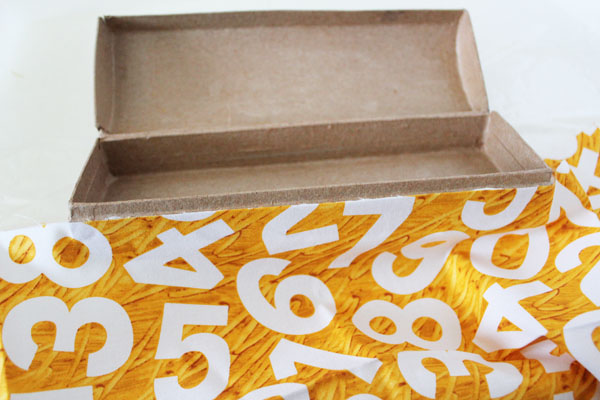
Cut the fabric on the sides of the box so that it is attached at the top and bottom.
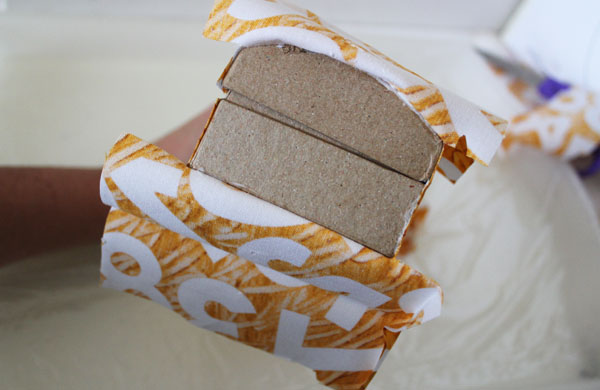
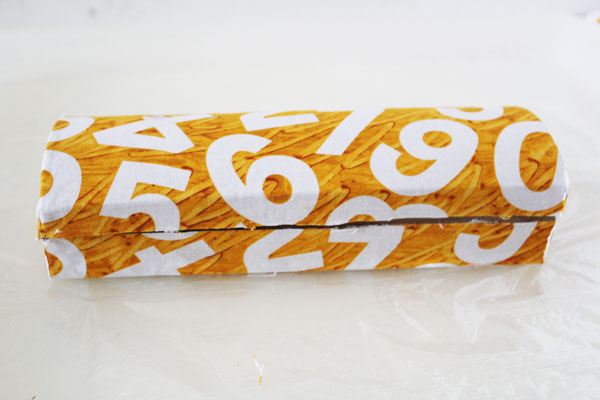
Secure the fabric on the sides with Mod Podge and trim flush. Your box is now covered in fabric!
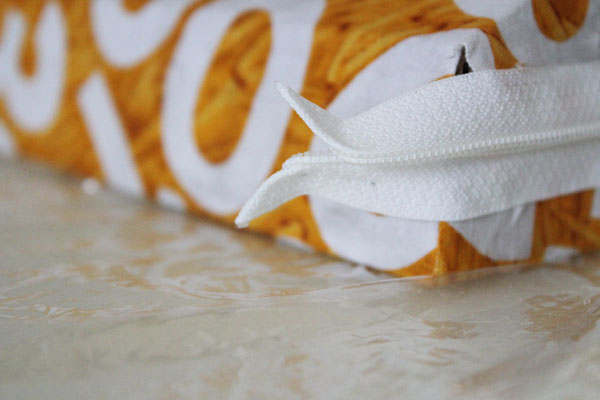
Time to add the zipper. Use a line of hot glue on each edge of the zipper and attach the zipper to the box, starting about 2″ along the back. Starting the zipper at the back of the box instead of the back will help the box open fully.
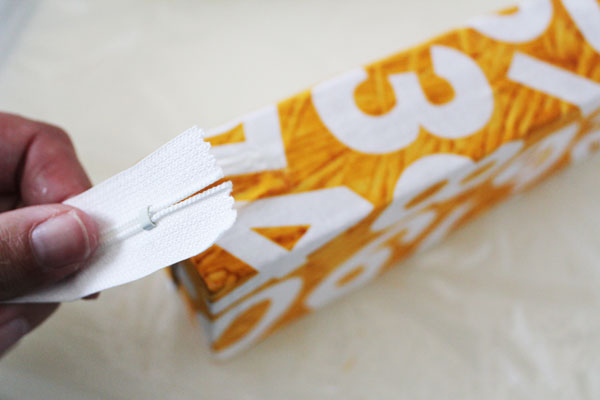
Here are some tips to help you when applying the zipper:
Open the box about 1/4″ as you apply the zipper. This will give more room for the zipper to open and close.
Make sure to keep the glue to the very edges of the zipper – glue near the zipper teeth might result in a box that won’t unzip
Don’t wrap the zipper tightly around the corners – wrap it loosely so that the zipper can easily go around the corners.
Cut off any excess zipper and wrap it around the back of the box. Either miter the corners by folding them under, or add some extra glue to keep the zipper pull from coming off.
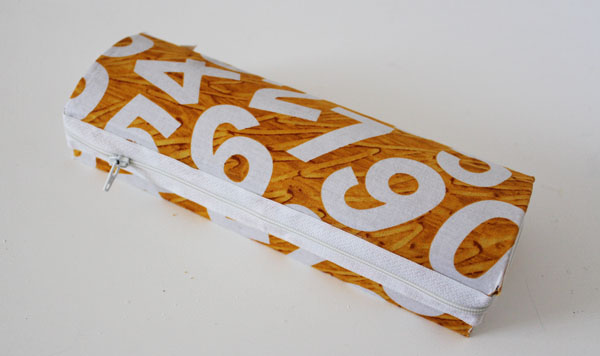
And just like that you have a simple to make, no-sew fabric covered box!
Come back this afternoon for a round up of more quick crafts as Craft Lightning Week continues. If you’ve missed anything this week, you can catch up by reading the day one roundup, day two roundup, and day three roundup.


Leave a Comment