Search Results for: scarf

The Top 30 Minute Crafts of 2012

top 30 minute crafts of 2012

2012 was an exciting year here at 30 Minute Crafts. The blog was launched in this new format, and lots and lots of fun features were shared, as well as lots of original tutorials! I’d like to share with you the top Quick Crafts of 2012, in order of the most pageviews. The featured crafts with the top hits will link directly to the post on the original site to save you an extra click.

Thanks for your support in making 2012 an awesome year! I’m looking forward to fulfilling all of your quick crafting needs in 2013!

Crafty Quickies Round Up

I can’t believe our Crafty Quickies week is over! Before I get into today’s round-up, I want to give a HUGE thank-you to my co-host Angie from The Country Chic Cottage. This was her amazing idea. When she first approached me with the idea of doing a series on crafts that can be completed in 15 minutes, I thought maybe we were being over-ambitious. Though this blog is all about crafts that can be done in 30 minutes or less, she was looking to cut that time in half!
Any doubts I had were silly, of course. As you can see by the posts that Angie and I have been featuring all week, as well as the amazing crafts in the link-up, 15 minutes is oodles of time to make something! Proving that we all have time to be creative – each day or each week. We can fit crafting into even the most busy life!

The Sick Chick made this dyed scarf in 15 minutes. It is so amazing that if Angie and I do something like this again, I’m going to suggest a clause whereby all participating bloggers send a sample of their project. Because I love this scarf. Good thing there is an amazingly detailed tutorial so that I can make my own!

My co-host, Angie, created this Doily Pillow using doilies as stencils. How great is that? And you’ll NEVER guess what she used as the “base” for this pillow! So head on over to find out!

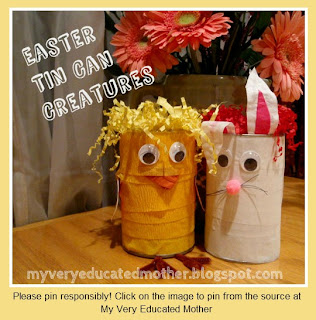
In just 15 minutes you can make a cute Easter Bunny or Chick out of recycled materials using this tutorial from My Very Educated Mother. So cute! And great Easter decor. I can’t believe that Easter is next week already! Where has the time gone?

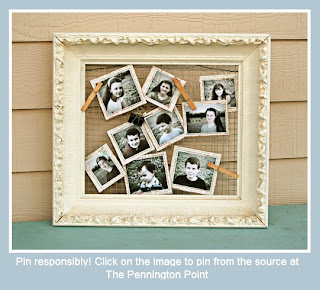
Over at The Pennington Point you’ll find this awesome photo display board. Simple, clever, and can easily be changed out as you have new photos you want to display. I love that!

And this morning, I showed you that sentiment doesn’t have to be hours in the making. It also doesn’t have to be hours in the breaking… my son decided that he “wanted” the key, and has since peeled it off. But, it wasn’t a labor-intensive project that is totally ruined… so I went with it. Yet another great benefit to simple, quick (and inexpensive) crafting.

Thanks again to Angie, and all the wonderful bloggers who threw caution to the winds and spent 15 minutes crafting… and then an hour or more editing photos, and typing up instructions!
Make sure you didn’t miss a single minute!! Check out the roundups from Monday, Tuesday, Wednesday, and Thursday as well as the great projects shared on the Crafty Quickies Linky Party!

Make sure to come back often as I inspire you to get your craft on, and move on, in 30 minutes or less!

Until Next Time!

Ribbon Snowman Pin


Need a quick, festive pin to wear to a casual holiday party? What about an easy gift for someone who really should get “something” but not something big? Or a fun way to decorate a holiday gift with a little something extra? This snowman pin is just the thing! Made with just a few inches of grosgrain ribbon, scraps of felt, a safety pin, and some glue, you can whip one up in about 10 minutes! Just don’t go so quick that you burn yourself on the hot glue!

If you make these pins assembly-line-style, you can have a whole army of snowmen to pass out at the office, to toss in with gifts, adorn stockings… the uses are endless! And when someone asks, “Did you make this?” you can answer “YES!” as if you’d spent the entire day slaving over a hot-glue gun!

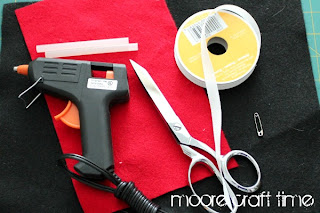
To get started, gather your materials – white grosgrain ribbon, red felt, black felt, a safety pin, and your glue gun.
Cut 2 lengths of ribbon, with the ends cut at an angle. The longer piece (about 6 inches) will be the head and top body piece, the shorter piece (about 5 inches) will become the bottom body piece.
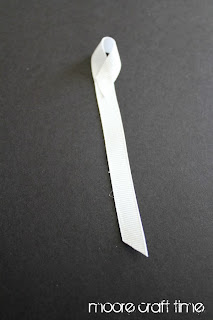
Make a loop using roughly the top 2.5″ of the 6″ piece of ribbon. Secure with a dab of hot glue. Just a dab, you don’t want a runny, goopy, hot-glue mess!
Bring the bottom half up, and secure with another dab of hot glue. Your snowman is starting to take shape! Right now, it should look like a figure-eight with the top part smaller than the bottom.
Add on your 5″ piece of ribbon, securing right on top of your last 2 ends, with yet another dab of hot glue.
Bring the “tail” end up and secure with still another dab of hot glue.
Cut out your hat from the black felt, and your scarf from the red felt. You can see my hat is less than 1″ x 1″ in size, and my scarf is about .5″ x 3″. I cut some “fringe” into each end of my scarf using sharp scissors.
Wrap the scarf around the snowman’s neck. Play with the placement until it looks the way you want it to. Use some hot glue on the front to secure it. Before securing the scarf on the back, slip in a safety pin, making sure the sharp part of the pin is up. When you secure the scarf to the back with hot glue, you’ll be securing the pin in place at the same time!
Just secure the top hat in place with one final dab of hot glue, and you’ve got yourself a ribbon snowman!

I’m off to go work on lots more of these… I’m thinking that they’ll make great little gifts for the front-desk staff at my son’s daycare… and they’ll look great as gift toppers for all the gals at work!