Search Results for: harry potter

Harry Potter Hogwarts House Cards

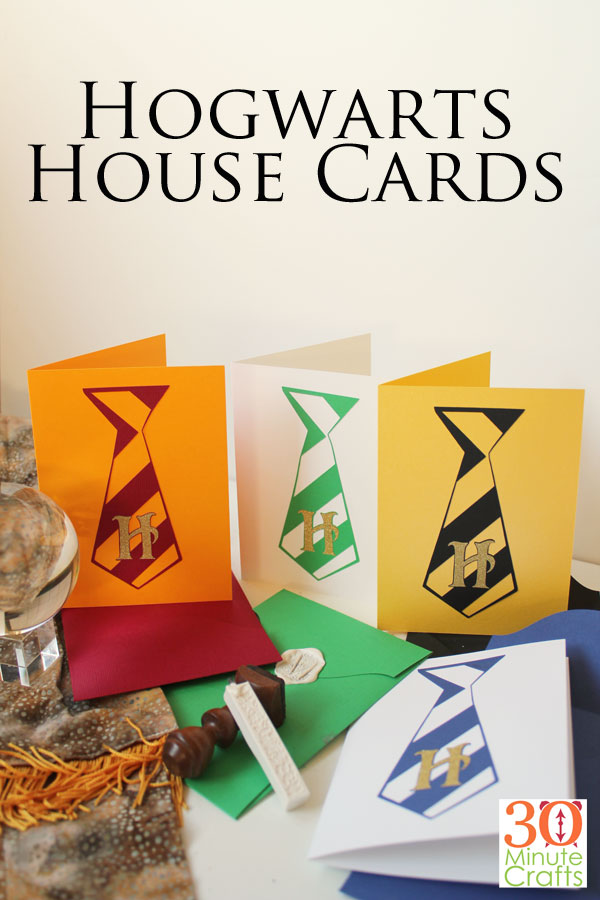
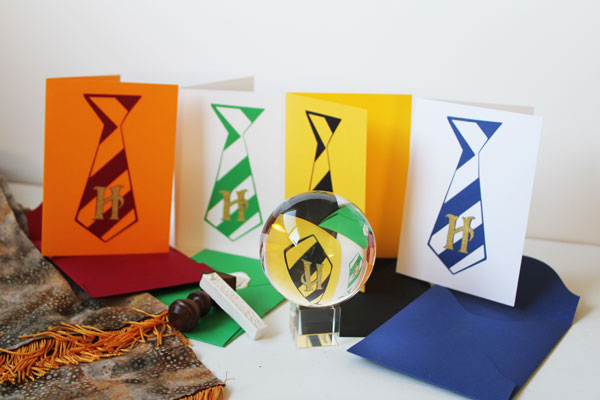
If you have a Harry Potter fan in your life, they will love these Harry Potter Hogwarts House Cards. The ties that Hogwarts students wear are one of the most iconic parts of the clothes in the movies. Each house wears striped ties in their house colors. These make a great Harry Potter Birthday Card, Hogwarts Congratulations card, or a fun card for any Muggle special occasion.

Hogwarts House Cards - Fun Harry Potter themed cards for any special occasion.

This post contains affiliate links which help support this site at no extra cost to you.


To make the Harry Potter Hogwarts House Cards, you’ll need:

Cricut Cutting Machine
1  12×12 sheet in each of the 2 house colors
Gold Adhesive Vinyl
Glue Stick
Wax Seal (optional)

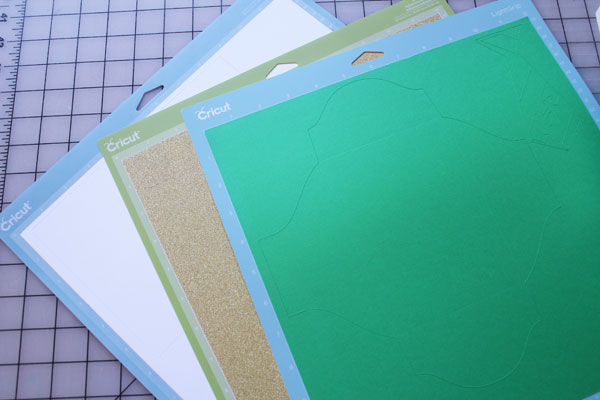
Open up the Hogwarts Card file in Design Space. Cut out the pieces.

cut pieces

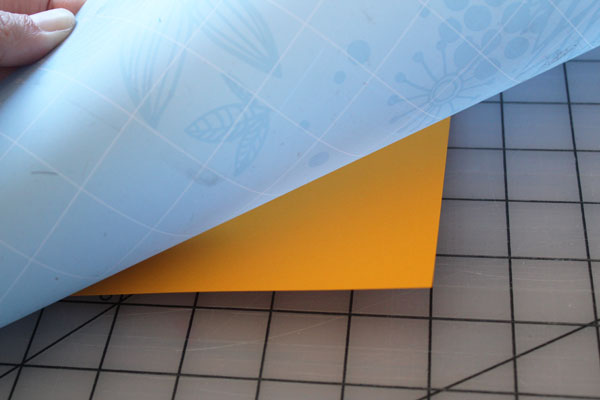
Peel the pieces off the mat. To prevent curling, it is often easier to peel the mat away from the paper, rather than the paper from the mat.

peel off mat

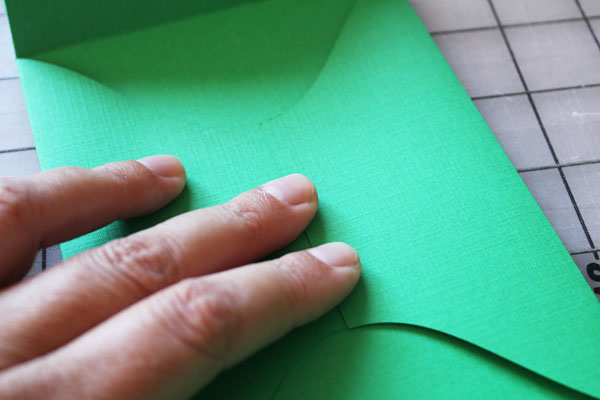
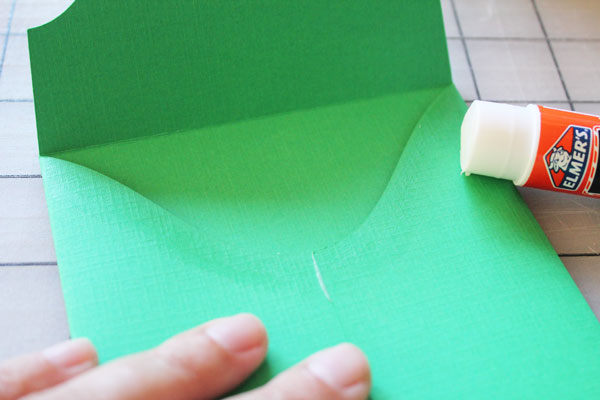
Fold the envelope, and glue the side and bottom flaps to eachother.

glue side flaps

glue bottom flap

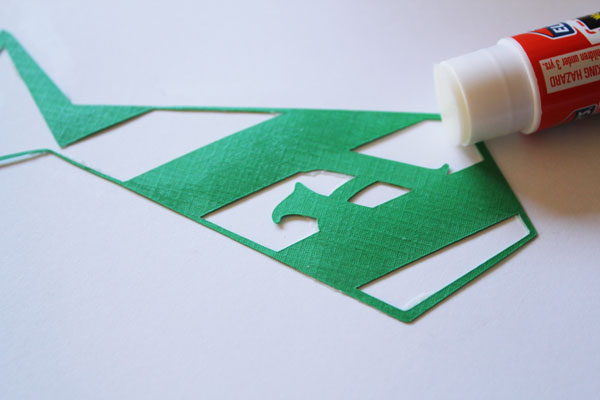
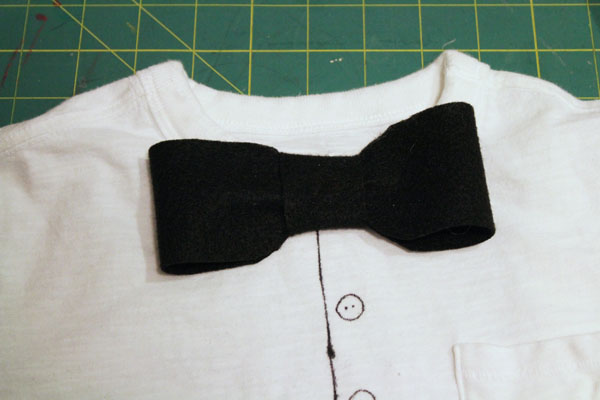
Fold the card. Glue the tie in the center of the card front.

glue on tie

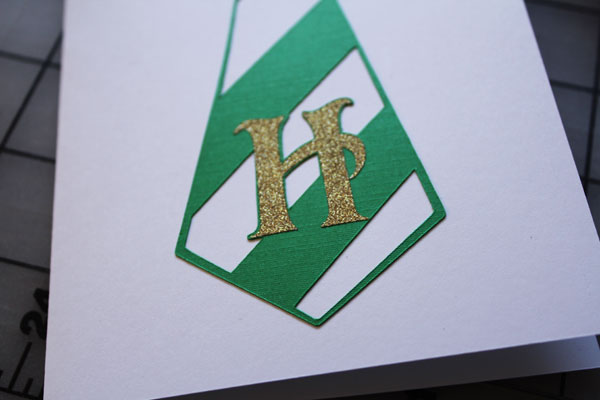
Carefully place the gold H on the tie.

add initial

Write your message inside the card. For fun, look up some great Harry Potter quotes. Here are a few of my favorites:

Happiness can be found even in the darkest of times, if one only remembers to turn on the light.

Never trust anything that can think for itself if you can’t see where it keeps its brain.

It is our choices, Harry, that show what we truly are, far more than our abilities.

“After all this time?”

“Always,”

I solemnly swear that I am up to no good.

Mischief Managed.

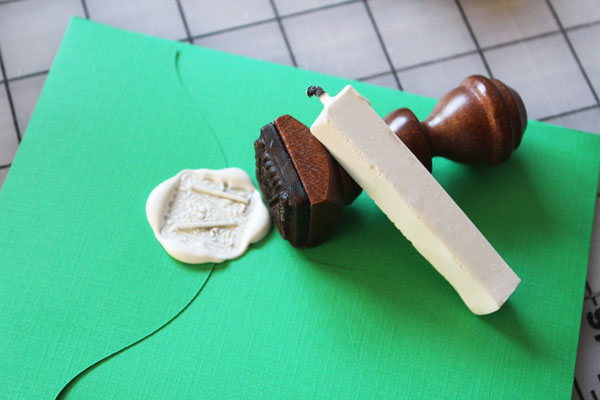
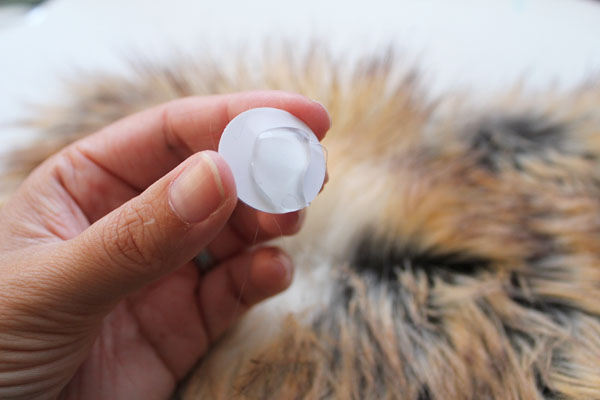
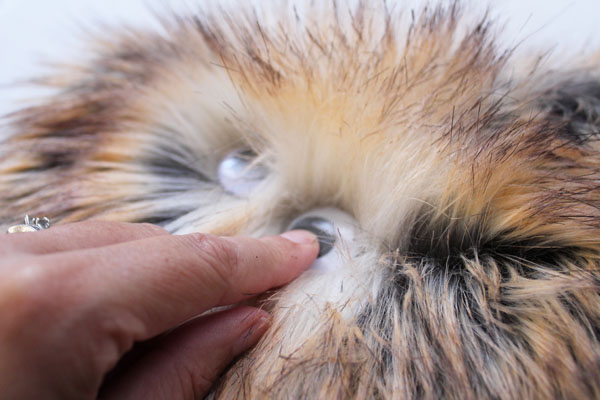
Put the card in the envelope, and close. You can seal it with a wax seal for an authentically magical feel.

wax seal


You can make all your cards for the same house, or you can make an assortment of Harry Potter Hogwarts House Cards.

DIY Harry Potter Hogwarts House Cards

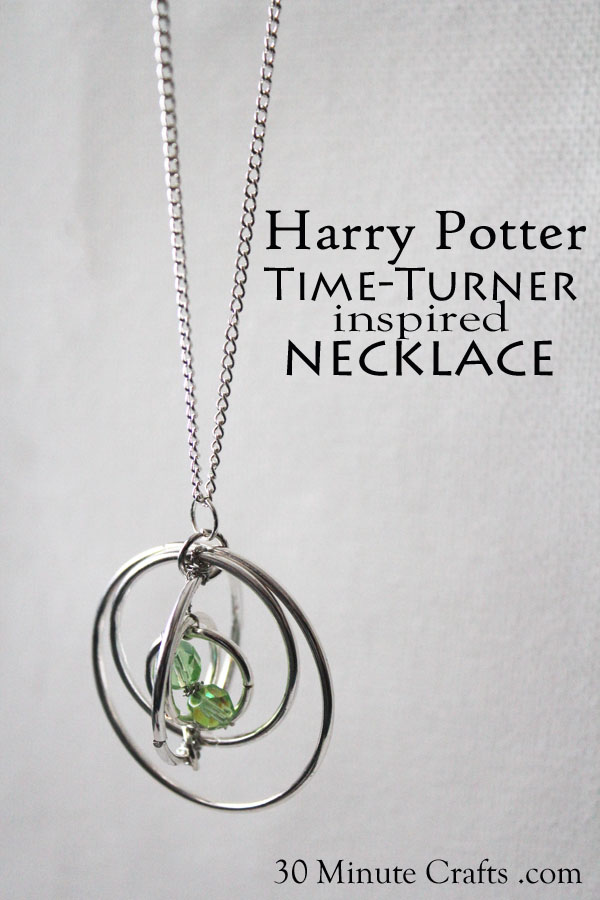
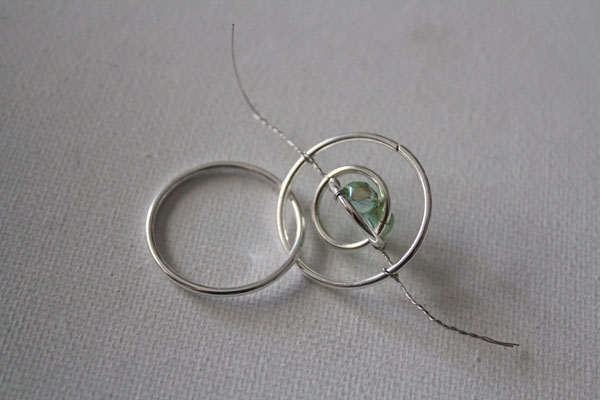
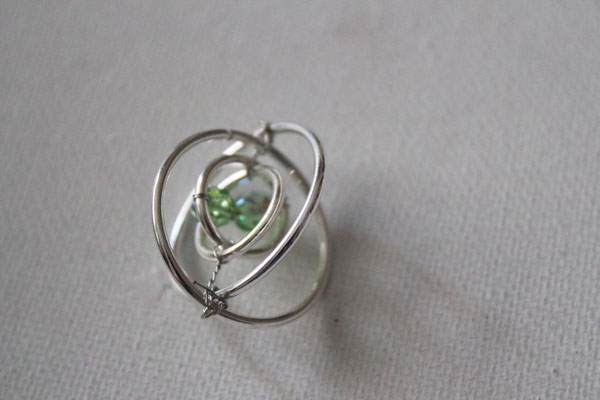
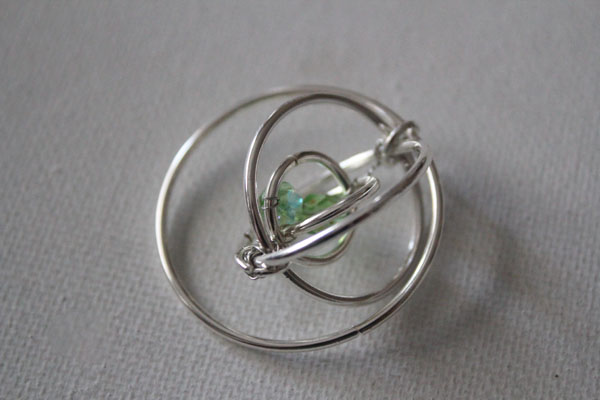
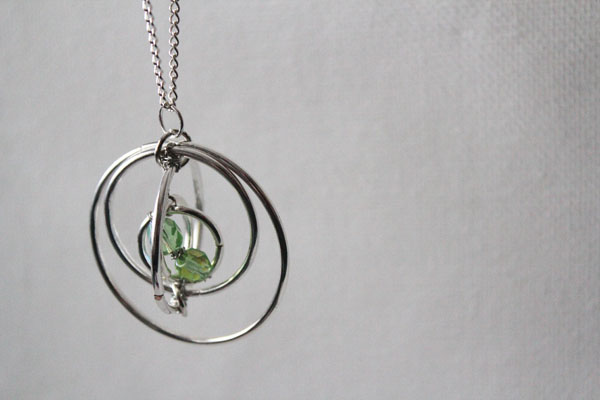
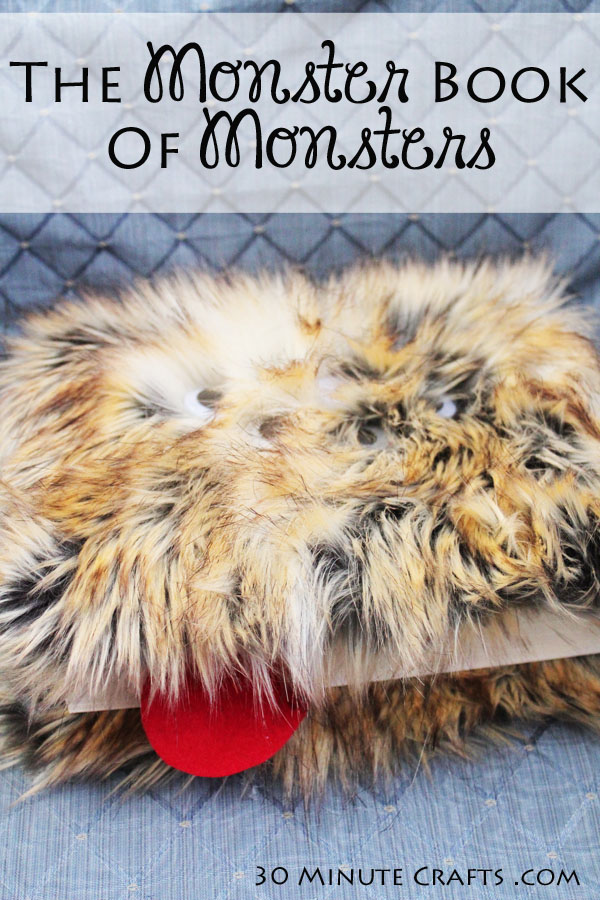
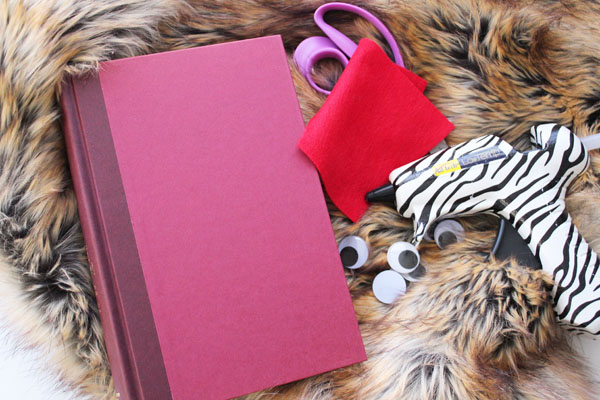
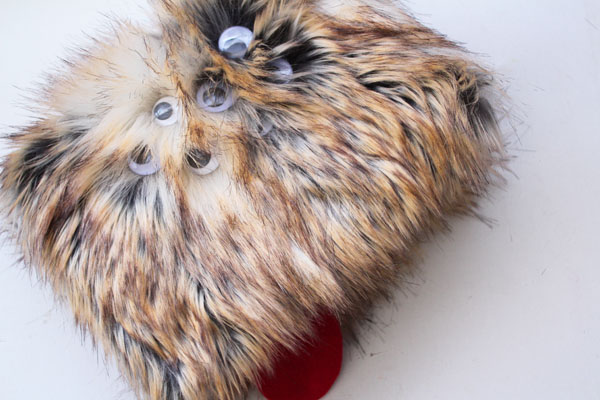
If you’re looking for another fun Harry Potter craft, check out this DIY Time Turner Necklace or this Monster Book of Monsters.

Harry Potter Time Turner Necklace

Are you nuts about Harry Potter? I’ve read the books twice (working on a third time – this time to my son), and love to watch the movies late at night, especially while doing some late night crafting. I love all of the wonderful wizarding world happenings in the movies – traveling by flu powder, a magical hat that knows where you’ll be successful, and books that are also monsters. When I was asked to take part in Marissa from Rae Gun Ramblings’ Harry Potter series, I wasn’t sure what kind of project to come up with! So many different possibilities… but in the end I decided to make a Time Turner Inspired Necklace.

Harry Potter Time Turner Inspired Necklace

Hermione reminds me so much of myself as a kid – kind of awkward, messy hair, and bossy. But with an awesome gang of friends. She also takes on a lot – including a double course load… assisted with the help of her time turner necklace. There are lots of times when I could use one of those! So, although this one doesn’t have any magical time-altering powers, I still love it. If you want to make your own time-turner necklace, here is how you do it…

Start with these supplies:
Crystal beads to make the hourglass
Hoops in 3 sizes for the body of the necklace
Jump Rings
Jewelry Wire (this is 28 gauge)
Jewelry pliers

supplies for time turner necklace

Start by adding the wire to one of the smallest hoops.

wrap wire on small ring

Then make the hourglass by adding the beads. Wrap the wire on the opposite side of the hoop to secure.

thread through second bead

Thread the wire back through the bead to the center.

add second bead

Twist the wire together in the center, and wrap around, to complete the hourglass look, wrapping the wire around the center to secure before clipping the wire.

twist wire for hourglass

Now that the hourglass is complete, add another small circle. Carefully open it like a jump ring, and loop it through the center circle, holding the hourglass, then close.

add second small ring

Wire the second hoop in place by cutting a 8″ length of wire for each side, and secure the spot where the small hoops meet on each side, leaving the wire tails in place. Use these wire tails to add a larger hoop. Then open up another hoop, and add it to the time turner.

add middle hoops

Secure this hoop in place using the same wire tails, then clip the extra wire.

twist wire on middle hoops

Use a jump ring to add the final, largest hoop. You can use a jump ring to secure the last layer of rings as well, if needed.

add outer hoop

Add a jump ring to the top, and string on a necklace. Your time-turner is complete! Though you can’t go back to this morning to get twice as much out of your day, this craft didn’t take that long, so you still have plenty of time to create lots more today!

time turner inspired necklace

Thanks for stopping by!

Animal Chocolate Holders

These adorable Animal Chocolate holders are easy to make with the free cut files I’ve shared below, and they are super versatile! Use them as gifts for a friend. As party favors. Write names on them and use them as placecards for a fun dinner party. Make lots and use them as centerpieces. Make two of each animal for a fun Noah’s Ark themed baby shower. Pick your friend’s favorite animal and fill up a tote. Use the frog as “Chocolate Frogs” for a Harry Potter themed party. I could go on and on… there are so many ways these animal chocolate holders can be used for parties, gift giving, and more!

Animal Chocolate Holders - Free Silhouette Cut Files

Butterfly Chocolate Holder Cut File

Flamingo Chocolate Holder Cut File

Frog Chocolate Holder Cut File

Horse Chocolate Holder Cut File

Kangaroo Chocolate Holder Cut File

Penguin Chocolate Holder Cut File

For each animal chocolate holder you need 12×12″ scrabook paper, a round chocolate (I used Lindt’s chocolates), and hot glue. Each Silhouette cut file has one or more of the animals on it, already sized and ready to go. Just cut, and glue together while holding your chocolate in place!

This frog is adorable – great for a princess party (anyone want to kiss the chocolate frog?), or make them with brown construction paper as “chocolate frogs” for a Harry Potter themed party!

cute-Frog-chocolate-holder


The Flamingo Chocolate Holder is perfect for pool parties! You could make a “Palm Beach” tablescape with some astroturf and these “lawn flamingos” scattered down the center. You really can’t go wrong with a pink flamingo!

Flamingo Chocolate Holder - Free Silhouette Cut File

These butterfly chocolate holders might be my favorite! Use them as place cards for a fancy tea. You can cut them out in different colors, or cut them out from white cardstock and decorate with your favorite markers, crayons, or colored pencils.

Butterfly chocolate holder with free cut file


One side of this little penguin actually has a beak that you can fold out! He is super cute, and great for any winter-themed party. Dress him up with a scrap of felt as a scarf for some extra dimension (and cuteness!)… you can even glue on some googly eyes to make him a little more crafty!

penguin chocolate holder

This horse chocolate holder can be whatever you want – call him a “Mustang” to use him at a school function with a Mustang mascot. Use him for a cowboy themed event – or for any horse lover!

Horse Chocolate Holder

I had so much fun creating these different chocolate holders – I hope you enjoy crafting with them!

Save

Save

Monster Book of Monsters in just 30 Minutes

The Harry Potter books (and movies) are full of all kinds of fun magical creatures, like the Monster Book of Monsters. These are the little things that make the story so magical and fun! Making your own Monster Book of Monsters is easy to do, with just a few supplies, and in only a few minutes.

I made this project as part of the annual Rae Gun Ramblings series celebrating Harry Potter crafts! You can go check out all the other awesome projects that are part of the series… but for now, let me show you how easy it is to make your own Monster book of Monsters. When you get down to the bottom, you’ll find an awesome Harry Potter inspired giveaway as well!

DIY Monster book of Monsters in just 30 Minutes

To make your own Harry Potter inspired Monster Book of Monsters, you’ll need:

Faux Fur from Shannon Fabrics
Hardback Book (I picked one up at Goodwill)
Googly Eyes
Red Felt
Hot Glue
Scissors

supplies to make a monster book of monsters

Start by placing the fur right-side-down, with the book open on top, and cutting the faux fur about 2″ larger than the book on all sides.

cut fur larger than book

Cut in towards the spine both at the top and the bottom, at an angle, and cut away. Then use hot glue to glue the spine in place.

glue down spine

Mark the corners of the book.

mark corners

Cut away the corner, so that the flaps of fur are angled. Then glue down the flaps one at a time.

glue in flaps

Repeat with the other side. You now have a furry book!

covered book

To secure the eyes, first move the fur a little, so that you create a part in the fur where you want to glue the eye.

move fur out of the way

Add a generous dab of glue to the back of the googly eye.

hot glue

Secure in place, where you created the part in the fur. Repeat for all the eyes you want to add.

press down googly eye

Once you’ve added all the eyes, you can pet down or fluff up the fur on your Monster book of Monsters.

Add a tongue by cutting a rectangle of red felt, then curving one end. Place between the pages so that the tongue sticks out.

cut out tongue

Your Harry Potter inspired Monster book is complete!

the monster book of monsters

Check out this fun Harry Potter inspired giveaway!

 
a Rafflecopter giveaway

Craft Lightning Day 5 Roundup!

It is Day 5 of Craft Lightning, and all week long we’ve been sharing fast and easy Halloween crafts that can be made in 15 minutes or less! If you missed them, check out Day 1 Fast Halloween Crafts, Day 2 Fast Halloween Crafts, Day 3 Fast Halloween CraftsDay 4 Fast Halloween Crafts. Now let’s get on to today’s crafts!

To get a full tutorial on each project, click the link below the photo.

Pumpkin soap dispenser

 Pumpkin Soap Dispenser


Halloween Jars

 Spooky Jars


treat tag with pocket

Halloween Gift Tag with pocket


Homemade spider cookies

Spider Cookies


Pumpkin Centerpiece

Pumpkin Centerpiece


Ghosts under Glass

Ghosts under Glass


mandrake-812x1024

Harry Potter inspired Mandrake Plant


dia de los muertos bow tie

Dia de Los Muertos Bow Tie


My crafty partner for this series, Angie from The Country Chic cottage made this awesome Elsa crown

make-your-own-frozen-elsa-crown-008

And I whipped up some fun Spider Snacks great for school or a Halloween party.

Halloween Spider Snack


No-Sew Magician Costume

This no-sew magician costume was incredibly easy to make.  Even the top hat. And the bow tie. And the wand. All made without any sewing! If you’re looking for a fast and easy magician costume, then this is the perfect craft for you! This costume is made in 3 different parts – the hat, the shirt, and the wand. Each part will take you 30 minutes or less to make!
And even better, I teamed up with over 80 bloggers to share a TON of different costume ideas! It was orchestrated by Jamie Dorobek and her handmade Halloween costume site, Really Awesome Costumes . To help you get ready for Halloween, we’re sharing tons of easy ideas to craft up DIY Halloween costumes for everyone including your pets, family costumes, and even a trunk or treat idea! Be sure to scroll down to the end of the post to see the full round-up!

No Sew Magician cosume

Supplies:

Black Felt
Hot Glue
2 sizes of plates
White Shirt
Sharpie Marker
Dowel
Glitter tape
Jacket, black pants, black shoes.


We’ll start with the hat. Trace a plate onto the felt. Cut 2. Trace the smaller plate on the inside.

trace plate and cut


Cut a 6″ tall piece of felt, as long as the circumference of your smaller circle, plus 1 inch. Fringe the bottom, about 3?4″ apart, and about 1″ deep cuts.

cut fringe

Glue the fringe to the inside of one layer of the donut-shaped felt piece.

glue fringe on inside of hat

Glue the other donut piece on top to cover the fringe bits.

Repeat with the top of the hat, using the circles cut out from the inside of the donut shaped piece.

glue on top of hat

Cover with the second circle, and the hat is done!

no sew felt top hat in just 30 minutes


For the shirt, draw a line just off-center, and draw on buttons.

supplies for shirt

Cut a strip of felt, and cut notches to make a bow.

fold and cut notches


Wrap a smaller strip of felt around the middle, then glue the bow into place at the collar of the shirt.

hot glue bow tie

glue on bow tie

The wand is easy! Cut a dowel to about 6″, then color with the Sharpie.

color dowel with marker

Wrap some glitter tape on one end. The wand… and your costume… is done!

glitter tape on end of wand

No Sew Magician Costume Tutorial on 30 Minute Crafts

Check out all these other great costume ideas!


101+ Handmade Halloween costumes at Creating Really Awesome Free Things


And now it’s time for tons more DIY Halloween costume inspiration! Join in on the BLOG HOP! Click on the links below each collage to get the detailed instructions about how to make the costume pictured, just like mine above. Don’t forget to follow the Handamde Halloween Costumes Pinterest Board for even more DIY costume greatness!


88+ Handmade Halloween costumes at Creating Really Awesome Free Things

1. Handmade Baby Hamburger Costume

2. DIY Baby Game Boy Costume

3. DIY Minecraft Steve Costume

4. Football Brothers Halloween Costumes with DIY Pads and Onesie

5. Star Trek Halloween Costume for Kids

6. A Bee and Her Keeper

7. No Sew Magician Costume

8. Flint Lockwood Costume

9. Pinocchio

10. Marty McFly

11. Princess Wedding Dress Costume

12. Handmade Lalaloopsy Doll Costume

13. Homemade Toothless Costume

14. DIY Mermaid For Less Than $20 (No-Sew Option)

15. Easy Tinker Bell Costume

16. Mario and Luigi Go Kart Costumes

17. Dog The Bounty Hunter and Beth

18. Family Monsters University Costumes

19. Scooby Doo family costumes

20. DIY Storm Cloud Costume


88+ Handmade Halloween costumes at Creating Really Awesome Free Things

21. Cheap and Easy DIY Spider Costume

22. Easy Tin Man Costume

23. No Sew Bee Costume

24. Planet Halloween Costumes

25. DIY Cheshire Cat Costume

26. DIY Instagram Board

27. Elsa crown

28. Dog Collar Ruffles

29. DIY Pineapple Baby Costume

30. DIY Lego Movie Costume

31. Weeping Angel Costume

32. Disney Planes Costume: Dipper

33. Easy Pirate Costume

34. Easy Costume Idea – Renaissance Girl

35. 10 Minute Homemade Jellyfish Costume

36. DIY Cat Costume

37. Lucy And Ricky Costumes

38. Easy Frozen Costumes (Carrisa!!)

39. Easy Greek Goddess Costume

40. DIY Family Willy Wonka Costumes

101+ Handmade Halloween costumes at Creating Really Awesome Free Things

41. DIY No Sew Maleficent Costume

42. No Sew Pineapple Halloween Costume

43. Graveyard Bean Bag Toss: Trunk or Treat Car Costume

44. DIY Teenage Mutant Ninja Turtles Costumes

45. DIY Raccoon Costume with Printable Mask

46. Easy WildStyle Lego Movie Costume

47. Simple Hello Kitty Costume

48. No Sew Minnie Mouse Costume

49. DIY Inspector Gadget and Penny Costumes

50. DIY Frozen Elsa Dress Baby Edition

51. Fairy Princess Dog Costume

52. DIY Hashtag Halloween Costume

53. Toddler or Baby Egg Costume

54. Easy No Sew Olaf Costume

55. DIY Baymax Costume

56. DIY Tooth Fairy Costume

57. Baby Short Stack Pancake Costume

58. Elephant and Piggie Halloween Costumes

59. Instagram Halloween Costume

60. Peter Pan & Mr. Smee Halloween Costume


88+ Handmade Halloween costumes at ReallyAwesomeCostumes.com

61. Wildstyle Costume from the Lego Movie

62. Fred and Wilma Couples Costume

63. Viking Family Costumes

64. DIY Cruella de Vil Costume for a child

65. Disney Frozen Olaf Halloween Treat Bucket

66. How to Make a Minecraft Steve Head

67. DIY Harry Potter Costume

68. DIY Duck Dynasty Costumes

69. No Sew Cupcake Baker Halloween Costume

70. DIY Skunk Mask

71. Ghostbusters Proton Pack DIY

72. Frozen Anna Costume Tutorial

73. Candy Corn Costume

74. Paw Patrol Halloween Costume

75. No Sew Toothless Dragon Costume

76. DIY Robot Costume

77. Wonder Woman Costume

78. Reese’s Peanut Butter Cup Costume

79. Thrifted Gentleman Spy DIY Halloween Costume

80. DIY Boy Garden Gnome Costume

81. Group Costume: Bob Ross, Happy Tree, & Squirrel

82. DIY Blues Brothers Costumes

83. Snow White Costume

84. Peacock Princess Costume

85. Scarecrow Costume

86. Easy Teenage Mutant Ninja Turtle
Costume

87. Handmade Teddy Bear Costume

88. Princess Elsa and the Spy Kid

89. DIY Baby Koala costume

What handmade costume ideas did you love the most?! Be sure to click over to get the costume instructions, pin the costume, and let them know you love it! Also, follow the Handmade Halloween Costume board on Pinterest!

Follow Jamie Dorobek {C.R.A.F.T.}’s board “Handmade Halloween Costumes” on Pinterest.

Craft Lightning Camp Crafts – Day 4 Roundup

We’re nearing the end of Craft Lightning week, and we have some more great camp craft ideas to share with you! Angie from The Country Chic Cottage and I put on this week-long Craft Lightning series, and this week the theme is camp crafts!


Laura from Laura Kelly Designs made a quick and fun interactive rainbow tablecloth for the Sock Monkey, tie-dye, rainbow mash-up party she put on.

Table-Cover-1024x498


Kadie from Seven Alive whipped up this fun little nature treasure box – such a great craft to do in the morning before a nature hike!

Nature-Treasure-Hunt-Box-camping-kidsfun-craftlightning

Mandy from Sugar Bee Crafts made these cute numbered shirts with her kiddos. Great for kids to personalize – you can use them to indicate ages, or group numbers.

sprayed-diy-number-shirts

These no sew zippered pouches made by Heidi from Happiness is Homemade were created using Duck Tape – and with all the colors and patterns of Duck Tape available, these make an awesome camp craft and back to school craft!


Quick-and-Easy-No-Sew-Duck-Tape-Zipper-Pouches


How cool is this light up Harry Potter Wand from Marissa at Rae Gun Ramblings? She whipped it up in just 15 minutes, and it makes the perfect camp craft for campfire night!

Harry-Potter-Wand-005s

These glow in the dark mason jar lanterns from Kimbo at A Girl and a Glue Gun make an awesome pre-campfire craft as well… or they could be used instead of a campfire if there is too much fire danger.

glow-jars-for-kids-camping


This crafty camp sign by Lindsay at Frenchie Wraps can be used to decorate the camp, or can be great for campers to take home to decorate their rooms.

4Custom-Wood-Sign-at-frenchiewraps2


Pass the marshmallows! Angie from The Country Chic Cottage, my partner for this series, just upped the yum factor on traditional s’mores with these Nutella Peanut Butter s’mores. We will absolutely be trying these out at my house!peanut-butter-nutella-smores-004

I whipped up a simple pony bead bracelet – an easy camp craft for kids or adults.

make a pony bead bracelet


Be sure to stop back tomorrow, our last day for Craft Lightning Craft Camp… we have lots more fun crafts to show you!

Google Eye Monster Jewelry

google eye monster jewelry

I have a thing for google eyes. Or googly eyes. Whatever you want to call them. I don’t know why, exactly. They are just so much fun. And so simple to craft with. Add two google eyes to a rock, and you’ve got a little rock person. Done. And so simple! And there is such a variety of googly eyes. Big ones, small ones, colored, glow in the dark, with eyelashes… I have a small collection of googly eyes that I use on different projects. And I was super, super excited to make this Google Eye Monster Jewelry. It is insanely simple to make, and is so much fun to wear! Let me show you how…

google eye jewelry suppliesStart with:
Earring posts
Jewelry Glue
Google eyes of your choice
Necklace Pendant
Jump Ring
Necklace Chain


Grab your earring posts and two googly eyes. Put a dab of glue on the earring posts.dab of glue on posts

Smoosh your google eyes onto the posts. Don’t center them (you’ll be tempted to). Instead, put the posts towards one side. This side will be the top. Not centering the posts will make them more comfortable to wear, especially on smaller earlobes. glue on posts

Just let the glue dry, and you’ve got some great googly eye earrings!

google eye earrings

I wanted to make a necklace to go with my earrings. I had these charm bases from Martha Stewart’s Jewelry line, and they fit a google eye PERFECTLY. I love it when that happens!

pendants

Just a very small dab of glue in the middle (enough to secure it, not so much that it gooshes out everywhere) (yes, “gooshes” is a very technical term here).

dab of glue

Then I just put my google eye in place, and let it dry. After it dried, I added a jump ring to the top and strung it on a chain for a very spooky looking pendant.

put google eye in pendant

It reminds me a little bit of Mad Eye Moody from Harry Potter… but in Jewelry form!

Mad Eye Moody Harry Potter Jewelry

Rune Necklace

Rune Necklace on 30 Minute Crafts

Lately, I’ve been into Harry Potter. Which is where I came up with this Rune necklace. Hermione talks about how much more interesting a subject Ancient Runes is than Divination, and in the final book, the Deathly Hallows are mistaken for a rune. I thought it would be fun to incorporate runes into a necklace for a Halloween-worthy look that you can get away wearing to the office. A fun accessory that isn’t too costume-y.

This necklace is also super-easy to make! All you need are:
Sharp Blade
Large Black Beads (with white underneath)
Eye Pins
Chain
Jump Rings
Necklace Clasp

Start by scratching your rune designs into one side of the beads. I made sure that my beads had black over white, so that the bottom layer showed through.

scratch shape into rune

I looked up a list of runes to find the different shapes I wanted. Each has a meaning, so I picked symbols that have meaning to me.

make the runes you want

As you can see, scraping the designs into the beads made the shapes look very raw and rustic – perfect!

I strung the eye pins through the beads, and closed the loop on the other side, using round-nosed pliers.

add eye pins

Then I used jump rings to string them together, and attach them to the necklace chain.

add chain

All that was left was to add the clasp, and my Rune Necklace was complete!

finished rune necklace

This will surely get you in the mood for some more fun Halloween crafts. I’ve teamed up with some of my blogging buddies to share fun Halloween crafts all week long! Check out some of their projects in the linky below:

the creepers are coming button

Craft Lightning Super Spooky Edition – Day 1 Roundup!

Craft Lightning is one of my favorite ongoing series. For lots of reasons. I love hanging out with Angie from The Country Chic Cottage, who puts these events together with me. I love having other bloggers join in, and I LOVE all the fun projects. Seriously, y’all… check out what today’s awesome bloggers have come up with!

The Creative Mom has these Halloween candy dishes – she made 4 fun designs! How fun! I want to paint up a whole family of Frankensteins in different sizes!

Halloween Candy Dish on The Creative Mom

Over a 4 You With Love, you’ll find this Washi Tape candle. Who doesn’t love Washi Tape? And it is PERFECT for quick crafting! A great way to add color and texture in almost no at all time!

15 minute Halloween candle from 4 you With Love
These Pumpkins from DIY Inspired are lots of fun. I love the shine and subtle pops of bling. This would look great on a mantle… and can you believe it was done in just 15 minutes? With the help of a 3-year-old (and you know that kind of “help” makes things take just a little longer, right?)

Halloween Pumpkin Display by DIY Inspired

Laura Kelly always comes up with cute projects… these Halloween treat bags are great for “Boo”-ing your neighbors, or just because! I love them!

Spooky Treat Bags by Laura Kelly Designs


My partner in crafting, Angie from The Country Chic Cottage, made these fun treat bags out of Duck Tape! Oh, the possibilities! DIY Halloween Treat Bags made with Duck Tape at The Country Chic Cottage

And earlier today, I shared with you a bead spider that you can whip together in just 5 minutes! How fun would it be to make a whole trail of these, Harry Potter style across a window ledge?

5 minute spider craft

If you have a 15 Minute Halloween craft you’d like to share, please add it to the Craft Lightning Linky – we’d love to see it!