


Yesterday, as part of our Craft Lightning Craft Camp, I shared with you simple and easy less-mess tie dye. Because I loved dying shirts at camp. Today I wanted to bring dye into another part of craft camping… because most of the craft huts I’ve seen at camps only have a limited amount of supplies, it helps to be able to use the same supplies in multiple ways – and Rit dye is one of the most versatile supplies out there. It made shirts yesterday, and stained glass today!
Craft Lighting is a semi-monthly series where Angie from the Country Chic Cottage and I, along with our blogging friends, make fast (15 minute or less) projects on the same theme. This week, the theme is Camp Crafts – and we’re having so much fun with this. In case you missed them, go check out the Day 1 Camp Craft Roundup and Day 2 Camp Craft Roundup.
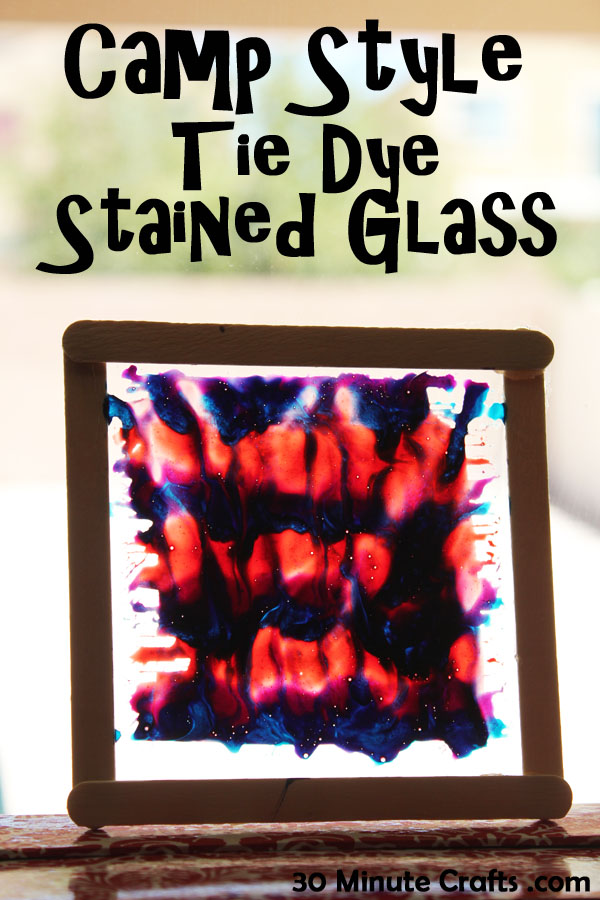
This camp-style tie dye stained glass is super easy to make. You only need a few supplies
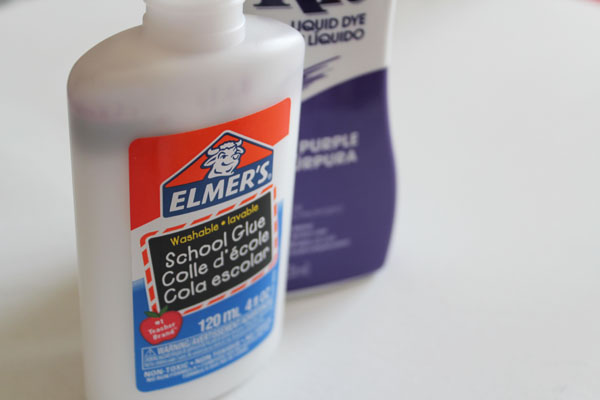
Elmer’s School Glue
Rit Dye
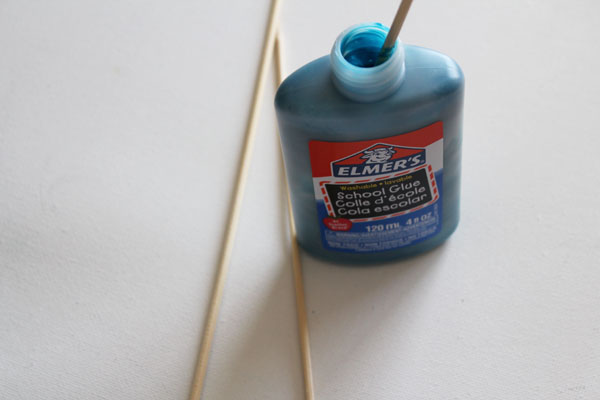
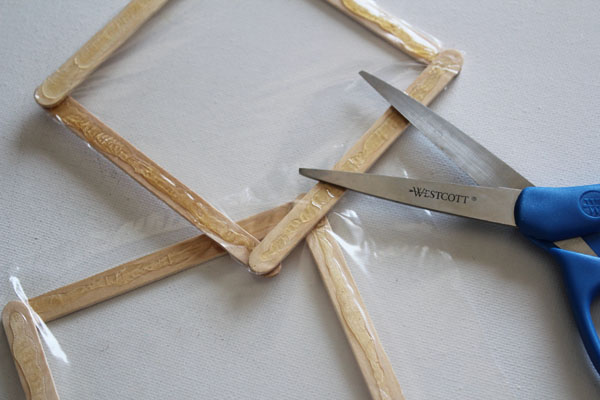
Wooden skewers
Popsicle Sticks
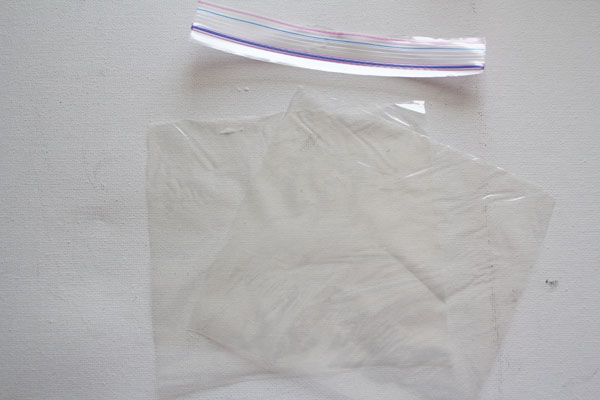
Plastic Sandwich Bags
Hot Glue
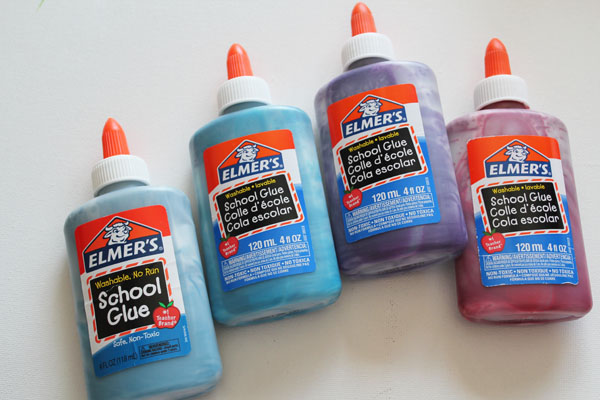
Start by making the glue dye. You need school glue that is about 3/4 of the way full – then add your dye.
Use a wooden skewer to stir your glue dye.
Make as many colors as you would like.
Put your glue dye aside, and make your “glass” frames. Start by cutting your bag. You can make two frames from each bag.
Hot glue the popsicle sticks in place. I did two vertical pieces first, with a horizontal piece (not glued) behind to measure the distance apart.

Add the horizontal sticks with hot glue as well, then trim off the extra plastic.
Now create your designs with the dye glue! You’ll want to use a very THIN layer of dye glue.
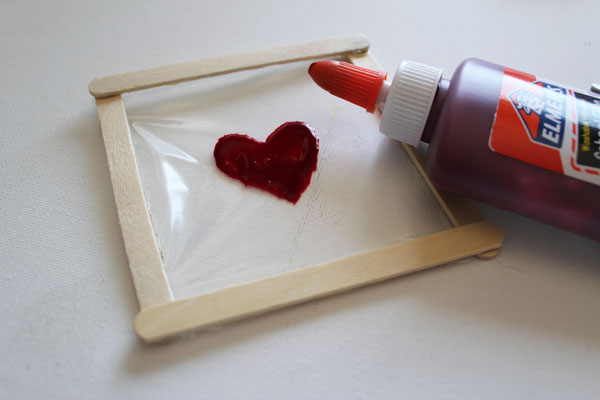
To create a fun tie dye look, add thin stripes of color.
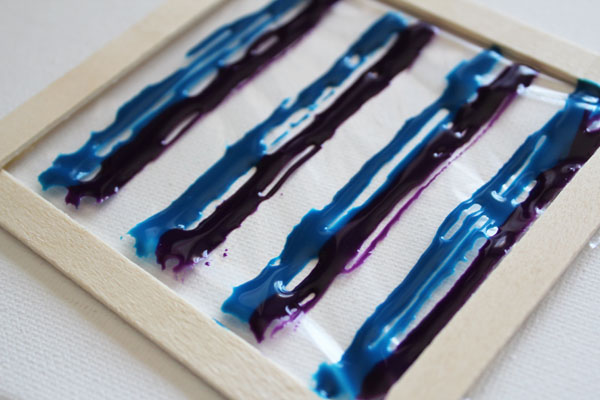
Then use a toothpick or skewer to swirl the colors together.
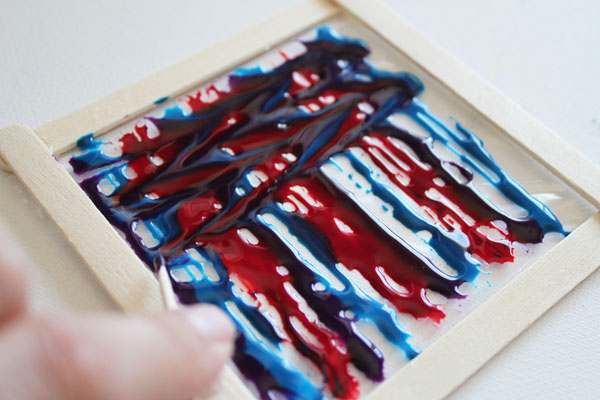
You can leave the gaps to allow more light through, or close the gaps by spreading the dye glue with the toothpick.
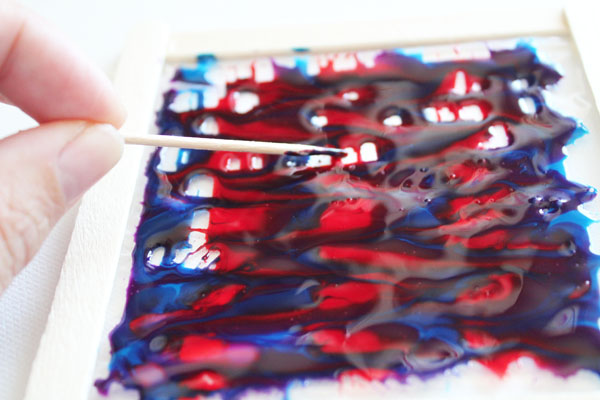
Once you’ve created your designs, allow them to dry.
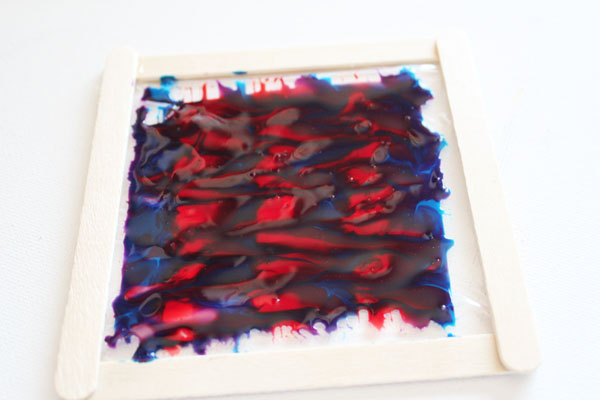
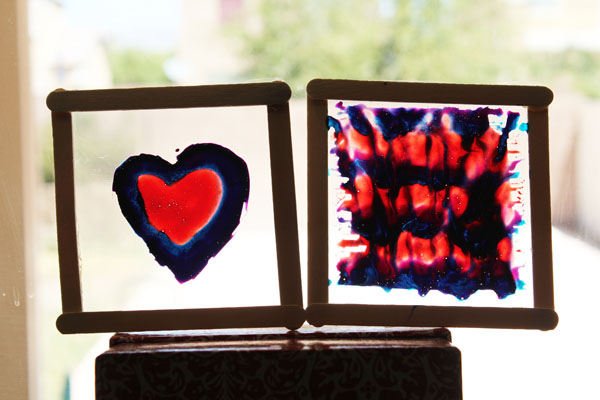
Place your tie dye stained glass in a bright window to catch the light!
Then make sure to come back tonight for a round up of more fun and fast camp craft ideas!


[…] Easy Tie Dye Stained Glass […]