CREATE Zippered Bag

Looking for a crazy-simple project that you can say you made yourself? That’s exactly what this CREATE Zippered Bag is. I started whipping this bag up after the sun went down, and was finished before the last rays of light left my craft room. Yes, it helps that the sun really has staying power during the summer… but this is a crazy fast craft project. Let me show you how easy it is to make!
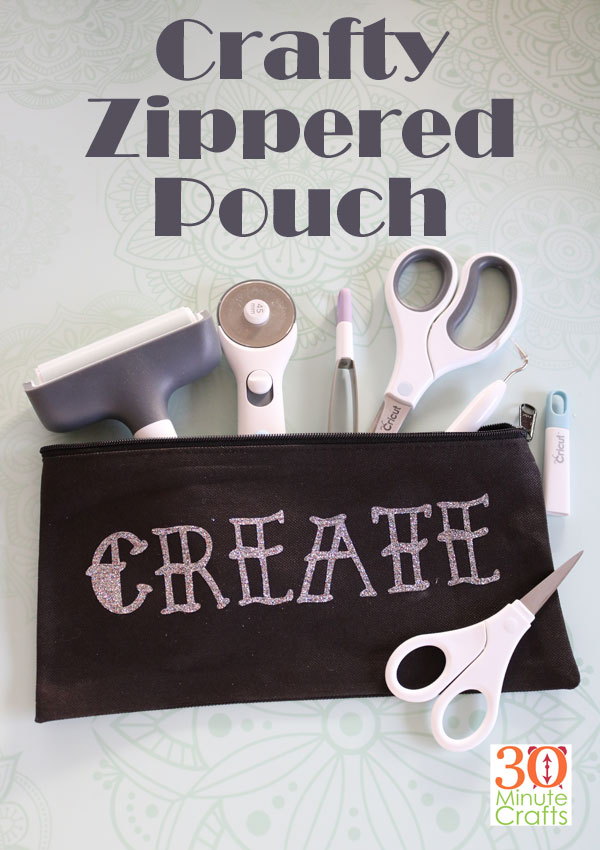
Crafty Zippered Puch - such an easy DIY!

This project is part of a whole week of iron-on projects made with the Cricut. All week long my friends and I are sharing how you can use iron-on to make fun and custom projects. Be sure to scroll all the way down to check out their amazing ideas!

To make this crafty zippered pouch you’ll need
A zippered pouch ( I got mine from Canvas Corp)
Glitter Iron-On
Weeding tools
Bright Pad (optional)
Heat press or Iron
Old towel (trust me – I will explain)
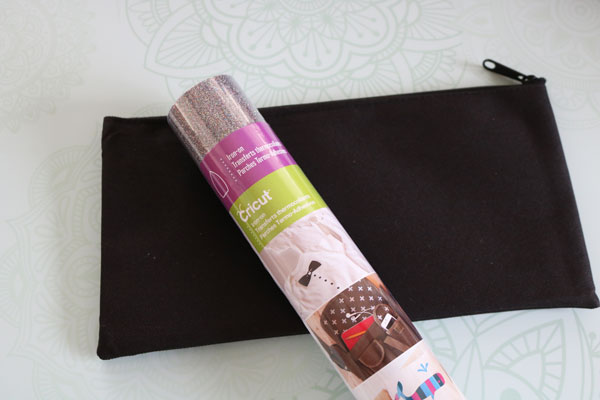
supplies

Cut out the Create cut file with your Cricut Machine. Remember when you’re cutting Iron-On that you have to toggle the “mirror” button, otherwise your words will be backwards! Also, cutting glitter iron-on is a little different than plain iron-on. It is a little thicker and harder to cut. So make sure that you choose “Glitter Iron-On” from the settings so that your iron-on will cut through completely.

Once you’ve cut the design, weed the vinyl. This just means that you take out all the background and extra pieces of the vinyl to expose the finished design. When using glitter iron-on, I find that using a bright pad or holding the iron-on up to a bright light in a dim room helps me to find the cut lines. This makes weeding a lot easier.
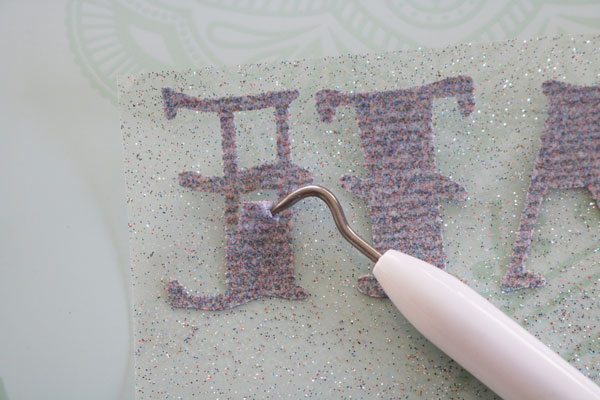
weed your vinyl

Place the design on the zippered pouch. You can center it, off-set it – whatever you like!
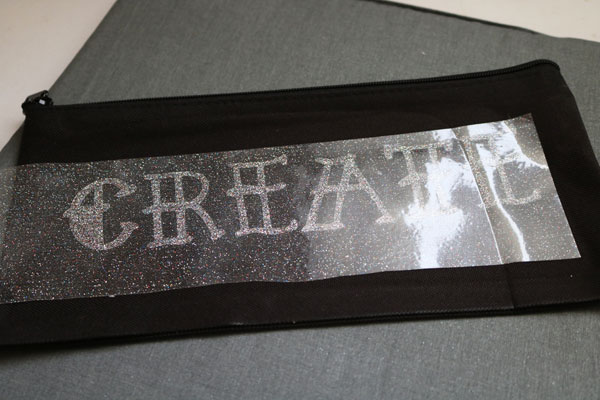
place file

Here is a tip that I learned the hard way. Before you iron your design into place, open up the pouch and look inside. The inside of my pouch was lined with a plastic lining. Great for having a very durable bag – not so great when you apply heat. The inside of my bag fused together when I ironed on the design! Luckily, I was able to peel the layers back apart. But, it wasn’t ideal. So, if you have an old towel you can place inside to protect the layers, that would be a good idea. A teflon sheet would be even better.

Use your EasyPress or Iron to fuse the Iron-on into place. Once it has been fused, you can remove the transfer plastic
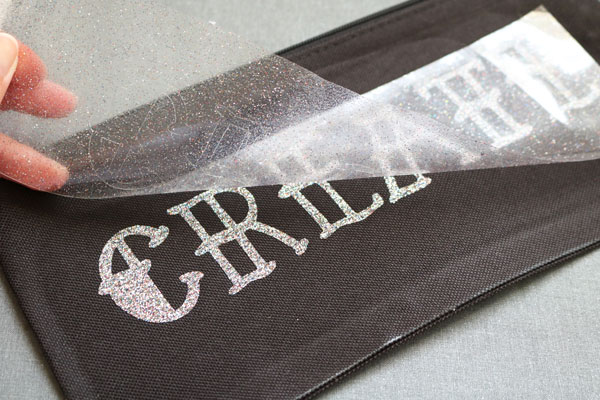
pull transfer sheet

If you didn’t use an old towel or teflon sheet, here comes the step where you peel the layers apart before you can use your bag! But, once you’re done, you have a great bag… I think I’ll be using mine to hold my favorite Cricut tools!
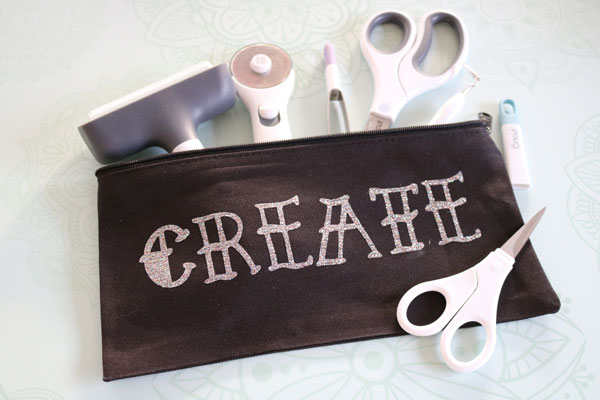
finished create pouch


a Rafflecopter giveaway

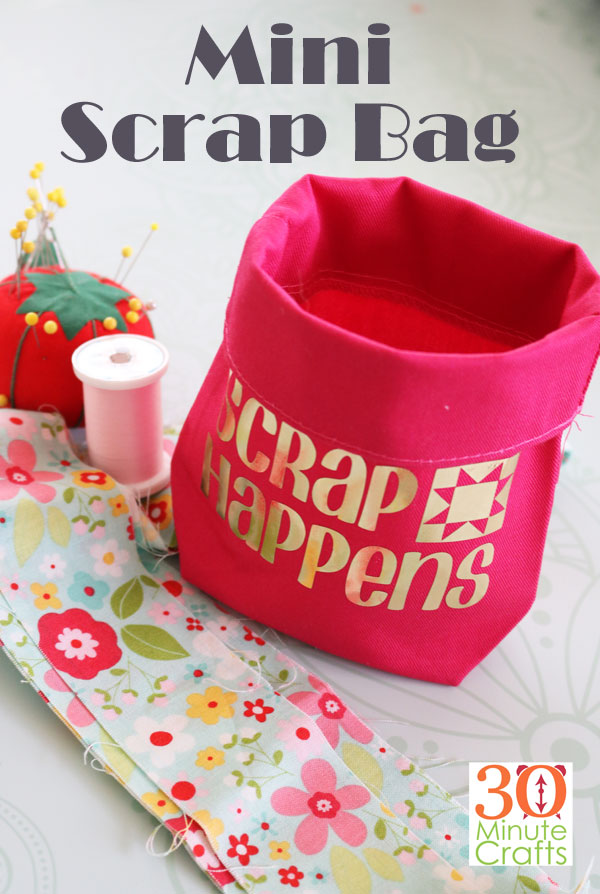
Scrap Happens Customized Scrap Bin

Having a small spot to put loose threads or small snips of fabric can help to keep a sewing area more tidy. And it absolutely saves time – no need to get up and walk to the garbage can for each thread snip. So when I saw this cute scrap bin, I knew I wanted to customize it to use on my sewing table! You can customize your own scrap bin following these instructions!
mini scrap bag made even cuter with a custom foil iron-on cut on the Cricut. Free Cut File available!
This project is part of a whole week of Cricut Iron-On crafts. All week long my friends and I are sharing fun crafts that you can make using all the different kinds of Cricut Iron-On! Be sure to scroll all the way down to check out all the awesome ideas we’ve come up with!

To make your Scrap Happens Customized Scrap Bin, you’ll need:

Cricut Machine
Fabric Scrap Bin (I got mine from Canvas Corp)
Scrap of Iron-on (I had this gold foil iron-on that was perfect)
Weeding Tools
Iron or Easy Press and Mat


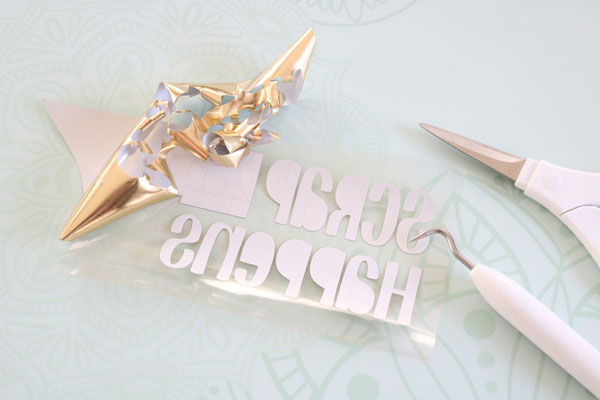
You can see that there is a large piece cut out of the iron-on that I used. This project only takes a small amount of iron-on to make, so I was happy to re-use this piece. But if I left the design as-is, the Cricut would have cut in the area where the iron-on has been cut away already. To prevent this, once I moved from the design screen to the mat view (this happens after you press “Make It”), I was able to tap on the design and move it to the right. That way, I was able to use the upper right corner of this piece of iron-on, and get the most use out of it!

Use this cut file to cut the “Scrap Happens” from the iron-on. You can re-size it to fit your bin if your bin is a different size. When using iron-on always remember to mirror your image! You’re cutting the back of the material, not the front. To make sure that you don’t get your words in mirror-image (a la DaVinci), you need to toggle the “mirror” switch.

Weed the vinyl. This just means peel away any parts of the vinyl that won’t be needed in the finished project. All of the background parts, and insides of letters like R, e, and A.

weed vinyl

Flatten the scrap bin, then place the design.

place the design on the bin

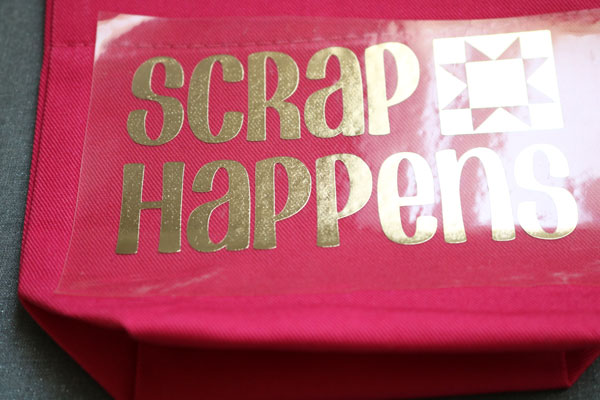
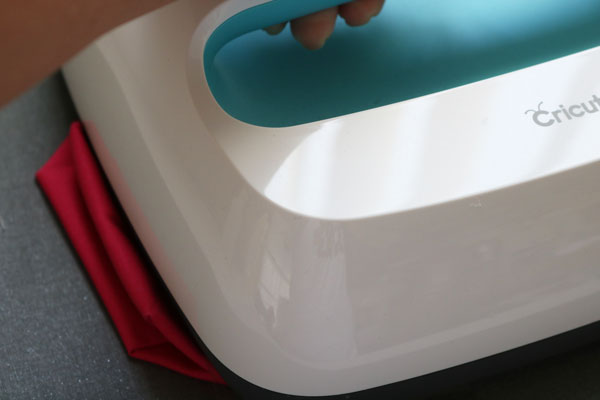
Press using your EasyPress or Iron.

use easypress

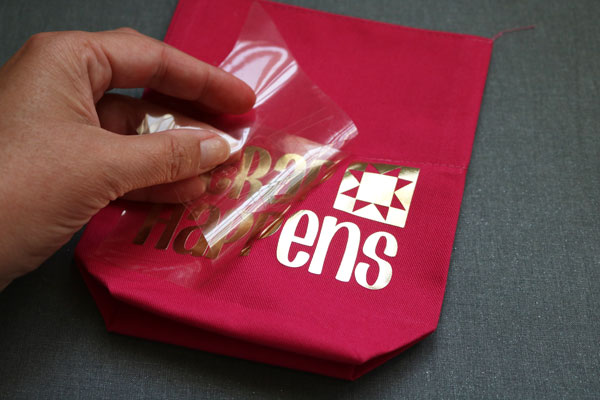
Peel away the transfer plastic.

peel transfer plastic off

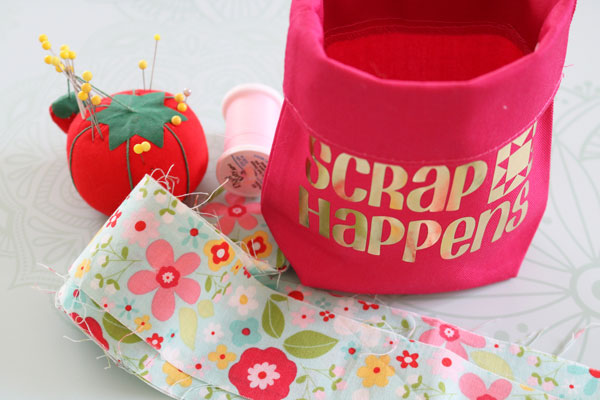
All done! The perfect place to tuck your scrappy bits!

finished scrap happens pouch perfect for sewing

Check out all these awesome crafts you can make with Cricut Iron-On!


a Rafflecopter giveaway

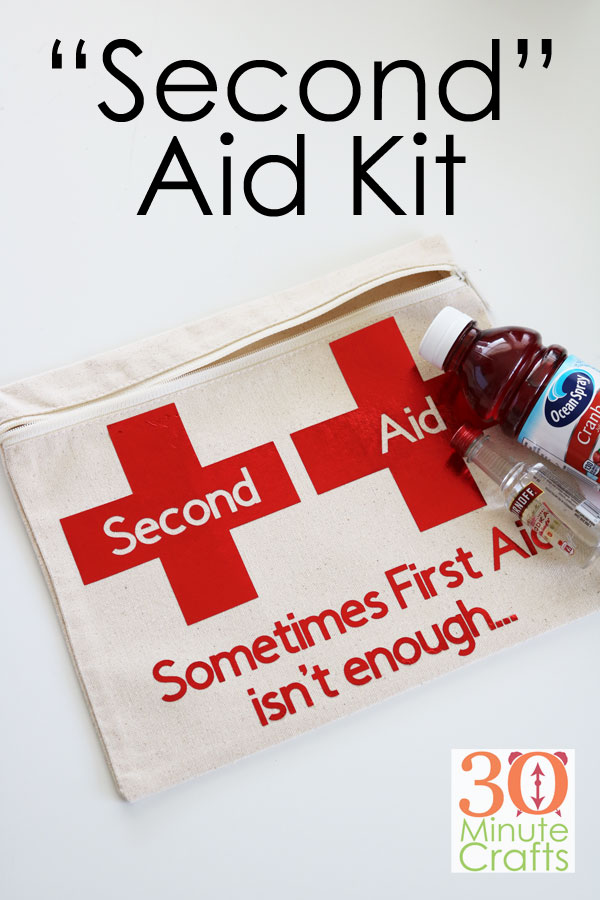
DIY Second Aid Kit – Sometimes First Aid isn’t enough!

First aid is important. But after that is done, you’ll want this DIY Second Aid Kit. Any mom will tell you that she has essentials for “those days.” It might be chocolate, or coffee, or booze, or Diet Coke. It might be a good book and a bath bomb. This DIY Second Aid Kit, filled with whatever self-care essentials, makes a perfect gift for a friend! If you like this idea, chances are you’ll love my Emergency Chocolate and my Custom Flask ideas.

DIY Second Aid Kit - the perfect gift for anyone needing a pick-me-up!

I made this project as part of a week of all Cricut Iron-on Projects. Cricut has some amazing options when it comes to Iron-on, and you don’t need to be a pro crafter to cut it out! So all week long my friends and I are sharing fun crafts you can make using Cricut Iron-on. Make sure you scroll all the way to the bottom to check out all the fun iron on projects from the whole week!

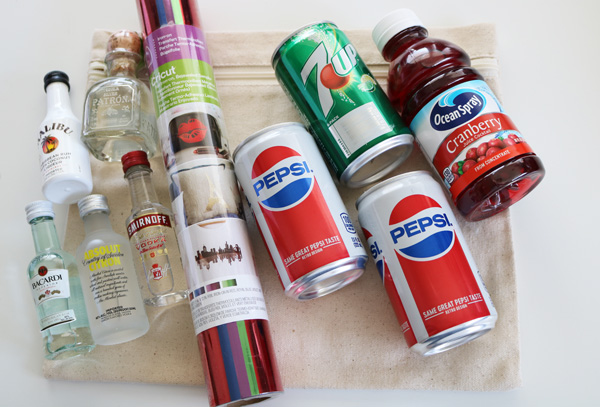
Supplies for your Second Aid Kit:

Zippered Pouch – I used one I got from Canvas Corp
Red Iron-On (I used Red Foil Iron-On)
Cricut Machine
Weeding tools
Iron or Easy Press
Goodies for inside your pouch

supplies for second aid kit

Use this Design Space Cut File to cut out the Iron-On. You can re-size it to fit your zippered pouch. Make sure that you have the foil pretty-side-down on the mat, and that you have set the design to “mirror.” Otherwise, your design will end up backwards!

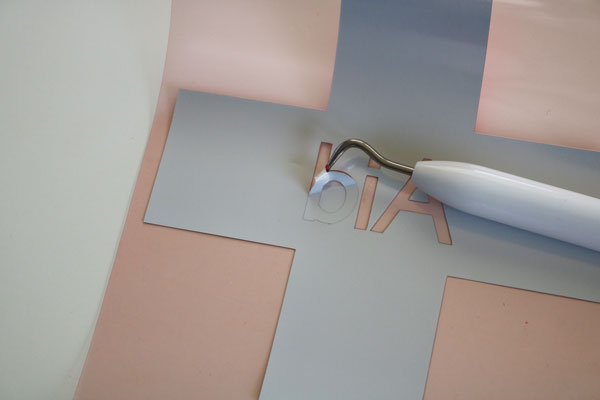
Weed the Iron-On. This just means remove all the background parts, so just the parts you want are left.

weed the vinyl

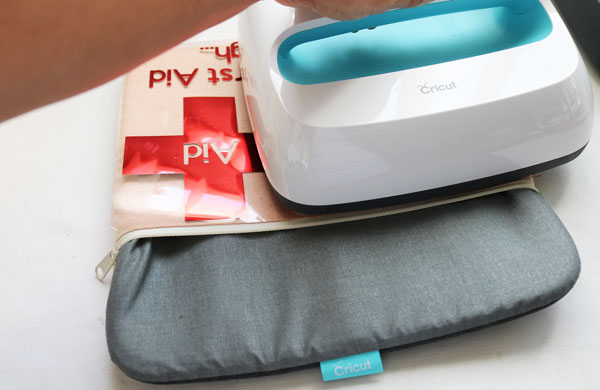
Use your iron or Easy Press to secure the Iron-on to the zippered pouch.

press on to zippered bag

Allow to cool, then remove the backing.

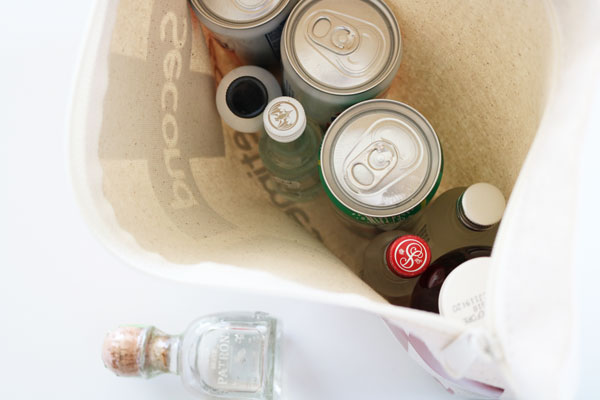
Fill with goodies of your choice!

inside of the kit

It is that easy to make a thoughtful gift that will absolutely be appreciated! Self-care is so important!

the second aid kit

You’ll want to make a custom Second Aid kit for all of your friends!

DIY Second Aid kit for those times that first aid is not enough

And check out all of these other fun things you can make with Cricut Iron-On!


tart InLinkz script –>

a Rafflecopter giveaway

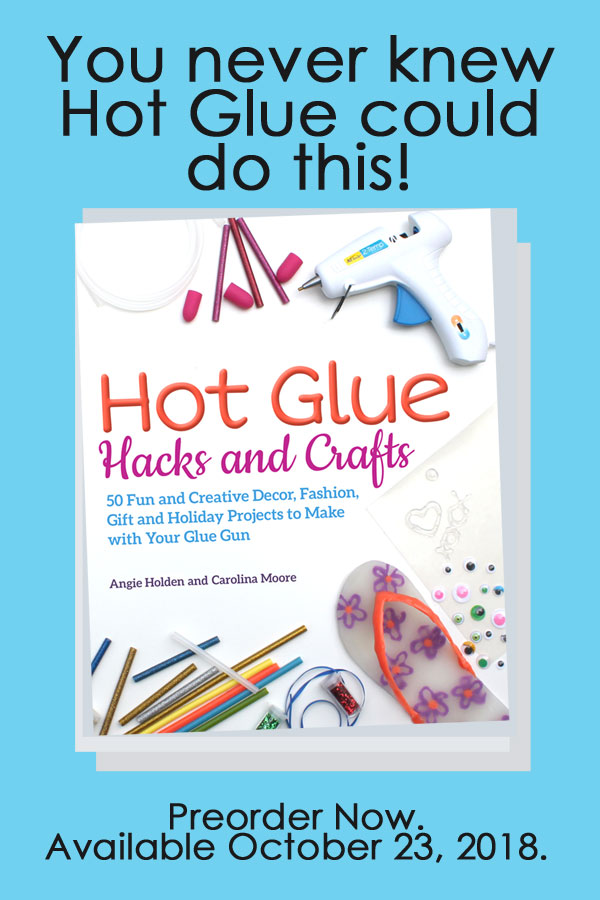
Hot Glue Hacks and Crafts – the BOOK!

I don’t share a lot of personal things on this site, because I know that most of you come here to get fun and fast crafting ideas. But sometimes, the rest of my life does include fun crafting things, and I feel compelled to share.

Last winter, one of my crafty besties (you all know her – Angie from The Country Chic Cottage) and I were given the opportunity to co-write a book all about Hot Glue Hacks and Crafts. (Named – you guessed it – Hot Glue Hacks and Crafts) We immediately jumped on it, and had an absolute blast writing the book. It was so much fun collaborating with another crafty mind on how to really make Hot Glue shine (and in some cases, literally so)! I’m so thankful to have Angie as my co-author on this project. Not only because of her fabulous organizational skills (she is a master at taming a deadline) but because working with her pushed me to be even more creative!

Hot Glue Hacks and Crafts - You never knew Hot Glue could do this!

Over several months of crafting and writing, we put together a book that we are incredibly proud of. Rather than recycle tired old crafts, we worked to be as innovative as possible. But we made sure to keep the projects achievable. This is not a book filled with projects pulled from Pinterest. In Hot Glue Hacks and Crafts we elevated hot glue to more than an adhesive. I wish I could show you all the projects inside. You’d be shocked at what can be done with a humble stick of hot glue!

Pre Order Hot Glue Hacks and Crafts TODAY!

I’m sharing my Amazon Affiliate link so you can pre-order the Hot Glue Hacks and Crafts book now. We debated an alternate title of “The Hot Glue Bible” because this is really the word on all things Hot Glue. In the book you’ll learn all about our favorite tools, including some you might not expect. We tell you how to pick the perfect hot glue gun for your crafting arsenal. And we share all the hot glue sticks you’ll want to have on hand (have you tried glitter, colored, scented, or glow in the dark hot glue yet?). And then we share 50 fabulous projects using hot glue for everything from kids’ crafts to home decor and holidays!

I’ll be sharing more in the upcoming weeks. So make sure that you’re following me on Facebook and Instagram. Then pre-order your copy of  Hot Glue Hacks and Crafts today!

A huge thanks to Angie for being the best co-author ever. And a huge thanks to our whole team at Ulysses Press who have made writing our first book a wonderful experience!

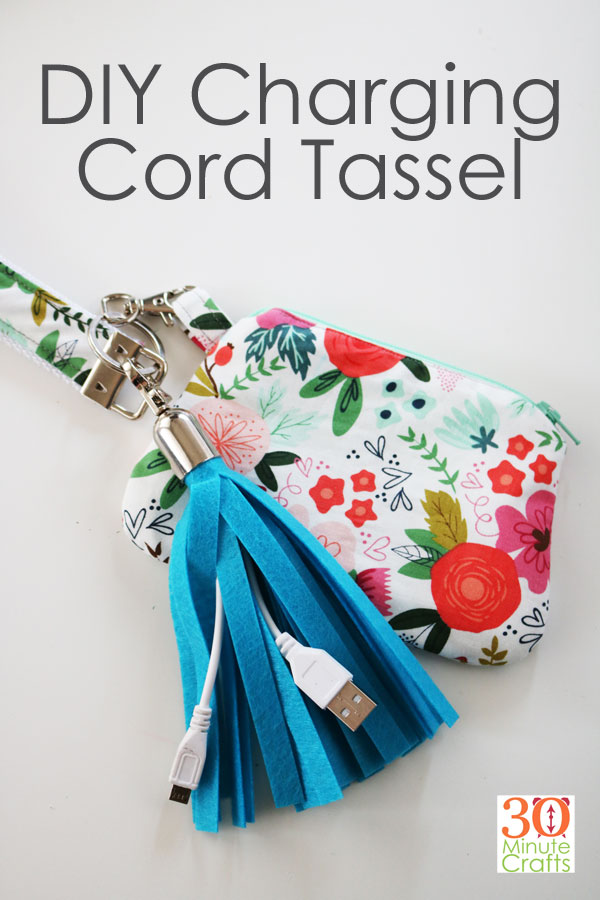
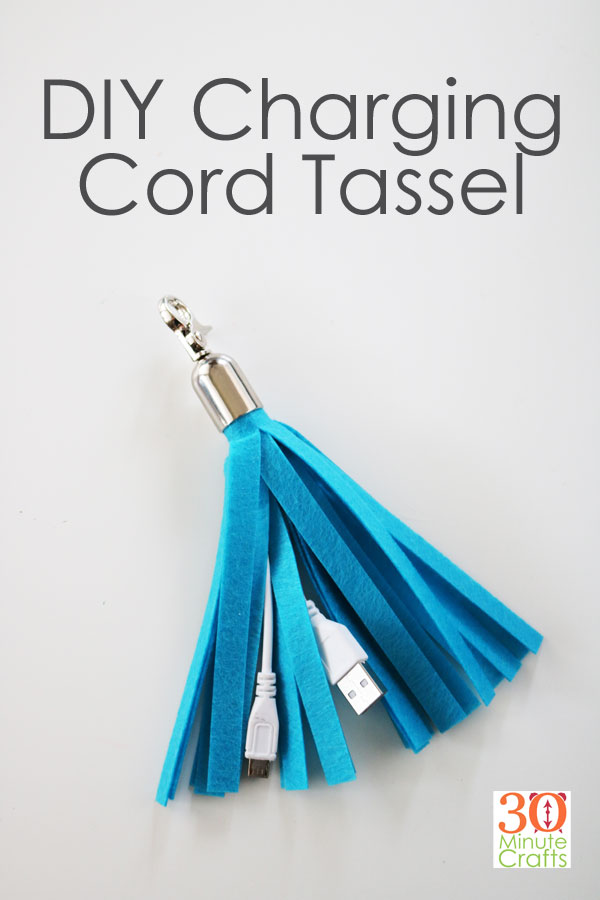
DIY Charging Cord Tassel

Have you ever found yourself in need of a charging cord, but without one handy? This has happened to me so many times! This DIY Charging Cord Tassel is a simple solution and decorative solution to a first-world problem.

This page contains affiliate links which help pay for this site at no additional cost to you.

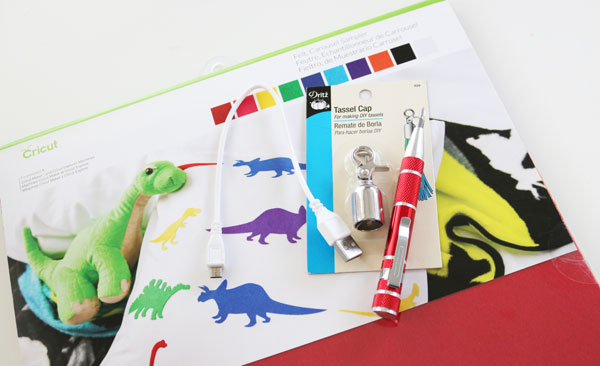
To make this DIY Charging Cord Tassel, you’ll need:

Short Charging Cord
Felt
Cricut Maker
Dritz Tassel Cap
Small Screwdriver

supplies for tassel charger

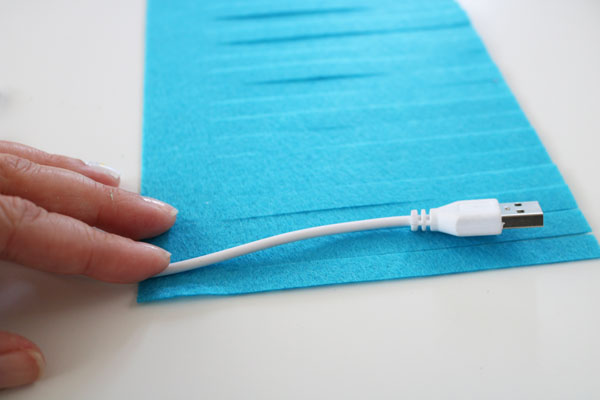
Use this Cricut Design Space file to cut the tassel.

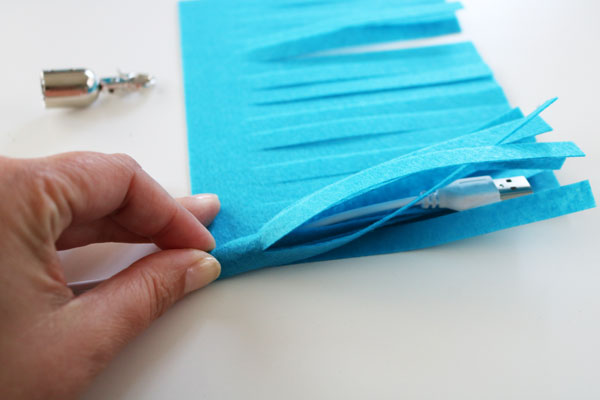
Fold the cord in half to find the halfway point. Unfold. Place the halfway point on the top of the fringe.

tuck cord

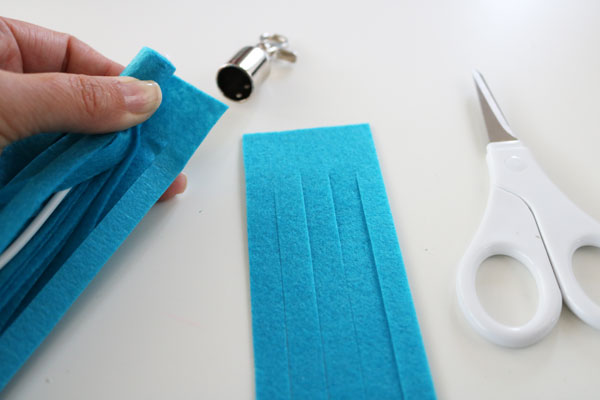
Roll up. After you have rolled once or twice, fold the cord back in half, then keep rolling.

roll up cord

If the top gets to large to fit into the tassel cap, cut off any excess fringe.

trim excess fringe for USB cord tassel

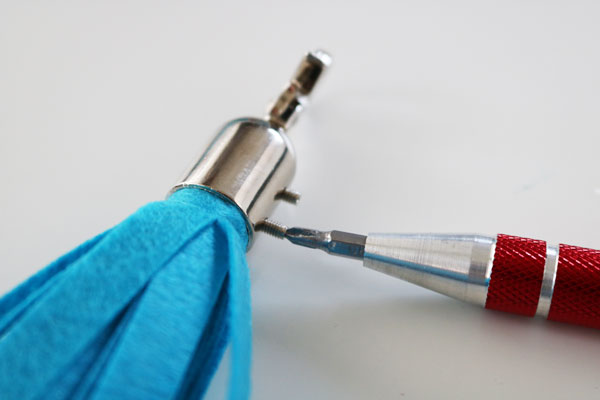
Insert into the Tassel Cap. Be careful to place the fold of the cord in line with the screws, so that the screws are inserted between the folded cords, and not into them. Then tighten the screws using the small screwdriver.

screw on cap

That’s it! You can now attach your USB Charging Tassel to the strap of your purse so that you always have a cord handy. Mine has already saved me more than once!

USB Charging Cord Tassel DIY

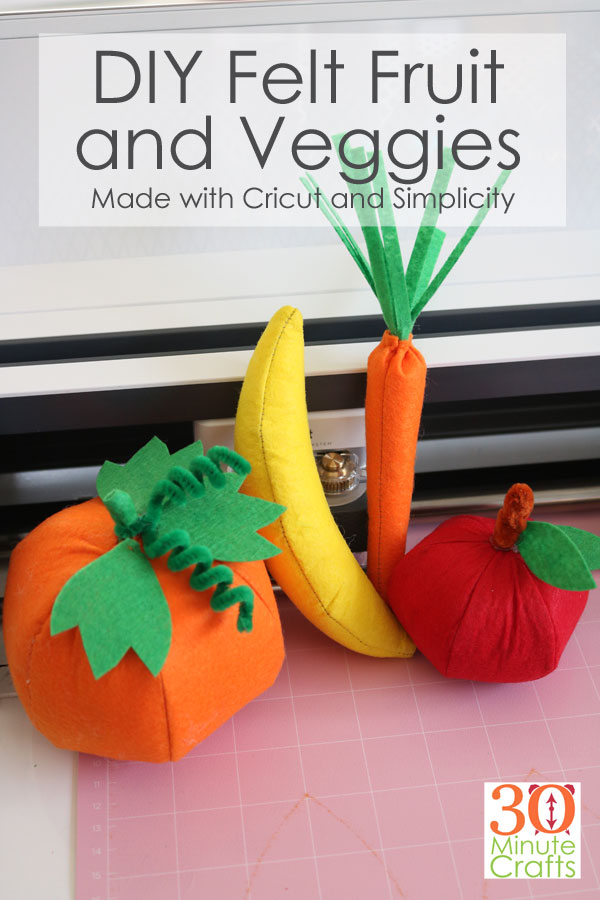
DIY Felt Fruit and Veggies with Cricut and Simplicity

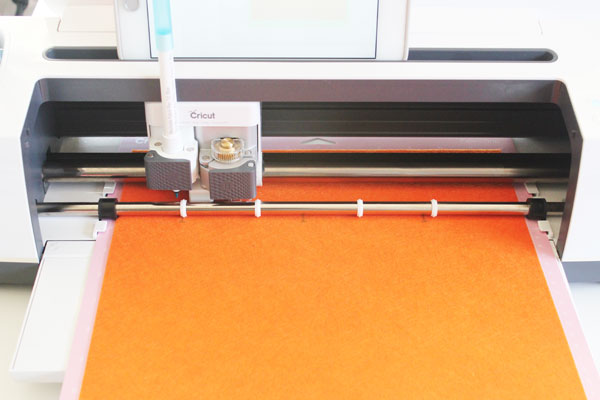
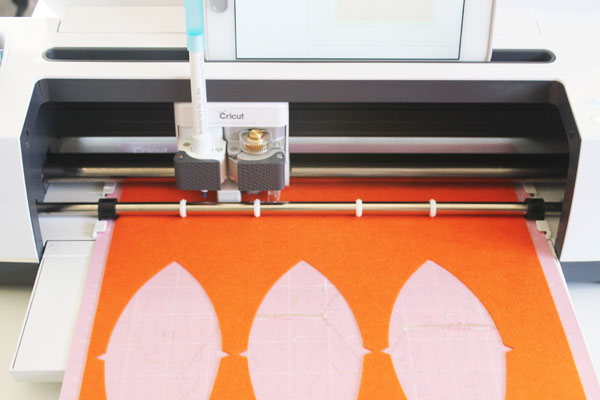
Felt food is fun to make – and now it is even easier with Cricut doing the cutting! Recently, Cricut asked if I would share some of the Simplicity Patterns that have been loaded into Cricut Design Space. I jumped at the chance to show you how simple it is to make these felt fruit and veggies! The Simplicity Patterns have already been loaded into Design Space. Just let your Cricut do the cutting, and then follow along on the pattern PDF (which is also accessible through Design Space) to make your felt food!

DIY Felt Fruit and Veggies made with the Cricut Maker and Simplicity Patterns. Follow along to learn how easy it is to make these fun patterns!

I used the Cricut Brand Felt Carousel Sampler pack to make all of this felt food, and my Cricut Maker. If you plan on making the pumpkin, you’ll need to packs of the felt. The other supplies you’ll need include a sewing machine, pins, a needle and thread, pipe cleaners, and the Cricut Fabric Marking Pen.

DIY Felt Banana

The Banana is a great piece to start with. There are not a lot of pieces to cut or sew. Follow along in this video as I show you how to make the felt banana. Start by cutting the pieces on the Cricut. Stitch the two identical pieces together. Then add the third piece, leaving a hole for turning. Turn right side out, and stuff. I’ll show you how to use a ladder stitch to invisibly stitch the banana closed. It is that simple! If you want to add some realism, you can use brown fabric paint to add some spots on your banana as it “ripens!”

DIY Felt Pumpkin

I really like the pumpkin. Perfect for fall decor, this pumpkin is adorable. Follow along in the video as I show you how to cut, stitch, and complete this felt pumpkin. The felt is all cut on the Cricut – the pumpkin body, the leaves, and the stem. Stitch the body together by stitching three segments together to create halves. Make the stem, pin in place, then stitch the two halves together. Turn the pumpkin right side out, then stuff. I’ll show you how to use a ladder stitch to stitch the pumpkin closed. Then stitch on the leaves and use a green pipe cleaner to add some curly vines to the top.

DIY Felt Carrot

Making the felt carrot is very simple – and it can be made with the scraps of the pumpkin! They use the same colors, and the carrot doesn’t need much felt at all.

Make the carrot using just one seam on the sewing machine. Turn the carrot right side out and then stuff. You then create a gather along the top, tuck in the green carrot top, and stitch it into place. It is that easy to whip up this carrot!


DIY Felt Apple

I also love the felt apple. Made very similarly to the felt pumpkin. The pieces are a little smaller. But, instead of making the stem out of felt, I made the stem from a brown pipe cleaner that gets glued in place.


Now that Cricut has so many Simplicity patterns in Cricut Design space, it is so easy to start your sewing projects! No need to find a store that has your pattern in stock – the digital patterns have already been uploaded. Each piece is cut and marked to perfection, and you don’t have to do any extra work! It takes a lot of the frustration out of sewing if your cutting has been done correctly.

Once you have the pieces cut, you’re just a few seams and a handful of stuffing away from completing your felt food!

This is a sponsored conversation written by me on behalf of Cricut. The opinions and text are all mine.

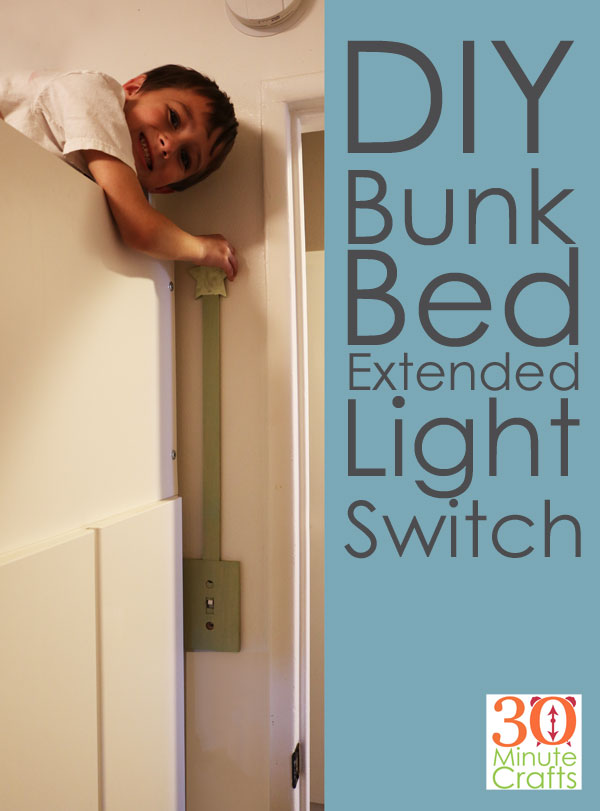
DIY Bunk Bed Extended Light Switch

A couple months ago, we re-did the kids’ room to include lofted bunk beds. But they could no longer reach the light switch to turn out the light in their room! If you’ve spent any time around young kids, you know that the issue of turning lights on and off is of paramount importance. So, we decided a fun DIY solution was in order. I designed this DIY Bunk Bed Extended Light Switch so that my youngest could turn on and off the light switch while in the top bunk. But the light switch is still usable from the doorway. And, it is super simple to make!

This DIY Bunk Bed Light Switch is made from a sheet of Basswood, and is my final project for Craft Lightning Wood week. All week long my crafty friends and I have been sharing fast and fun craft projects that can be made with wood. Thanks so much to Angie from The Country Chic Cottage and Laura from Pet Scribbles for co-hosting with me. Be sure to scroll down to the bottom of the page to check out all the fun 13 minute or less wood crafts made by today’s crafty friends! DIY Bunk Bed Extended Light Switch

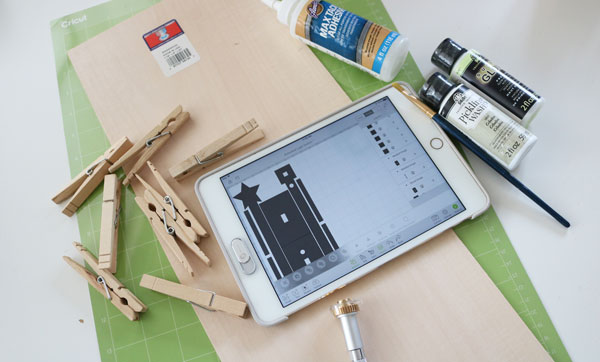
To make this DIY Bunk Bed Light Switch you’ll need:

Cricut Maker with Knife Blade
8″ x 12″ piece of 1/16″ Basswood
Glue
Clothespins
Drill with 5/32″ bit
Screwdriver
Light Switch Plate removed from wall
Pen
Paint (optional)
Glow in the dark paint (also optional)

supplies for extended light switch

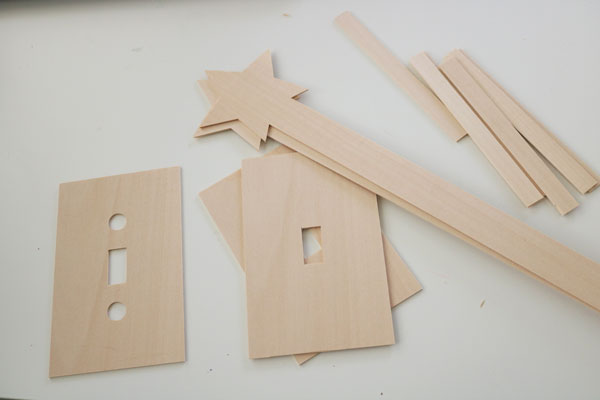
Use this cut file in Cricut Design Space to cut the pieces for the Bunk Bed Light Switch.

Cut the pieces

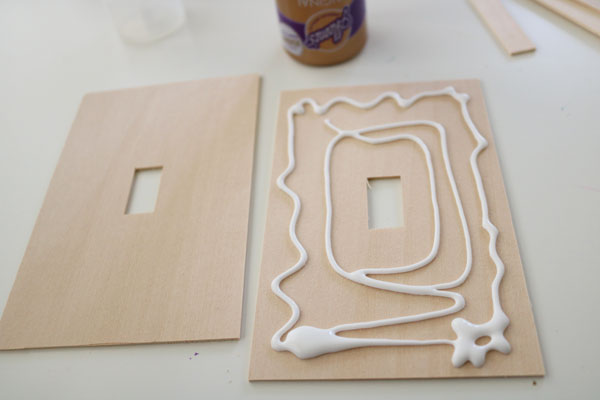
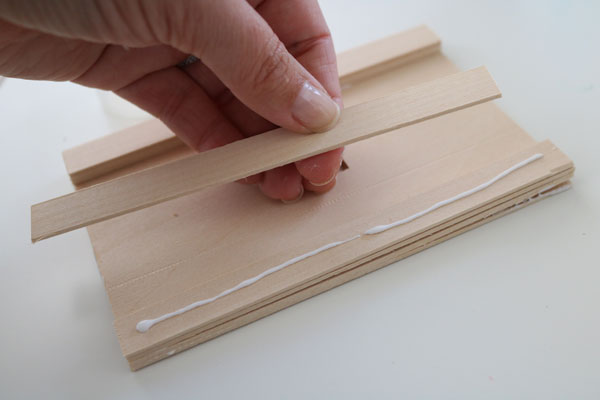
Glue together the matching face plate pieces.

glue pieces

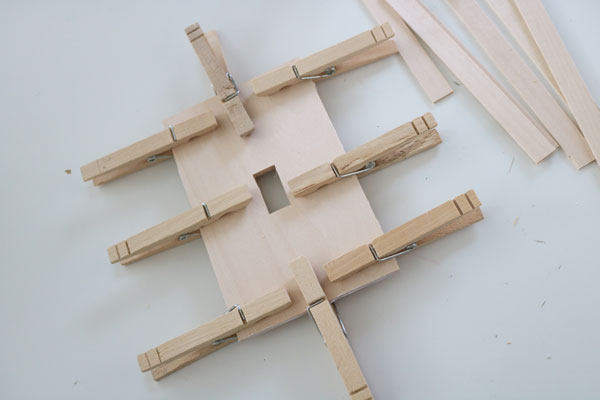
Secure with clothespins.

layper panels

Do the same with the two long light switch pieces with the stars on the end.

Once the glue has set, glue the small rectangles and small squares in place. The rectangles go on the sides, and the small squares go at the top (these will keep the long pole from wiggling side-to-side).

glue spacers

Glue the front piece (with the circle holes) on. You’ll need to put the long pole in place first.

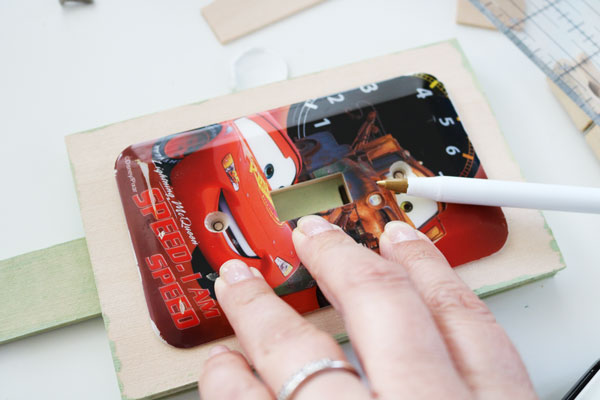
Use the old light switch plate to mark the screw holes.

draw holes

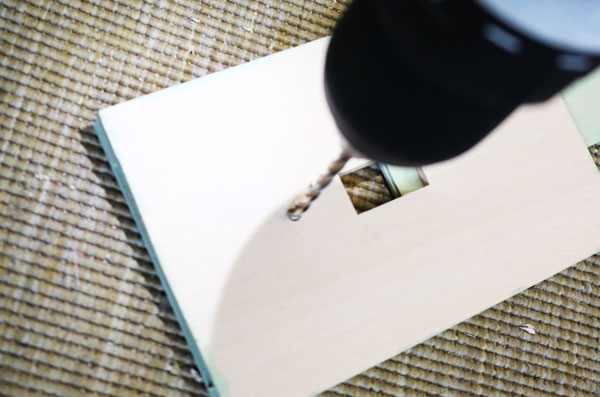
Drill the holes. Be careful as you go through the holes in the pole and in the front plate.

drill holes

Paint as desired. I used glow in the dark paint on the star for a little extra fun.

You can use the same screws already in the switch to secure the new face plate to the wall.

DIY Bunk Bed Extended Light Switch


Check out these other fast and fun crafts made with wood!

How fun is this farmhouse paper towel holder from Kati ad Houseful of Handmade.

I love this decorative serving tray from Jen at 100 Directions.

This DIY Wooden Frame Clock from Laura at Laura’s Crafty Life is perfect!

Blanca at Creativites Galore made this Patriotic Table Place Card.

Ann from Annmakes gets you all set for Father’s Day!

Over at See Lindsay, you’ll learn how to make the perfect cutlery for a mermaid party.

How fun is this great 15 minute craft from Katie Berry?

I’m loving this wooden craft from Niki Meiners.

Our Guest Co-host, Laura from Pet Scribbles made Sparkly Glitter Monogram Magnets.

Angie, my long-time Craft Lightning co-host from the Country Chic Cottage shows you how to make a wooden puzzle.


Wooden Box Purse

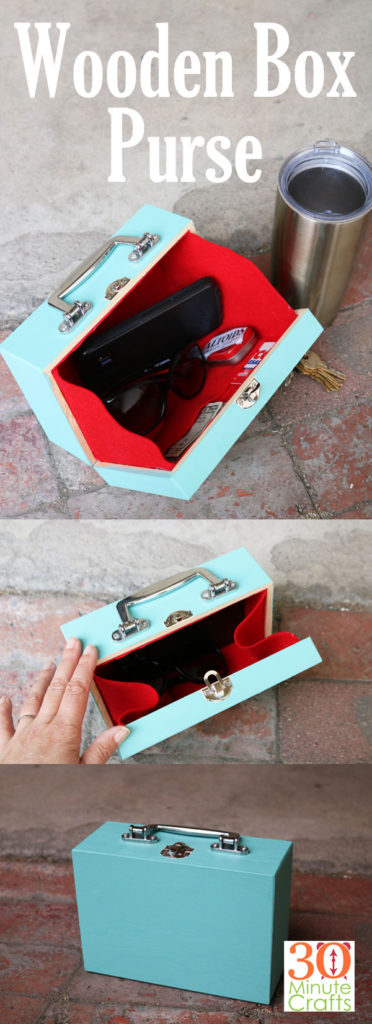
When I saw this wooden box at the craft store, I just knew it needed to come home with me and become a little purse. Sure, a wooden box is a great place to tuck things away and store them, but with a little help, this wooden box can be transformed into a purse! A wooden box purse is a fun way to accessorize an outfit – and a fun DIY to make!

This wooden box craft is part of Craft Lightning Wood week! All week long my friends Angie from the Country Chic Cottage, Laura from Pet Scribbles and I are all making lightning fast (15 minute or less) crafts made using wood! And we’ve invited some of our craftiest friends on the internet to join in! Be sure to scroll down to the bottom of this page to check out their fast wood craft ideas!

Wooden Box Purse - transform a simple wooden box from the craft store into a fun and functional purse! THis wooden purse is a great accessory. Customize it to match your favorite outfit!


To make your Wooden Box Purse, you will need:

Wooden Box
3/4 yard felt
Paper
Pencil
Scissors
Ruler
Hot Glue
Paint
Paintbrush

supplies for Wooden Box Purse

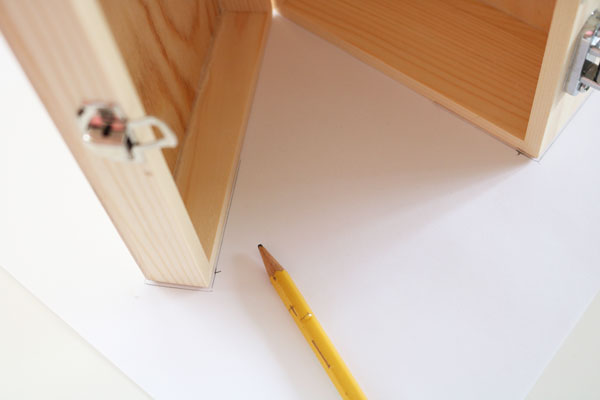
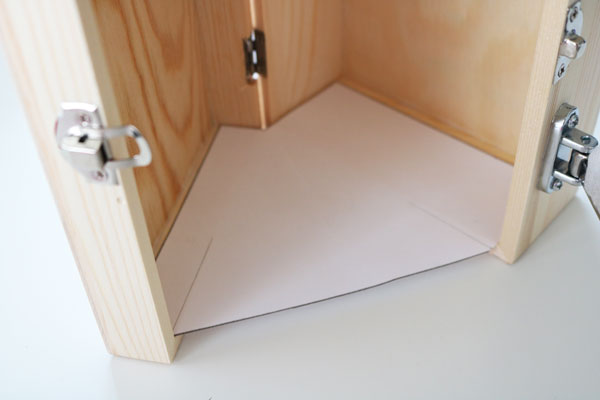
Open your box about 1/3 of the way. Place it on its side on a piece of paper, and trace the angle.

trace angle

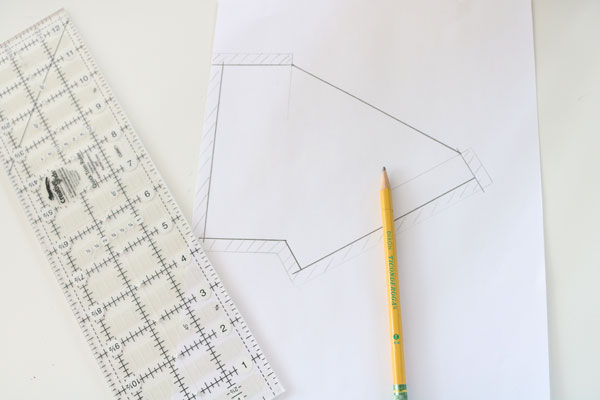
Use the ruler to draw inside the traced line. You want to draw your inner line as far from the outer line as the thickness of the wood. For my box that was a little more than 1/4 of an inch.

draw template

Cut out the template on the inner line. Place it in the box to check the fit. Adjust as needed.

fit the template

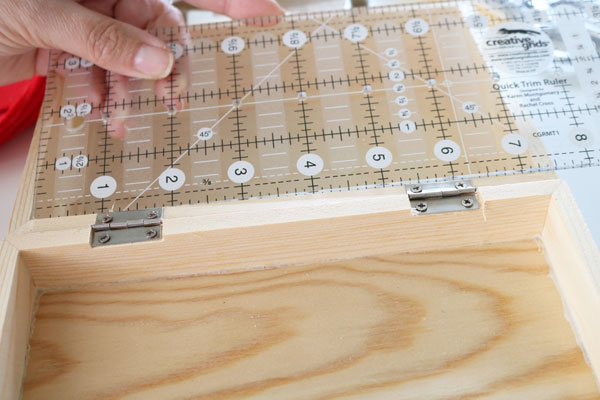
Measure the width of the inside of the box. This will be the width you cut.

measure width

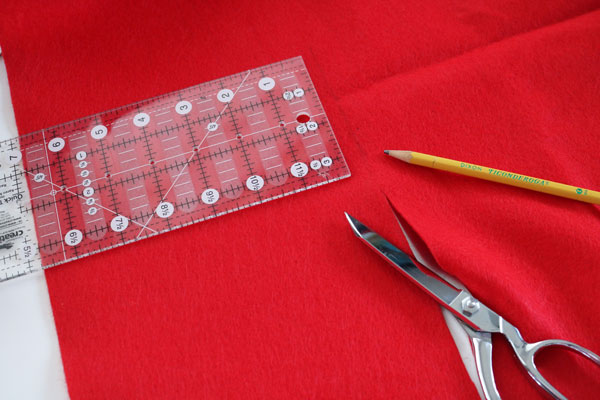
Add together the height and depth of the box. Multiply by 2. Add 4. This will be the length of the strip you cut.

Cut a strip the length and width you calculated in the last 2 steps.

cut strip

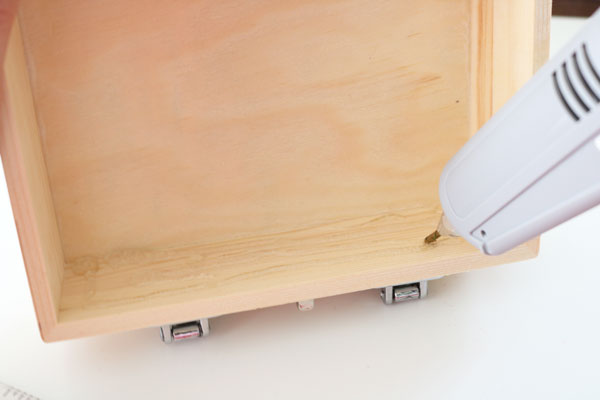
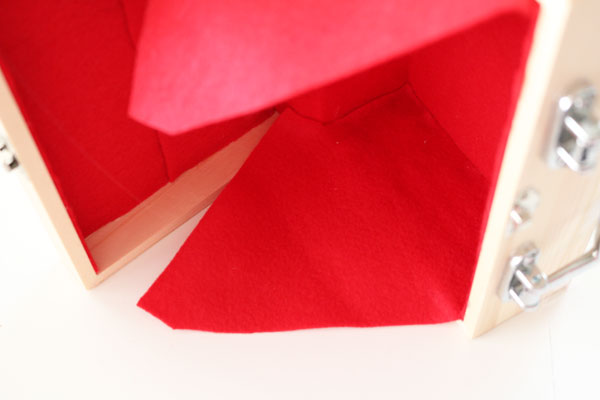
Using the hot glue, glue the strip along the inside of the box.

glue strip

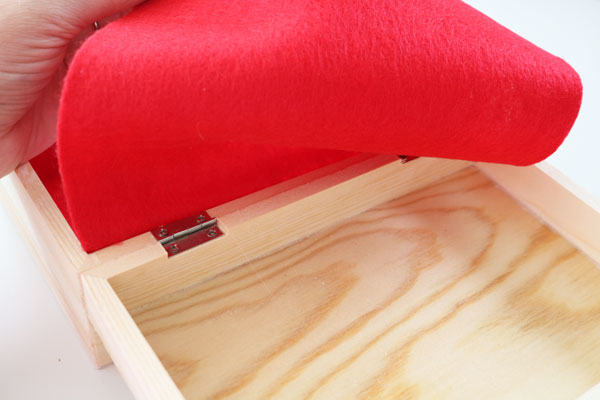
Do not add any glue on the edges with the hinge. Close the box to about 90 degrees, then keep gluing the fabric around the inside.

no glue in hinge

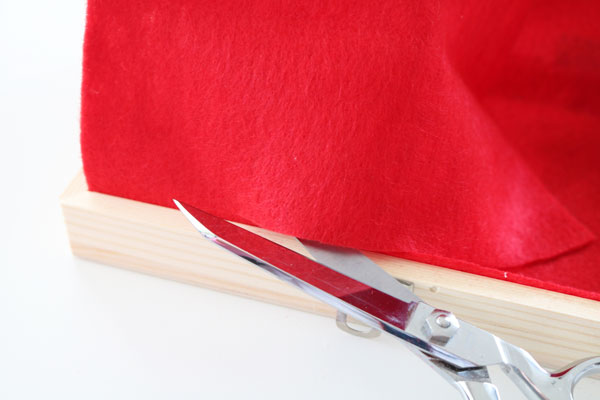
When you get to the end, trim off the excess.

trim off extra

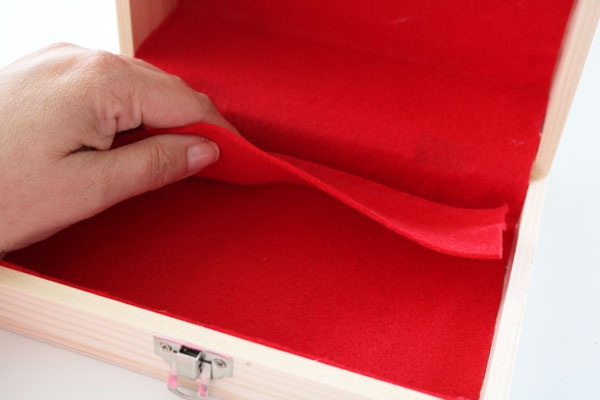
Trim down the excess piece to 2 1/2″. Place in the lid half of the box to make sure it is the right size.

fit pocket

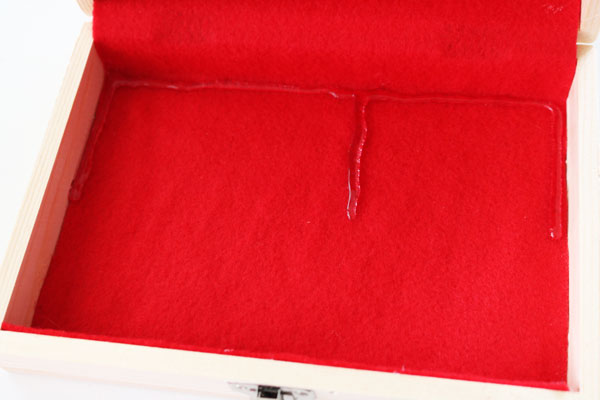
Carefully add a line of hot glue down the two edges and the bottom where the pocket will go (on the lid half of the box). Add an extra line just off center of the middle to divide the pocket in two. Then press the felt on top to secure the pocket in place.

glue for pocket

Use the template to cut two pieces of felt to the size of the template.

Place one of these pieces in the side of the box to double-check the fit.

Glue both pieces to either side of the large half of the box.

glue in sides

Glue the other side of the templates to the small half of the box (the lid).

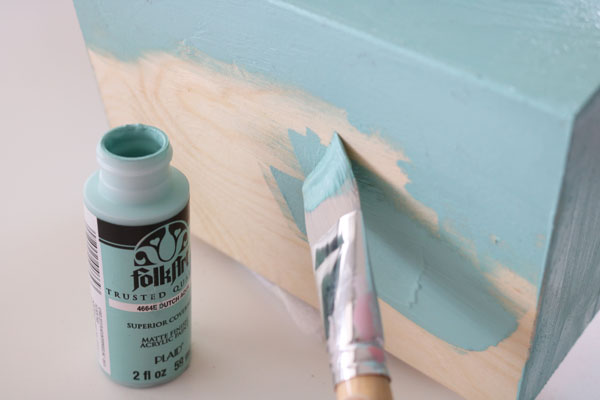
Now, if you like, you can paint the box. It is all done!

paint outside

Check out these other fun and fast crafts made out of wood!

Creatively Beth shows you how to stain a wooden box using markers!

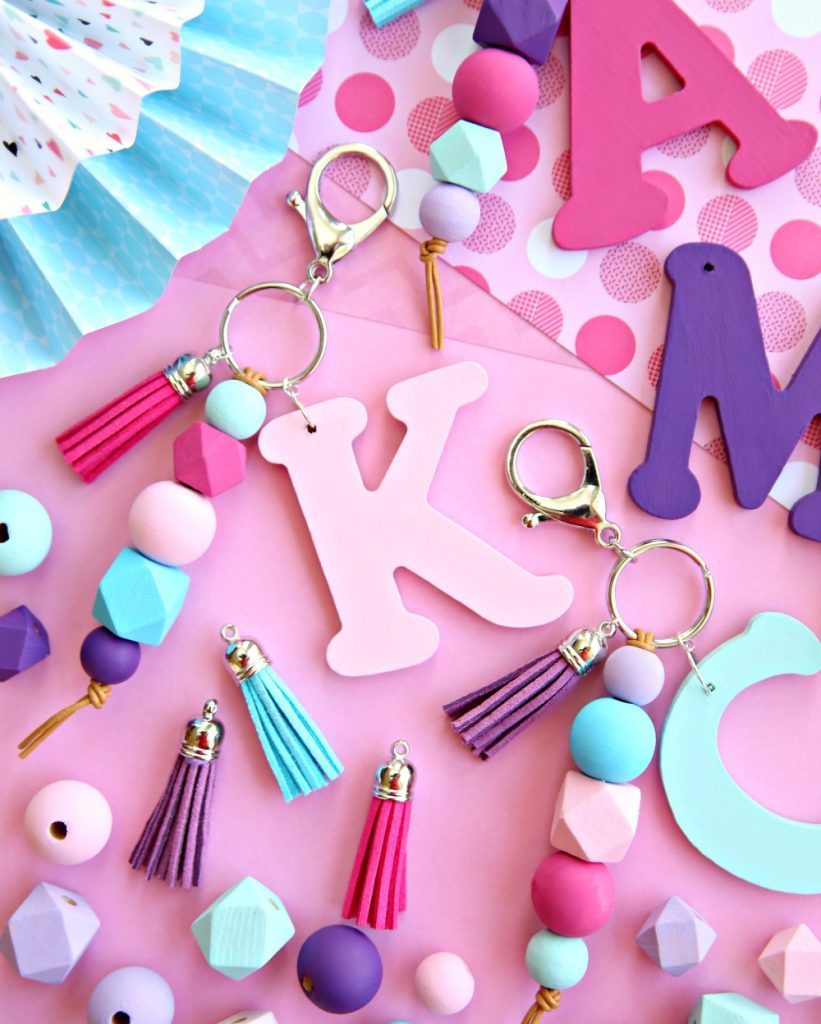
Happy Go Lucky will teach you how to make wood monogram keyrings.

These wood cake toppers from Dragonflies and Lillypads are just darling!

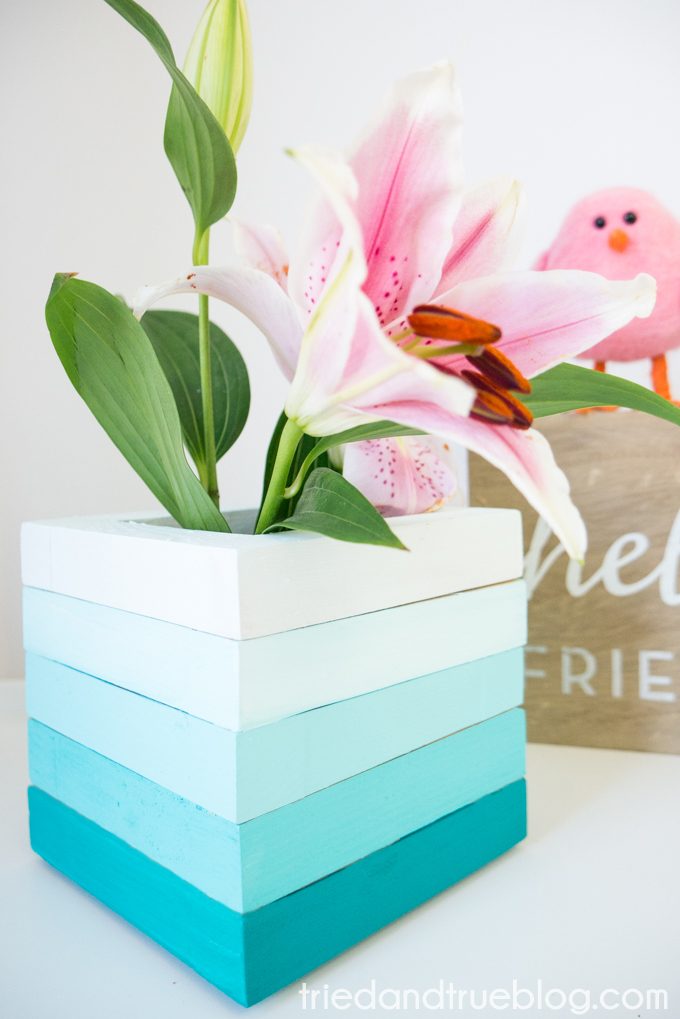
I love this wood frame from Tried and True.


Simplicity Change Purse with the Cricut Maker

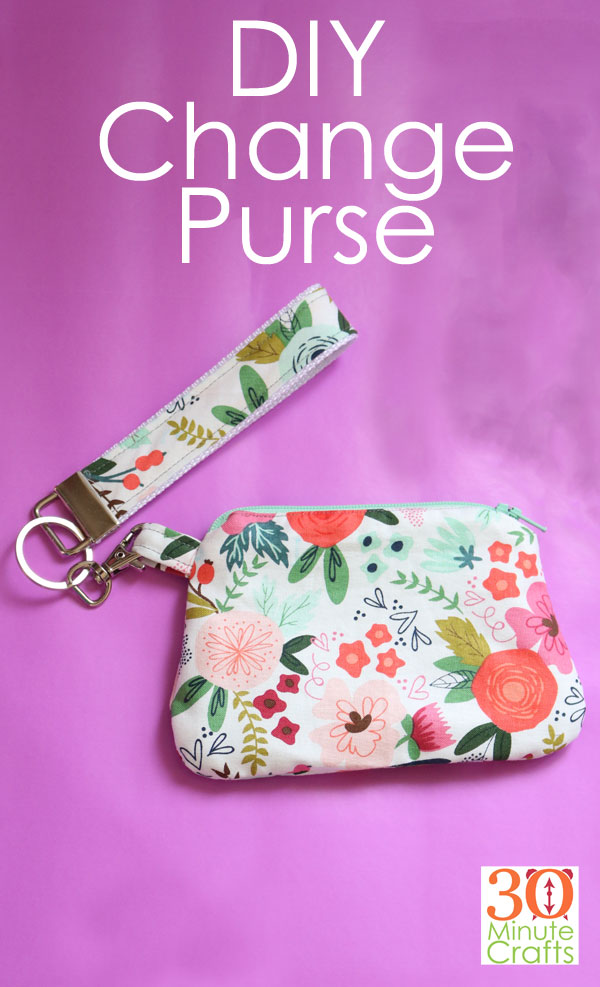
I’ve been enjoying sewing with the Cricut Maker. When the folks at Cricut asked if I’d share how to put together the Simplicity Change Purse, I was excited. The Simplicity Change Purse is a simple project to make, and it is made even easier when all the cutting is done by the Cricut Machine.

This simple change purse is such a handy bag to have on hand. Store some change, a few cards, maybe a power cord and an external charger – and you’re set for the day! And they make great gifts! Pick out fabric that reminds you of the person you’re making it for, and stitch one up!

DIY Change Purse - Make this Simplicity Change Purse using your Cricut Maker! The Cricut does the cutting, and you can do the sewing!

This post contains affiliate links which help support this site at no extra cost to you.

To make this Simplicity Change Purse you’ll need:

Cricut Maker
Fabric
Fusible Interfacing
Brayer
Water Soluble Pen
Cricut EasyPress
EasyPress Mat
Key Fob Hardware
Clasp

Cricut Fabric:  Fabric Brayer: Cricut Maker:  Fabric Pen: EasyPress: EasyPress Mat:

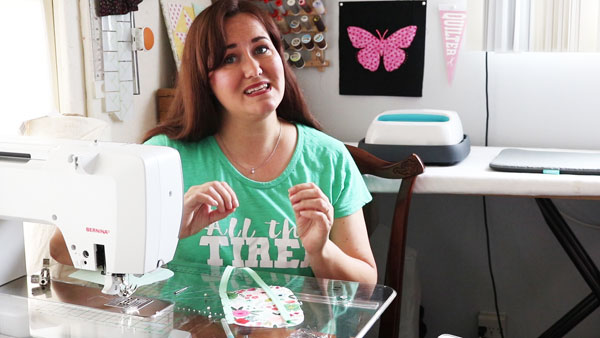
You can follow step-by-step in the video below as I show you how to use the Cricut Maker to cut the fabric, and how to sew the change purse on your sewing machine.

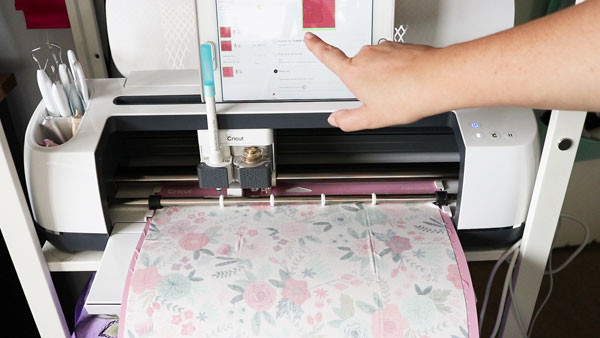
The Cricut Maker cuts and marks the fabric. You can follow the steps to find the file, or click this link for the Simplicity Change Purse.

Cut fabric on the Cricut Maker

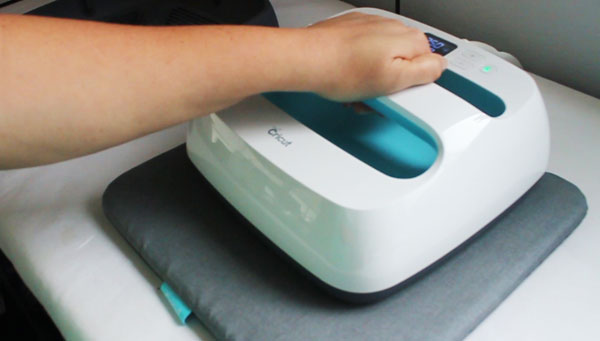
And I use the Cricut EasyPress to apply the fusible interfacing. It worked great!

Easy Press for fusing

And be sure to check out all the funny faces I make while talking… pretty much any spot you pause, and you’ll find a fun face!

Cricut Video

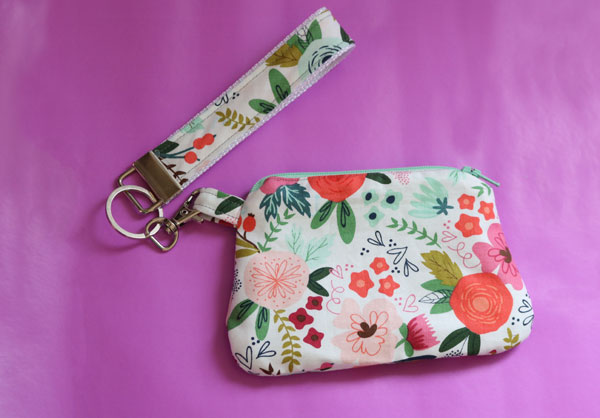
And, in the end, you’ll have a cute change purse!

I love that Cricut has partnered with Simplicity to make sewing even easier. I find so much satisfaction in making and sewing – that the Simplicity patterns are all set and ready to go makes it that much easier for me to stitch up something fun for a friend, or for myself!

DIY Coin Purse made with the Cricut Maker

This is a sponsored conversation written by me on behalf of Cricut. The opinions and text are all mine.

No Sew Sewing Box

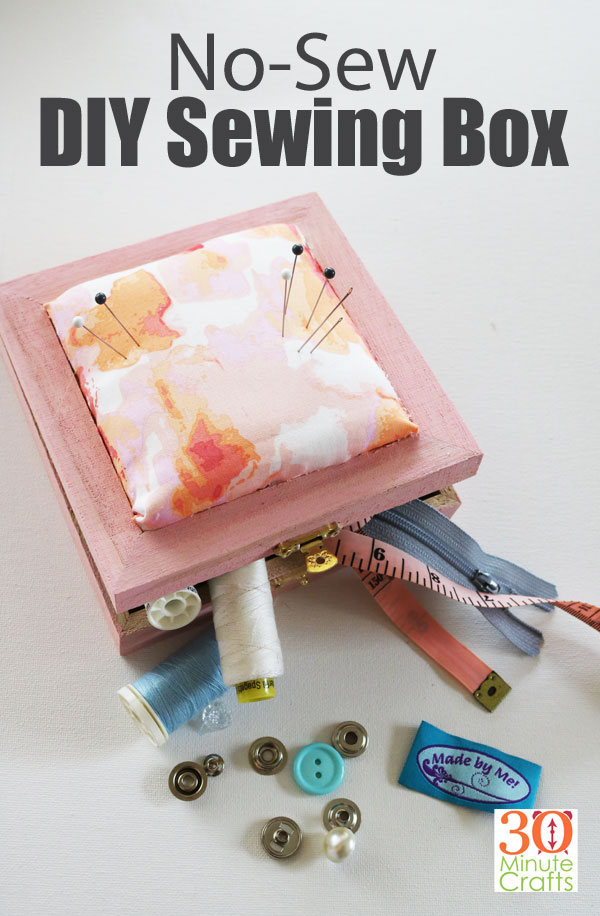
Sounds like an oxymoron, right? But it isn’t! This cute Sewing Box is a no-sew project! You won’t need to thread a needle to make this handy sewing box! Perfect for storing thimbles, thread, and sewing notions inside, while using the pincushion on top for pins and needles.

This project is part of Craft Lightning Week. All week long I’m sharing crafts that can be made out of wood – and in 15 minutes or less! That’s right, this No Sew Sewing Box can be made in just 15 minutes! And my friends Angie from The Country Chic Cottage and Laura from Pet Scribbles are also in on the fun, sharing 15 Minute Wood Crafts on their sites as well. Of course, we also have crafty friends from around the internet joining in… scroll down to the bottom of the page to find all of their fun ideas!

No Sew DIY Sewing Box

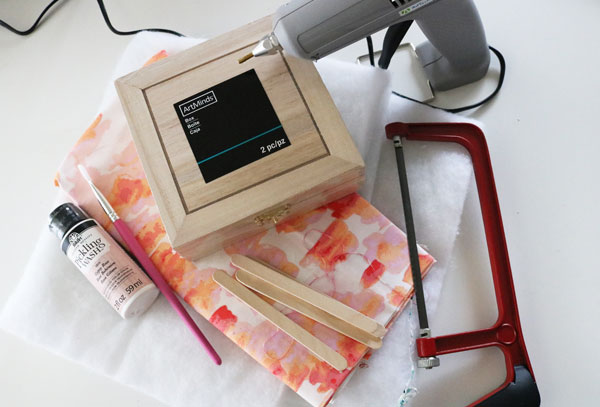
To make this No Sew Sewing Box, you’ll need:

Wooden Box with an inset square (I got this one at Hobby Lobby)
Paint or Stain
Paintbrush
Fabric
High-loft Batting
Scissors
Hot Glue
Popsicle Sticks

supplies for box

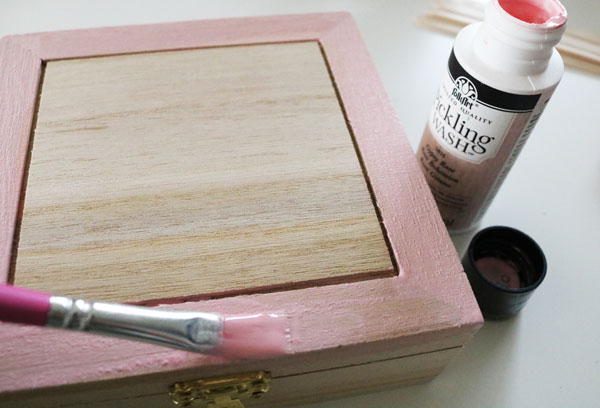
Start by painting the box. I used this Folk Art Pickling wash in a pretty pink color.

paint box

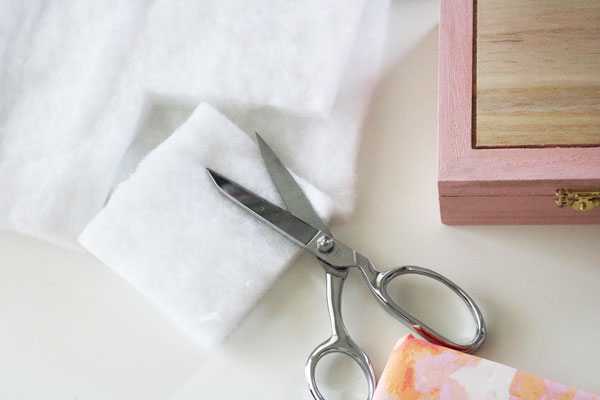
Cut two pieces of batting the size of the inset square on the box.

cut batting

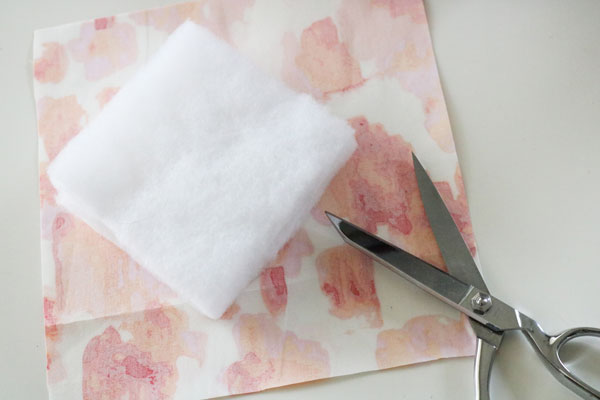
Cut a piece of fabric about 2″ larger on all sides than the batting squares.

cut fabric

Stack the two batting squares on top of each other. Center them on the fabric. Wrap the fabric around the batting, and glue in place.

glue up sides

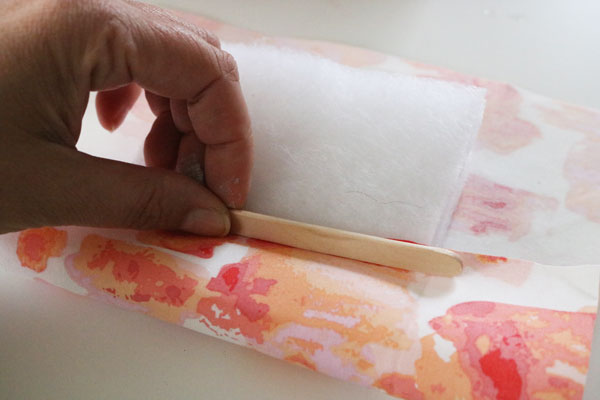
You can use a popsicle stick to hold the fabric in place while the glue cools. A great alternative to burning your fingers.

glue sides

Fold up the sides as well, keeping the corners neat, and gluing the fabric in place.

pin cushion for top of box

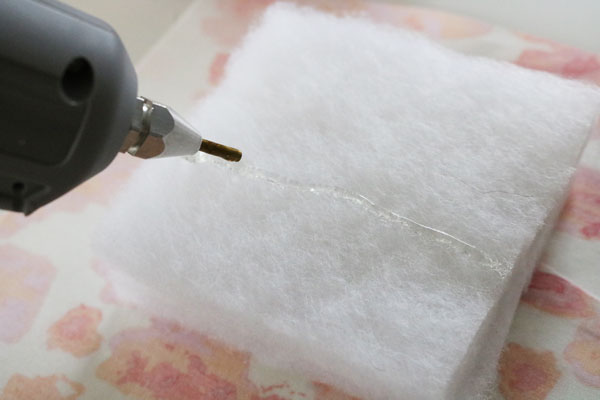
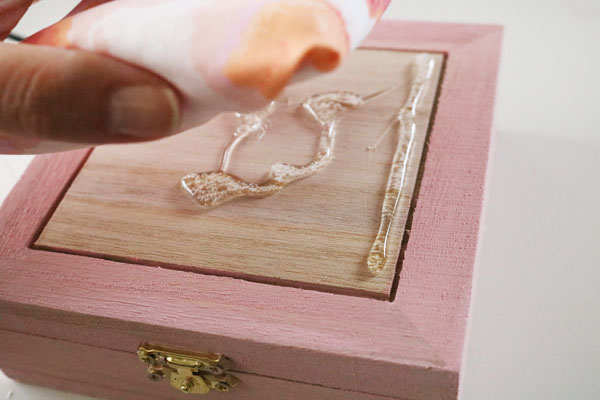
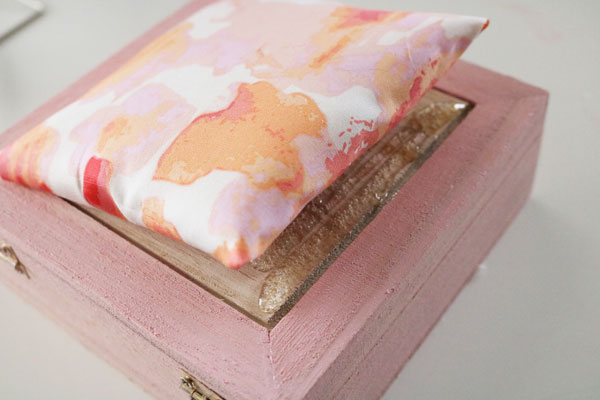
Fill in the inset square on the top of the box with some hot glue.

glue on pin cushion

Add more glue to each edge, one at a time.

glue down other side

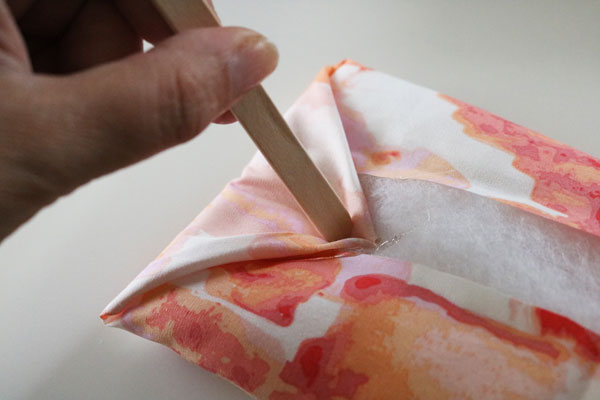
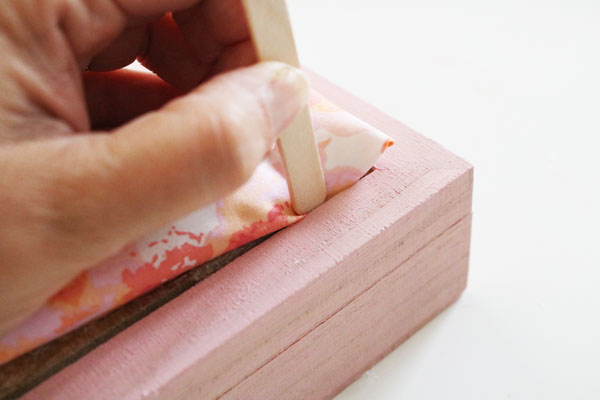
Before the glue cools, use a popsicle stick to push the edge of the fabric into the groove on the lid of the box. This makes for a nice, neat edge.

use popsicle stick to tuck in fabric


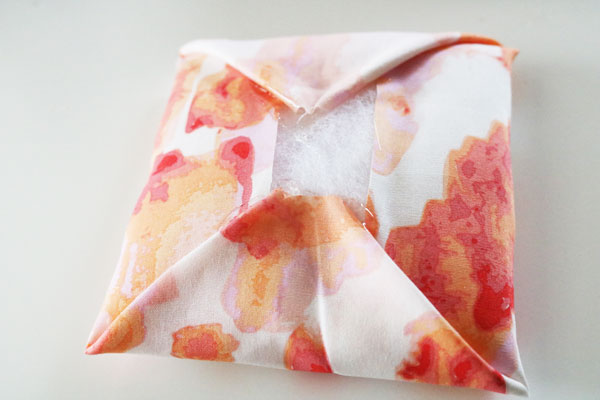
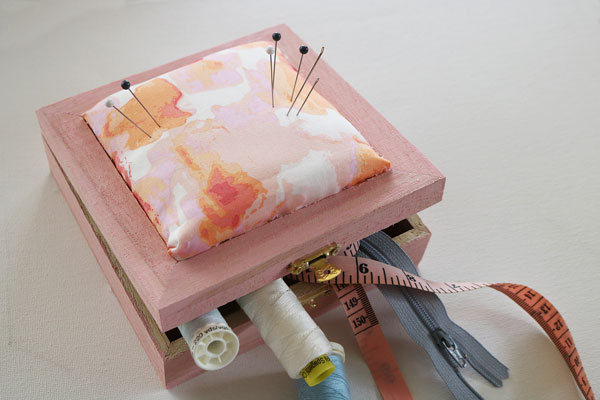
Once all four sides are glued down, your No Sew Sewing Box is complete!

mo sew sewing box you can make yourself

It is that simple (and that fast) to make!

Check out these other fun and fast wood crafts… and be sure to come back all week long for more fast wood craft ideas!


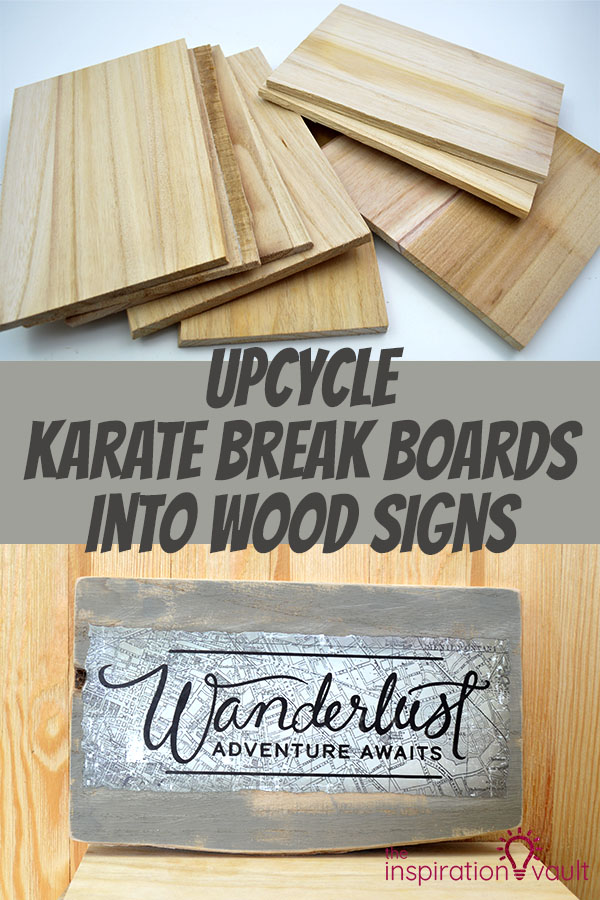
Over at The Inspiration Vault, you’ll learn how to turn Karate Break Boards into Inspirational Signs.

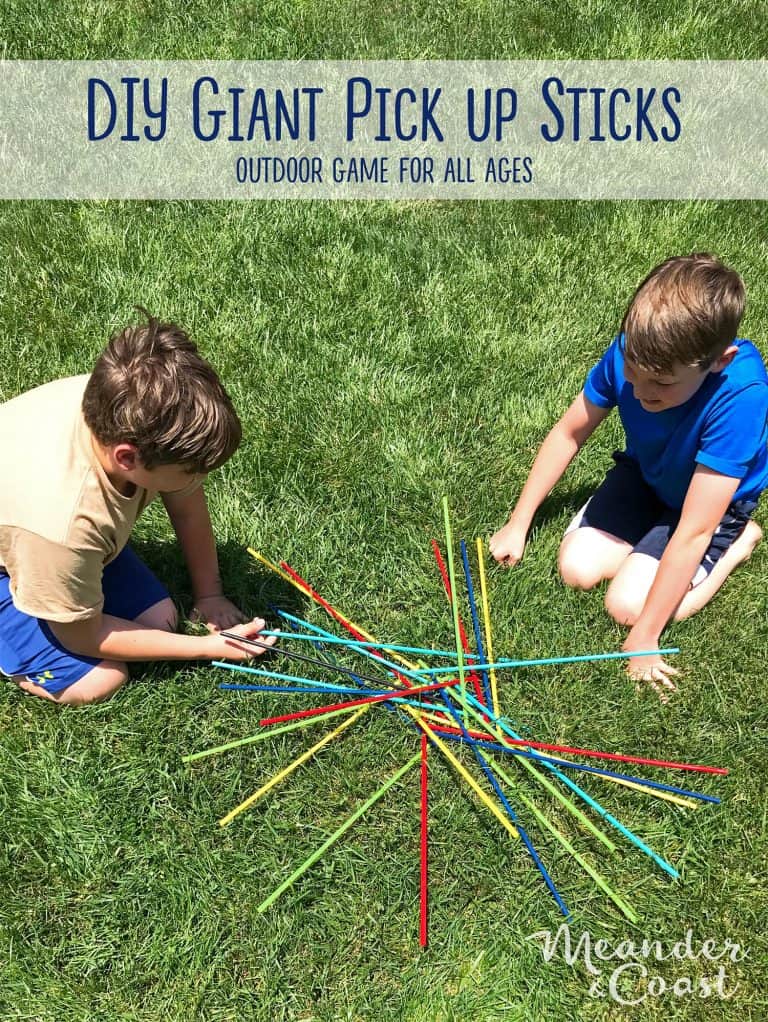
I love this giant Pickup Sticks game from Meander & Coast.

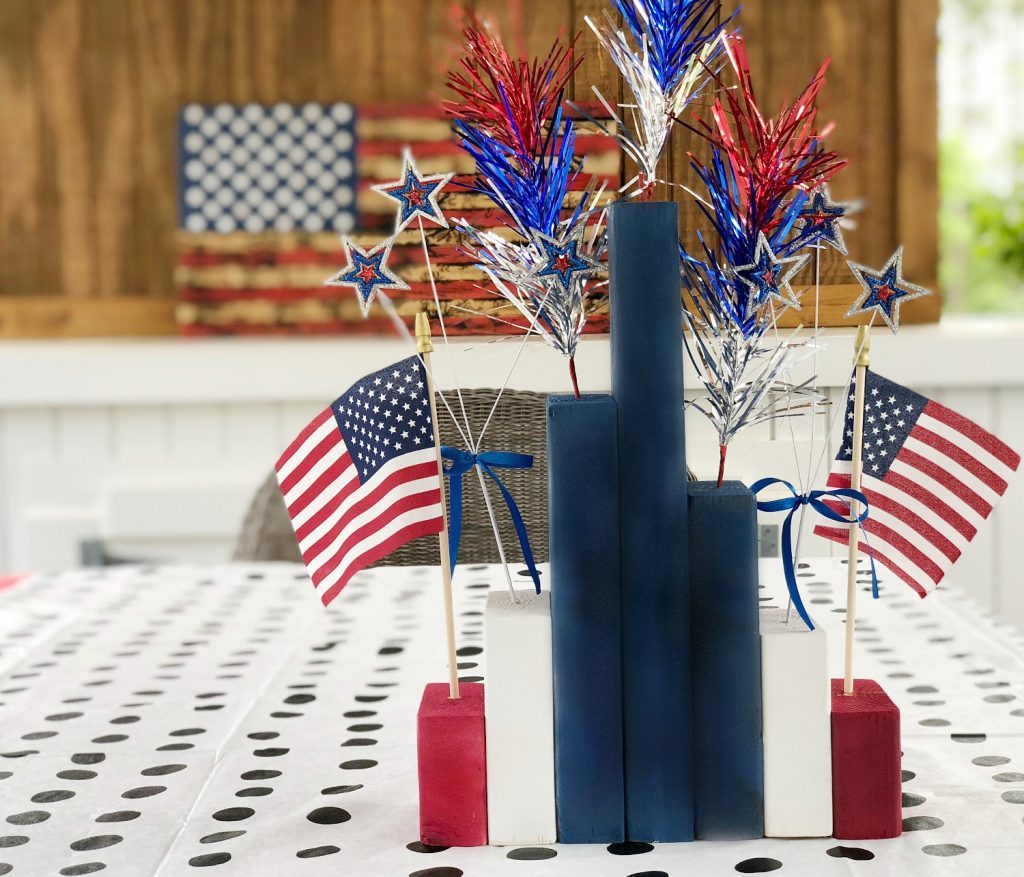
Scrap Wood can be transformed into Patriotic Decor with Refresh Restyle.

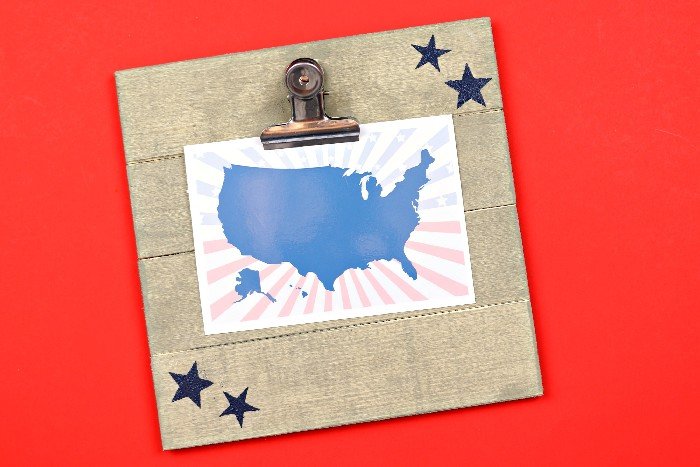
Mad in Crafts whipped up this Americana Clipboard and shows you how to make your own.

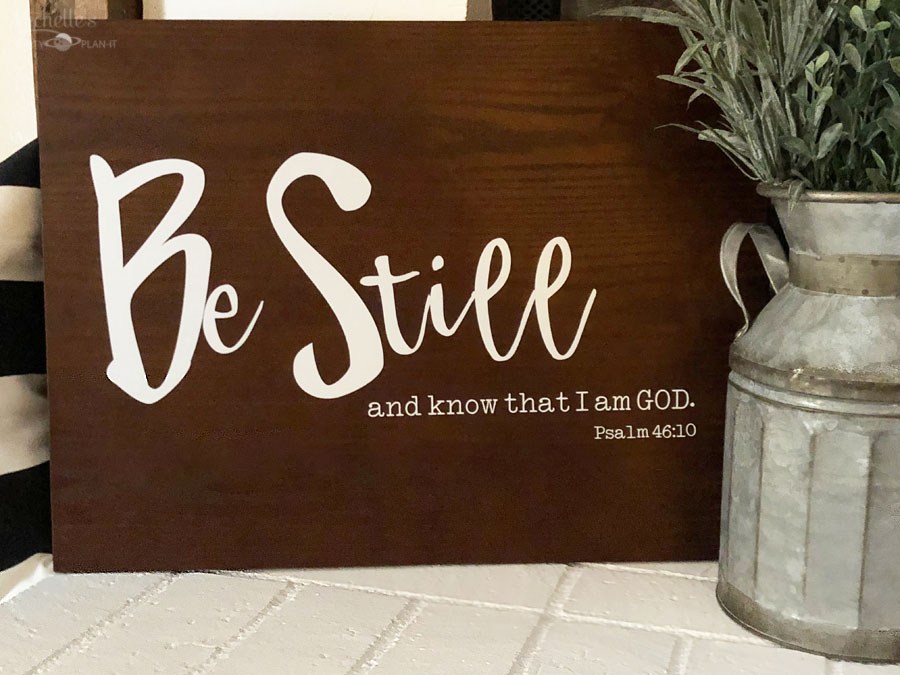
How fun is this Be Still Sign from Michelle’s Party Plan-It?

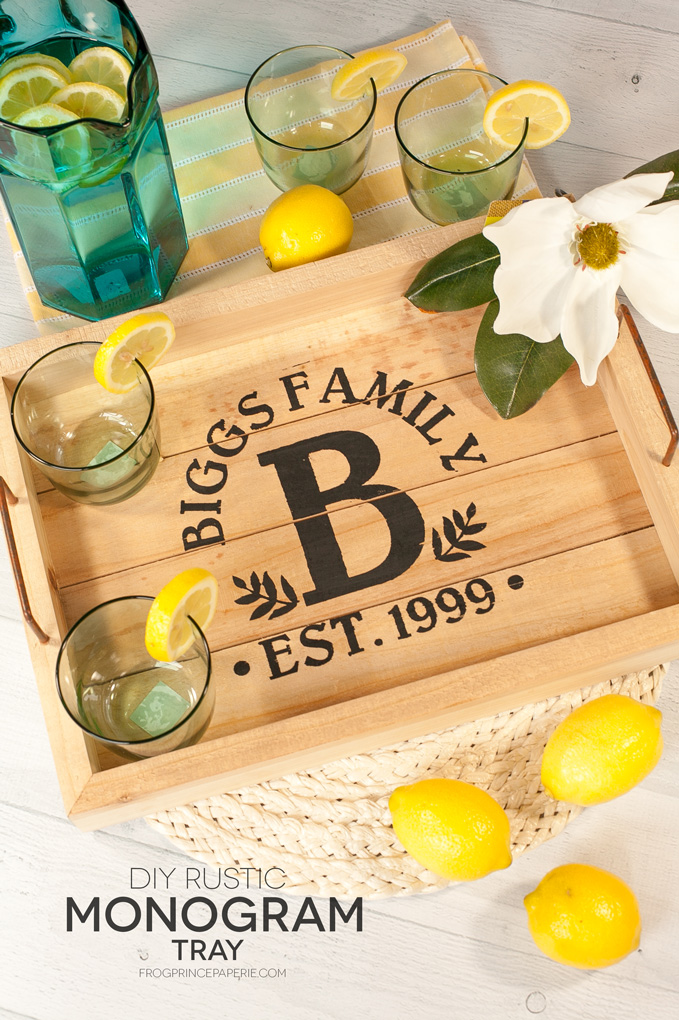
Paula at Frog Prince Paperie uses curved text and her Cricut to make this great project!

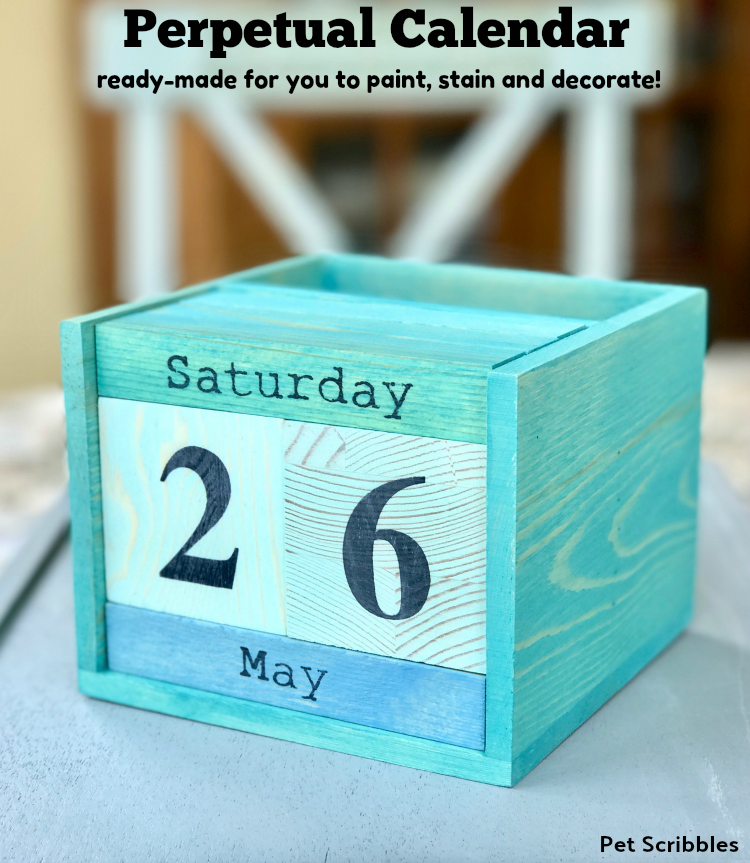
I love this perpetual calendar that Laura from Pet Scribbles made!

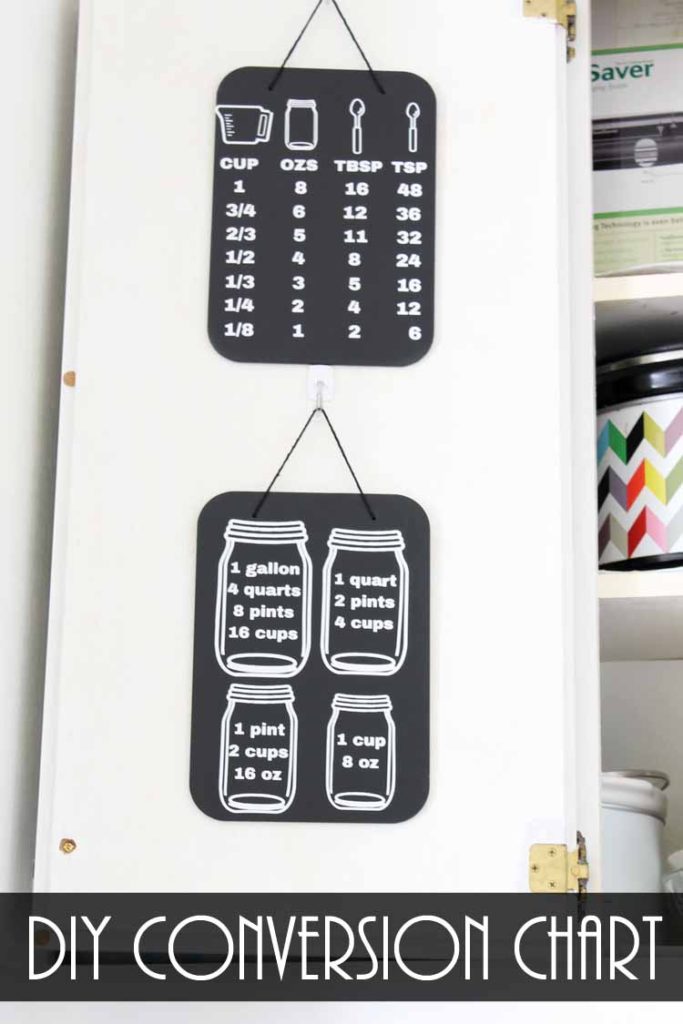
How clever is this Measurement conversion chart that Angie from The Country Chic Cottage made?

Be sure to come back tomorrow to check out more fun and fast crafts made out of wood!