Watch me craft live with my friends Angie from The Country Chic Cottage and Shannon from Madigan Made! If you’re here at 4pm PST, you can watch us live… if you’re here after that, you can watch the recording! We are each sharing a craft with you that will take 10 minutes or less!
Super Simple and Fast Mitten Ornaments
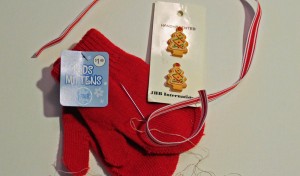
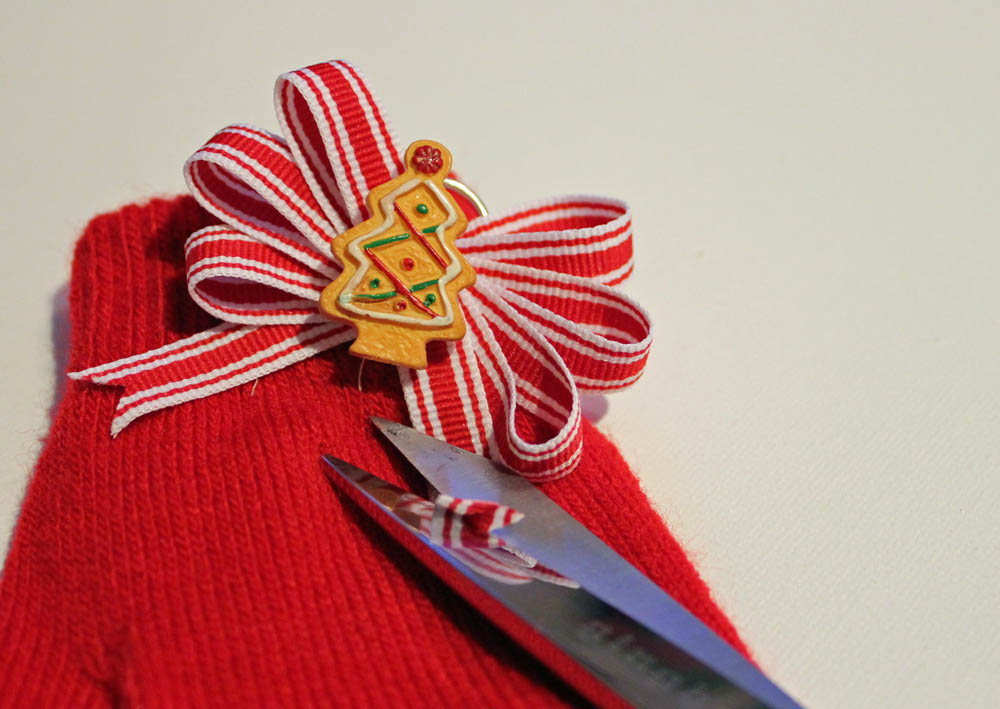
The final day of Craft Lightning – Holiday Edition, and I’m sharing this super-simple holiday ornament! I found a set of child-sized red mittens in the “dollar spot” at Target last year. I knew they would make perfect ornaments, so I tucked them aside. Miracle of miracles – I found them almost 12 months later to make this craft!
To make a mitten ornament you need:
Child sized mitten in Holiday color (I went with red)
18″ of ribbon
Holiday button (though a regular button would be cute too)
Jump Ring
Needle and Thread
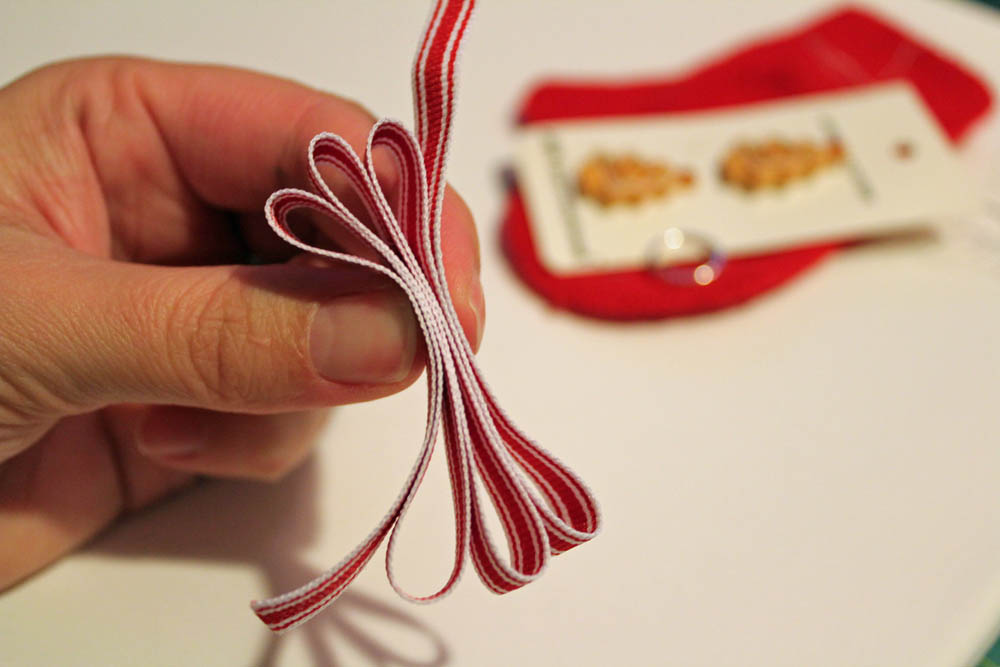
Fold the ribbon up accordion style to make 6 loops, 3 on each side. The two tails of ribbon should be pointing different directions. Don’t worry about the length of the ends, just try to make all the loops the same size.
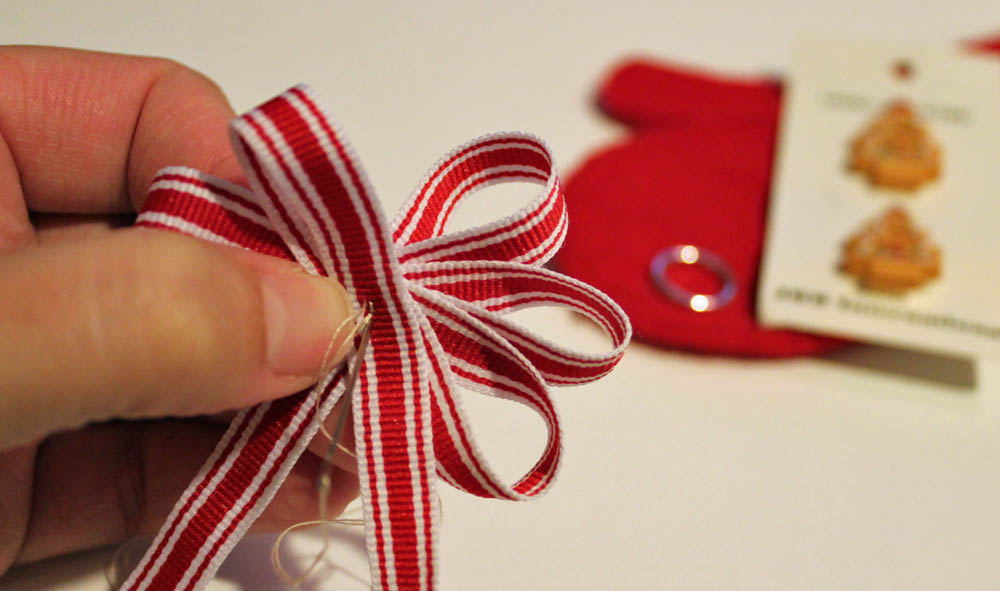
Fan out the loops, and stitch in the middle to secure.
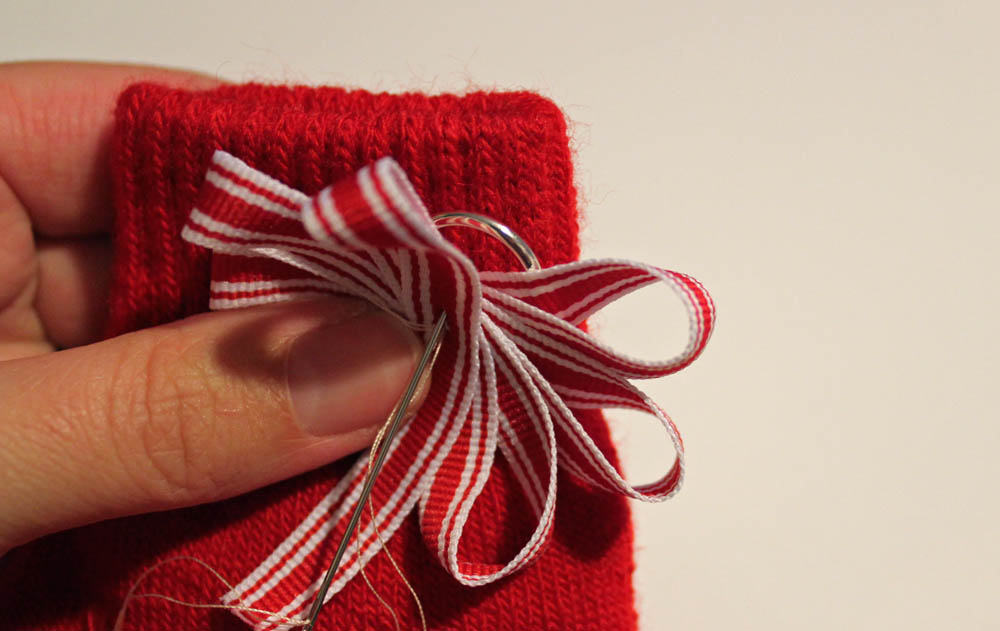
Stitch onto the mitten, securing the jump ring in place at the same time.
Stitch the button in place over the middle, then trim the ends of the ribbon to be the same length.
Hang on the tree and you’re done!
Craft Lightning Holiday Edition – Day 4 Roundup
Just one more day of Craft Lightning’s Holiday edition! This has been so much fun! If you missed any of the days, just go back and look at the fabulous posts – each holiday craft can be made in 15 minutes or less!
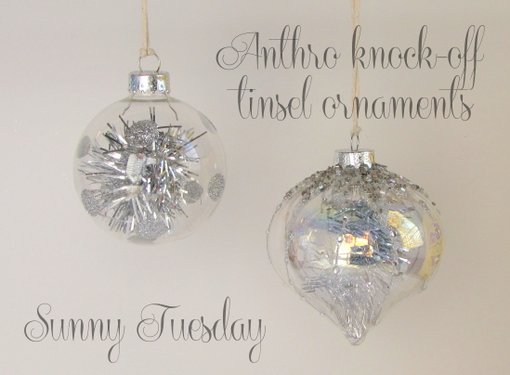
These beautiful glass ornaments look like they were purchased at Anthropologie – but you can DIY your own Anthropologie-look Ornament with her tutorial!
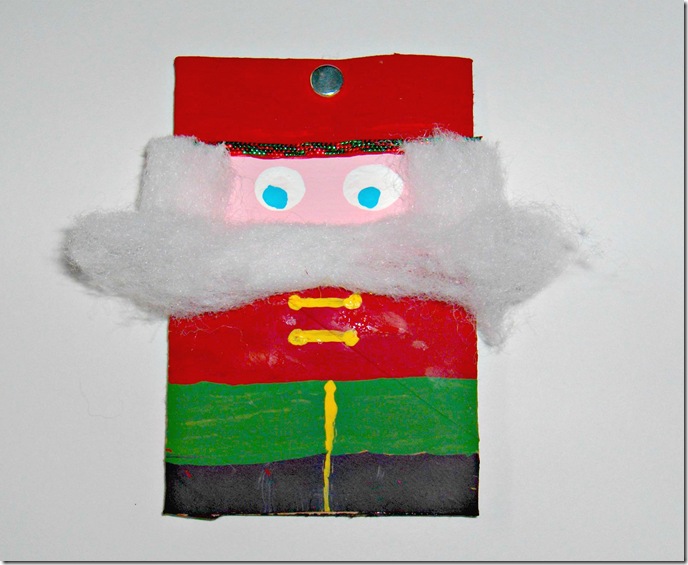
I’ve seen lots of ideas for things to do with toilet paper rolls – but to make a gift card holder is genius! And I never would have thought of it!
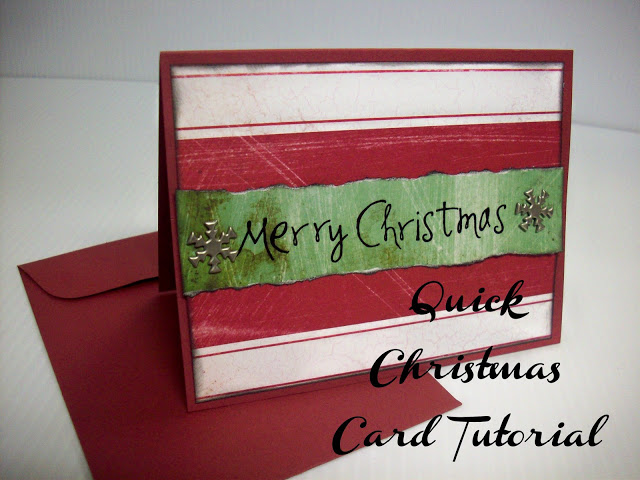
Summer Scraps made a Christmas card with so much richness and detail, it is hard to believe that it only took 15 minutes!
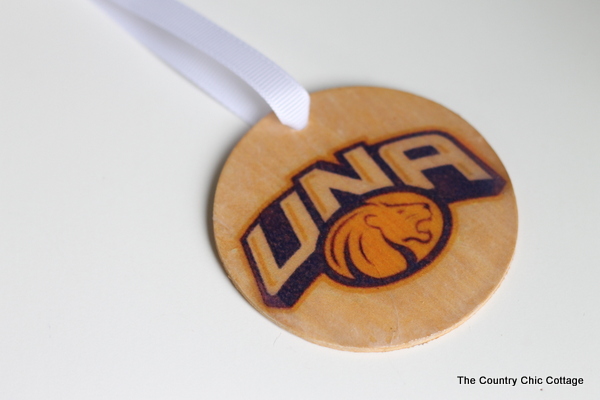
Angie made this professional looking logo ornament! She had some dry-time, but hands-on was only 15 minutes!
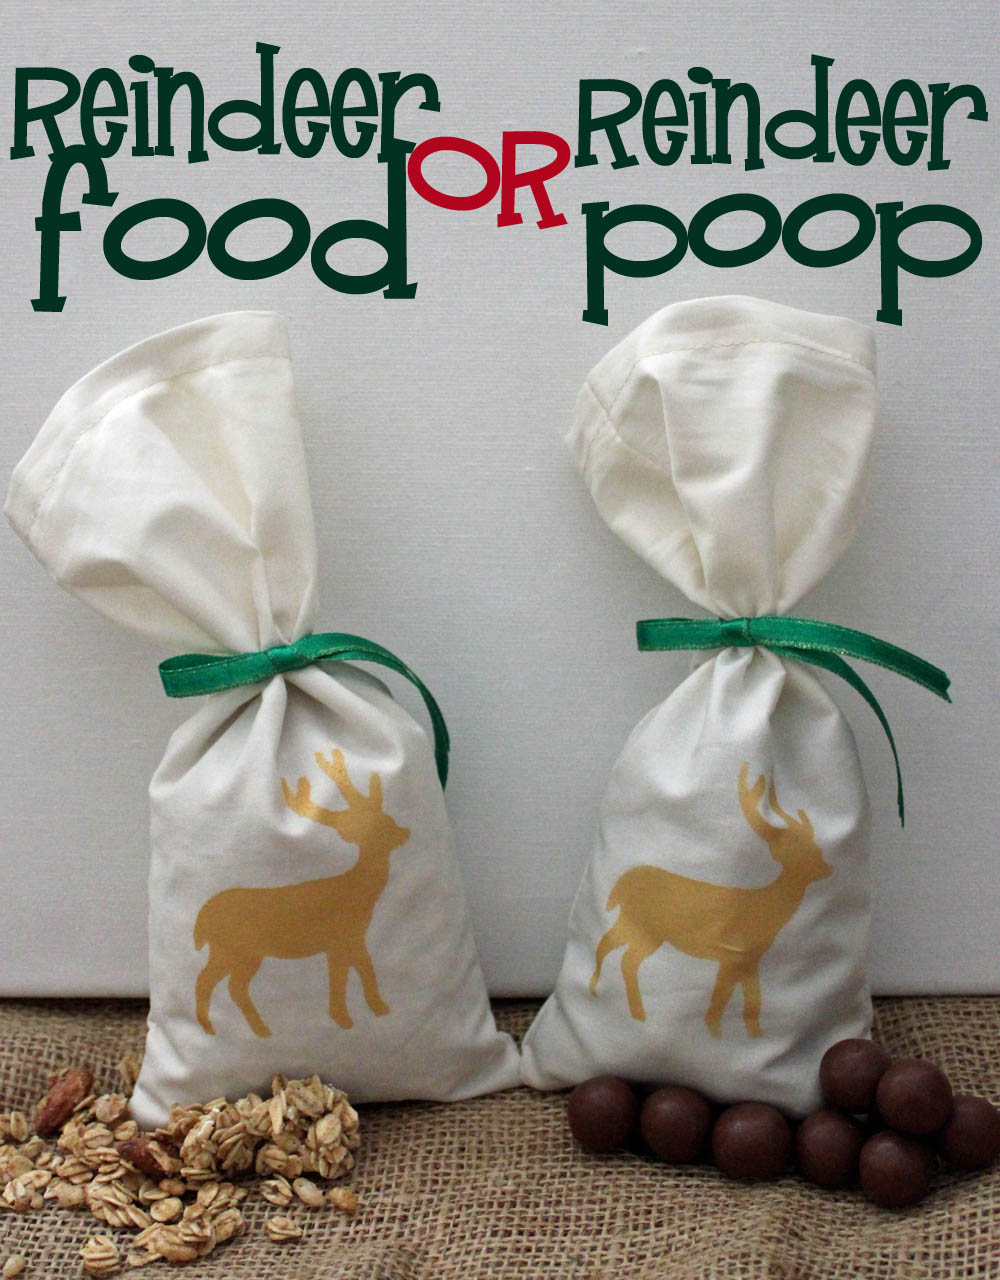
And in case you missed my project from earlier today… I showed you how to make a bag for reindeer food, or to collect reindeer poop!
Bags for Reindeer Food… or Reindeer Poop!
Santa and his reindeer are a fun topic at Christmas time. If you’re leaving out cookies for Santa, consider leaving out some reindeer food for your favorite four-legged sleigh-pullers. The reindeer need a little extra energy to pull the big man (and all those presents) on Christmas eve! And if you want to add some fun, replace the reindeer food in the bag with a little “present” from the reindeer… reindeer poop!
There are so many fun ways to use these bags. If your family has an Elf on the Shelf, perhaps your kids can send some reindeer food along with the elf to give the reindeer… and he can return the following day with reindeer poop. Or perhaps reindeer poop is this year’s substitute for coal in the stocking…
So many ways to use these bags! Which is great because they are super easy to make!! I whipped up a pair in less than 15 minutes… here is how you can make your own:
Supplies:
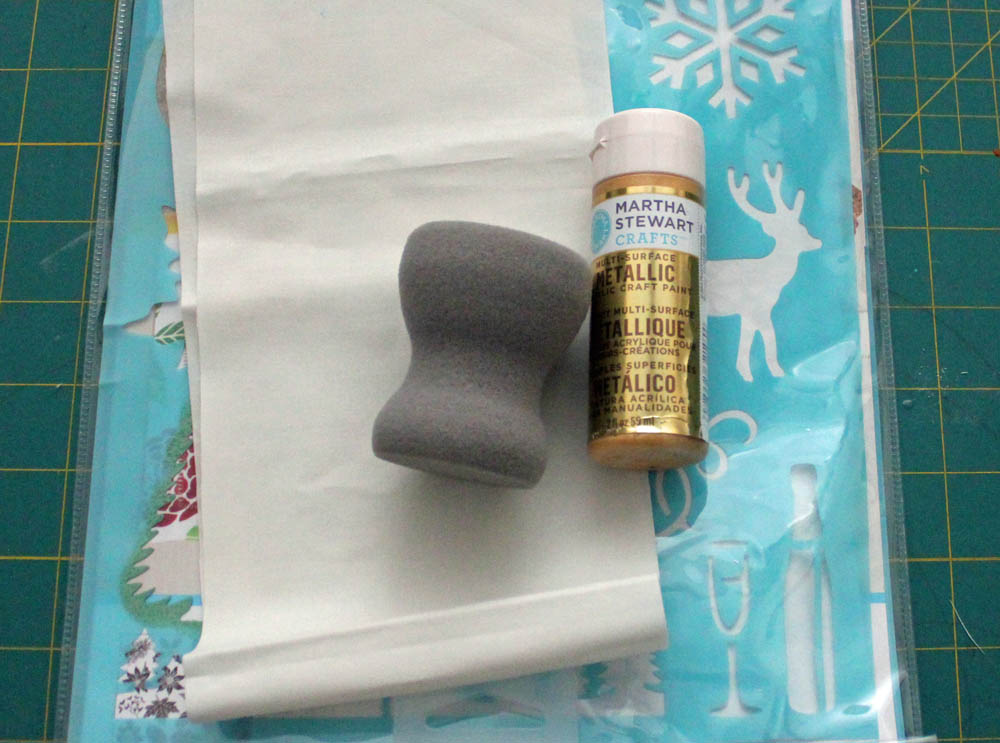
Fabric cut to 5″x20″
Gold Multi-Surface Paint (I used Martha Stewart by Plaid)
Reindeer Stencil (also Martha Stewart by Plaid)
Foam brush or pouncer
12″ length of ribbon
Scissors
Sewing Machine & thread
“food” and /or “poop” (I used granola and malted milk balls)
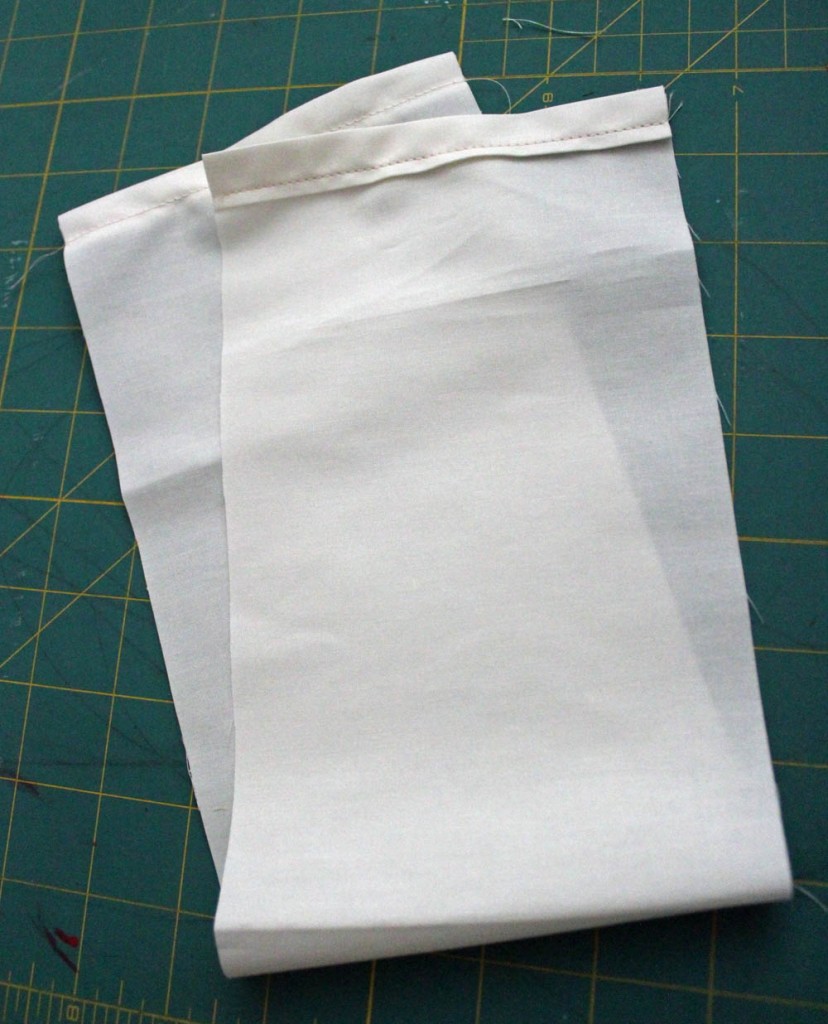
Start by folding over one of the 5″ sides of fabric about 1/2″. Fold over again, and then sew across. Repeat with the other side.
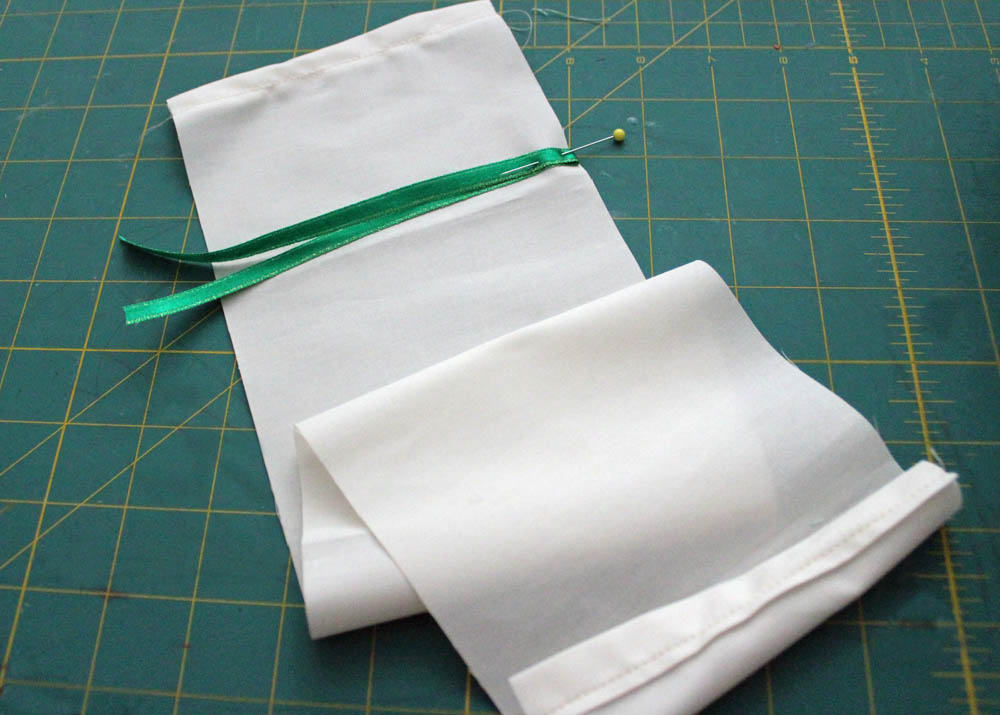
Fold in half, with the “right” side of the fabric in. Fold the ribbon in half, and pin the fold about 3″ down from the edge you just stitched.
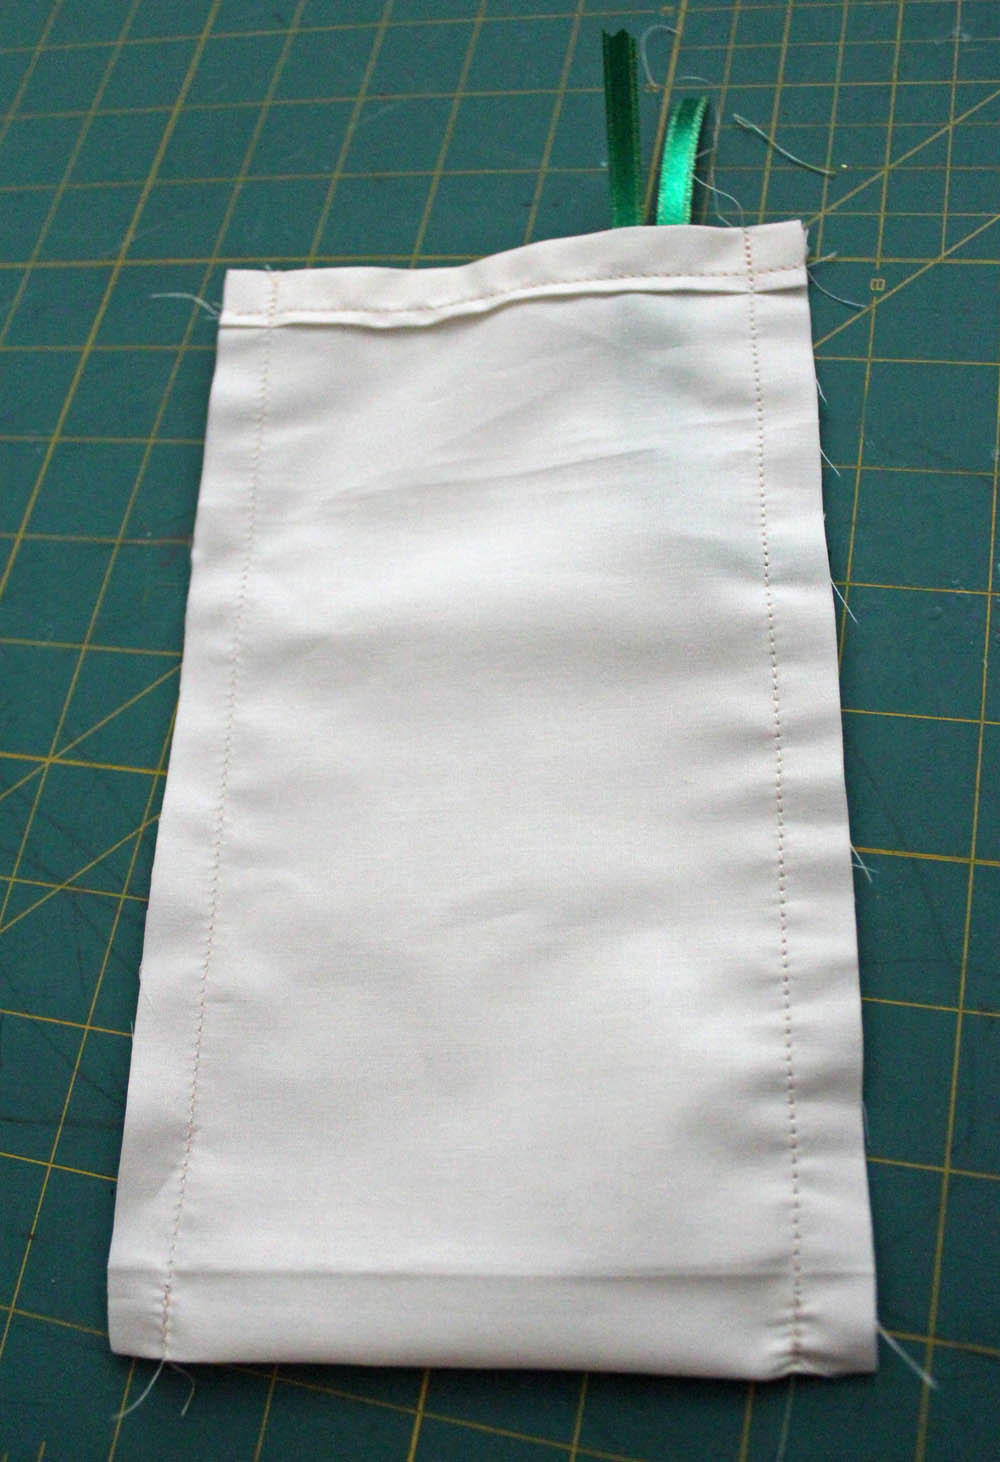
Fold the fabric in half, with both the stitched edges touching. Sew down both sides, making sure to stitch over the ribbon where it is pinned, and moving it out of the way on the other side.
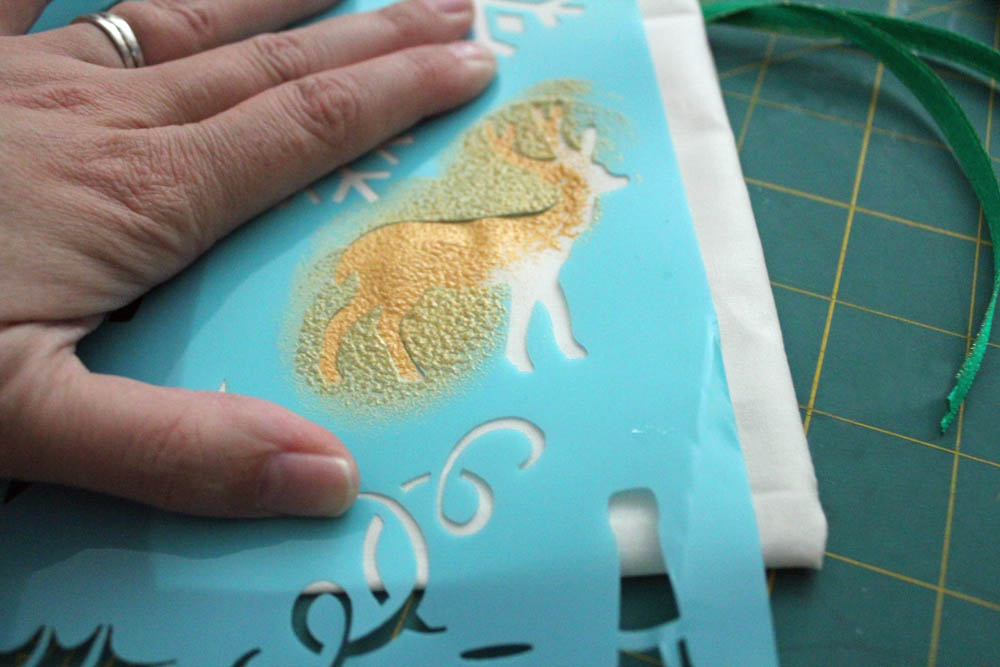
Flip the bag right-side-out, and tuck a folded piece of paper between the layers. Stencil the paint onto the fabric with the pouncer and reindeer stencil.
Wait for the paint to dry, fill your bag with reindeer food (or reindeer poop), and then tie the strings. Fast, simple, and super cute!
This is another 15 minute project as part of Craft Lightning – Holiday Edition. Each day, Angie from The Country Chic Cottage and I are teaming up with some bloggy friends to share holiday crafts that are fast and easy. You CAN fit crafts into your holiday schedule – no matter how hectic! Come back this afternoon for more ideas… and if you missed any, be sure to check out the other fun crafts!
Craft Lightning Holiday Edition – Day 3!
I can’t believe we are already halfway through our Holiday Edition of Craft Lightning. I love these Lightning Craft weeks, because Angie and I partner up to share ways that you can get crafty in a hurry. No need to set aside an entire day to let your creative side shine! If you have enough time to heat up a glue gun, grab a paintbrush, or just clear off a square of counter space, you have time to create!
Today, our blogging friends shared some more Craft Lightning projects:
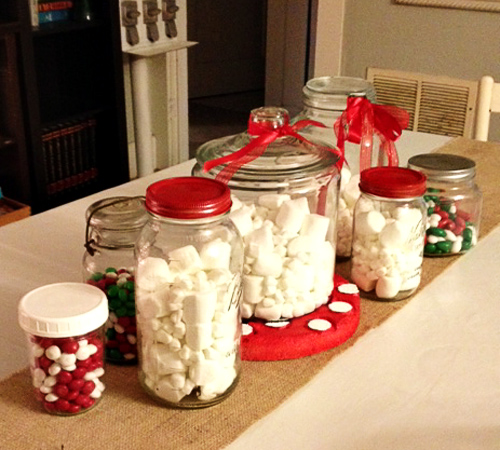
I absolutely love this “snowy” holiday centerpiece from the Pennington Point! How simple and fun is this!?
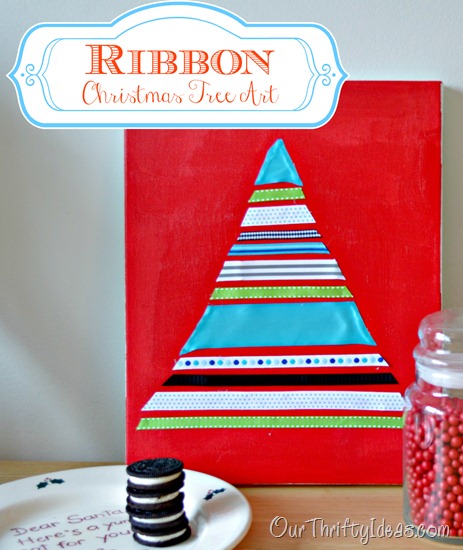
I have a box full of ribbon scraps – perfect for whipping up a ribbon Christmas Tree canvas like this one at Our Thrifty Ideas!
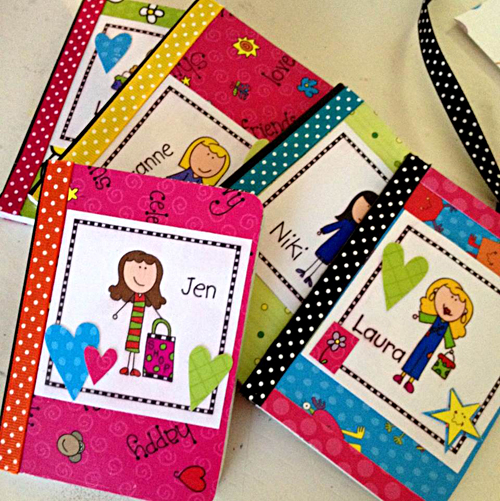
Wondering what to do with all those holiday cards you get in the mail? Cut your cards up to cover notebooks! 100 Directions shows you how.
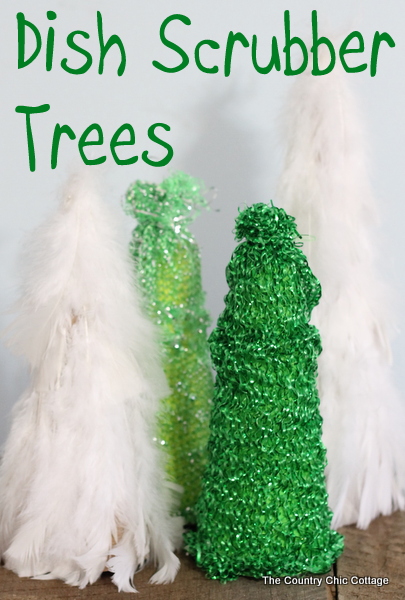
My Craft Lightning Co-Hostess, Angie from The Country Chic Cottage made Christmas Trees out of Dish Scrubbers! Such a clever idea!
In case you missed my project today… I shared some easy Holiday Specimen Art.
If you have a Holiday craft project that can be done in 15 minutes or less, be sure to add it to the Craft Lightning Holiday Edition Linky Party! And come back tomorrow for more 15 minute crafts!
Holiday Ornament Specimen Art
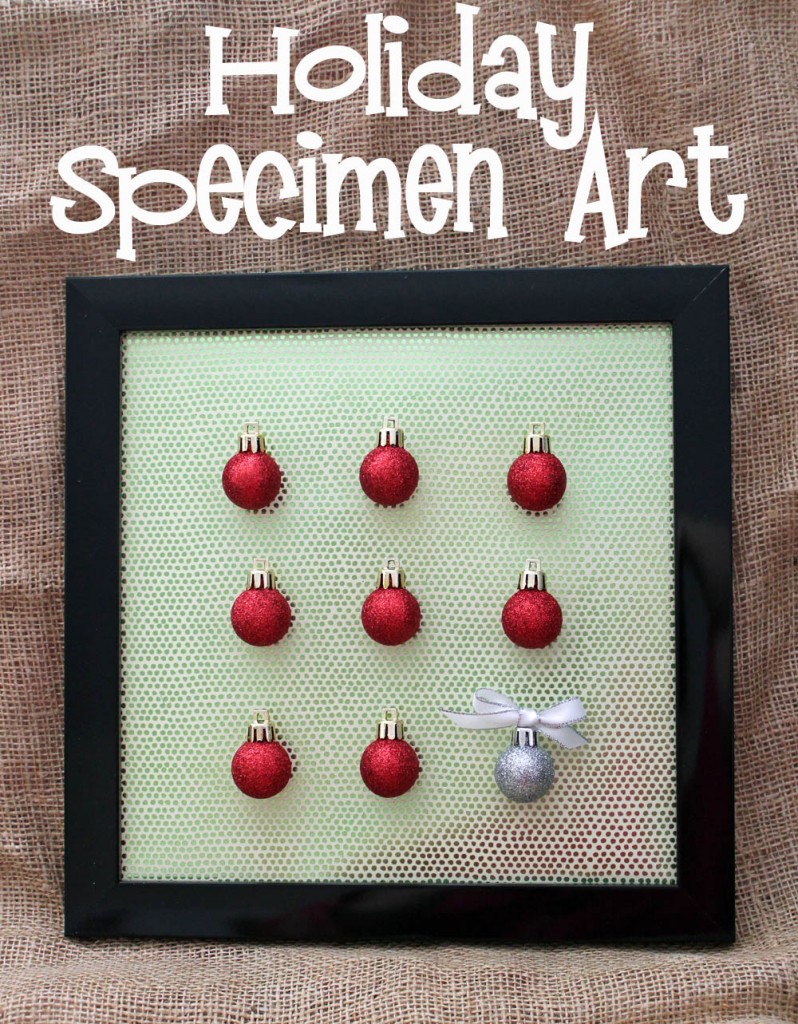
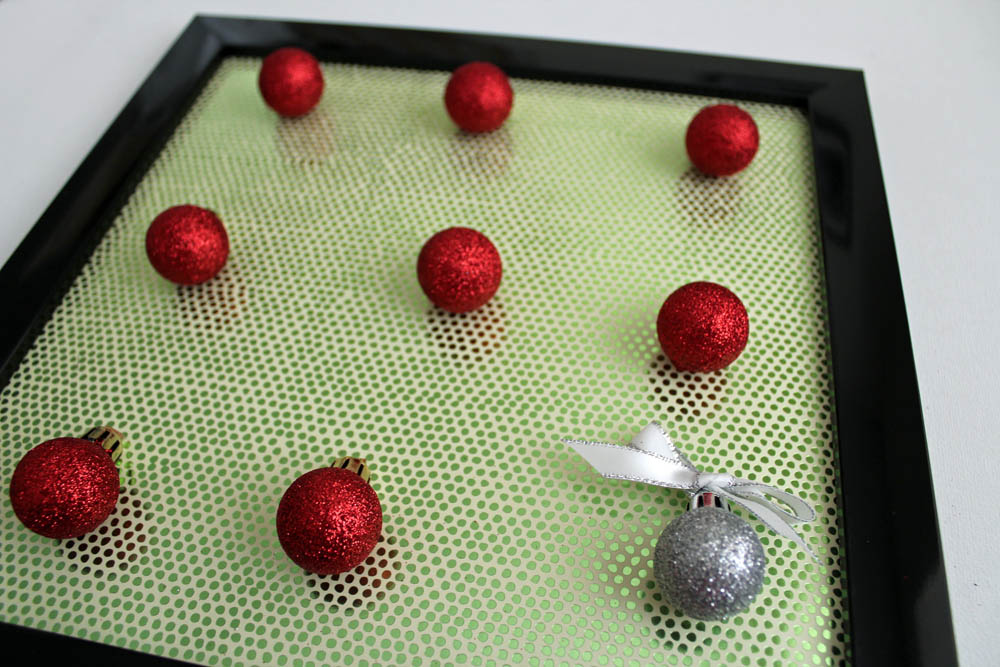
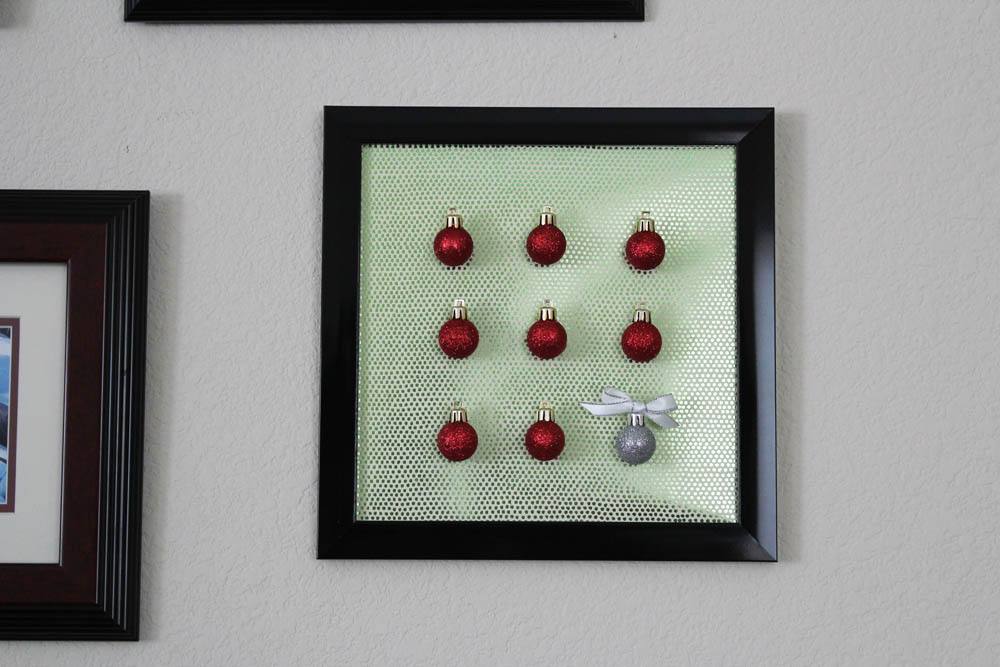
Specimen art has been big this year. Setting up an item on a board like they were botanical or biological items pinned into place. I love making holiday decor that brings in the trends of the year, so I whipped up this super fast and easy Holiday Specimen Art!
Here is how you can make your own Holiday Ornament Specimen Art…
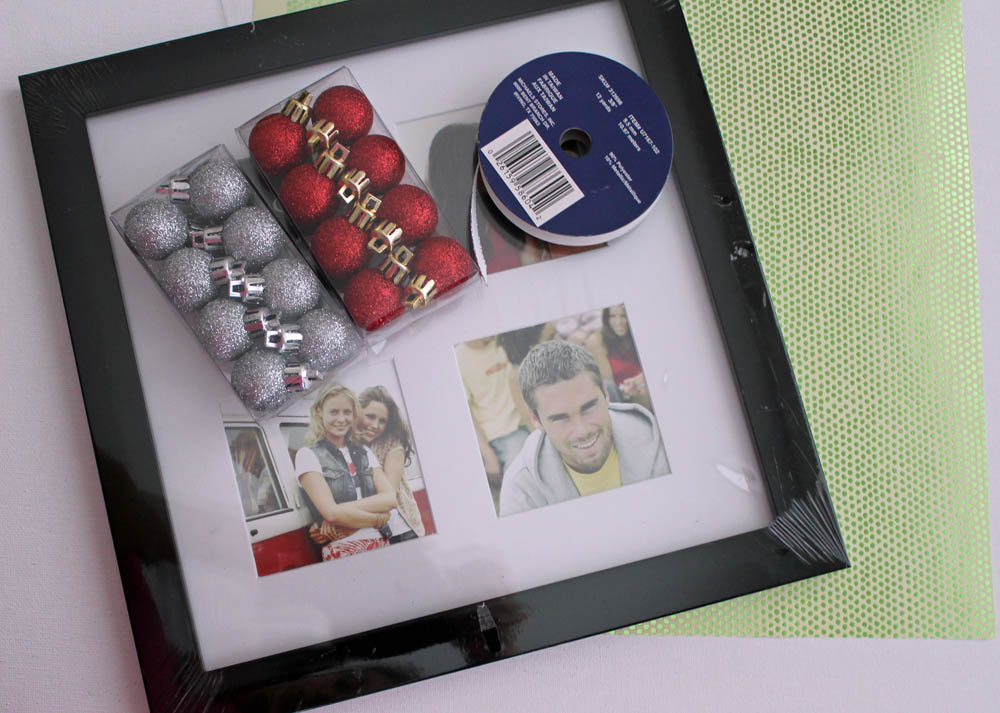
Supplies:
Square picture frame (mine fits a 10″x10″ photo)
Scrapbook paper (or wrapping paper)
Scissors or paper trimmer
Mini ornaments in 2 colors (8 of one color 1 of the other color)
Ribbon
Hot Glue Gun
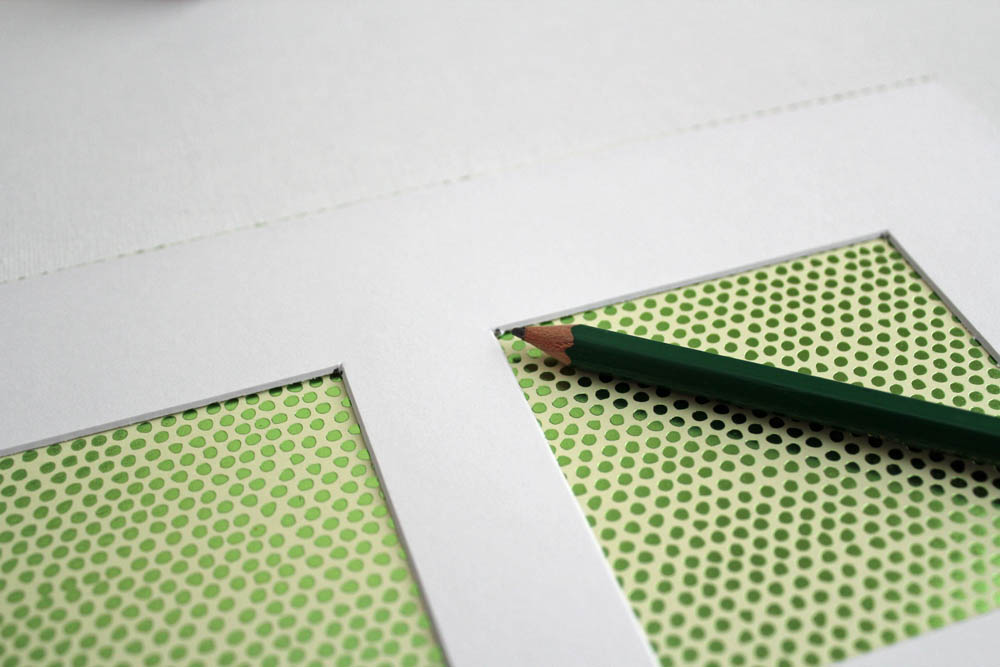
Trim your paper to the photo size. For me that is 10″x10″. If your frame came with a mat, use a pencil to give yourself guidelines for placing your ornaments by putting a small pencil mark in each corner.
Put your paper into the frame so that it is on top, with the glass and mat behind it. This keeps your glass handy if you want to use this frame for a different seasonal project.
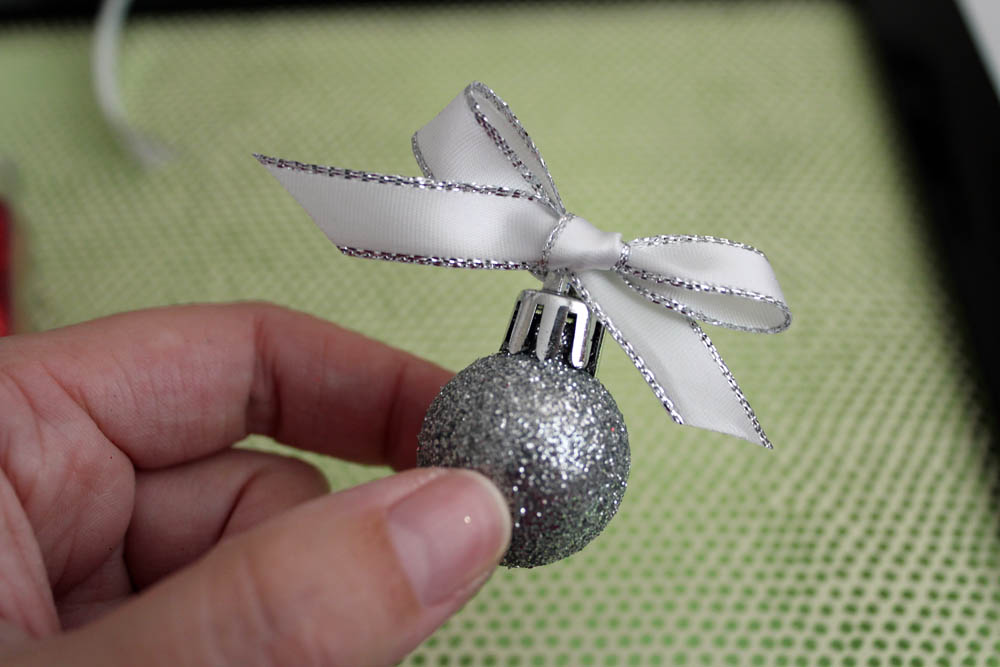
Using the ribbon, tie a bow on your odd-colored ornament. For many of us, getting a pretty bow here is the most time-consuming part of this project!
Lay out all your ornaments to figure out the spacing you want.
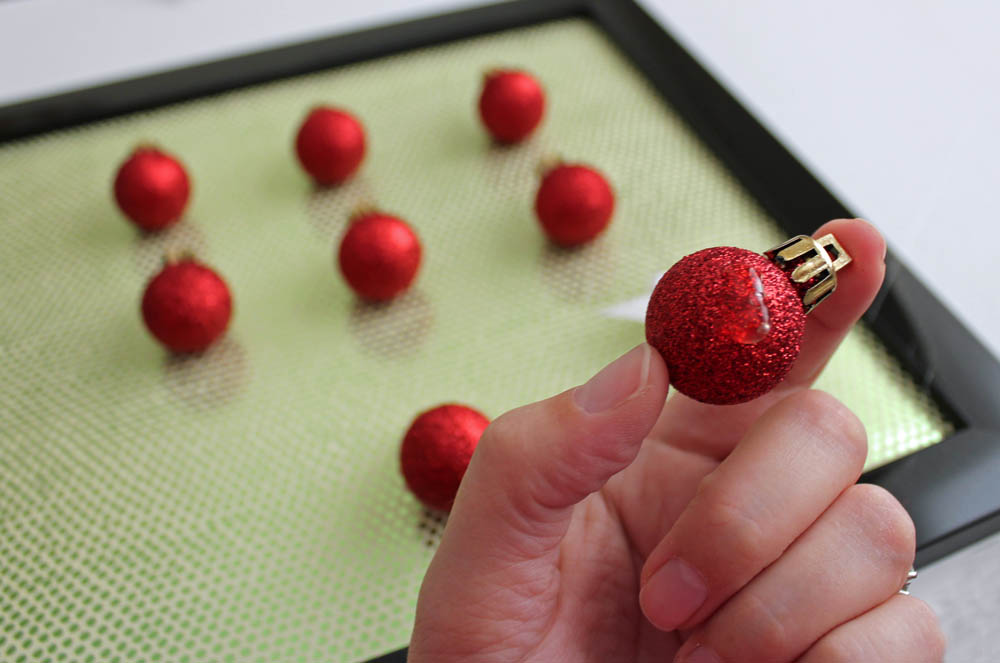
Using the hot glue, glue each ornament into place.
Remove any trailing glue strings, and hang on your wall! Your festive specimen art is all done!
This is my third project as part of Craft Lightning Holiday edition with my friend Angie from The Country Chic Cottage. Come back tonight and I’ll have a round-up of today’s 15 minute projects to share with you!
Craft Lightning Holiday Edition- Day 2
Another fun day of quick projects! And here is a quick round-up… in case you missed any!
I have a love affair with Mason Jar crafts – I love the idea of using aMason Jar for a place setting!
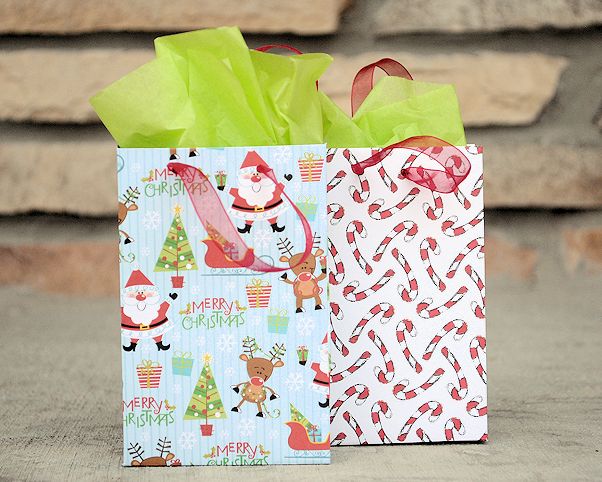
Over at Crazy Little Projects, you can learn how to make these adorable gift bags! The perfect size for wrapping up a gift card!
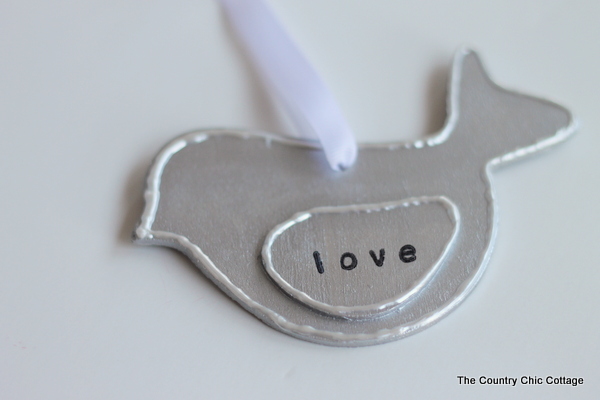
and Angie from The Country Chic Cottage created this Love Bird Ornament. Simple and beautiful, don’t you think?
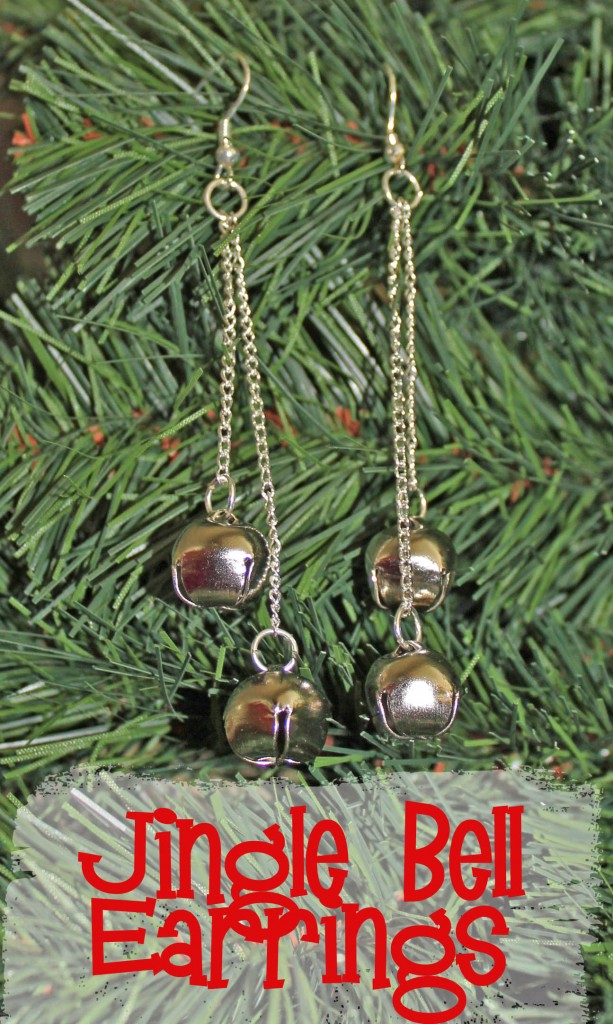
In case you missed my project earlier today, I made bell earrings – very quick and easy, even if you’ve never made jewelry before!
Come back tomorrow for even more quick holiday crafty goodness!
Jingle Bell Earrings
I’m sharing these Jingle Bell Earrings with you as day 2 of Craft Lightning. That’s right – it is a Craft Lightning project, which means it can be done in 15 minutes or less! These Jingle Bell Earrings are great for the holidays. Even if you have never made jewelry before, with a couple simple supplies, you’ll be surprised how quickly and easily these go together…
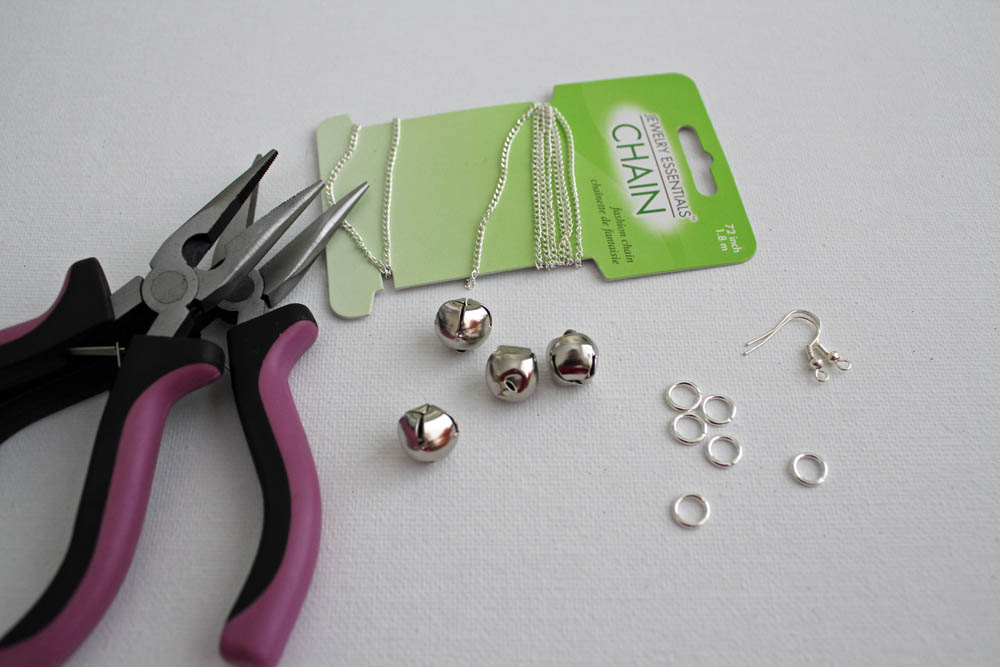
Supplies:
4 bells
Jewelry chain to match the bells
2 Earring Hooks
6 jump rings (must be small enough to fit through jewelry chain)
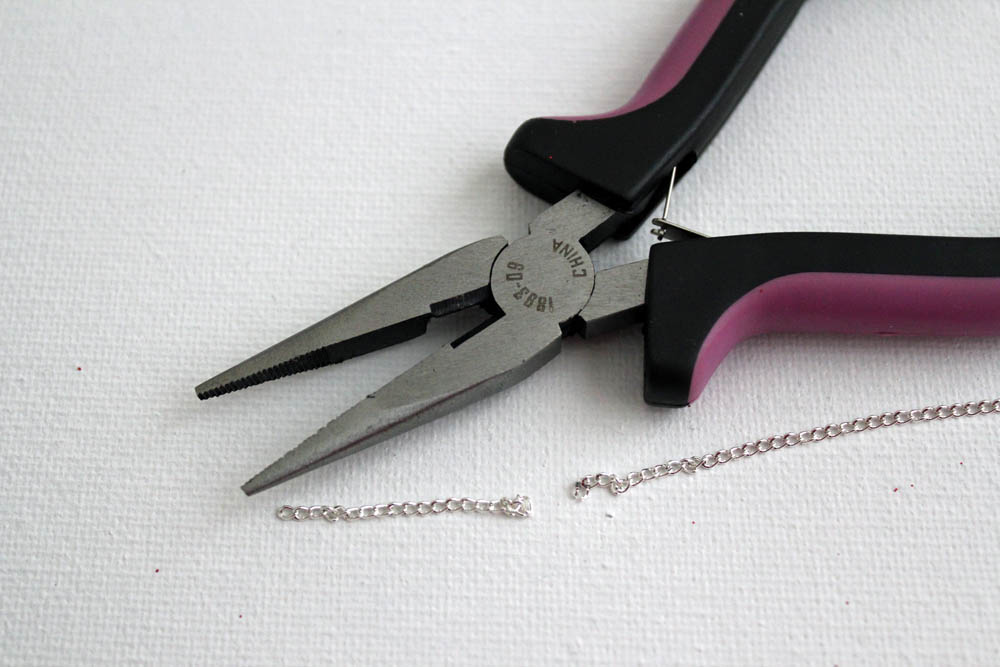
Start by cutting your chain. I cut 2 pieces to 1.5 inches and 2 pieces to 2 inches… but you can cut yours based on how dangly you like your earrings.
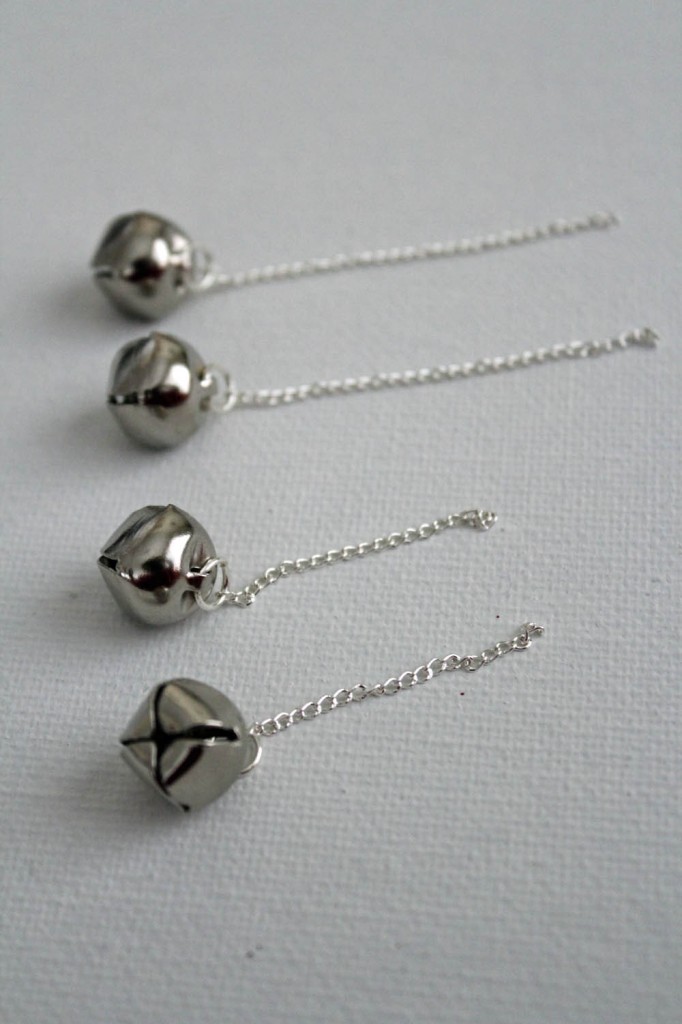
Attach your bells to the bottom of each chain using the jump rings. Check out the end of the post for instructions on how to properly open a jump ring.
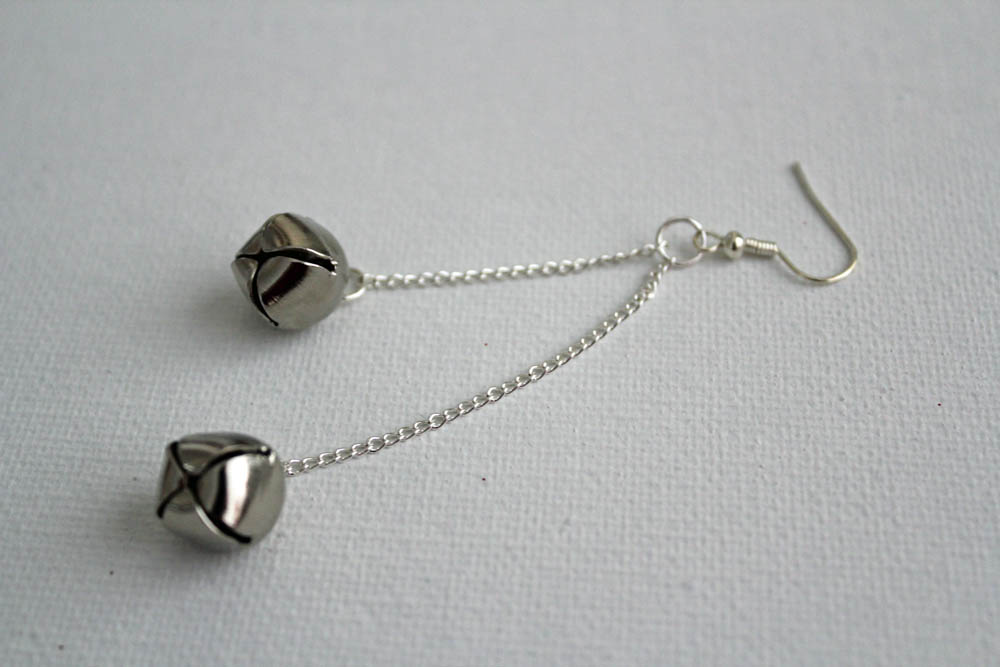
Once you have all 4 bells on the chains, it is time to attach them to the earring wire. Open a single jump ring and attach one short chain, one long chain, and the earring wire. Close the jump ring and you are all done!
To open a jump ring:
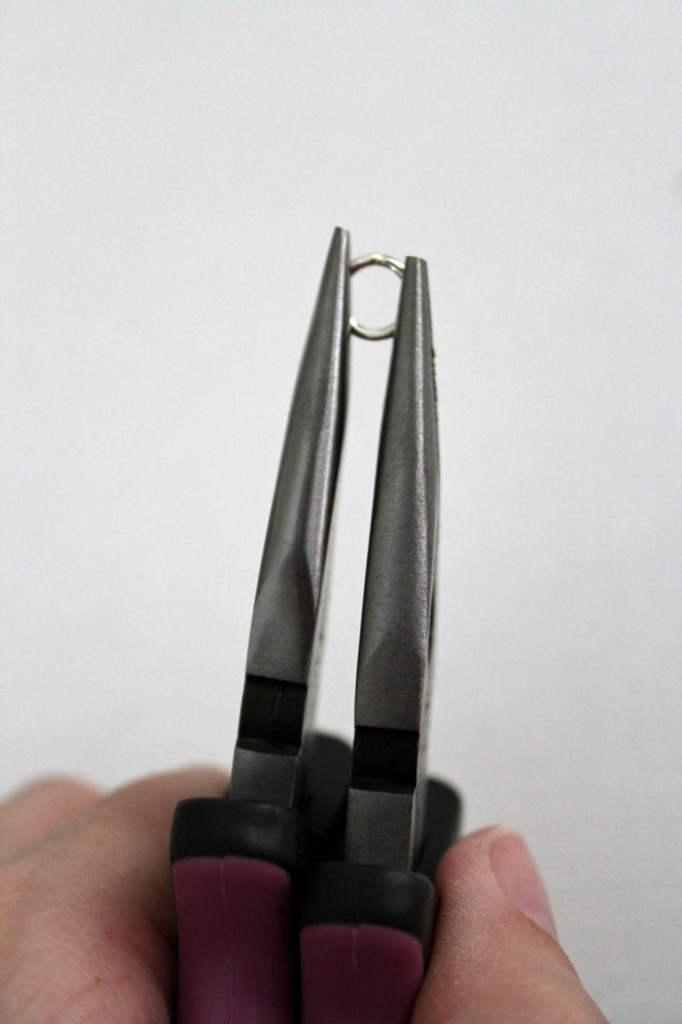
Use 2 pairs of pliers. With the split of the jump ring at the top, tightly clamp onto each side of the jump ring with the pliers.
Twist one pair of pliers towards you, and one away from you to open the jump ring. To close it, use the same motion in reverse. This opens the jump ring without damaging the circle shape.
Craft Lightning Holiday Edition – Day 1 Roundup
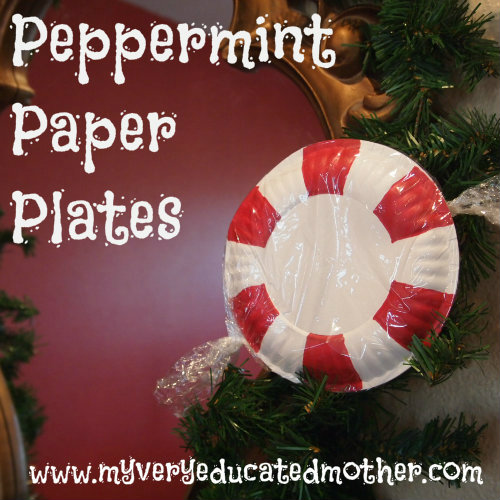
And how cute are these peppermint paper plates by Very Educated Mother? A great kids craft!
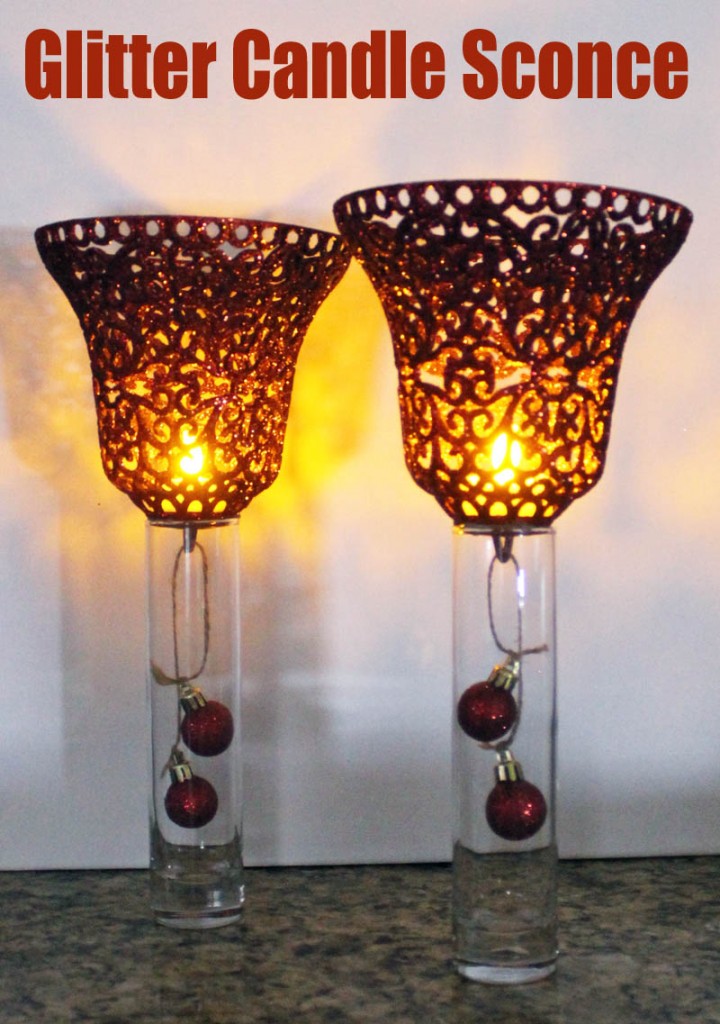
Glitter Bell Candle Sconce
YAY! It is time for another week of Craft Lightning projects! That’s right – I’m partnering up with Angie from the Country Chic Cottage again, and we’ll be sharing with you dozens of fast crafts – projects that can be completed in 15 minutes or less! Every morning, each of us will be sharing a Holiday craft that can be done in 15 minutes or less. And then in the afternoon, we’ll each give a round-up of crafts from our fellow bloggers who are joining in on Craft Lightning.
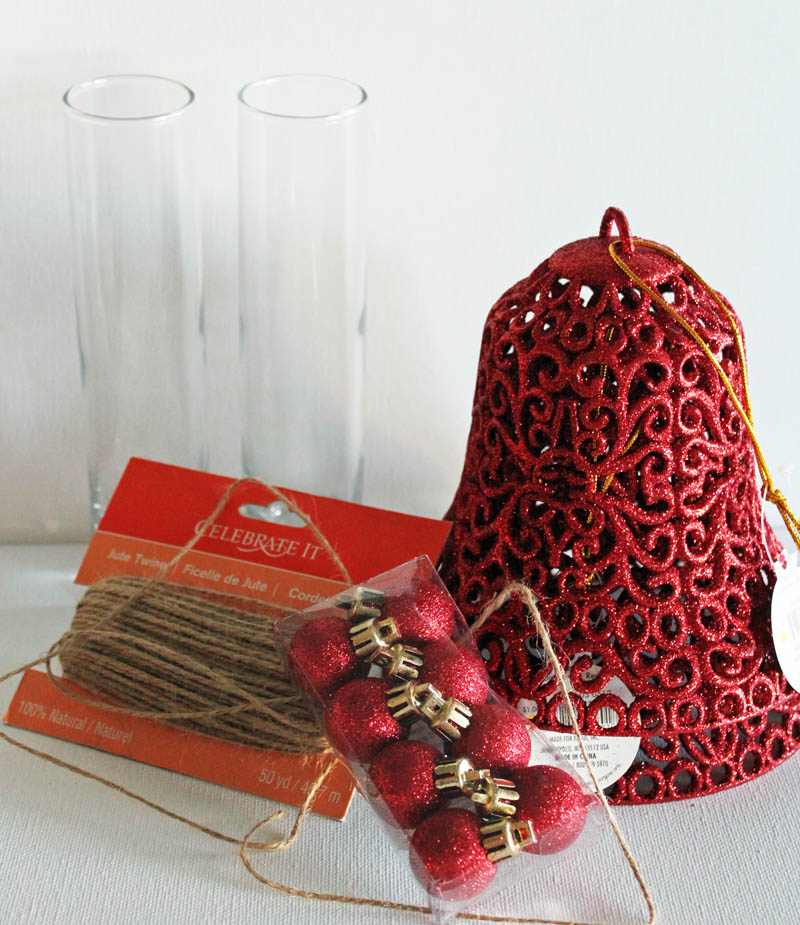
Today I’m sharing with you this Glitter Bell Candle Sconce. I picked up most of the supplies at Target after I saw the glittered bell in their Dollar Spot. I hopped over to Michael’s, where I found the mini ornaments in their dollar bin, the twine, and the bud vase. I already had the flameless tealights on hand.
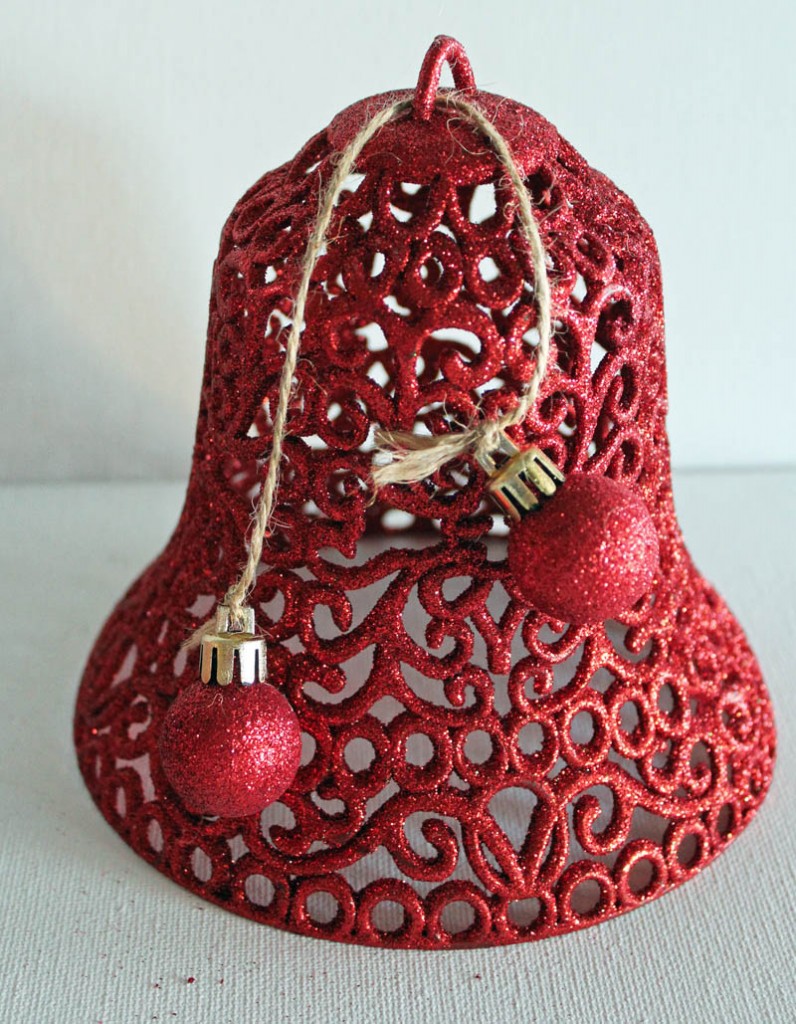
I cut a length of twine about 1 1/2 times the height of the inside of the vase. I threaded it through the glitter bell, and tied each end to a mini ornament. I frayed the edges of the twine for looks.
I put the bell on top of the vase, tucking the ornaments in. Once I had it the way I liked, I glued it on with a glue gun.
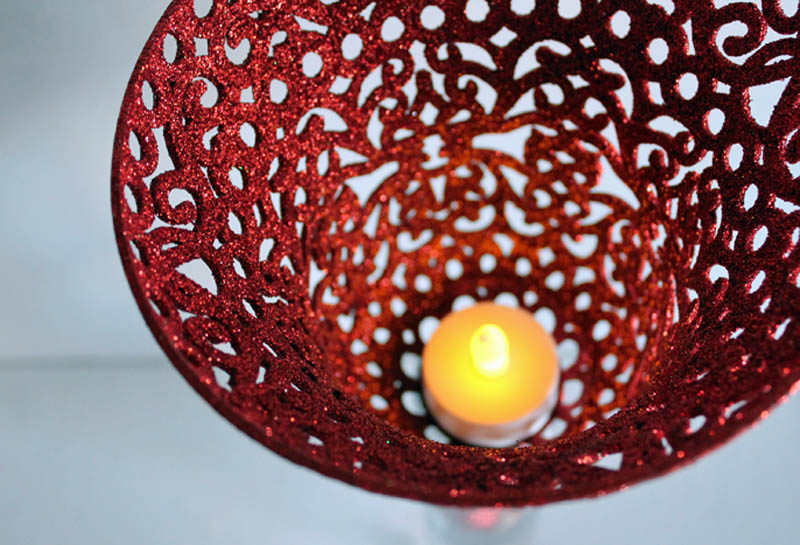
All that was left was adding a flameless tealight to the top, and I was all done!
Make sure you stop by this afternoon for a great round-up of fast Holiday Crafts!







![Johanson Journey Glitter Mason Jars_thumb[2] Johanson Journey Glitter Mason Jars_thumb[2]](https://30minutecrafts.com/wp-content/uploads/2012/12/Johanson-Journey-Glitter-Mason-Jars_thumb2.jpg)
