Thumbrint Snowman Holiday Frame

Simple Thumbprint Snowman Frame

Kids love getting their fingers in paint… and if you don’t have a kid handy, you can still make this frame using your own fingerprints. Though, crafting with a kid is a lot of fun, although it tends to be messier.

This frame will take you less than 15 minutes to decorate, as long as you have a cooperative kiddo on hand. Which is why it gets to be part of this week’s Craft Lightning series! I’ve teamed up with Angie from the Country Chic Cottage this week, and each day we’re sharing a fast and easy holiday craft that takes 15 minutes or less. But we’re not doing it alone! We’ve teamed up with a couple dozen of our favorite bloggers, who are also creating 15 minute or less Holiday crafts. And every evening, I’m sharing those with you. Go check out the Day 1 Roundup, Day 2 Roundup, and Day 3 Roundup if you’ve missed anything.

raw wooden frameTo make your snowman frame you need:
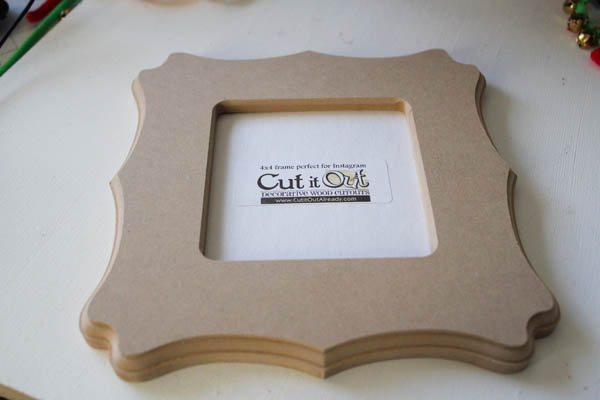
Wooden frame
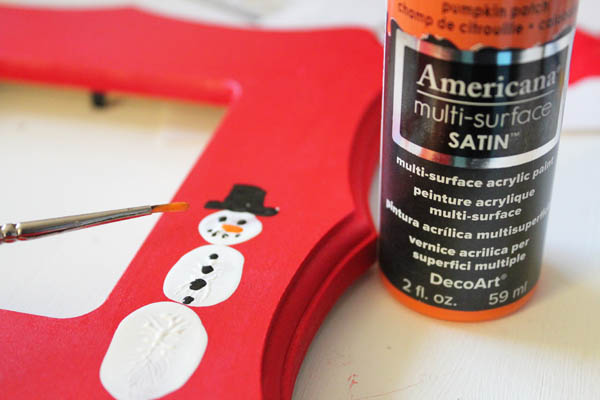
DecoArt Multi-Surface Paints in black, white, orange, and red
Paintbrush
Fingers ready to paint


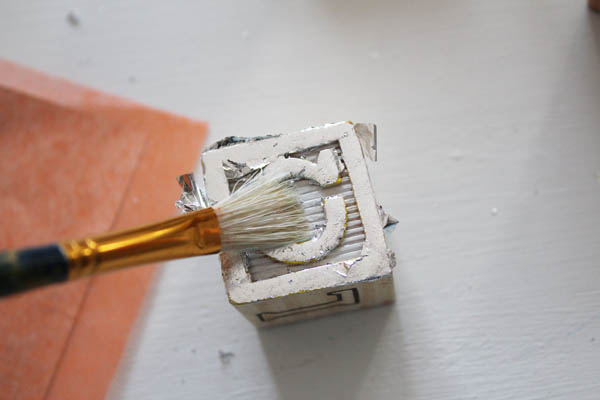
Start by painting the frame red. The raw wood soaks up the paint really well, so it dries fast.

Make thumbprint

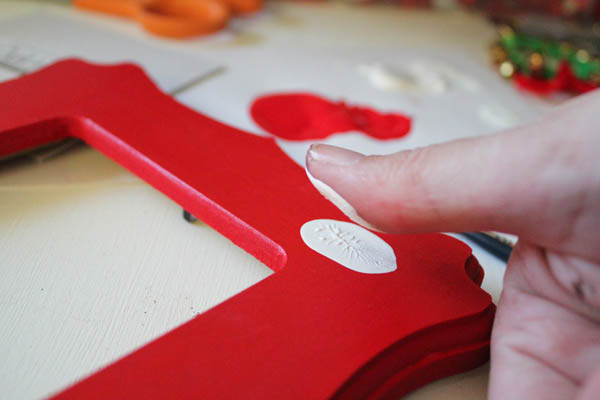
Start with a thumbprint of white paint. Practice on a piece of paper to see how much paint you need on your finger – you don’t want too much or too little.

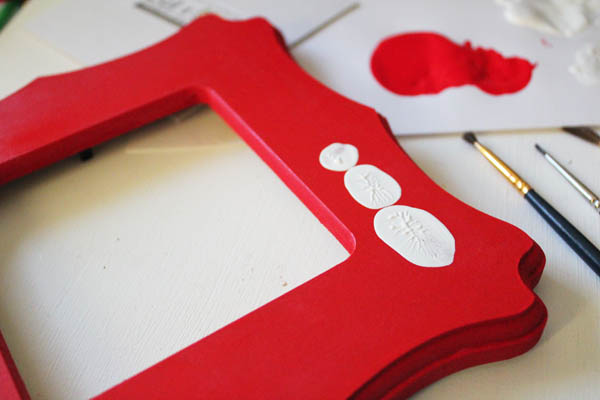
Make the body and head prints. You can use different sized thumbs (Dad, Mom, Kiddo), or you can use the same person’s hand ad use a thumb, ring finger, and pinky.

Thumbprints on frame

Use a fine tipped paintbrush to paint a hat, eyes, mouth, and dots up the front of the snowman.

Paint in black hat and dots

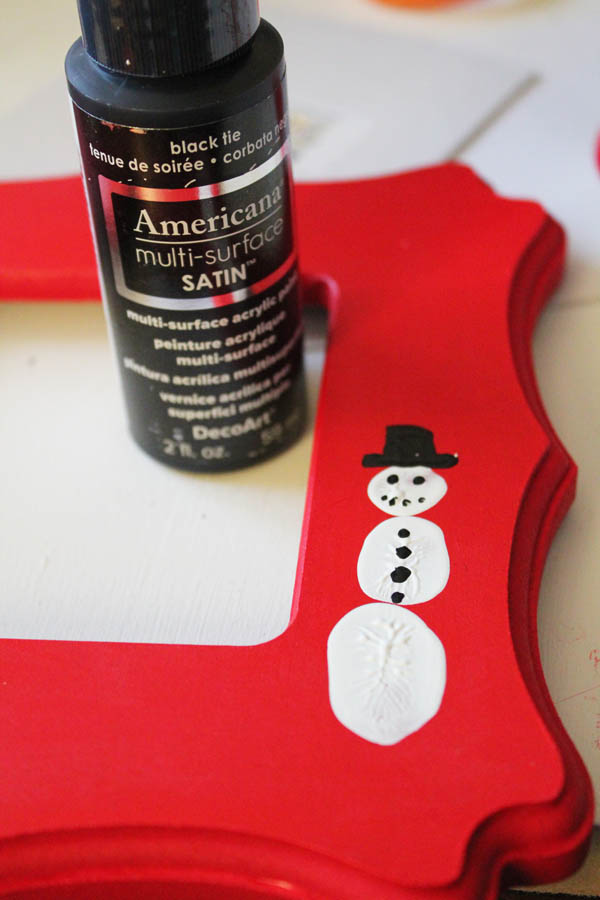
A little bit of orange with a fine tipped paintbrush is the nose.

Paint orange nose

I added a squiggly line of white at the top and bottom of the frame. Totally optional.

Thumbprint Snowman Frame at 30 Minute Crafts

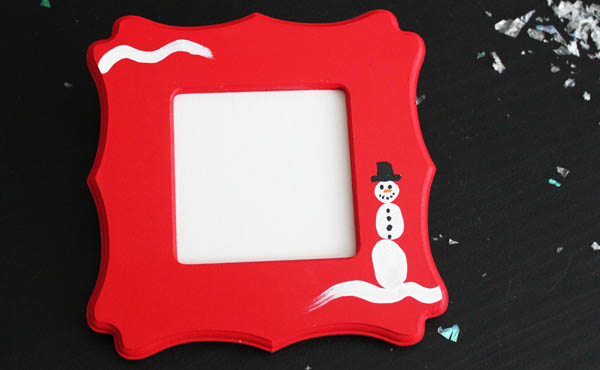
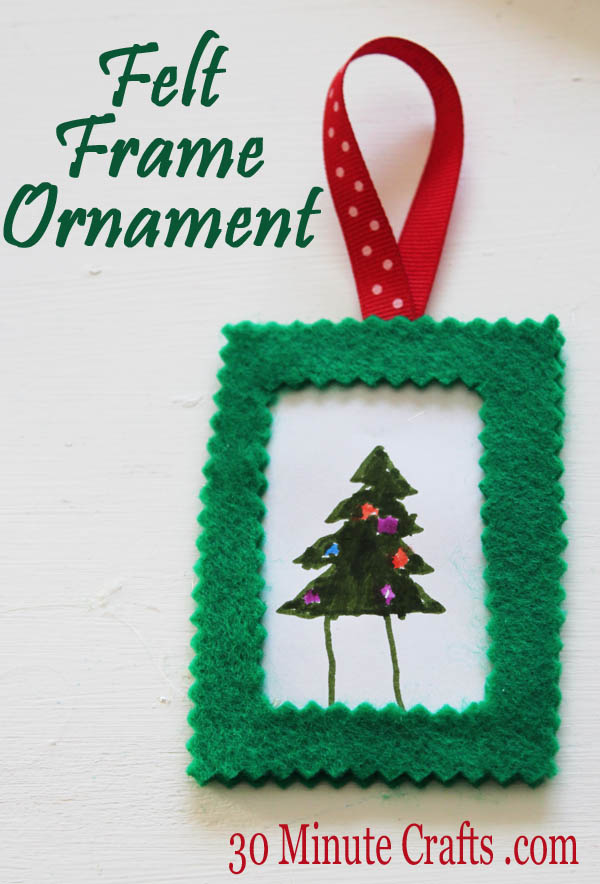
And it is that easy to whip up a fun frame… pop in a picture of the kids on Santa’s lap, decorating the tree, going caroling… or opening up presents on Christmas morning!

Be sure to come back tonight, for more fun and fast Holiday crafting ideas!

Craft Lightning Holiday Edition – Day 3 Roundup!

The third day of Craft Lightning is already over! A whole week of fun and fast holiday crafts. I’ve partnered with Angie from the Country Chic Cottage, and all week we’re both sharing a fast, 15 minute or less holiday craft, every day. AND we got a bunch of our blogging pals involved… each day different bloggers are joining in with their own fun and fast holiday crafts! To make sure you don’t miss any of them, go check out the Day 1 Roundup and the Day 2 Roundup, then check out all the crafty goodness that was shared today!

First up – did you know you can use Rit Dye and Mod Podge to stain mason jars? You can! Learn how to stain mason jars.

Dyed Mason Jars - Craft Teen

Add some handmade stitching to your holiday tree with these adorable felt ornaments. A great project to do in front of the TV or with a group.

Felt Gingerbread Ornaments - Do Small Things with Love

Add some joy to your Christmas Mantle, both literally and figuratively, with these fun joy frames. So simple and easy to make!

Christmas Joy Frames - Yesterday on Tuesday

How adorable is this button ornament? So super cute – and easy to decoupage together.

Decoupage Button Tree Ornament - Laura Kelly Designs

Speaking of button ornaments – how adorable is this button snowman? Customize your button ornament with colors that match your holiday decor. Button Snowman Ornament - One Artsy Momma

Looking for a fast holiday gift for that hard-to-craft-and-shop-for friend or neighbor? How about some 10 minute peppermint soap? You don’t have to tell them how easy it is to make!

10 Minute Peppermint Soap - Happiness is Homemade

Buttons are very on-trend this holiday… you can find holiday buttons that match your decor, and use them on your table with these napkin ring and candle holder embellishments.

Button Table Decor - Scrappy Chick 101

And if you’re like me you’re probably hosting a variety of holiday events, so make sure you have a second set of napkin rings handy (or you could gift a set to a friend). I love these simple holiday napkin rings.

OLYMPUS DIGITAL CAMERA

If you’ve already finished your holiday shopping (shhh… don’t tell anyone or we will be forced to hate you forever)… you can move on to wrapping and adding big bows. These bows are simple to make with the bowdabra.

diy handmade bows - the country chic cottage

I made a super-simple gift to give a neighbor or friend. Seriously, these ornaments in a jar are an embarrassingly simple craft.

Simple Neighbor Gift - Ornaments in a jar

Be sure to come back tomorrow for more fun and fast crafts… we’ll be doing fast holiday crafts all week long!

Simple Holiday Neighbor Gift

Simple Neighbor Gift - Ornaments in a jar

Looking for a simple gift to give a neighbor, teacher, or another person that fits into the “more than a casual acquaintance and should be given some kind of token gift” category? Have your kids help you whip up a super simple project like these ornaments in a mason jar. This project is so shamefully simple it probably doesn’t need a tutorial… but I’ll give you one anyway.

Because that’s what I’m doing all week… simple, fast, easy crafting tutorials for our Craft Lightning week. All week long, Angie from the Country Chic Cottage and I are sharing fast holiday crafts… and then each evening, we’re sharing fast holiday crafts from our blogging friends. It is fast crafting madness over here I tell you! This week we’ll be sharing over 50 fast holiday crafts… from ornaments to gifts to tags and more… we’ve got you covered.

Ornaments in jar supplies

Ok… on to making today’s super simple craft project. Which naysayers might say doesn’t qualify as a craft because if tying a bow is crafting, then I craft my son’s tennis shoes on every morning. Bah humbug, naysayers! A craft is any time we create. So let’s get to creating…

You need:

Mason Jar
Small Ornaments
Ribbon
Tag


Carefully place the ornaments in the jar. You can try for a layered effect, but I like having them in the jar in a random order.

Put on the lid.

Attach the tag to the ribbon, and tie in a bow around the lip of the jar.

Super Simple!

If you don’t have tags around, grab a rectangle of cardstock, cut off two corners and voila! A tag!

Ornaments in a Jar Neighbor gift

Make sure to come back tonight for more fast and simple Holiday crafting ideas… Craft Lightning is going on all week long! And if you missed the beginning of the series, check out the Day 1 Roundup, my Felt Frame Ornaments, Day 2 Roundup, and my Gilded Block Ornaments.

Craft Lightning Holiday Edition – Day 2 Roundup!

It is only Tuesday, and already I’m super excited by all the crafting that has been going on this week! It is Craft Lightning week, which is when Angie from The Country Chic Cottage and I get together with a bunch of our blogging pals to put together an entire week loaded with fast crafting tutorials. And, while this is 30 Minute Crafts, we like to up the ante by only including 15 minute crafts! It is amazing how much crafting you can do in just 15 minutes. Check out all of these awesome 15 Minute or less Holiday Craft Tutorials!

This first project is simple to make with a crafty cutter – while the cutter is doing the intricate cutting, you can work on putting together the pieces for a fabulous holiday gift box!

Reindeer Gift Box at a Little Craft in Your Day

These Vintage inspired ornaments are simple to make, and super quick, too! You can customize the colors to match your holiday decor (or that of a friend if you want to give them as a gift).

Vintage Inspired Ornaments at DIY Inspired

Looking to add some giggles (and potty humor) to the holidays? How about the gift of Snowman Poop… with a free Snowman Poop Printable Poem.

Snowman Poop - 4 You with Love

Snowglobes are iconic holiday decor – get the look without the water with these beautiful waterless snowglobes.

Waterless Snow Globes - Organize Your Stuff Now

And if you love that snowglobe look… how about a snowglobe ornament? Easy to make with just a few supplies.

Mini Tree Ornament - Practically Functional

Do you love adding some sparkle to the holidays? Then you’ll love this glittery and oh-so-simple glittery pinecone centerpiece.

Easy Christmas Centerpiece - Seven Alive

Jessica from Mad In Crafts is determined to use every single part of her thrifted plaid shirts… including the placket! Yup, check out this genius no-sew Button Down Votive Holder.No Sew Button Down Votive Holder - Mad In Crafts

Angie, my crafty partner for every Craft Lightning week, is the queen of Cootie Catchers. She makes one for just about every occasion, and they are all adorable. This free printable holiday cootie catcher is no exception – head on over and print it out!

free printable christmas cootie catcher - the country chic cottage

I shared a simple and elegant ornament – a gilded vintage block ornament to hang on your tree!

Vintage Block Ornaments at 30 Minute Crafts dot com

Whew! I can’t believe it is only the second day of Craft Lightning! Be sure to check out the Day One Roundup and my Simple Felt Frame Ornament from yesterday… and come back tomorrow for more fun, fast holiday crafts!

Vintage Block Ornaments

Vintage Block Ornaments at 30 Minute Crafts dot com

Last month, I went to a one-day blogging event over in Southern California, called the So Cal Social. Two very dear blogging friends, Vivienne and Beverly put on the event, and it was wonderful. An afternoon of strolling around Downtown Orange, popping into unique shops of all kinds – including some amazing vintage shops. At one of the vintage shops (Vintiques Home Decor)I found a stack of old blocks. I knew right then that the blocks would be perfect for making custom ornaments. So I dug through all the blocks to find my family’s letters… C, J, L, B.

At first I thought I’d just add a hook or loop of some kind and hang them as-is… but then I got the idea to glam them up a little bit with some Gilding. And that’s how today’s Craft Lightning project was born! That’s right… I got so excited sharing all of this I forgot to mention that this week is Craft Lightning week! All week long I’ll be sharing a new fast craft (15 minutes or less) right here, and Angie from The Country Chic Cottage will share a fast craft over on her site. Then each evening, I’ll share a round-up of fast crafts from my blogger pals that are joining in this week. So much fast holiday crafting going on around here… if you can keep up, we’ll have you ready for Christmas before you even have Thanksgiving dinner!


wooden blocks

On to today’s craft! What you need:
Wooden blocks
Gilding Adhesive
Fine-tipped paintbrush
Gilding
Ribbon
Hot Glue


Clean off your blocks if they are dirty. Then paint on the gilding adhesive with a fine brush. Just paint the letter and any border. Leave the background alone.

paint on adhesive

Once the adhesive dries (it took about 5 minutes – you can tell it is dry when it is all clear), push the shiny side of a gilding sheet onto the block.

press gilding to block

Lift the gliding sheet off. If the gilding didn’t adhere in any areas. Press a fresh part of the sheet back on, and press firmly again, rubbing the gilding into place to secure it to the glue.

brush away gilding

Use a stiff-bristled brush to rub away any excess gilding.

I couldn’t find a block with a raised “L”, so I picked this one… I think the gilding really makes it shine.

gilded blocks

Once your blocks are gilded, grab a length of ribbon, and tie it in a knot. Place the knot on one of the edges of the block, with the two raw edges of ribbon running down different sides of the block. Glue the ends in place.

Glue on ribbon

It is that easy! Fast crafts are so addictive, aren’t they? Come back tonight for my Craft Lightning Day 2 Round-up… I’ll be sharing more fast holiday craft tutorials from friends around the web. And if you missed it, be sure to check out yesterday’s Craft Lightning Day 1 Roundup, and yesterday’s Fast Felt Frame Ornament Tutorial.

Craft Lightning Holiday Edition – Day 1 Roundup!

YAY! The First day of Craft Lightning is here… which means I get to share with you all of these amazing crafts that other bloggers put together. The best part? Each of these fast holiday crafts can be whipped up in 15 minutes or less! In the craft world, it doesn’t get much faster than that, does it?

First, how cute is this Mason Jar Cozy from Patchwork Posse? If you know how to sew a straight line, and have a spare quilt block or scrap of fabric, you can totally whip one of these up!

Patchwork Posse Mason Jar Cozy

Are you a washi tape fanatic (admit it – who isn’t), and want to add a little washi to your tree this year? How about this Great Washi Tape Ornament? Easy to make and totally customizable!

LisaStuf Washi Tape Gourd Ornament

Mason Jars are another passion of mine. How adorable is this Mason Jar Snowman from Creative Cynchronicity? I’m over the moon for this project.

Mason Jar Ring Snowman Ornament - Creative Cynchronicity

For all of you “non-crafty” folks out there… this next project is super simple that even someone who truly cannot craft (and I have never met such a person) could pull this off. Super easy, super cute… mini Thankful Sticker Pumpkins.

Mini Thankful Sticker Pumpkins - Sew Country Chick

Looking to spruce up your living room with a little holiday decor, or make a simple gift for a friend or neighbor? These Holiday Coasters take very little time to make… and are a perfect, simple gift!

Christmas Coasters - Mommy Envy

Do you know yet how to set your holiday table? If not, you’ll want to make some custom Christmas Napkins to celebrate the holiday…

Christmas Napkins - 4 you with love

If you’re serving buffet style, or want a little decor for your mantlepiece, whip up a simple yet spectacular holiday banner.

Thanksgiving Printable with Banner - The Creative Mom


If you’re a card-maker or scrapbooker, you have lots of scrap paper around… perfect for whipping up these adorable gift tags!

Scrap Paper Gift Tag - My Card Party

Angie from the Country Chic Cottage, my crafting partner for this series, whipped up a great little holiday treat with these adorable snowmen. Yum! Snowmen on a stick!

10 minute snowmen treats - The Country Chic Cottage

And I whipped up a super fast and simple ornament with my kiddo – just a little felt, paper, glue and ribbon to make a felt frame ornament.

Felt Frame Ornament

Craft Lightning will be going on all week! Be sure to stop by every day for some fast crafting fun! Each morning I’ll be sharing a simple Holiday craft that takes 15 minutes or less… and every night I’ll share the round-up of other bloggers joining in on the fun! See you tomorrow!


Simple Felt Frame Ornament

Felt Frame Ornament

Being a mom, I have to take credit wherever I can get it. Let’s face it – nobody is going to thank me for mopping the floors or making sure they have clean clothes to wear. So, when I made this simple felt ornament with my son, and he was over the moon about it, I let him pour on the thanks. Because it doesn’t matter that it took only a few minutes. What matters is that we spent those minutes together, creating a holiday keepsake that will last for years.

This project is the first in this year’s Holiday Edition of Craft Lightning. Angie from The Country Chic Cottage and I do this series together, where we each share a quick craft that takes 15 minutes or less to make… and then we invite some of our blogging pals to join in! Each day come here to see a fun, fast Holiday craft… then come back each night for a round-up of all the bloggers that are joining in!

Felt Frame Ornament SuppliesHere’s how to make your own simple felt frame ornament. You’ll need:
Felt
Pinking Shears (Zig-Zag scissors – but you can use regular scissors for a less fancy edge)
Ribbon
Hot glue (you could use regular glue)
Picture drawn by your child, or a photo.


Start by cutting a rectangle out of a double layer of felt.

Cut two felt rectangles

Fold one of the rectangles in half, and cut a rectangle out of the middle to make a frame.

Cut out Center of Frame

Cut a piece of ribbon.

check placement of image

Glue the photo and ribbon onto the back piece of felt.

place drawing into felt ornament

Glue the frame piece down on top, and your ornament is all done!

Remember to come back tonight for more Craft Lightning fun!

I’m excited for another week of Craft Lightning! That’s right, this week Angie from the Country Chic Cottage and I are doing another awesome week of fast crafts – projects that can be done in 15 minutes or less. And, we’ve rounded up some of the most creative quick crafters in the blogosphere to join in! Each day, come here for a fun Holiday quick craft, and every night come back for links to several other blogs to see their fun and fast holiday crafting tutorials.

And, we want  you to join in! If you have any fast holiday crafting tutorials, link them up below!


https://30minutecrafts.com/2013/11/3083.html

Styrofoam Reindeer Ornament

Reindeer Ornament from Styrofoam BallAngie and I did some Crafty Hangouts this week… you can check out the whole series that we participated in with other bloggers over at Crafty Hangouts .com. In this video, I show you how to make a simple Reindeer ornament. This reindeer is obviously Rudolph since he has a red nose. But you can make Dasher, Dancer, or Blitzen if you want… especially if you don’t have a red pom pom on hand.

To make the reindeer ornament (which, if glued to a napkin ring could be part of a cute place setting), you need:
Styrofoam Ball
Styrofoam Cutter (optional – you can use the whole ball if you want)
Decoart Multisurface Paint in Coffee
Paintbrush
Googly Eyes
Red Pom Pom (or black, brown, or white)
2 Pipe cleaners (in the antler color of your choice)
Ribbon to hang & Hot glue to attach ribbon

iframe src=”//www.youtube.com/embed/ix35FIYtDg8″ height=”315″ width=”560″ allowfullscreen=”” frameborder=”0″>

Gingerbread House Kit

Gingerbread House Kit at 30 Minute Crafts

Have you started your giant list of people you need to make gifts for yet? All the neighbors, teachers, friends, and more that all need “something”. The cost adds up… and so does the time if you like making gifts! Instead of baking up trays of holiday cookies and fudge, or going to the store to buy a stack of gift cards, make these simple and fun Gingerbread House kits!

Gingerbread House kits are a super simple idea for making holiday gifts this year! Each Gingerbread House Kit costs $5-8 each to make (less if you’re a budget or bulk shopper), and it is a holiday gift and holiday activity all rolled into one. Winning.

Mason Jar Gingerbread House SuppliesTo make your Gingerbread House Kit you’ll need:
Mason Jar
Ribbon
Tag
6 Graham Cracker Squares
Assorted Small Candies (I used mini M&Ms, Starburst, and Sweet Tarts)
Royal Icing in Ziplock Bags (I use the Wilton Royal Icing Recipe – Powdered Sugar, water, meringue powder)

Start by making the Royal Icing. This takes about 10 minutes. Just sift together the powdered sugar and meringue powder, add water, and mix with an electric mixer. I live in Vegas where the air is super dry, so I always have to add a couple extra tablespoons of water. But don’t add too much! You don’t want runny icing!

Scoop about 1/4-1/2 cup of icing into the corner of a ziplock bag. Push the icing to the corner, squeeze out the air, and seal the bag. If you’re making several kits, go ahead and prep all your icing bags at once so that the icing doesn’t dry out.

Tuck your icing bag into the bottom of your mason jar. Add your 6 graham cracker squares. Then start pouring your candies around the crackers.

Put crackers and candy in jar

Fill your jar up to the top. Yum!

Fill Jar with Candy

Secure the lid, then add a tag with a ribbon.

label and ribbon

The recipient can use the lid as the base for their gingerbread house. All they do is clip the corner off of the bag of icing, and start building!

Mini Gingerbread House on a Mason Jar Lid

So fun! They get to make a gingerbread house themselves, and when they’re done looking at it, they have a sweet snack!