Simple Wooden Santa

Simple Wooden Santa on 30 Minute Crafts dot Com

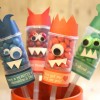
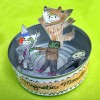
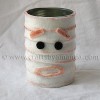
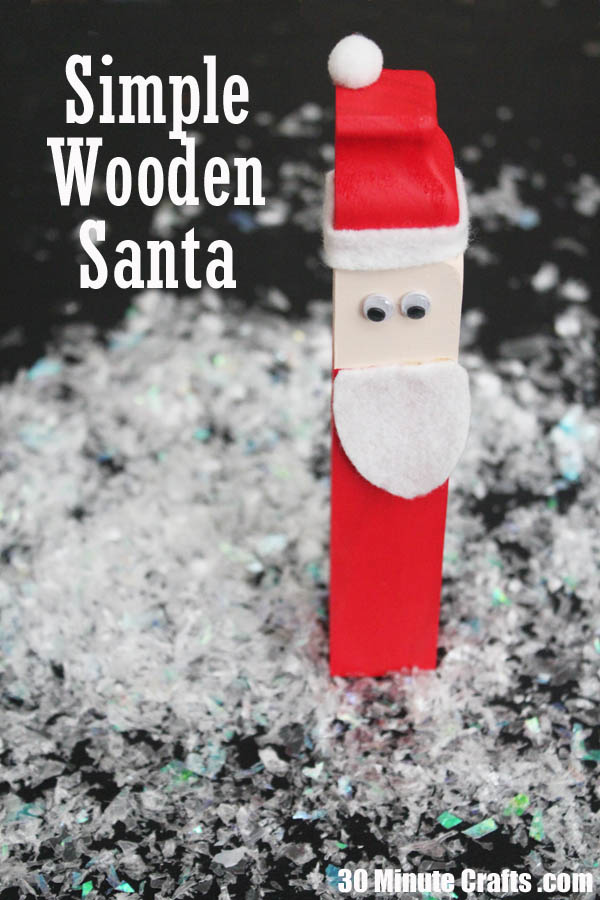
I was strolling through the hardware store earlier, wanting some ideas for Christmas projects. I was in the “wood bits” section, and KNEW that these wood bits would make a super cute, super simple Santa. Because c’mon, how cute is this guy? Just a piece of decorative wood trim, some paint, felt, and (of course) googly eyes… and ta-da! Santa. You could whip up a whole army of these little guys to give as gifts. The wood trim cost me less than $.50 a piece (SCORE!), and everything else I had on hand.

Here’s what you need to make your own simple wooden Santa:
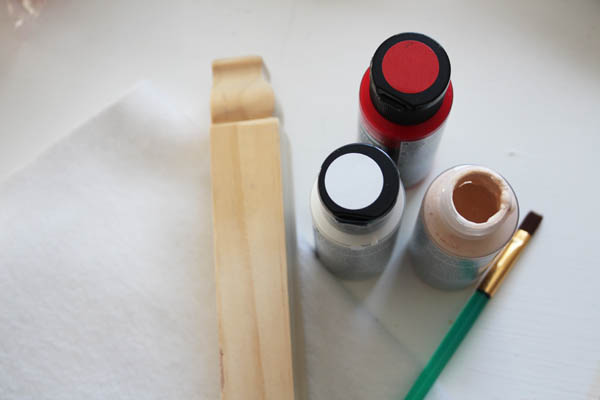
Supplies for Small Wooden SantaWood trim
DecoArt Multi-Surface Paint – Red and a skin-tone
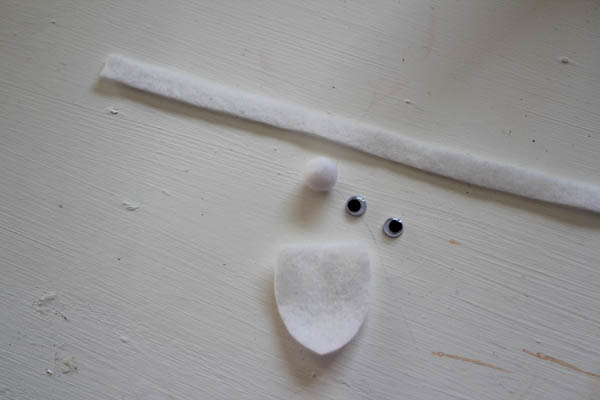
Scrap of white felt
Scissors
Paintbrush
Googly Eyes
Hot Glue Gun
Small White Pom Pom


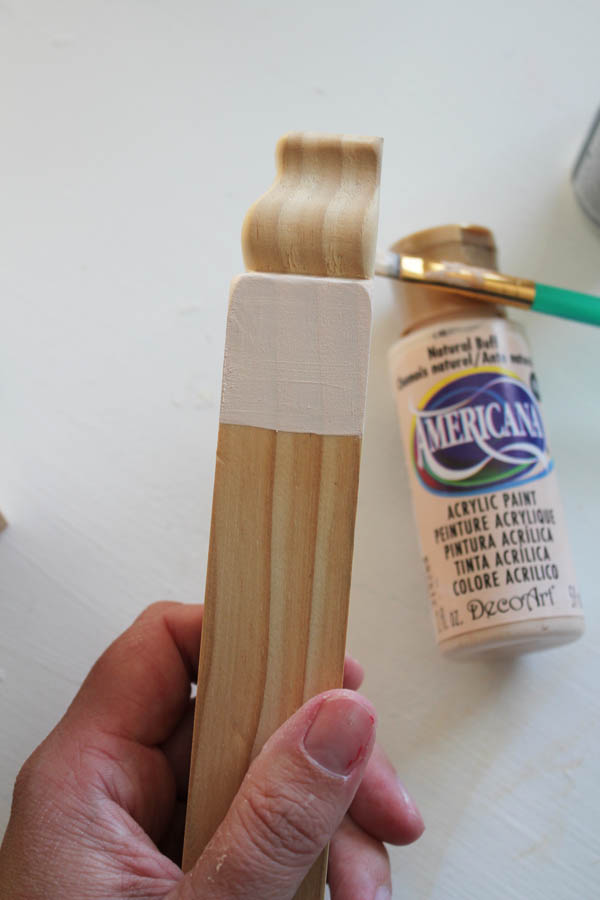
Start by painting the face with a skin-tone paint. Whatever skin tone color makes you happy works here. Paint from the notch down about an inch or an inch and a quarter. I didn’t measure, but if you want to measure and draw a pencil line with a ruler, I totally support your OCD.

paint face

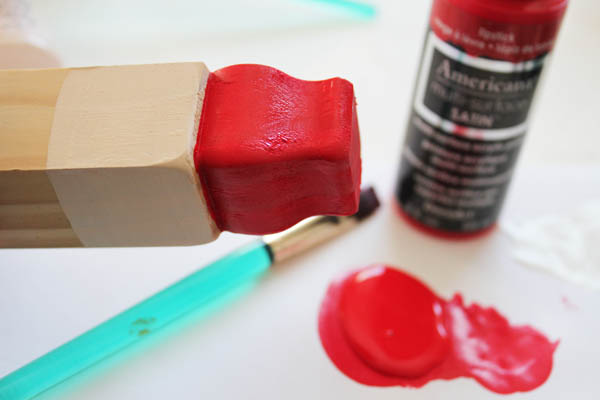
Paint around all 4 sides. Then grab your red. Paint the hat on all 4 sides.

paint hat

This raw pine SOAKS up paint, so it dries super fast. Which is awesome. While you’re waiting for the top to dry, go ahead and prep the felt pieces. Cut a little beard shape, about the width of the wooden piece, and a strip for the hat. Grab your googly eyes and pom pom.

Grab Felt Accessories

By now your paint should be dry enough that you can handle it to paint the bottom. Paint the bottom red on all 4 sides.

paint santa body

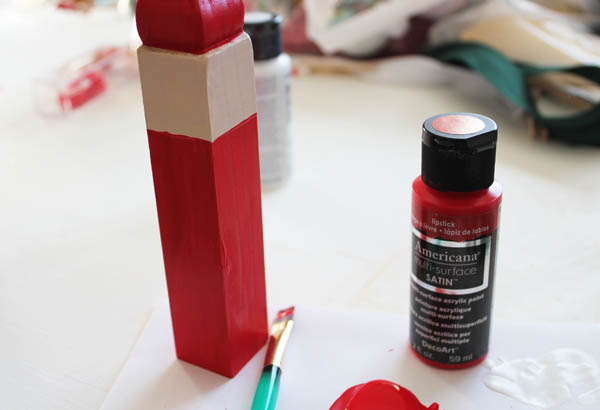
BTW – I’m loving these Americana Multi-Surface Paints by DecoArt. One coat and DONE. I reach for these paints all. the. time. And it doesn’t hurt that the lipstick red shown here is my favorite shade of red.

Ok… back to the tutorial! Once you’ve painted the bottom, grab your glue gun, and start accessorizing Santa.

glue on beard and hat rim

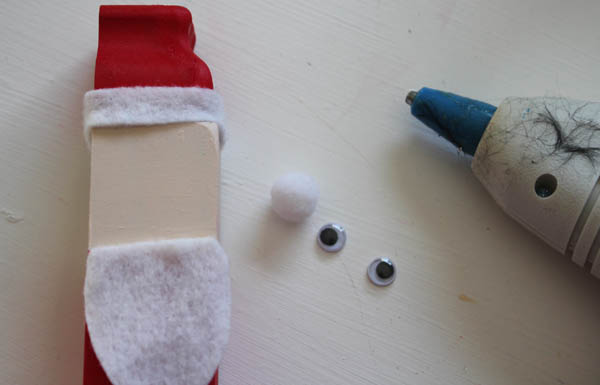
Pick a side (any side) to be the front. Glue on his beard, and the white trim all the way around the hat. Then glue on the eyes and add the pom pom. If you’re a great painter, you can paint in cute eyes and give him rosy cheeks… but that was too much detail work for me when a set of googly eyes are just as cute!

Add Eyes

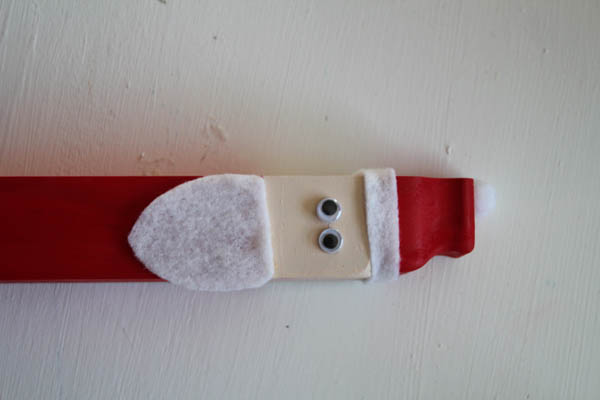
And that’s it! Go whip up an army of Santas!


30 Minute Snowy Bowl Holiday Decor


holiday bowl

The Holidays are here. We can ignore it, or we can embrace it. I’m choosing to give the holidays a giant bear hug. Because before I know it, all of this fun gift-giving, holiday crafting, family time will be over… and I’ll have to wait until next year. So I’m perfectly fine with Christmas taking over November.

I am, however, taking it a little slow. I don’t have all my holiday decor up yet. I’m slowly bringing out pieces, bit by bit. Our Holiday tradition is to put the tree up the day after Thanksgiving… we might wait that long, or we might go a bit sooner this year. We’ll see.

This simple holiday bowl is a great transition piece. I can put it out now, and keep it up through the holidays and into January, as part of my winter decor. Holiday Decor that extends beyond the season – winning!

I made this project as part of a sponsored campaign with Martha Stewart Crafts. They sent me a box of goodies to play with, and will send me a little something for my time. And I get to share this super easy craft with you!

suppliesWhat you need to make this bowl:
Glass Bowl (I got mine from the Floral section at Michael’s)
Rubbing Alcohol and Paper Towel
Martha Stewart Decoupage Medium in OPAL
Martha Stewart Decoupage Papers
Martha Stewart Decoupage Brush
Scissors


The process is super simple. After cleaning the bowl thoroughly with alcohol and a paper towel to remove any smudges or oily fingerprints, brush some Decoupage Medium on the bottom of the bowl. Brush some more onto the Decoupage paper, and press onto the bowl. I chose to have the sliver side in, but you can go either way.

If your bowl is curvy, like mine, the Decoupage Paper won’t lie flat. I cut each section to help the paper curve around the bowl.

cut paper

Working on glass has its own special challenges. It is nearly impossible to get a perfectly smooth finish – so instead of fighting it, I embrace the texture. I pulled lines of the Opal Decoupage medium down the sides of the bowl to get a pretty opalescent finish. Around the Decoupage paper, I stippled my brush to give lots of texture. That texture will also grab the light and help the sheen of the finished project.

decoupage on glass

Just let the bowl dry overnight, and you’re all set! … and since the Martha Stewart Decoupage medium is dishwasher safe, I’ll be able to keep this bowl clean and sparkly!

opal decoupage bowl

Follow Plaid Crafts on Facebook, follow the Martha Stewart Crafts Pinterest Board, and sign up for the e-mail newsletter for more Plaid Crafts and Martha Stewart inspiration!

And here’s some more great project inspiration as well…

Easy Holiday Ornaments!

Jingle Bell Wreath Ornaments

It is Holiday Hangout time again! Check out all the fun posts on Crafty Hangouts this week! Today, Angie and I are sharing a couple fun ornaments… I’m making a super simple jingle bell wreath, and Angie is making a button Santa.

The jingle bell wreath is easy to make, and I take you through the steps. All you need is a red pipecleaner, a green pipecleaner, and some bells.

Angie had some technical difficulties, so she takes you through the steps to make her button Santa in the second video… the joys of crafting live on air! HA!

Here is the second video so that you can get the details on how to make the button Santa!

Simple Fall Wreath

I know that once November 1st hits, we’re supposed to be all gung-ho for Christmas. And I promise you, I really AM. In fact, I might start decorating the house for Christmas this week. Maybe. The jury is still out… but before I dive head-first into sleighbells ringing, snowflakes on my nose,  and the scent of pine, cinnamon, and mulling spices, I want to take a minute to just enjoy fall. With a simple wreath.

Really. We JUST the sugar-fueled costume frenzy of Halloween. Before we buy postage for Christmas cards, put up trees, and start wrapping gifts, let’s enjoy fall. Let’s take a deep breath of the crisp air and stop. Instead of wracking our brains each day to figure out what we’re thankful for so that we can share it on our Facebook page, let’s take that moment to actually BE thankful for this moment… and then take the next 30 minutes to craft. Like making this fun and simple fall wreath over at Pretty Prismatic. Because Christmas will be here before you know it… and as long as the stockings are hung by December 24th, Santa will get them filled.

Fall Wreath - Pretty Prismatic

You’ll want to pin this to your Autumn Crafts Pinterest board… but be sure to pin from the original source.

Fast Paper Flower Wreath

My mom’s favorite flowers are Mums. She loves mums, and I think they’re great fall flowers. I’d love to make nice fall mums out of paper using this paper flower tutorial, out of red, yellow, orange, and other great fall colored tissue paper, and use those to make a great (and fast) fall paper flower wreath!

paper flower wreath

Pin this to your crafty ideas Pinterest board, but be sure to pin from the original source!

15 Minute No Knit Scarf

15 Minute No Knit Scarf

I’m “yarn challenged”. I don’t knit, and I don’t crochet. So I rarely head over to the yarn aisles of the craft store. But on a recent trip, I had my mom with me. She does knit and crochet (further proof that I was a difficult child – my mom can practically crochet in her sleep, but I don’t even know how to hold a hook). My mom was looking for some yarn for a crochet project, and I was wandering along the aisle, fondling the soft yarn, the fluffy yarn, and checking out some of the new, unusual yarns.

I came across this yarn from Lion Brand Yarn. It is designed for people like me. Seriously. Awesome stuff.

pre-knit yarnI made a scarf with a single skein of this yarn, in 15 minutes. With no hooks, and no needles. The basic directions are right there on the package, I just added a little to it.

Very important: Before you start, take off any rings, bracelets, or anything that will snag. Then thread one end of the yarn, and threading it over your non-dominant hand. I’m right handed, so I threaded it over my left hand.

cover arm with yarn

Once you have it all threaded, grab the end by your elbow, and pull it to your hand so that the two ends meet, and the previously elbow-end meets with the hand end.

make ends meet

Grabbing the now doubled end, pull it off your arm, slowly, matching up the two layers to make one thicker piece.

pull over no knit scarf

That’s where the instructions on the packaging end. I went a little  further. I repeated the process,  making the scarf even thicker. This makes the scarf half as long as well, which was perfect for me.

The last little modification was with the end. After threading everything through twice, one of my ends was a little ragged.

end hanging out

I tucked the excess end up into the body of the scarf, then tied a knot in the end.

tie end in knot

And just like that, a cozy scarf for this cool weather!

easy to make no knit scarf

Snow Ornament

snow ornament at 30 Minute Crafts

I love making ornaments. Every year I make more… it doesn’t seem like there is such thing as “too many” ornaments. And when I decorate my tree, I take time to remember when the ornaments were made. Like the wooden ornaments I made for my first tree. Or the felt ornaments made with friends. Each is like a miniature time capsule. This year, I thought I’d make some ornaments with names on them. My son is old enough to read his name, and he loves seeing his name on things. I’m making ornaments for each of my nieces and nephews, which I’ll attach to their Christmas gifts. Fun, right?

Snow Ornament suppliesThese ornaments are super easy to make! Here is what you need:

Ornaments (glass or plastic)
Fake Snow (this is from Darice, it is basically shredded Cellophane)
Funnel (or paper and tape for making a funnel)
Darice Snow Writer
Ribbon (optional – for hanging)


Open up the ornament by pulling off the cap. Insert your funnel, and pour in the fake snow. You’ll need to push the snow through the bottom of the funnel. I used the back of a paintbrush, but a pen would work just as well. Keep going until you fill the ornament.

fill with snow

Put the cap back on, and pull out the Snow Writer. If this is the first time you’re using it, shake it so that all the paint is at the tip. Squeeze some out onto a scrap of paper until it flows smoothly, then start writing your name. Don’t worry about perfect – part of the fun of these ornaments is that they are made with your handwriting.

write on ornament

That’s it! Just set the ornament aside to dry, and add a loop of ribbon if you like for hanging.

Snow Writing Ornament

You can always add a date, or a location to the ornaments if you like.

This project is part of the “No Ugly Ornaments” series over at My Very Educated Mother. Go check out all the other awesome ornament projects this week!
 photo NUO2013_zps3547e5dd.png

Scrabble Tile Ornaments

Are you ready for all the countdowns? You know… less than 55 days until Christmas… only 7 weeks until Christmas… as if Christmas isn’t going to suddenly be here before we know it without us counting down the days, minutes, hours, seconds, and Saturdays until the big day arrives.

Some of us have been preparing for Christmas for months already. Or, I should say, some of YOU. I have been happily procrastinating. But now the countdowns have begun, and with them the late nights of crafting to come up with the perfect gifts for EVERYONE.

And so the list making begins…

But between the lists, cards, gift making and wrapping, I hope to find some time for ME. Some me making. Like some fun ornaments. And to help inspire me, Erin from My Very Educated Mother has come up with a fun week-long series called “No Ugly Ornament”. All week long, she and many others will be sharing fun DIY ornaments. I have a fun one planned for tomorrow!

Check out her ornament post for today – fun Scrabble Tile Ornaments!

Scrabble Tile OrnamentsPlease pin this project to your holiday ideas Pinterest board (because it will help get everyone else into the Christmas frenzy… er… spirit), but be sure to pin from the original source.

Fast and Easy Monster Crafts

Looking for some Monster decor? A craft to entertain the little monsters in your life? Just need a little monster crafting fix? Whatever your reason for wanting a fast and easy monster craft, here are over 30 great and simple monster crafts.

Over 30 Fast and Easy Monster Crafts copy


Last Minute Trick or Treat Bag

15 Minute Trick or Treat Bag

Every Year I leave making a Trick or Treat bag until the last minute. Sure, I could send my kids out with a pillowcase… but carrying a pillowcase made heavy with candy is rough on young hands. I could give them a plastic grocery bag, but my inner DIY-mama cringes at the thought! So I came up with a fast and easy trick or treat bag, based on my fast bag from a t-shirt. That’s right, this fast and easy trick or treat bag is made from a plain ol’ shirt! Oh, and if you want to know how to make the wizard costume, I have a Wizard Costume Tutorial.

shirt bag suppliesTo make your own, you need:
A t-shirt
Scissors
Sewing machine (we’re just sewing one line, and it doesn’t need to be perfect)
Paint & stencil (optional)


Start by cutting off the neck and sleeves.

cut neck and sleeves

Turn the shirt inside-out, then stitch all the way across the bottom. If your machine has a stretch-stitch, use that (A stretch stitch looks like 3 lines of stitching, but all on top of each other). If not, you can stitch forward an inch, then back an inch, then forward two inches, then back an inch, then forward two, back one… and keep going to the end.

stitch down the bottom

Turn the shirt right-side out again. You can be all done here, but I chose to stencil on mine.

stencil onto bag

Just a quick and easy stencil, and the bag is all done!

stencil design

If you use an old Halloween t-shirt, you can completely skip the stenciling, and still have a fun bag… close to Halloween you might find discounted Halloween shirts at the stores… so grab a “boo” or “witchy” or “gimme the candy” shirt, and turn it into a Halloween Treat bag!