30 Minute Bible Figure Costume From a Pillowcase

Biblical Figure Costume From a Pillowcase in 30 Minutes

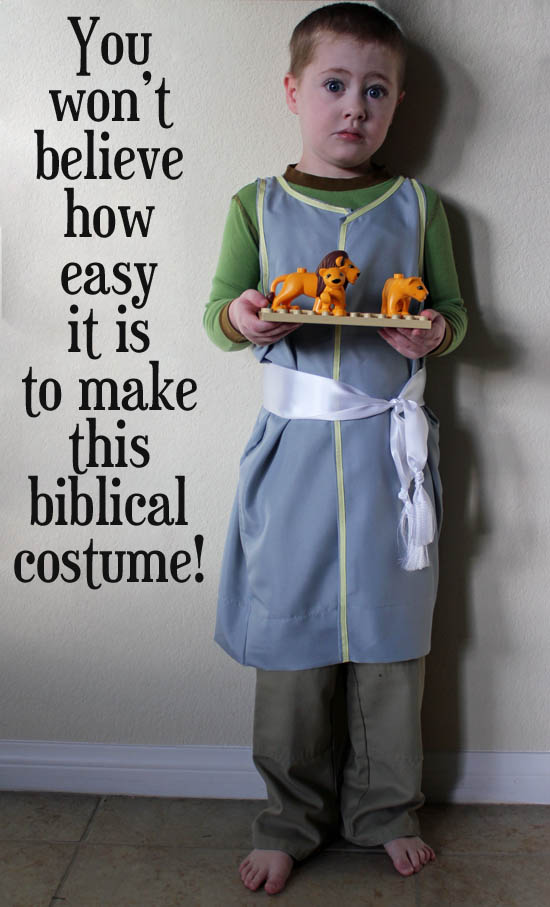
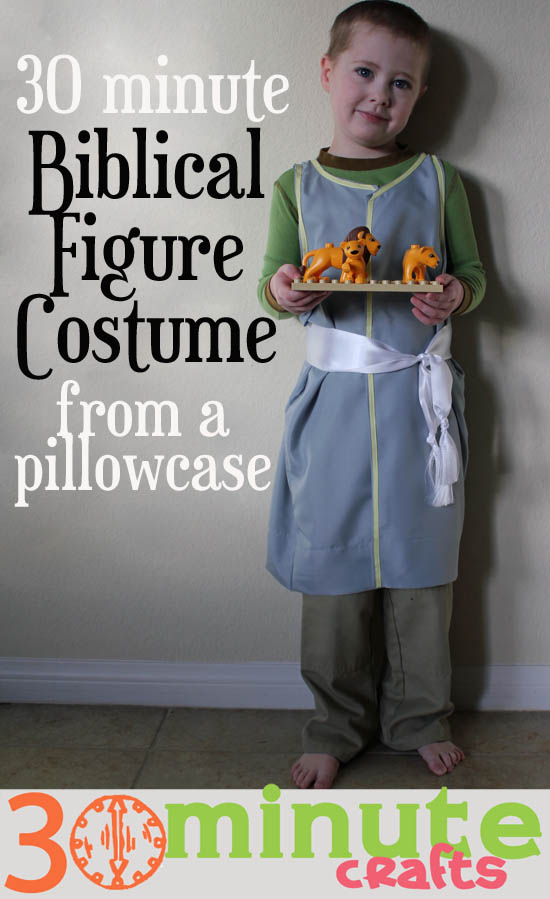
Making a biblical robe costume for a child couldn’t be easier when you use a pillowcase as the base. Depending on the size of the pillowcase you begin with, you can make the costume for preschool or grade-school aged children. This biblical robe can be accessorized to become any number of famous biblical persons. Here we added lions for a Daniel in the Lion’s Den costume. With a stuffed lamb and a slingshot, this costume becomes David from David and Goliath. Print the 10 Commandments onto grey cardstock, and the costume is Moses. Add a crown of Thorns and you have a Jesus costume… there are so many ways to change this basic biblical robe to represent whatever biblical person your child is dressing up as.

My son needed to dress up as his favorite person from a bible story for school. After briefly considering sending him to school in a white t-shirt and khakis with a felt fig leaf pinned to the front, I whipped up this biblical robe costume for him to wear over khakis and snug-fitting pajama top. Using a pillowcase as the base meant no hemming, and minimal sewing.

To make a fast biblical costume, you’ll need:
Pillowcase in your choice of color
One spool of grosgrain ribbon
Several feet of wide satin ribbonChild’s t-shirt (for measuring purposes)
Sharp sissors
Clothes for the child to wear under the costume.

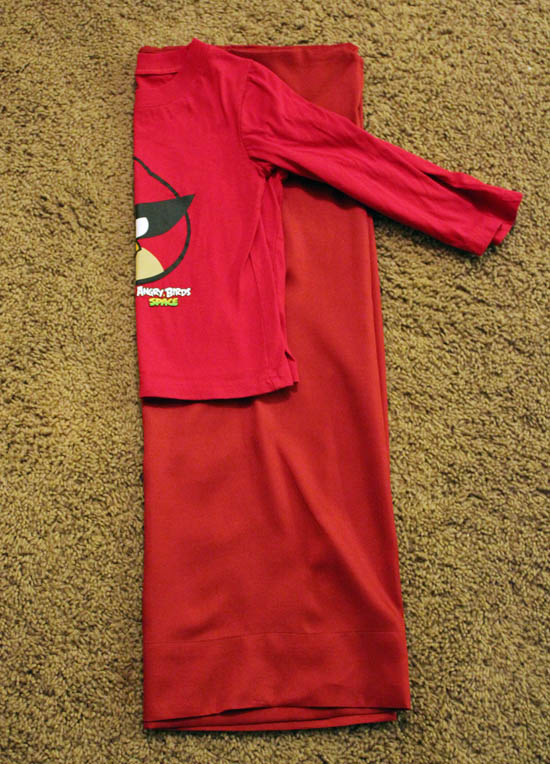
I started with my pillowcase. A standard-size pillowcase worked great for my 3.5′ tall 4-year-old. If your child is taller, you may want to use a King-sized pillowcase. I folded it in half with the opening at the bottom, and laid my t-shirt on top, also folded in half.

make a bible character costume

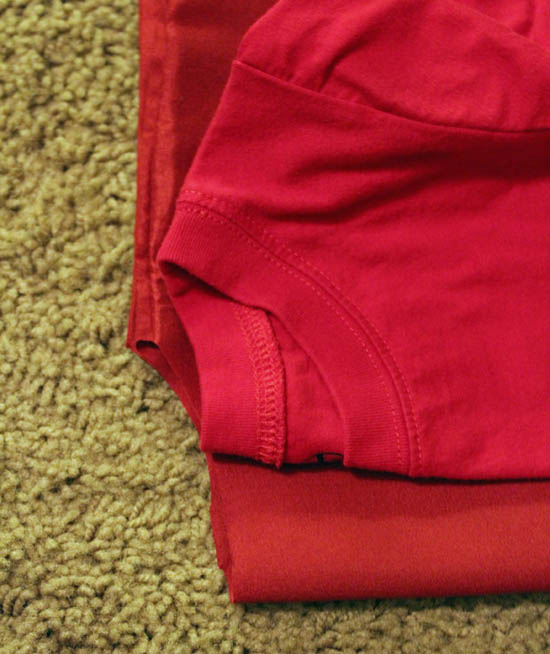
Using sharp scissors, I cut based on the back neckline of the t-shirt through all 4 layers.

cut back neck for biblical costume

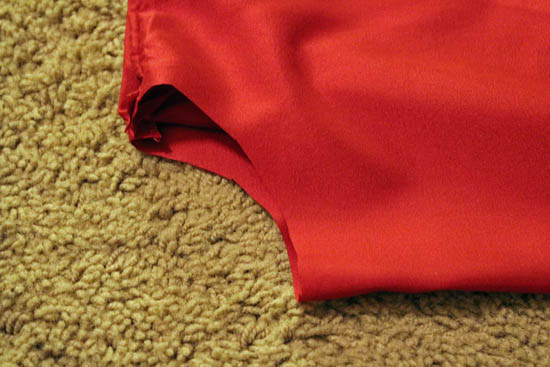
I moved the inner layer out of the way, I cut based on the front neckline of the t-shirt through 2 layers.

cut front neck of bible character costume

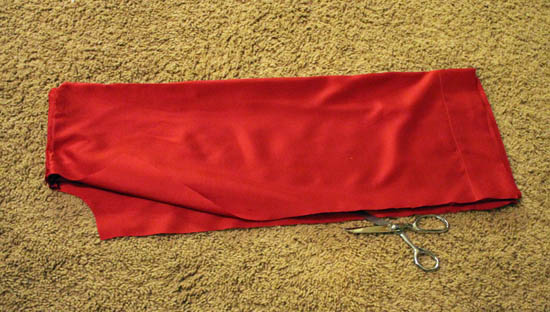
Then I cut from the bottom to the neckline, cutting just through a single layer.

cut front of bible robe costume

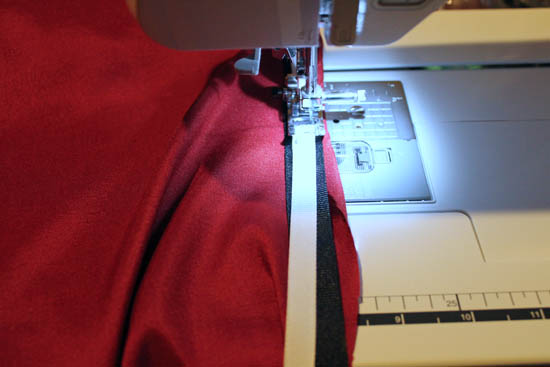
Now it was time to sew. I used a zig-zag stitch to attach grosgrain ribbon to all the raw edges. I tried with a single and a double layer of ribbon, and found that a single layer works best (a double layer is shown in the picture). I folded over the raw edge, covered it with the ribbon, and allowed the raw edge to be stitched down with the ribbon. Ironing this raw edge over before stitching may be easier than trying to free-hand it at the sewing machine, depending on your level of experience. How far you need to fold over the fabric depends on the width of your ribbon.

sew trim onto biblical robe costume

Then I made the sash. I cut a piece of the wide satin ribbon about 4″ longer than I wanted the finished sash. To give the illusion of tassles, I tied an overhand knot at each end, about 3″ away from the raw edge, then frayed the ribbon up to the point of the knot to create a “tassle” on each end.

It was that easy to make the bible character costume for my son! I made a second for him to bring to school just in case another parent wasn’t able to come up with a costume. I could see making several of these in different colors for a young Joseph, shepherd, drummer boy and Three Kings to wear as costumes in a Nativity or Christmas play. They are so fast and easy to make!

super easy biblical costume

Craft Lightning: Valentine Cards

Angie from the Country Chic Cottage and I are giving you a Valentine Video Preview today! All next week, bloggers will be sharing fun Valentine’s Videos, and today we’re giving you a preview with these fun and Quick Valentine Card ideas! We’ll be starting LIVE at 4pm PST, and if you miss the live demo, you’ll be able to watch the recorded video right after we’re done!

If you want to see more fun video crafting, check out CraftyHangouts.com

Make a hat from a Wool Sweater

Winter is the perfect time for snuggly crafts like hats, scarves, mittens, and thick wooly afghans. But if you’re no yarn whiz, and you never learned how to handle a crochet hook or knit nicely, there are still ways for you to DIY your own winter wear. You can use a sweater from your closet, or an older thrifted sweater (perhaps a sweater that shrank in the wash) and stitch up a wool hat in less than 30 minutes!

Hat from a wool sweater

If you want to keep this handy for the next time you shrink a sweater in the wash, you’ll want to pin this to Pinterest. Make sure you click through to the original source first.

Make a simple Groundhog Face

Make a simple Groundhog Face

Not every Groundhog’s Day craft has to include a groundhog popping out of a plastic cup. There are plenty of other ways to celebrate a groundhog weatherman. You can dress up as a groundhog, go outside on February 2nd, and see if you see your own shadow! This is a fun and easy craft to do with kids, to surprise your kids with on Groundhog’s day, or to weird out your co-workers with.

Supplies:
Foam Stress Ball (if you have a clown nose handy, you can use it instead)
Scissors
Black Paint (I used Martha Stewart Crafts Multi-Surface High Gloss)
Paintbrush
White felt
Hot Glue Gun

supplies to make groundhog nose

I used the foam stress-ball because they are so inexpensive and easy to find. If you have a clown nose hanging around, that might work as well.

I started by cutting a deep slit into one half of my foam ball.

cut ball

Then paint the ball black. I used the slit to clip the ball onto a plastic lid to make it easier to paint.

paint the stress balls

While the paint is drying, cut a rectangle out of the white felt. It should be about as wide as one of the balls, and about two times as long. Paint a black stripe down the center of the felt.

paint line on the felt

Once the paint on the balls have dried (about 15 minutes), you can hot glue on the felt teeth. glue them at the base of one of the slits, and make groundhog noises! Once you figure out what a groundhog sounds like… and then come back and let me know, because I’m curious.

If you want to check out some other awesome groundhog’s day crafts that don’t involve plastic cups, check out these awesome crafts my friends made:

Be okay with whatever the groundhog predicts with this Groundhog’s Day Printable.
Print up a Groundhog’s face and attach it to a paper bag to make an adorable Groundhog Paper Bag Puppet.
Make some fun Groundhog’s Day Treats to enjoy on Groundhog’s day – rain or shine!


groundhog-day-button

Knit a Scarf in 30 Minutes!

You can knit a quick scarf in 30 minutes or less using this amazingly fast method. And you don’t even need knitting needles! All you need is a couple skeins of bulky yarn and two arms!

Simply Maggie has a great video on her site that shows you exactly how you can arm knit your own chunky cowl scarf.

30 minute knitted scarf by simply maggie

I know you’re going to want to arm knit in the future, so make sure to pin this – but click through to the original source first!

Announcing the 30 Minute Crafts Dollar Store Challenge!

30 Minute Crafts is all about making crafting accessible. It doesn’t have to take a whole lot of time to get exercise some creativity – and actually finish a project! This month, Dollar Store Crafts is challenging crafters to make a project out of Dollar Store items… and in less than 30 minutes! This makes crafting doubly-accessable. Fast and Cheap!

You don’t have to use all Dollar Store items… you can find all the rules over on the Dollar Store Crafts website. And make sure you enter because I forgot the best part… I’m judging!

That’s right, I’m a guest judge for this month’s contest! I’m looking forward to all the awesome and creative projects that come out of this challenge!

30mincrafts-challenge-heade

Raw-edge non-Applique Throw Pillow

Don’t be scared by the word “applique”. Especially when applique is preceded by the words “raw-edge”. Because a raw edge applique is basically an ironed-on patch of fabric with stitching around it. And a raw-edge non-applique is probably something I just made up… because it is an ironed on patch of fabric with no stitching. Super simple, right? You can try this fancy technique (c’mon, all the cool kids are doing it) on a simple Valentine’s throw pillow. If you have a fancy craft cutter you can add vinyl lettering. If you don’t, you can paint on some letters. Or not. It would look pretty cool without.

Lovethrowpillow at crazylittleprojects

When your friends come over and comment on your cute new pillow, you can tell them that it is Raw-edge non-applique, and that you’ve pinned it to Pinterest. Make sure that when you pin, you click through to the original source.

Watercolor Pennants

Even if you count the time it takes to dry, you could probably finish these pennant banners in 30 minutes. Because there is no sewing involved. That is right – NO SEW PENNANT BANNERS! Or you could spend 15 minutes painting them, 30 minutes watching The Big Bang Theory, and then 15 minutes assembling them, and you’d have just spent an amazing hour. Go check out how to make your own watercolor pennant banners for instructions and great tips.

Watercolor pennants from Jaderbomb

I’m addicted to Pinterest. If you are too and want to pin this post, please click through to the original source.

Pom Heart in 30 minutes or Less

I love this Pom heart for so many reasons. It isn’t just traditional V-day colors. You can hang it up and enjoy it long past Valentine’s. It is quick and easy to make. It is fuzzy… I could go on, or you could go learn how to make your own pom heart plaque.

Valentine DIY pom pom plaque

If you’re pinning, be sure to click through and pin from the original source.

Simple Valentine Banner

If you have an old book that is falling apart, some construction paper, twine, and a marker, you have the makings for this adorable Love banner! Grab your supplies and read the tutorial for step-by-step instructions on how to whip up a banner that will add some quick Valentine’s spirit to your home decor.

book page love banner cover - creative carissa

If you don’t have your broken down books handy right now, you can pin this project to Pinterest… but be sure to pin from the original source.