Search Results for: 30 minute baby bib

30 Minute Baby Bib with Velcro Tabs

30 Minute Baby Bib with velcro closure

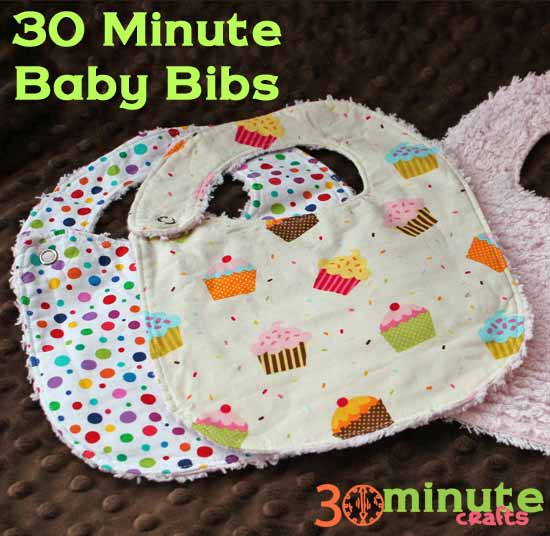
My 30 Minute Baby Bib tutorial is one of the most popular posts, month after month. And who doesn’t need a quick and easy baby shower gift? I’ve made many of these bibs myself. I’ve made them for showers I’ve planned where I did much of the planning and therefore didn’t have time to make a more time-consuming gift, but still wanted to add a touch of hand-made. I’ve made them when visiting a friend who just had a baby or who had a baby a few months ago, and I’m finally stopping by to meet the little one. Recently, I made them for a no-notice baby shower. If you’ve never been to a no-notice baby shower, it is a shower that your husband casually mentions to you the night before. These fast and easy DIY bibs come in really handy then!

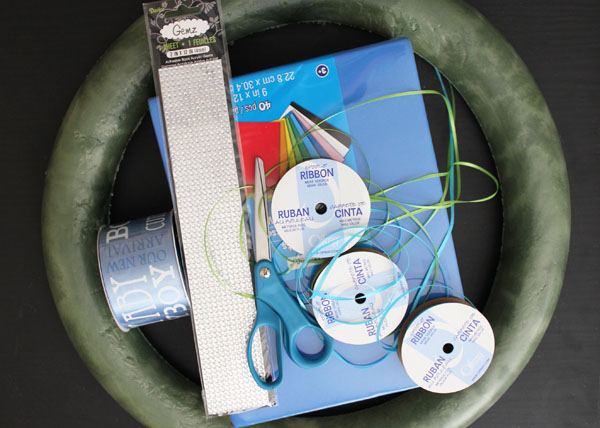
But, with no notice, I didn’t have all of my regular supplies on hand. I was all out of snaps. So I decided I’d whip out some bibs using Velcro brand hook-and-loop strips. Because I DID have Velcro handy. And I figured I would give you a little update on my original 30 Minute Baby Bib tutorial in case you want to use Velcro instead of snaps.

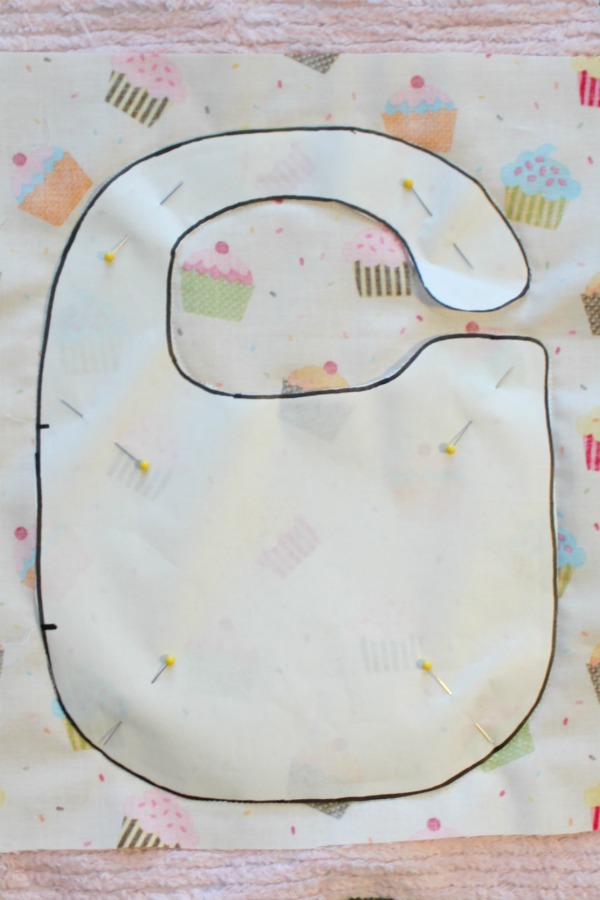
Refer to the original 30 Minute Baby Bib tutorial for the pattern and overall instructions.

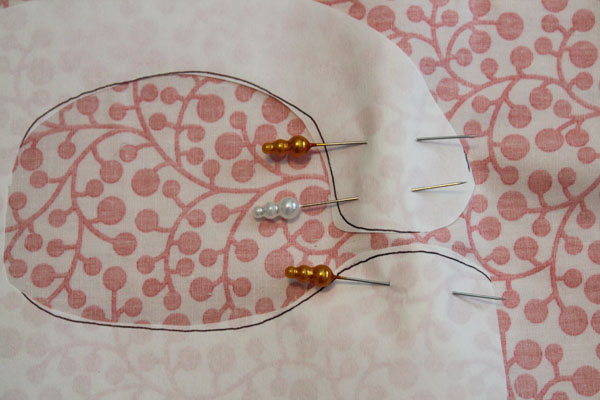
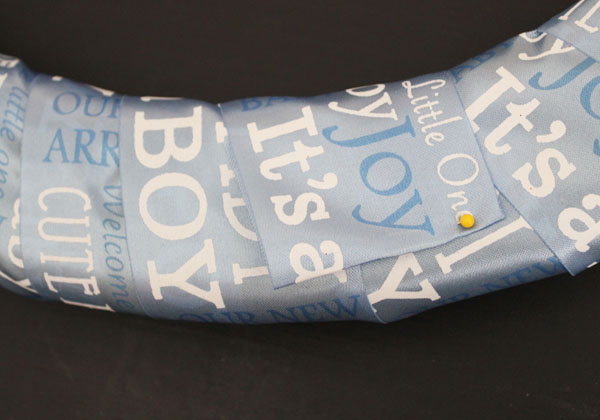
After you put the template in place, pin the Velcro to the right side of the fabric. This is what it will look like on the wrong side of the fabric, the side the pattern is on.

pins on front

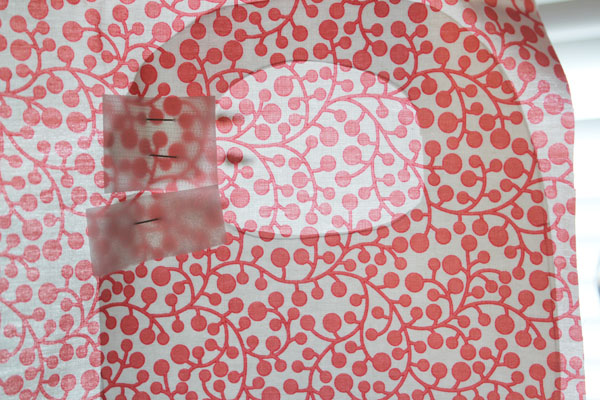
You can hold your fabric up to the light, or a window, to check the placement.

placement

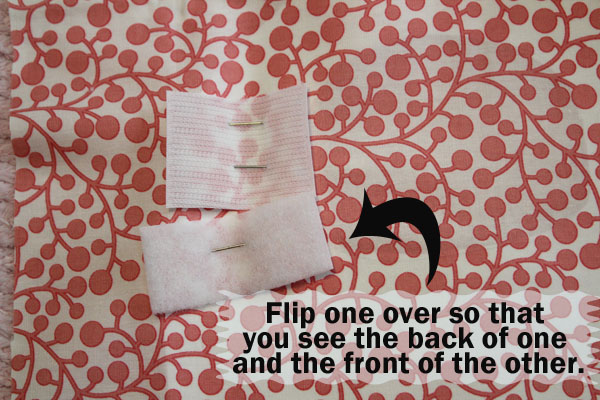
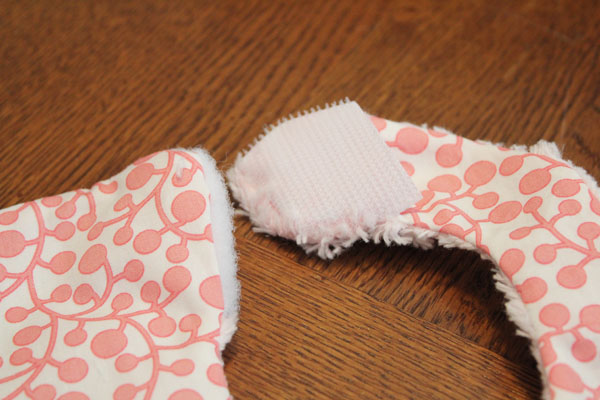
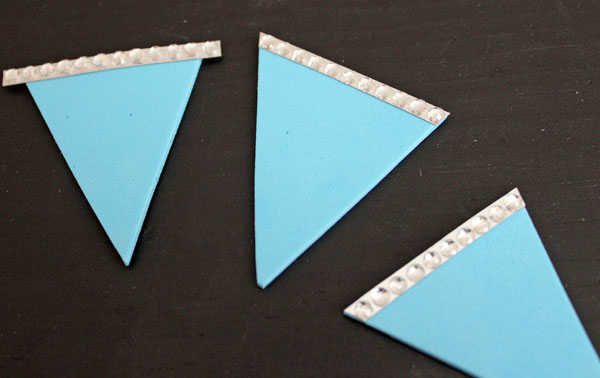
The right side of the fabric should look almost like this. In this photo, you see the hook and loop sides of the Velcro. What you really should see is either the hook or loop side on one piece, and the back of the opposite piece.

flip over one of the velcro and pin to the fabric

Then stitch around the pattern, trim, and turn as in the original instructions. Turning can be tricky if the hook side of the Velcro gets caught up in the fabric you are using. I used terrycloth, so I had a little of this.

turn right side out

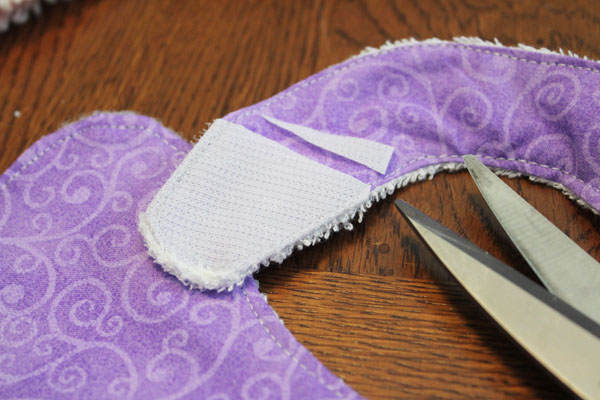
After top stitching all the way around the bib, I trimmed off any excess Velcro and top stitched down the edge of the Velcro as well.

trim velcro

FREE Printables – Boy Baby Shower Games

Are you planning a boy baby shower? It can be hard to come up with boy baby shower games that are fun but not too “cute.” And if you’re hosting a co-ed baby shower, or a shower for a mom-to-be that doesn’t usually like baby games you’re probably looking for games that everyone will enjoy.

These quick and easy games are perfect for an upcoming boy baby shower! Here are three quick and easy boy baby shower games for you to print out. All the work has been done for you – just print these out, cut them in half, and you’re ready to go.

These printable baby shower games are also great if you’re flying in for a baby shower or co-hosting a shower long-distance. You can prepare these games ahead of time to pack in your suitcase or put them in an envelope an mail them to the shower. If you’re hosting a virtual baby shower, you can put each of these games in an envelope labeled “game 1”, “game 2” and “game 3” and mail them to the shower guests. They can open each envelope at the start of the game – a simple way to play a game together without huge postage costs. Having easy virtual baby shower games is so handy!

All the games are PDF files – none are personalized in any way, so you can just print and go! You can print them on colored paper to make them more festive. Print each on a different color to make it easy to switch between games. Each sheet has 2 copies per page, saving on paper. Just cut down the middle.

Tips for Printable Baby Shower Games

If your shower is being hosted in a living room with sofas rather than a restaurant with tables, make sure to have clipboards or hard-back books that guests can use as a hard writing surface.

Make sure to have lots of pens or pencils available – not everyone keeps a pen in their purse. For fun, you can make the pens festive by gluing a pom-pom, small rubber ducky, or other item that fits your shower theme onto the end of the pen.

Printable games are great for showers at restaurants where you may not have a lot of room to move around, or for a shower at someone’s home if you’re unsure of the layout. They are also great if you have a big age range in the attendees, because printable games tend to level the playing field – regardless of age or physical ability, printable games are accessible to everyone. And having accessible baby shower games means that everyone can have a good time.

Once you have your baby shower games printed, you just need prizes! These can be super simple – candles and candy make great (and easy) prizes. You can pick candy in colors that match the baby shower, and pack the candy in favor boxes from the wedding section of the craft store to make it look upscale. Scented soaps, lotions, bath bombs, and picture frames also make great (and inexpensive) baby shower prizes and can be purchased at outlet stores.

List of Printable Boy Baby Shower Games

Boy, oh boy! – come up with as many words as you can that use the word “boy.”

How Handsome! – Does mama-to-be want the baby to have her eyes, or daddy’s? Guess which family tree she favors!

Finish the Nursery Rhyme – A baby shower classic… how well do you know your Mother Goose?

Sign up for the newsletter below to get your FREE Boy Baby Shower Game Printables

Get the FREE Printables!
Sign up for our email list to get your free Printable download files!
You’ve successfully signed up! Check your email for details.

I sent a shower package with these games, a welcome baby pennant wreath, and of course my baby shower gift! I’d made some 30 minute baby bibs out of some of my favorite boy fabrics!

Here are some more of my Baby Shower ideas… yes, I’ve run quite a few of these!!
Winnie The Pooh Baby Shower
More Baby Shower Games (with Baby Shower Bingo Printable)
Orange and Monster Truck Baby Shower
Duck Themed Baby Shower
Ideas for a baby “sprinkle”

Baby Shower Decor – Pennant Wreath

30 Minute Pennant Wreath

When having a baby shower at someone’s home, I love starting the baby shower decor at the door… by having a wreath on the door that ties in to the baby shower theme! It is an easy way for guests to know that they’re knocking on the right door, and it is a nice keepsake for the mom to take home after the shower is over. I first did a wreath last year for the Orange and Monster Truck shower I did for a friend of mine.  This wreath is a super simple, super fast, and super cute way to say “hello baby!”

supplies for wreathSupplies:
Wreath form (I used a styrofoam wreath form given to me by the wonderful folks at FloraCraft)
Wide ribbon (this should be unwired)
A pin (just one is fine)
Small ribbon or string
Hot Glue
Craft Foam Sheets
Gemz (optional)
Paint pen or permanent marker

I started by wrapping my wreath form in the ribbon. I went all the way around, then cut it off the spool and pinned the end in place.

wrap and pin wreath

I cut a strip from two different colors of craft foam, then cut these into triangles.

cut foam sheets

I added strips of Gemz to the top of the pennants, and trimmed them flush with the sides. This is optional, but I like the extra sparkle.

add glitz to pennants

On one color, I wrote “WELCOME” and on the other I wrote “BABY”.

write letters on pennants

I glued the pennants to the thin ribbon using hot glue on the back of each pennant.

glue ribbon to back of pennants

All that was left was to tie the ribbons to the wreath!

tie one side of wreath

I tied both ends to one side, and then individually tied the other sides. I trimmed the ends of the ribbon and was all done! I love fast, easy, and cute baby shower decor!

This wreath was for my sister in law’s shower, which I was regretfully unable to attend. I sent this wreath along with some fun printable baby shower games and a gift of several 30 minute baby bibs.

ps – do you see my “little helper” hand in that last photo? He really wanted to get his hands on those pennants!

The Top 30 Minute Crafts of 2012

top 30 minute crafts of 2012

2012 was an exciting year here at 30 Minute Crafts. The blog was launched in this new format, and lots and lots of fun features were shared, as well as lots of original tutorials! I’d like to share with you the top Quick Crafts of 2012, in order of the most pageviews. The featured crafts with the top hits will link directly to the post on the original site to save you an extra click.

Thanks for your support in making 2012 an awesome year! I’m looking forward to fulfilling all of your quick crafting needs in 2013!

5 Minute Shimmer Snowflake Onesie!

5 minute shimmer snowflake onesie

Just last week the stork flew by and dropped off my first nephew! I wanted to make him something fun to wear this winter, so I picked up a pack of long-sleeved onesies when I was at the store to whip up a super-simple shimmer snowflake onesie! This onesie would be great for girls as well… but there are no baby girls in the family right now.

supplies for shimmer snowflake onesie

The supplies were super simple. A package of Tulip shimmer Sheets, Onesie, Scissors, and some snowflake cutting instructions. I just googled “Snowflake Cutting Instructions” and looked for my favorite.

I started by making my square. Because of the size of my onesie, I didn’t want a huge snowflake, so I folded in the corners to make two squares – I used one to practice, and one as my final snowflake. But you can practice on paper if you prefer.

make shimmer snowflake

I folded my square to make a 6-pointed snowflake. Fold in half diagonally, then in half again, then fold into thirds. You’ll have something that looks like the picture below. Then cut off the pointy tops, and you can start creating your snowflake.

cut shimmer snowflake

Start chopping! Cut out curves, spikes, triangles, or whatever to make your snowflake. To get a pretty lacey snowflake, cut out lots. You want it to look like there is barely any snowflake left!

Once you’ve cut it out, carefully unfold it. Your sheet will stick together a little at the cutting points, so you want to carefully peel apart the layers.

Now it is time to iron it! Place it on the shirt, cover with a piece of paper, and iron it on.

iron shimmer snowflake

All that is left is to pack it up (with a couple burp cloths, and maybe a 30 minute tag blanket and some 30 minute baby bibs), and send it off to my new nephew!

Learn more about all that sparkles for the holidays by hopping over to the I Love to Create Website, liking them on Facebook, following them on Twitter, and Pinterest.

Want more 30 minute crafts? Like 30 Minute Crafts on Facebook, Follow 30 Minute Crafts on Twitter, and check out 30 Minute Crafts on Pinterest.

And check out all these other awesome shimmery projects:


I wrote this post as part of a paid campaign with (client’s name) and Blueprint Social. The opinions in this post are my own.

Quick and Easy Baby Bib

30 Minute Baby Bib

Bibs are an all-time handy must-have for every baby. And handmade bibs are a perfect baby shower gift. This is an easy baby bib that is simple to make, with no fancy applique or stitching. But it is still cute because of the printed fabric! And, they are  reversible with the chenille side being extra-absorbent! If you want, you can use terrycloth instead of chenille for the backside of your easy baby bib. Your local fabric shop should have terrycloth you can use… but if they don’t, you can buy a towel. You’ll get several easy baby bibs out of a single towel.

Supplies for 30 Minute Easy Baby Bib:

2 fabrics (I used a cotton print and a chenille)
freezer paper
marker or pen
a couple pins
your iron and sewing machine
Snaps and snap tool (if you want to use velcro, check out the 30 Minute velcro bib)

To download the bib template, sign up for our free newsletter here:

Get the FREE Printable Template!
Sign up for our email list to get your free Printable Template download!
You’ve successfully signed up! Check your email for details.
Print out the bib template, and trace it on freezer paper. Cut out on the traced line and iron the template onto the wrong side (back) of the cotton fabric. The paper side of the freezer paper is easy to write or draw on, and the plastic side irons easily onto the fabric (and removes easily later).
 
Next, put the cotton fabric onto the chenille, with the right sides together (the print side and the fuzzy side towards the middle). Pin the bib template in place through both layers of fabric. Stitch around, right next to the line. If you are careful and stay right next to the line, you can re-use the stencil on another bib. Don’t stitch along the side between the two little marks so that you have a hole for turning.
 
 
Pull off the freezer paper, and cut around the bib with pinking shears (that’s the “official name” for the sewing scissors that cut a zig-zag). Cut close to the stitching, but not so close that you risk cutting the stitches you just made. Also, cut carefully in the gap between the bib and the strap, and cut some extra “room” next to the turning hole to make it easier to tuck it in when stitching it closed.
Using pinking shears instead of regular scissors means that you don’t have to clip the corners before turning it. Yay for time-saving steps!
 
 
The next step is to turn the bib right side out through the hole you left for this purpose. If you have a turning tool or some long pointy object (but not too pointy!), use it to help poke out the curves and corners, and to turn the strap.
 
 
Once you have the whole bib turned right-side out, tuck in the fabric at the turning hole, and press everything down with an iron.
 
Once pressed, bring it back to the sewing machine and top-stitch close to the edge. This gives the bib a nice finished look, and closes the turning hole at the same time.
 
All stitched together, the bib looks like this:
 
The last step is to add a fastener for the bib strap. I love this little tool to attach snaps. I know a lot of bibs nowadays use velcro, but with a double-sided bib, I didn’t want the scratchy side of the velcro face the baby’s skin. Also, velcro can get stuck on other things in the washing machine. Plus, these snaps are super-easy to put in. Just have a hammer handy, and follow the directions on the package. However, if you really want to know how to make the bib with velcro, you’ll want to check out How to make a velcro 30-minute bib.
 
EDITED TO ADD: I’ve had lots of people e-mail me to ask about the snap setting tool. I love this tool, and actually own two (I misplaced the first one, and ended up buying a second one when I was whipping up some bibs and couldn’t find the tool). Here is an Amazon affiliate link that you can use to buy it, or just get more details: Dritz Snap Fastener Attacher Kit – “Easy Attacher”

Who knew that making a bib could be this easy? You can whip up an easy baby bib or two on the morning of a baby shower, and still have time to do hair and makeup before you go!


Pin It

Save

Save

Fast and Easy Costume Ideas

Need some fast and easy costume ideas? Here are some great ideas that you can make in plenty of time for Halloween! Each costume or accessory can be whipped up in 30 minutes or less, making a DIY costume attainable. It might even be easier to whip up a costume than to head to the store and buy one.

Over 30 Fast and Easy Costume Ideas


Also, check out the Ultimate list of last-minute costume ideas!