DIY Decorative Dish Soap Dispenser

Around my sink is a disaster of sponges, hand soap, dish soap, dish rags, and nipples to baby bottles. Not attractive. But with this quick and easy dish soap project from the V Spot, I can glam up my kitchen sink!

We all love Pinterest, but please do not pin from this post. Please click to go to the source, and pin from there.

10 Minute t-shirt skirt

It is hot, hot, hot this summer! All I want to do is hang out around the house and veg out. Preferably in one of these super comfy skirts by Blooms and Bugs. And, since they are quick and easy to make, I can whip out one (or three) in no time flat, without breaking a sweat, and still feel like I accomplished something!

We all love Pinterest, but please do not pin from this post. Click to go to the original post, and pin from there.

Want more 30 minute crafts? Like 30 Minute Crafts on Facebook, Follow 30 Minute Crafts on Twitter, and check out 30 Minute Crafts on Pinterest.

30 Minute Girl’s Outfit

My bloggy and real-life friend Abigail from Lovin’ Our Chaos made this adorable outfit for her daughter in just 30 minutes! You won’t believe how she made that cute skirt with just one simple seam… click on over to read how!

We all love Pinterest… but please do not pin from this post. Click to go to the original post and pin from there.
Want more 30 minute crafts? Like 30 Minute Crafts on Facebook, Follow 30 Minute Crafts on Twitter, and check out 30 Minute Crafts on Pinterest.

Crafty Quickies Round Up

I can’t believe our Crafty Quickies week is over! Before I get into today’s round-up, I want to give a HUGE thank-you to my co-host Angie from The Country Chic Cottage. This was her amazing idea. When she first approached me with the idea of doing a series on crafts that can be completed in 15 minutes, I thought maybe we were being over-ambitious. Though this blog is all about crafts that can be done in 30 minutes or less, she was looking to cut that time in half!
Any doubts I had were silly, of course. As you can see by the posts that Angie and I have been featuring all week, as well as the amazing crafts in the link-up, 15 minutes is oodles of time to make something! Proving that we all have time to be creative – each day or each week. We can fit crafting into even the most busy life!

The Sick Chick made this dyed scarf in 15 minutes. It is so amazing that if Angie and I do something like this again, I’m going to suggest a clause whereby all participating bloggers send a sample of their project. Because I love this scarf. Good thing there is an amazingly detailed tutorial so that I can make my own!

My co-host, Angie, created this Doily Pillow using doilies as stencils. How great is that? And you’ll NEVER guess what she used as the “base” for this pillow! So head on over to find out!

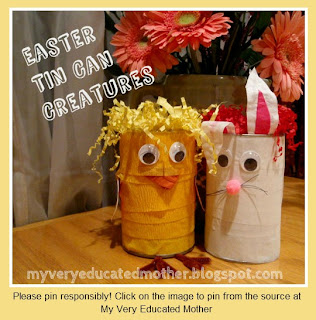
In just 15 minutes you can make a cute Easter Bunny or Chick out of recycled materials using this tutorial from My Very Educated Mother. So cute! And great Easter decor. I can’t believe that Easter is next week already! Where has the time gone?

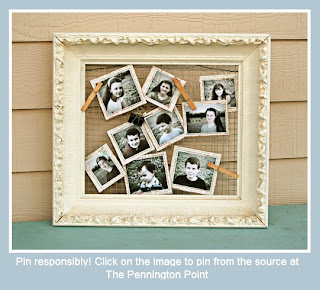
Over at The Pennington Point you’ll find this awesome photo display board. Simple, clever, and can easily be changed out as you have new photos you want to display. I love that!

And this morning, I showed you that sentiment doesn’t have to be hours in the making. It also doesn’t have to be hours in the breaking… my son decided that he “wanted” the key, and has since peeled it off. But, it wasn’t a labor-intensive project that is totally ruined… so I went with it. Yet another great benefit to simple, quick (and inexpensive) crafting.

Thanks again to Angie, and all the wonderful bloggers who threw caution to the winds and spent 15 minutes crafting… and then an hour or more editing photos, and typing up instructions!
Make sure you didn’t miss a single minute!! Check out the roundups from Monday, Tuesday, Wednesday, and Thursday as well as the great projects shared on the Crafty Quickies Linky Party!

Make sure to come back often as I inspire you to get your craft on, and move on, in 30 minutes or less!

Until Next Time!

Key to My Heart Mini Frame

This was a fun quick craft, and it just goes to show that a labor of love doesn’t have to be decades – or even hours – in the making. My son loves this little key in a frame. He’s at that age where keys are a “big deal” and he loves all things key and lock related. Which results in plenty of locked doors that shouldn’t be. But, that is a story for another day… actually, more like several more stories while we share a bottle of wine!

If you want to take a few minutes to share your own “key to my heart” sentiment… here’s how:

I started off with simple supplies, paint & paintbrush, frame, keys from the scrapbook section of the craft store, and some scrapbook paper for my heart and background.
I brushed some silver paint over the key, and let it dry (just a couple minutes), and came back and gave it a second coat.
While the key was drying, I took apart my frame, and traced the insert that came in the frame on my background paper, then cut it out.
On the scrapbook paper for the heart, I drew the rough shape of a heart on the back of the paper, and then tore around it.
Using the mostly-dry paintbrush with the silver paint, I painted some silver on the scrapbook heart.
I attached the heart onto the background paper, popped the heart in the frame, and then glued the now-silver key right onto the glass.
Quick, easy, done… and heartfelt!

Make sure you read further for all kinds of other great projects you can do in 15 minutes or less… I’ll be back later today with another great round-up of posts!

Until Next Time!

Want more 30 minute crafts? Like 30 Minute Crafts on Facebook, Follow 30 Minute Crafts on Twitter, and check out 30 Minute Crafts on Pinterest.

Crafty Quickies Round Up

Here are some more amazing and amazingly quick crafts! I can’t believe it is Thursday already, which means that tomorrow is the last day of the Crafty Quickies series that I’ve been putting on with Angie from The Country Chic Cottage… and your last chance to add your 15 minute craft to our Crafty Quickies link-up!

Gina from the Shabby Creek Cottage threw down the gauntlet with a craft project that doesn’t take 15 minutes… it takes about 15 seconds! These hanging starfish make great, and simple, decor! Click on over to see how she makes it so, so easy.
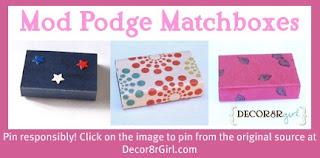
Over at Decor8r Girl, Melinda shows us several ways to dress up a simple matchbox with Mod Podge. A cute way to store a small item, or give a little gift.
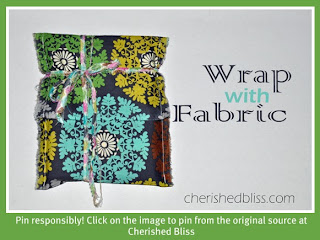
I never have enough wrapping paper handy… or the right style. But my fabric stash could use some purging (please don’t let the hubs know I said that)!! Cherished Bliss shows us how to wrap a gift with fabric… in less time than it might take to wrap with traditional paper. That’s a win-win!
Angie over at The Country Chic Cottage has been keeping this week of Crafty Quickies going with me… and showed up today with yet another awesome project. I don’t want to give away the secret material she used to make her Quick and Easy Monogram Wallhanging… so click on over to find out!
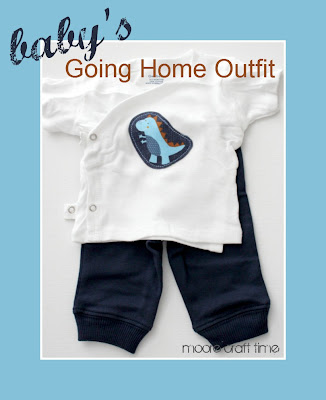
I got something knocked-off my to-do list, AND in less than 15 minutes by making a going-home outfit for my little guy. Just a month to go before we’ll be putting this little outfit to use!

Make sure to come again tomorrow for even more quick crafts! In the meantime, check out the roundups from Monday, Tuesday, and Wednesday, as well as the great projects shared on the Crafty Quickies Linky Party!

Until Next Time!

Dinosaur Outfit – Baby’s Going Home Outfit

Hubby and I decided to do the baby’s nursery in Dinosaurs. Which, of course, includes a fun dinosaur print. To make a going-home outfit for baby, I decided it would be fun for him to match his new decor. So, I put together a quick going-home outfit for him. Really, it is just a shirt with a raw-edge applique dinosaur, and a matching pair of pants. But, as far as he’s concerned, “mommy made it”. And that should be all that matters, right?

I bought a pack of side-snap shirts from Target. These are the best for infants, because they don’t put any pressure on the still-healing umbilical cord. And, a couple pairs of pants that coordinate with my dinosaur fabric.

I started with just one of the shirts.
I ironed Heat-n-Bond Lite to the back of my fabric. Using a fabric marking pencil, I outlined my dinosaur in the shape I wanted to cut. I made sure to leave a margin around him for stitching.
After cutting him out, I peeled the paper off the back of the Heat-n-Bond, and placed him where I wanted him on the shirt.
Then ironed him in to place.
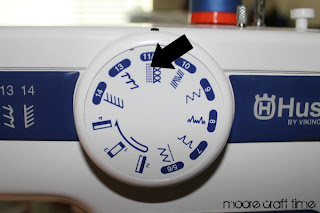
It is important to select the right stitch when sewing on a t-shirt. I used this triple stitch to give extra support on the stretchy fabric.
I unsnapped the side of the shirt, and stitched around the dinosaur, attaching him to a single layer of the shirt. My stitching is about 1/8″ away from the edge of the dinosaur applique.
It was so simple that I whipped up a couple spares… just in case baby decides to get messy between getting dressed, and actually making it home. You can never be too safe (or too cute)! All I have to do is throw these in the wash and they’re ready to go!

Make sure you stop by again this evening for a Crafty Quickie roundup! Angie from The Country Chic Cottage and I have lots of fun quick crafts to share, and so do several other bloggers! We’ve been sharing them all week. Check out the roundups from Monday, Tuesday, and Wednesday, as well as the great projects shared on the Crafty Quickies Linky Party!

Until Next Time!

Want more 30 minute crafts? Like 30 Minute Crafts on Facebook, Follow 30 Minute Crafts on Twitter, and check out 30 Minute Crafts on Pinterest.

Crafty Quickies Round Up

Day three of the Crafty Quickies week that I’m hosting with Angie from The Country Chic Cottage… and I am so glad that I don’t have to pick a favorite! So many amazing quick crafts. It just goes to show that there is always enough time to craft up something fun!

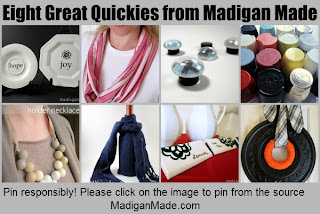
Madigan Made did a crafty quicky round-up of her own, sharing eight craft tutorials that can all be completed in less than 15 minutes. So, if you have 2 hours to kill, you can whip up all eight of these bad boys! FUN!
This pendant from Cynchronicity is a quick upcycling project that you can make with items you likely have lying around the house. With a couple of extra minutes, you could add paint or some Mod Podge Dimensional Magic and nobody would have a clue what the original materials are! Though, as is, they’d have a hard time guessing!
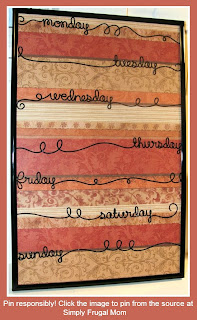
With the meal planning that’s been going on around my house lately, I’ll have to whip up one of these great menu boards from Simply Frugal Mom. So stylish, you’d never guess it only took her about FIVE minutes to make! Scroll down in her post to see other fun crafts you can make with your leftover 10 minutes…
Easter is sneaking up on me this year. I’ve done nothing to get ready! But I could whip up a couple of these Boutique Easter Onesies from Sunny Tuesday and have them in the mail to my nieces before naptime is over!
Angie from The Country Chic Cottage painted up some flower pots in preparation for Spring… you’ll want to see the great tool and technique she uses to get each flower painted perfectly.
And if you missed my Quick Monogram Bag from earlier today, make sure to check out my fast painting tips!

For more fast crafting inspiration, we have some great quick crafts linked up to the Crafty Quickies Linky… make sure to add your own as well!

Until Next Time!

Quick Monogram Bag

In less than a month, we’ll be adding a new member to the family! This means packing hospital bags. Several of them. For me, with everything I’ll need… from clothes to phone chargers. But also a special bag for 3-year-old “Little Moore” who will be coming to the hospital to visit me and his new baby brother. I thought it would be fun to whip up a special hospital bag just for him!

I picked up a plain red tote bag at Michaels. This is the perfect size for a puzzle, a couple small toys, and some snacks. And, it is just the right size for him to carry himself… which will be very handy when mama’s arms are full of baby (and baby gear)!

I just used two paints, and since the two paints never actually touch each other, I didn’t have to worry about the one drying before starting on the second.

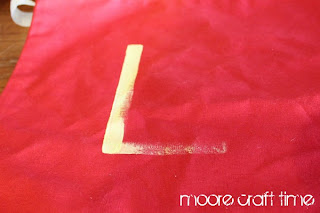
I put some yellow paint on my paintbrush, and outlined a quick L.
I then added more paint, and darkened the L, making the line a little thicker, and cleaning up the edges.
In just a couple minutes, I had my L completed!
Now to add the glitter. Some might think that glitter isn’t “manly”, but my little guy loves things that sparkle or are shiny… so I picked some very manly black glitter paint. To save on time, I just squeezed the paint right from the bottle onto the bag in a line.
Using a second paintbrush, I spread out the glitter.
And repeated the process, adding glitter paint, spreading and smoothing outward from the letter all the way around.

In less than 15 minutes, I created a custom tote for my little guy. One that he can tell his little brother “NO! That’s MINE!” for years to come.

Make sure to swing back by later today for a roundup of more Crafty Quickies from some other amazing bloggers including Angie who is partnering with me to create this fun week of fast crafts. You can also check out Monday’s and Tuesday’s Crafty Quickies roundups for more great ideas!

And if you have a Crafty Quickie of your own to share, you can link it up at the Crafty Quickies Linky!

Until Next Time!

Crafty Quickies Round Up

When Angie and I asked our fellow craft bloggers to come up with 15 minute crafts to share as part of our Crafty Quickies series, I had no idea that we’d get this variety of awesome crafts (and it is only day two)! It just goes to show that no matter what kind of crafting you’re into, there is a quick craft that will surely satisfy, no matter the time crunch! Unless you’re already running late, you have no excuse to not drop everything and try out one of these amazing crafts!

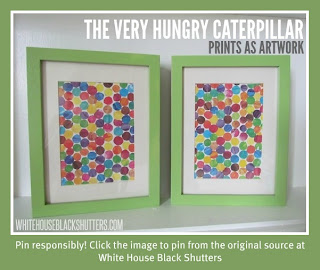
You’d never know that these great, colorful prints from White House Black Shutters are made using pages from The Very Hungry Caterpillar! They’d look equally great in a kid’s room, or a sophisticated hallway!
Angie over at Country Chic Cottage made these great boxes with the “Ikat” look… and you’ll never guess how! So click on over and find out her secret!
I have a feeling a family member or two will be getting a spring-inspired flower-painted votive to decorate their Easter table this year… especially since Mural Maker and More shows us all how to get ‘er done in under 15 minutes (minus dry time, of course)!
If you’re willing to take out the “repeat” part of “lather rinse and repeat” in your morning routine, you can make any of these great Paint Chip Earrings from Eclectic Mama to match your outfit, and still make it to work on time!
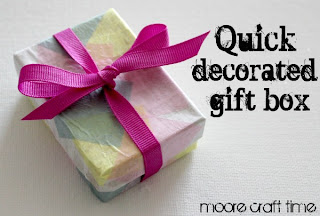
And if you missed my quick decorated gift box, consider whipping one up to gift a pair of those great earrings!
Remember, if you have a Crafty Quickie of your own to share, link it up at the Crafty Quickies Linky!

That’s all the time I have today… I’ve got some quick crafting to do!

Until Next Time!