Bottle Cap Ornaments

I’ve been collecting bottle caps. With no particular craft in mind. I thought it would be fun to turn them into mini ornaments for the Quick Handmade Holiday Gifts series that I’ve been featuring for the last week. The problem was – how would I secure the bottle caps together? Hot Glue would run out the sides and look ugly. And any other glue I could think of wouldn’t provide enough substance to adhere the uneven edges of two bottle caps. Then I came up with a solution that is total genius. If I do say so myself. Read on to learn how I did it.

Supplies:
Bottle Caps
Paint
Hot Glue
Push Pins
Embroidery Floss or other String for hanging loops
notions: Paintbrushes

 I started by pairing up sets of bottle caps. I painted them all with a base color. Each got two or three coats to cover the logo on the top.
I didn’t worry about painting the edges, the gold, green, or white was Christmasy enough for me, and I wanted to be able to tell that they were bottle caps.

After the bottom coat dried, which took no time at all in the Vegas heat with the ceiling fan on, I painted a snowflake on the top of each.

I let that dry for a minute, and then added a thin coat of glitter paint.

Here is the secret to gluing two bottle caps together. Push pins! I used wire clippers to clip the end off a push pin.
SAFETY TIP!! I made sure to cover my hand in a towel as I was cutting to make sure that the pointy metal piece didn’t go flying off… and either land in the carpet for me to step on later, or go straight for my eye. 

I hot glued the pins to the inside of one side of the bottle cap ornament.

I had some braided cording that I used for the hangers. Two overhand knots, with enough space between the two to slip over the top of the pushpin.

Then I used hot glue to secure the bottle cap on the other side, and the ornaments were all set!

These bottle cap mini ornaments would look great on a small tree, a tree covered in handmade ornaments, or as decoration on a gift-wrapped package.

This was the last project as part of the Quick Handmade Holiday Gifts series to celebrate Christmas in July. If you haven’t seen all the other 30 minute projects I put together, make sure to go check them out!

Want more 30 minute crafts? Like 30 Minute Crafts on Facebook, Follow 30 Minute Crafts on Twitter, and check out 30 Minute Crafts on Pinterest.

30 Minute Quilted Table Runner

 Making a quilted table runner in 30 minutes was a challenge. I busted right through this project and made it in just at 30 minutes. Really, by the skin of my teeth. My original plan was to use 3 wider strips, and instead I went with 5 more narrow ones. This looks better, but obviously if I had gone with just 3 strips it would have taken less time, and I would have been well within the 30 minute time limit for crafts on this blog.

To make your own:

1/2 yard Fabric 1
1/2 yard Fabric 2
batting cut to 11″ x 42″
notions: pins, rotary cutter
machine threaded with coordinating thread

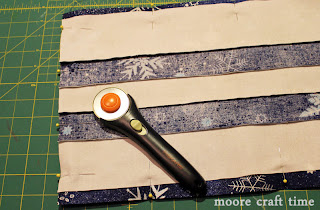
Start by cutting strips and backing. All were cut the width of the fabric. From Fabric 1 I cut two 2″ strips, and a piece 11″ wide for the backing. From fabric 2 I cut two 3″ strips and one 2″ strip for the middle.

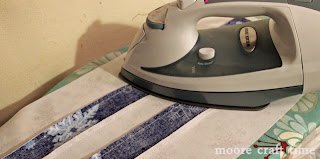
I stitched them all together, in order, and then pressed all the seams at the same time. Because I will be quilting this stitch-in-the-ditch style, I pressed the seams all in one direction, rather than pressing them open.

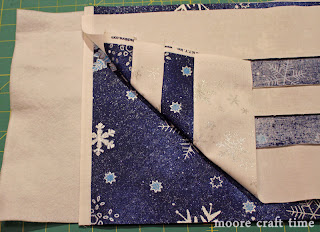
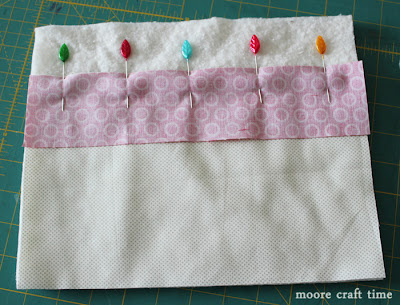
I layered my pieces. First batting, then backing (right side up), then the pieced top (right side down). The top is a little smaller than the backing and batting this is on purpose.

 I trimmed the ends, and pinned around the edges to secure while sewing.

I stitched all the way around, leaving a hole on one end for turning. Next time, I’ll leave my hole for turning along one of the long ends. Having it at the short end meant it was along a part that was pieced, and trying to tuck it all in to look pretty wasted precious time, and was nearly impossible. Putting it on a long edge will be easier and more time-effective.

After clipping my corners, I turned it right side out, stitched the hole closed, and (with the walking foot on my sewing machine) did straight-line quilting down the seams between the white 3″ strips and blue 2″ strips – so only time for two lines of quilting.

I love that this is a super-fast way to dress up a space for a party, add some softness to a mantle, or to give as a holiday-time housewarming gift or hostess gift. Using different holiday fabrics will also give different looks to this simple table runner.

There is still one more day of Quick Handmade Holiday Crafts as we celebrate Christmas in July! If you’ve missed any over the past week, make sure to go back and check them out.

Want more 30 minute crafts? Like 30 Minute Crafts on Facebook, Follow 30 Minute Crafts on Twitter, and check out 30 Minute Crafts on Pinterest.

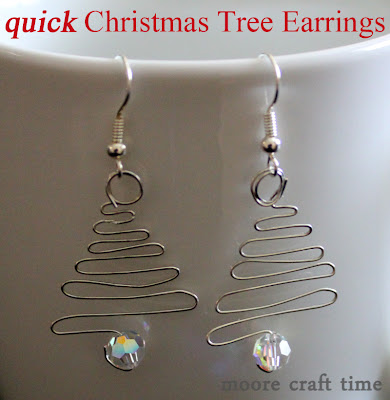
Quick Christmas Tree Earrings

Continuing the week of Quick Handmade Holiday Gifts, today I’m showing you jewelry. These earrings are quick and easy to make. It isn’t even that tricky to get the left to look like the right because the whole beauty of these earrings is that they are imperfect.

Supplies:
2 – 8″ pieces of heavy gauge wire
2 – earring hooks
2 – crystal beads
small pliers (round-nose are best, but needle-nose will do)
small paintbrush handle

Start by wrapping the end of one wire around the smallest part of the paintbrush handle. Thread on the earring hook, and make two to two-and-a-half circles at the top.

Using your pliers, start bending the wire to make a zig-zag. Keep increasing the width of the zig-zag as you go.

When you get to the end, bring the wire to the middle and bend the wire 90 degrees so that it points down.

Thread on one of your crystal beads, and bend the excess wire up and out of the way. If the zig zags have gotten distorted, press the earring between your fingers to get it to lie flat.

Repeat the process for the second earring, eyeballing to try to keep the tree the same width as the first. If one earring ends up longer than the other, just squish the wire closer together on the longer earring to make it shorter.

 Check out all the other great Quick Handmade Holiday Gifts in the series, and make sure to come back tomorrow for another fun and fast holiday craft.

Decorative Topstitch Zipper Pouch

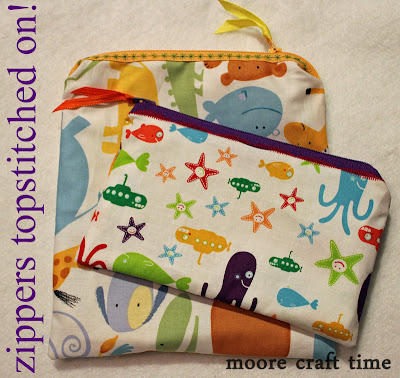
This is not your regular zippered pouch tutorial. This is completely different. Dare I say – game changing. The zippers on these little zippered bags are not stitched in. They are stitched on. With decorative stitches. Finally, an opportunity to use the decorative stitches on your sewing machine, AND a way to dress up the traditional zippered pouch! These are a fun little gift to make for someone else or to keep yourself!

I was able to make each of these zippered bags in about 20 minutes. If you don’t have experience working with zippers or making pouches, it might take you a little longer.

Supplies:
1 Fat Quarter Fabric
1 9″ Zipper
Sewing Machine threaded with contrasting thread
A Couple inches of ribbon (optional)

Start by cutting your fabric to size. With a 9″ zipper, I can go smaller than 9″ wide, but not bigger. I cut my pieces 8.5″ wide.
Cut the fabric TWICE the height (plus seam allowances) that you want the finished bag. I made one large bag (the one with the zoo animals) and one small one (the one with the submarines and octopi).

Once the fabric is cut, fold and press (wrong sides together) with the two 8.5″ sides touching.

Pin the folded edge of one piece to the BACK of the zipper, lining the edge about 1/8″ from the middle of the zipper.

Flip the fabric over and re-pin into place to make it easier to sew. Remove the pins from the back as you put the pins in the front.

Here comes the fun part! Pick a decorative stitch. For this bag I did stitch 24, for the other bag I did stitch 60.

With the foot for specialty stitching on, I stitched the zipper in place. This was a little tricky, because the zipper keeps things uneven. Just go slow and make sure to keep everything lined up. For the stitches I picked, I couldn’t use the zipper foot because it wasn’t wide enough. For the yellow zipper, I stitched the flowers right down the middle of the zipper side, and for the purple zipper, I lined the foot up right next to the teeth of the zipper so that the stitching would be on the edge of the zipper.

Once you’re done with one side, repeat the steps for the other side.

IMPORTANT: Before you proceed to the next step, open up the zipper halfway. This will make it MUCH easier to turn. If you forget to open the zipper, chances are this project will take you much longer than 30 minutes.

Now put the right sides of the fabrics together, with the (half open) zipper in the middle. Stitch all the way around, skipping the parts where you would stitch over the zipper, leaving a hole in the bottom for turning.

Then, go back and add some extra stitching right by the edge of the fabric, stitching the zipper ends in place. In this picture I’ve already trimmed off the excess ends of zipper, and clipped the corners (though you can’t see the corners here).

Flip the whole thing right side out, and stitch the bottom hole closed. If you want, thread some ribbon through the zipper pull.

Now you’ll want to make tons of these, trying out all the fun decorative stitches on your machine! Good thing they are so quick to make… and so useful! Plus, they make awesome gifts (or places to tuck gifts).

Check out all the other fun projects that are part of my Christmas in July – Quick Handmade Holiday Gifts week!

Want more 30 minute crafts? Like 30 Minute Crafts on Facebook, Follow 30 Minute Crafts on Twitter, and check out 30 Minute Crafts on Pinterest.

Fast and Simple Tech Pouch

In this tutorial I’ll explain how to measure your tech device so that you can custom-fit a pouch to whatever size device you’d like to make a cover for. 

 I made a much more fancy quilted cover for my Kindle over a year ago, and have since misplaced it. I’m sure it is somewhere, but I need to keep my Kindle protected when throwing it in my purse. If you’re thinking about giving someone a piece of technology for Christmas this year, consider stitching up a pouch to keep it safe as well.

Supplies:
2 coordinating or contrasting fabrics
scrap batting
sewing machine
walking foot (optional)

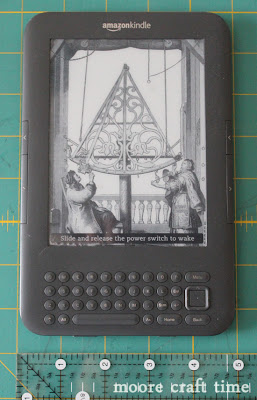
To make a quick pouch-style cover for it, I started by measuring my Kindle. This older version of the Kindle is about 5″ by 7.5″.

I added a little to the height of the Kindle – going up to 9″. This gives me a half inch for seam allowance, and another inch so that the kindle will be tucked in, and not sticking out.

I doubled the width to 10″, then added an inch. Half an inch is for the seam allowance, and half an inch is for the depth of the device and thickness of the batting.

That means that for the lining, I cut a piece of fabric 9″ by 10″. I also cut 2 pieces of batting this size.
To make the front, with the accent strip, I cut a 10″ by 2.5″ piece of my accent fabric.
For the main fabric on the front, I subtracted 2″ from the 9″ height to calculate that I needed a 7 x 10″ piece of fabric.
The reason I subtracted only 2 inches instead of the full 2.5 inches is because I will be using half an inch of fabric (1/4 inch on each side) in the seam allowance.
This is the only confusing part. I promise.

Okay! Now that the fabric is cut, I placed the main fabric right side UP, lined up with the sides and bottom of a double layer of batting. Then I placed the accent fabric on top, lined up with the top edge of the main fabric. I pinned it in place, through both layers of batting.

After stitching it down, I pressed the seam, and then top stitched 1/8″ away from the edge. You don’t have to top stitch, but I love top stitching – I think it adds a little “something” and makes a project look more finished and professional.

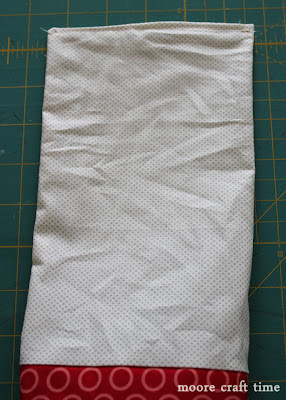
I then placed the backing fabric right side down on top of the piece I just finished, and stitched across the top to stitch it in place. I then pressed it open, and folded in half lengthwise with right sides together (see below), then stitched all the way around, leaving a hole about 4″ on the bottom of the lining.

I trimmed the corners, and then turned the whole bag right side out. I stitched across the bottom of the lining to close the hole used for turning. No worries about it being perfect, it is going to be tucked way down on the bottom, and nobody will ever see it.

Then I tucked the lining back into the pouch, and top stitched along the top edge. I put the Kindle in, and it was VERY snug. This is the way I want it, because over time it will stretch a little bit, and fit like a glove.

Come back tomorrow as I show you yet another great handmade gift idea! And click on the image below to see links to other great 30 minute gift ideas.

Want more 30 minute crafts? Like 30 Minute Crafts on Facebook, Follow 30 Minute Crafts on Twitter, and check out 30 Minute Crafts on Pinterest.

Quick Handmade Notecard Gift Set

 
I’m continuing my week of quick handmade holiday gifts with these notecards. In just 30 minutes, you can whip up a set of 8 notecards. Depending on the papers and stamp that you use, you can either give the set as a gift or you can keep it for yourself to send out thank you notes after the holidays.
Supplies:
9 cards & 8 envelopes (bought in the papers section of your local craft store)
2 sheets of coordinating scrapbook paper
2″ wide stamp
Glue
Paper Cutter

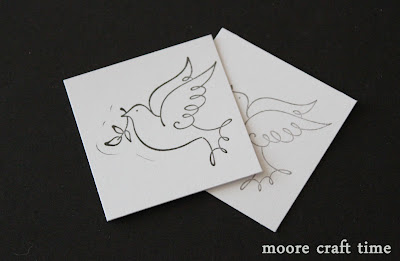
Cut one card into 2″ squares. I got 12 squares out of a single card. This is more than enough.

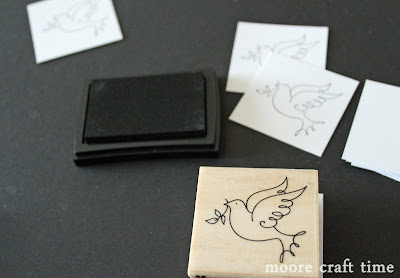
Stamp your image onto the front of each of the cut squares.

There are 4 extra – just pick the 4 that have mistakes or are too light, and toss them.

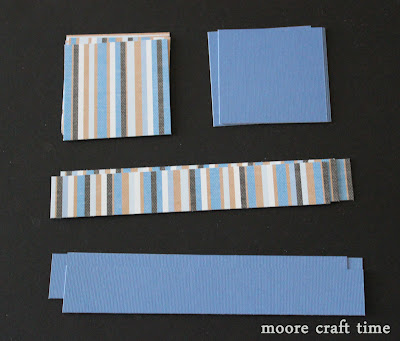
Cut your scrapbook paper. 4 pieces from each paper that is 2.5″ square, and 4 pieces from each paper that are 1″ tall, and as wide as needed for the card.

Glue the stamped squares onto the scrapbook paper squares.

Time to put them all together. Glue a strip down to the front of a card, and then glue a stamped square in the alternate color on top.

Once you’ve made all 8, tie the cards and ribbon into a neat little gift.

Now to decide… are you keeping them or gifting them?

I have five more days of Handmade Holiday Gift ideas, be sure to come back again tomorrow!

Want more 30 minute crafts? Like 30 Minute Crafts on Facebook, Follow 30 Minute Crafts on Twitter, and check out 30 Minute Crafts on Pinterest.

30 Minute Wine Bags

Only 5 months until Christmas! And this year I’m REALLY going to get my holiday gift crafting done early. And easily. With projects like this wine bag, which is great to have on hand for a hostess gift or last-minute present. I cut two simultaneously, and was able to get them BOTH done in 30 minutes.

The bag is the perfect size to fit a standard bottle of wine, but can also comfortably hold a bottle with a larger base, like a bottle of sparkling cider. In a fun holiday fabric like the one I chose, it instantly makes any bottle more festive!

Supplies:
Holiday Fabric
48″ of ribbon
Bottle of Wine or Cider

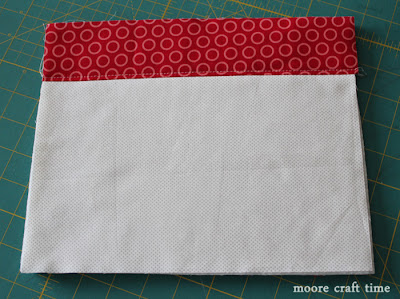
Start by cutting your fabric. For each bottle, you need a rectangle 12″ wide by 20″ tall. Iron a 1″ flap down at the top, and then another 4″. Mark where the second fold lands on the fabric. Unfold the second pressing, leaving just the 1″ flap down. Fold the fabric RST so that you are looking at a rectangle 6″ by 19″ (because that 1″ flap is still down at the top). You should have something that looks like this picture:

Fold the ribbon in half, and pin the fold on the longest raw edge, just above or just below where you marked in the previous step. Make sure to keep the ends of the ribbon on the inside of the bag and out of the way of stitching in the upcoming steps.

Stitch along the long side and the bottom, catching the ribbon in the seam. Keep wrong-side out and fold the bottom corners as shown in the picture below. Mark a line 1 1/4″ from each corner.

Stitch on the lines from the previous step, “boxing” the corners at the bottom of the wine bag.

Fold down the top of the bag to the crease line made by the iron in the first step (the 4″ mark). Stitch around the bottom of this fold, about 1/4″ from the edge (3 3/4″ from the top of the bag).

Turn the whole wine bag right side out, and you’ve got a finished bag!

Come back each day over the next week for another quick craft that will have you ready for the holidays before it is time to stuff your Thanksgiving Turkey!

And if you’re a blogger with some great quick handmade holiday gift ideas, make sure to link them up in the previous post!

Want more 30 minute crafts? Like 30 Minute Crafts on Facebook, Follow 30 Minute Crafts on Twitter, and check out 30 Minute Crafts on Pinterest.

Christmas in July – Quick Handmade Holiday Gifts

Merry Christmas… in July!

Every year I say that I’m going to get my handmade gifts done early.

If this is you too, follow along for the next week as I show you some great gifts that you can make now (in 30 minutes or less), and have ready when the holidays come!

If you’re not ready to make them today, bookmark or pin these projects so that you’ll have quick handmade gift ideas at your fingertips when you’re short on time in December.

If you’re a blogger with a 30 minute handmade holiday gift idea, link it up to the linky party below, and grab the button to add to your post!

Linking up grants me permission to feature your craft in a future post. A feature includes a single image from your post and text encouraging the reader to visit your site.
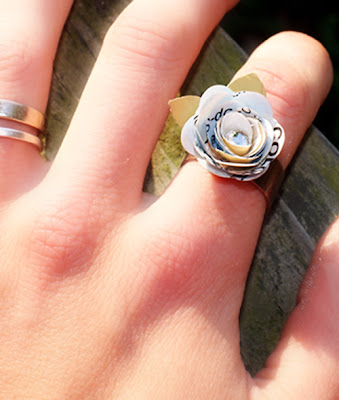
Simple Upcycled Rose Ring

Handmade Jewelry is great. Handmade jewelry that can be made in 30 minutes or less is awesome. Handmade jewelry that can be made in 30 minutes or less with upcycled materials is the pinnacle of crafty goodness. And you can quote me on that.
These upcylced rose rings are exactly that. The pinnacle of crafty goodness. And even if you don’t have the die she used, by looking at the pictures, you could figure out how to make one of these. But, obviously, the die would make whipping this ring out even faster. So you can make two – one for you and one for a friend. Or maybe just two for you…

We all love Pinterest but please do not pin this page. Click through to go to the original post and pin from there.

Duct Tape Dry Erase Board

My son loves dry erase boards. Loves them. He and my husband like to draw “boy” pictures on mine. For those of you who don’t live in a house filled with boys, let me tell you, it is pretty entertaining to walk into your sewing room and see boy pictures on your dry erase board. Like machine guns and tanks… and toilets.

With all the awesome patterned Duct Tapes out there, I could make us each a duct tape dry erase board like this one from Pink Pirate! And I could draw “girl” pictures on mine. Like bows, and princesses, and brand new sewing machines…

We all love Pinterest, but please do not pin this post. Click through to the original post and pin from there.