Boy Mom and Girl Mom FREE SVGs

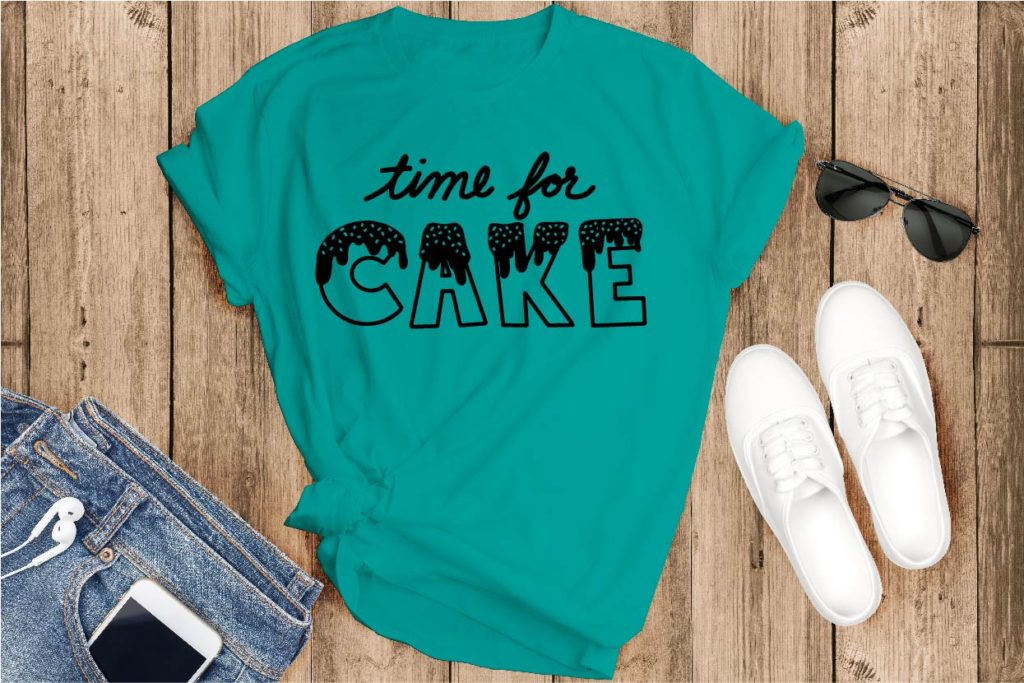
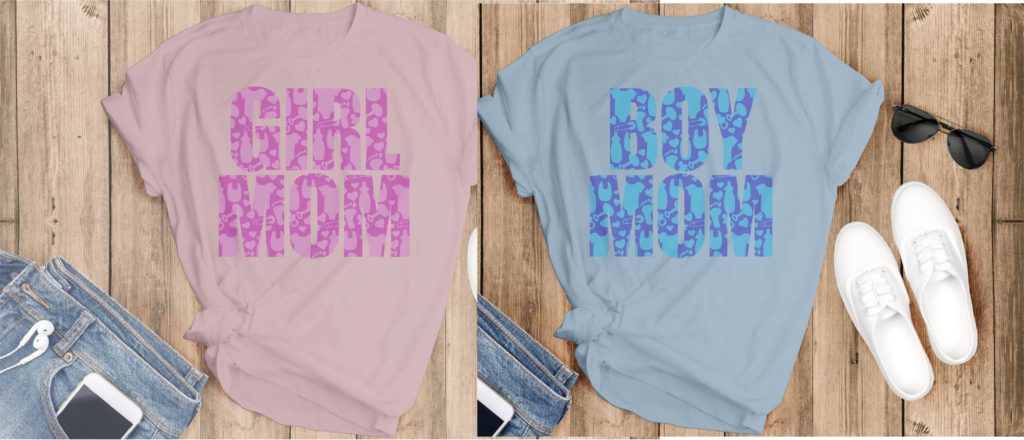
If you’re looking for a fun and personalized gift to give an expectant mom, then these Boy Mom and Girl Mom tees are just perfect! You can use your Cricut or other cutting machine to cut these designs and iron them on to a maternity tee for the boy mom or girl mom in your life!

Especially for a mom having a second (or more!) baby of the same gender, recognizing that these boys or girls are going to be taking over her life with a boy mom tee or girl mom tee is a fun way to celebrate! The SVG file is in two parts because this isn’t just text! Within the text you’ll find baby-related images – like a footprint, baby bottle, safety pin, bin, hearts, and onesie!

Subscribe to our email list below to get the free SVG files!


The files are free!

Sign up for our email list to get your free SVG files!

You’ve successfully signed up! Check your email for details.

Check out all these other fabulous SVGs perfect for a baby shower!
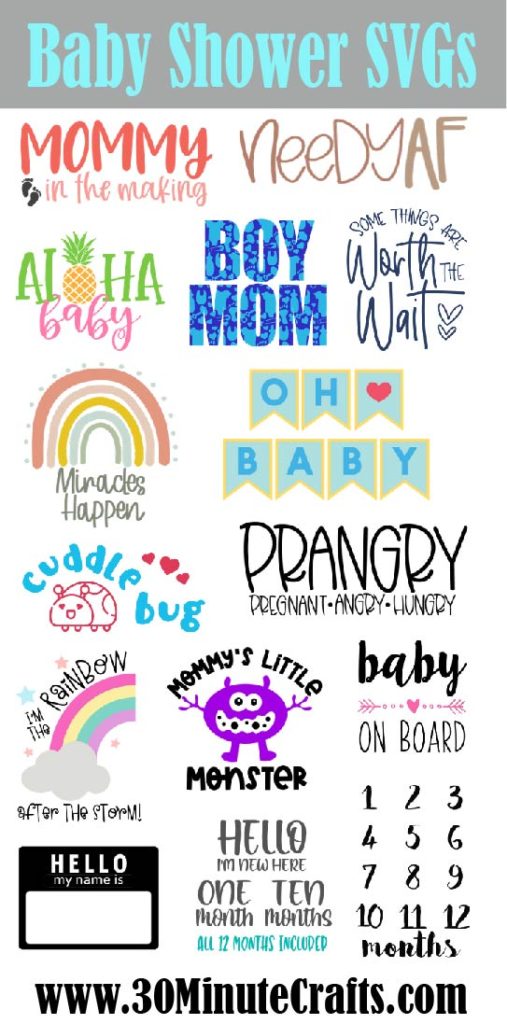
Birthday Cake SVG File

My favorite part of birthdays is the CAKE! So, to celebrate all things cake, I created this fun Birthday Cake SVG file. You can cut this SVG to use on a shirt, a mug, wrapping paper, or even use to etch the Birthday Cake serving plate! There are so many fun ways to celebrate with this Birthday Cake SVG file.

And if you love birthdays, you’ll want to scroll down to see all the other awesome Birthday SVGs!

Get your Cake SVG file by signing up for our newsletter here:


The file is free!

Sign up below to get your free SVG file!

You’ve successfully signed up! Check your email for details.

Check out these other awesome (and free!) SVG files!

Grill Master Supreme & Grill Master In Training – Hello Creative Family Ain’t No Hood Like Fatherhood – Hey, Let’s Make Stuff Funnier Than Your Average Dad – Crafting in the Rain Ask Your Mom – Everyday Party Magazine Dad Jokes? I Think You Mean RAD Jokes! – Happiness is Homemade Working on My Dad Bod – Mad in Crafts Hi Hungry, I’m Dad – Artsy Fartsy Mama Grill Skillz – The Country Chic Cottage World’s Best Farter…Father – That’s What Che Said Nacho Average Dad – Brooklyn Berry Designs Great Job Dad I Turned Out Awesome – Happy Go Lucky Dad Jokes – that’s how eye roll – 30 Minute Crafts Laugh at my Dad Jokes – 100 Directions

Sock Puppets with Felt Pieces

Puppets are so much fun to make, and sock puppets are an absolute favorite around here. We always seem to have orphaned socks, and making them into puppets has never been easier than with these felt pieces cut on the Cricut!

This is part of the family fun week that my friends and I are hosting. All week long we’re sharing family fun crafts that you can make with your Cricut. Go check out Angie at the Country Chic Cottage, Jessica at Mad in Crafts, and Jen at 100 Directions, plus other friends who are joining in – I have links to their projects down below!

These Sock Puppets are so easy with these felt pieces. Just cut out the felt pieces with your Cricut using this design space file.

I recommend using the fine point blade to cut out these pieces. Use a strong grip mat and a brayer to really secure the felt to the mat so that the felt doesn’t shift while cutting.

Once you have all your pieces cut out, it is time to assemble!

Pair the eye backs with eye fronts.

Then glue the eyes, eyebrows, and lips to the socks. The eyebrows can double as mustaches if you like! I used hot glue to secure my pieces – use whatever glue you prefer. Remember that hot glue is HOT, and you don’t want to have your hand inside the sock when you secure the pieces. The glue will go right through the fabric and burn your hand!

If you would like to add hair or other details, you absolutely can. But no need. These adorable sock puppets are fun as-is!

Check out all these other family fun crafts that you can make with your Cricut!

You are invited to the Inlinkz link party!

Click here to enter

Felt Tic Tac Toe Board

This week is all about family fun – which is why I whipped up this simple tic tac toe board out of felt with my Cricut! It just takes a few minutes to cut it out and glue it together. I don’t know about you, but my family loves playing tic tac toe – so this felt tic tac toe board is going to get a lot of use! And it takes up almost no space, so it is perfect to toss in a bag to take along wherever you go!

All week long I’m going to share family fun projects that you can make with your Cricut – and so are my crafting friends! Angie from The Country Chic Cottage, Jessica from Mad in Crafts, Jen from 100 Directions and I are all sharing a family fun craft you can make with your Cricut each day this week. And we’ve asked our craftiest friends to join in as well! Scroll down to see what everyone else is making!

To make your Cricut Felt Tic Tac Toe board, you’ll need some supplies:

Cricut Felt (one pack is plenty!)
Cricut Maker with the rotary blade – you can use the fine point blade, but a strong grip mat and a brayer will keep the felt in place better if you use a fine point blade
Fabric Glue

Use this Cricut Design Space file to cut out the pieces. Make sure that you choose “felt” as the material you are cutting.

Use your fabric glue along all the edges of the grid piece. Then place it glue-side-down on top of the large background square.

Once the glue has set, you’re ready to play!

And check out all these other fabulous family fun crafts you can make with your Cricut!

You are invited to the Inlinkz link party!

Click here to enter

Dad Puns – That’s How Eye Roll Free SVG

Yes, you could make your dad a #1 dad tee, and he’ll proudly wear it every Father’s Day. But if you want a tee that he’ll sport more than one day a year, make him a funny tee like this Dad Puns That’s How Eye Roll shirt! And if you’re looking for other funny options, scroll down for other great dad tees.

Dad pun svg - dad joke svg

Just sign up below to get your free download of this SVG file.

You can use this Dad Pun SVG to create a shirt, mug, tote … whatever you like! If you don’t have a digital cutting machine that will cut out SVG files, I’ve included the PNG file as well so that you can print it out if you prefer. The printout can be used to make a card, or whatever else you like.


The file is free!

Sign up below to get your free SVG file!

You’ve successfully signed up! Check your email for details.

Check out these other fabulous and free Dad SVG files!

Grill Master Supreme & Grill Master In Training – Hello Creative Family Ain’t No Hood Like Fatherhood – Hey, Let’s Make Stuff Funnier Than Your Average Dad – Crafting in the Rain Ask Your Mom – Everyday Party Magazine Dad Jokes? I Think You Mean RAD Jokes! – Happiness is Homemade Working on My Dad Bod – Mad in Crafts Hi Hungry, I’m Dad – Artsy Fartsy Mama Grill Skillz – The Country Chic Cottage World’s Best Farter…Father – That’s What Che Said Nacho Average Dad – Brooklyn Berry Designs Great Job Dad I Turned Out Awesome – Happy Go Lucky Dad Jokes – that’s how eye roll – 30 Minute Crafts Laugh at my Dad Jokes – 100 Directions
Fun Dad SVG files - make dad a tee

Because I said so Free SVG

Sometimes, as a mom, there is only one thing you can say. And that’s “Because I said so.” I’m all for kids being curious and wanting to learn things … but sometimes, the 45th “why do I have to go to bed?” or “why do I have to eat my vegetables?” or “why do I have to take my shower first?” can only have one answer. And that is “because I said so.” This free SVG file can be used to cut out the design to put on a shirt, a mug, a clipboard… whatever you like!

Scroll down to get your free SVG download. Once you’ve downloaded the file, you can cut it out on your Cricut or other cutting machine.

After cutting mine out of iron on vinyl, I fused it to a shirt. If you’re using iron on, make sure that you reverse the image before cutting!

It is that simple!

Download your free file by signing up for the newsletter here:


The file is free!

Sign up below to get your free SVG file!

You’ve successfully signed up! Check your email for details.

And, check out these other fabulous and FREE SVGs for moms who like to be a bit “cheeky!”

Free SVGs for mom

Free Healthcare Worker SVG

This SVG was designed for all of our healthcare workers, many of whom are making incredible sacrifices to keep the rest of us safe. I’m talking about the Doctors, Nurses, Nurse Practitioners, Physician Assistants, Paramedics, EMTs, Nurses’ Aides, and so many, many more. Because only in the movies do our heroes wear capes. Right now, they’re wearing scrubs and masks and uniforms and stethoscopes.

This is a hand-lettered SVG file, and you can download it to use on your digital cutting machine. Re-size it to use on mugs, shirts, clipboards, or whatever you like. There is also a printable version in the download file if you’d like to print it rather than cut it out.

To get your free SVG file, sign up for our mailing list, and you’ll be sent the download link:


The file is free!

Sign up below to get your free SVG file!

You’ve successfully signed up! Check your email for details.

And for more fabulous SVG files celebrating, honoring, and applauding the healthcare workers who are doing so much for so many, check out all these other fabulous (and free) SVG files:

Printable Thinking of You Cards

Everyone loves getting thoughtful mail. And now that we’re social distancing and spending lots of time away from those we love (and love to hang out with!), it is nice to add a little cheer to their day with a handmade card. And as an extra bonus – decorating and writing cards can keep kids busy for at least 90 seconds so that you can warm up your coffee for the fourth time.

If you scroll down, you’ll find links to several other free printable cards. Each is a bit different, so you can decide which works best for what you need.

To make the cards pictured here, you’ll need:
Access to printer and printer paper
Colored or decorative cardstock or construction paper
Coloring tools (crayons, colored pencils, etc)
Scissors
Paper Cutter (optional)
Glue Stick
Envelopes – see what you have lying around.

These four card fronts all print out on an 8 1/2 x 11″ sheet of paper. Depending on the age of the person helping you make these cards (if you have a helper), they can color and cut out the designs. And maybe cut the paper for the cards and glue it to the front as well!

Once you print out the cards (download information below), color them however you like. Colored pencils, crayons, watercolors, markers, or any specialty materials – have fun! The designs are simple so you can add your own style. I recommend skipping glitter unless you know the recipient loves glitter.

Once colored, cut them out. These designs have nice, big borders. You can cut inside the border if you want borderless, on the border if you want a thinner border, Or 1/8″ away from the border if you want a double border. You can also take out those fancy scissors that never get used to add a scalloped edge.

I have a paper trimmer with fancy edged blades, so I used that on some of my card fronts.

Then cut your cardstock for the cards. I went with 4″ x 8″ You can use 4 1/4 x 8 1/2″, but they may not fit in your envelopes. Check what size envelopes you have, first.

Fold the cardstock in half, then glue the card front on with a glue stick.

Add a note inside, address your card, and mail it off! Then feel good knowing you’ve sent a little happy out into the world!

To get your free card printable, sign up for the mailing list below and we’ll send you the download link!


The file is free!

Sign up below to get your free printable!

You’ve successfully signed up! Check your email for details.

Check out these other fabulous card printables!

Heart Earrings Free SVG

I’m so excited to share with you today’s project! These earrings are super simple to make and you don’t need a lot of supplies! I made mine out of felt, but you can make them out of cardstock as well – these earrings are super versatile – and lightweight to boot! Plus, if you scroll down to the bottom you’ll find a bunch of earring SVG files – all FREE! You can make yourself a whole earring collection with all these different Free Earring SVGs!

This post contains affiliate links. Shopping through these links does not increase your costs, but it does provide this site a small commission from your purchases.

To make these earrings you’ll not only need the file you can get by signing up for the email list below, but you’ll also need:
Glue – I used Thermoweb Fabric Fuse
Felt – I used Cricut Felt
Large Jump Rings
Earring Wires
Cricut Maker
Jewelry Pliers (optional)


The file is free!

Sign up below to get your free SVG file!

You’ve successfully signed up! Check your email for details.

Start by cutting out the pieces from the SVG file. There are 16 hearts. Four sets of four. Each set has the cut in a different spot.

Once you’ve cut out the pieces, gather four hearts together. Each of the four hearts glued together should be from a different set. What that means is that the slit on each heart is in a different spot. By gluing together hearts with a slit in a different spot each time, you add strength to the earring.

Add glue to the side that does not have the slit. Then add a second heart on top.

Repeat, until you have a stack of four hearts all glued together on the left side, with the right side (the side with the slits) unglued.

Repeat, making a second set of four stacked hearts that are only glued on the left.

Now repeat again, this time making two sets of stacked hearts that are completely glued together. You’ll now have four hearts. Two that are only glued on the left, and two that are completely glued. Allow the glue to set before continuing to the next step.

Assemble the earrings by opening up a partially glued heart and linking a solid heart into it.

Then carefully add glue to each layer to finish gluing the partially glued heart. Set aside and repeat with the second earring.

Open your jump ring. With these large jump rings I can open them with just my hands, but you may need a set of jewelry pliers. Remember that when you open jump rings, you twist them rather than pry them open. Twisting a jump ring open allows you to twist it closed later. This ensures that it closes fully and matches up properly.

On your open jump ring, add the linked hearts and your earring wire. Then close the jump ring (again, by twisting). Repeat for the second earring.

Allow the glue to dry and set completely, and your earrings are ready to wear!


The file is free!

Sign up below to get your free SVG file!

You’ve successfully signed up! Check your email for details.

For more fabulous FREE earring files, check out these links:

DIY Notebook Tabs

Organization is always better when it is pretty, right? So these DIY Notebook Tabs are basically the best organization ever. They are pretty, and practical … and you can whip them up at home!

These DIY Notebook Tabs are part of Craft Week that some of my friends and I have organized. All week long, we’re sharing fun crafts to make. Today’s theme is Digital Cutting, so if you scroll all the way down you’ll find a bunch of fabulous crafts you can make with your digital cutting machine!

To make these DIY Notebook Tabs, you’ll need:
Cricut Adhesive Backed Paper (I love these designs by Jen Goode!)
This Cut File for the DIY Notebook Tabs
Cricut Machine (Explore Series or Maker)
Scoring tool – either the scoring pen or scoring wheel

Cut out the design. Make sure to select Adhesive backed paper from the materials list.

Remove all the un-needed pieces of adhesive backed paper to reveal the tabs.

Pick the page you want to put your tab on. Put in place.

Then fold on the score line, and secure the two halves together.

Repeat on different pages for multiple tabs. So simple! And so fun!

Want more great crafts you can make with your cutting machine? Check these out!

Everyday Party Magazine made this DIY Farmhouse sign.

This DIY Easter Bunny Plate from Hey Let’s Make stuff is adorable!

I love these “just between us” notebooks from Happy Go Lucky Blog- I’ve done them with my kiddos and it is fantastic!

This Growth Ruler by Happiness is Homemade makes a great gift, or fabulous decor in your own home!

If you’re an enneagram fan, you might need to make these shirts by Lemon Thistle. Depending on what number you are, of course…

Liz on Call has a great thinking of you card that is perfect for so many occasions!

This rainbow picture frame by Lydi Out Loud is perfect for any rainbow babies!

Planning a Disney Trip? This Disney Countdown over on Tried and True Blog is perfect!

I love these Cricut Joy labels that The Country Chic Cottage shows us how to make!

Over at 100 Directions, you can see how the Cricut Joy can be used to label travel toiletries as well.

Over at Shrimp Salad Circus, you can learn how to make your own hand sanitizer and label it with your Cricut.

If you’ve been wondering how to make a two-color shirt with Cricut Infusible Ink, Pineapple Paper Company shows you how to make it happen!