Craft Lightning Roundup – Day Three

We’re halfway through Craft Lightning Week! If you missed the day one roundup or the day two roundup, make sure to check those out! This week I’m teaming up with Angie from the Country Chic Cottage, my partner in craft for these Craft Lightning weeks, to share crafts that can be done in 15 minutes or less. We also rounded up some of our blogging friends to share their own 15 minute crafts with you! In case you missed any today, here they are…


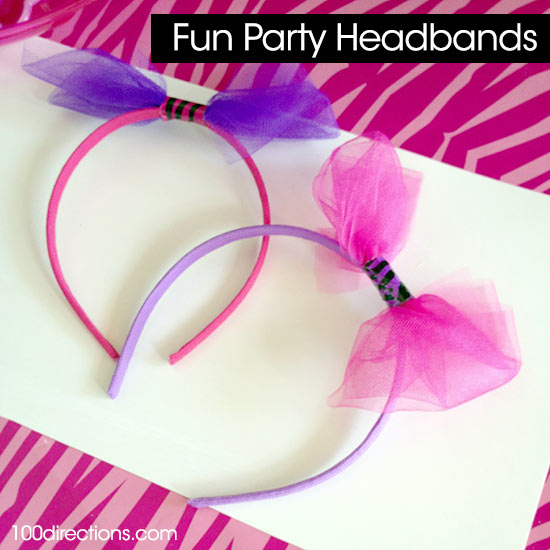
These party headbands are so fun! I could see making them for a sleepover party!

party-headbands - 100 directions


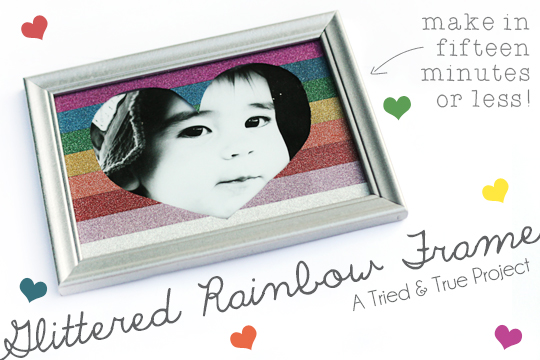
This glittered rainbow frame is so fun! A rainbow… with a sparkly upgrade!

glitteredrainbowframe - gerbera designs


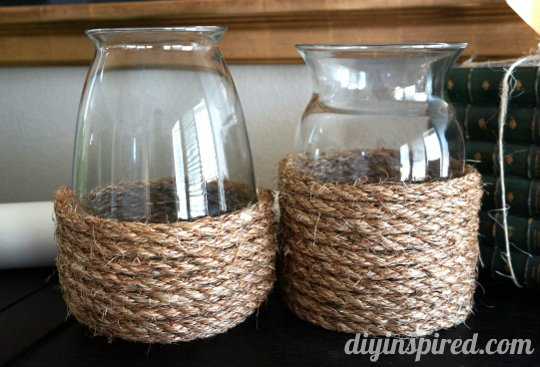
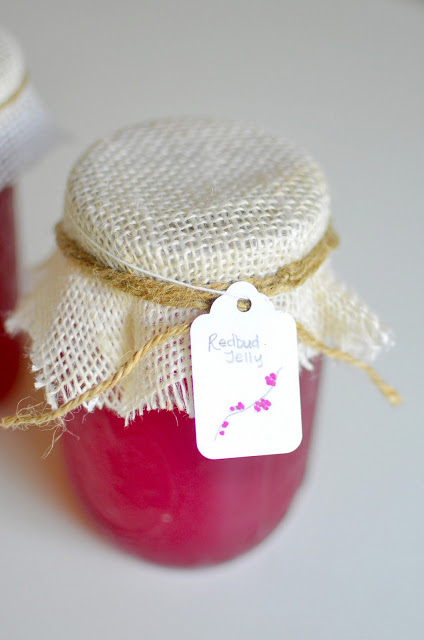
Burlap is such a simple and fun way to dress up a jar. Don’t you love this?

redbud jelly with label - a nest for all seasons


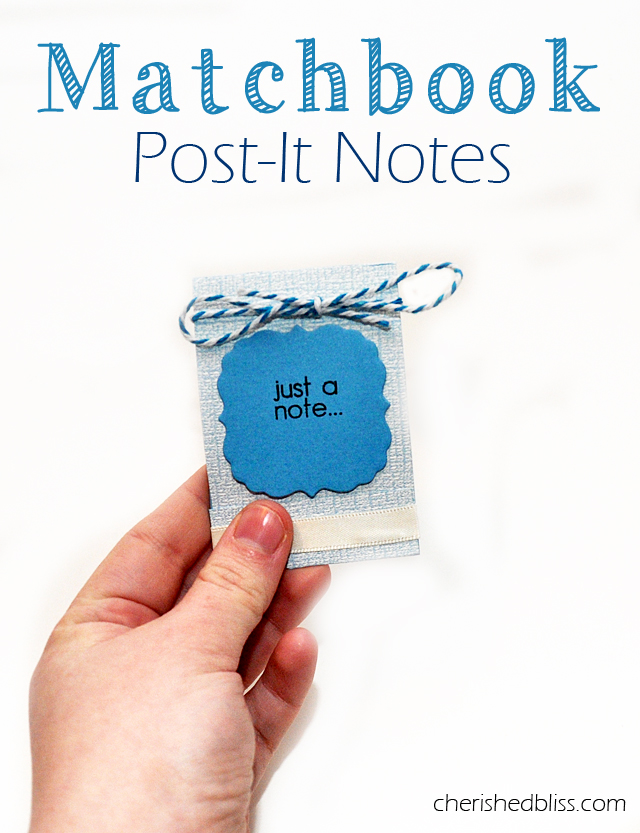
Post it notes are so handy to have around, I love the idea of making them cute, these post it matchbooks are awesome.

Matchbook-Post-It-Notes - Cherished Bliss


I love this stacked wrap bracelet, so simple and the colors really pop!15-minute-faux-stacked-bangles - mad in crafts


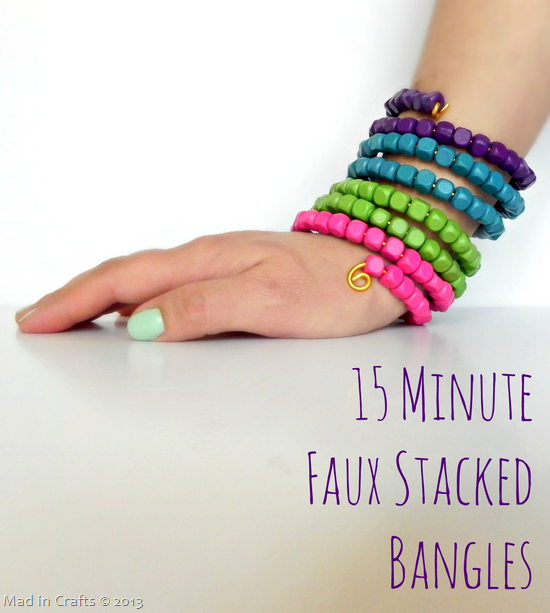
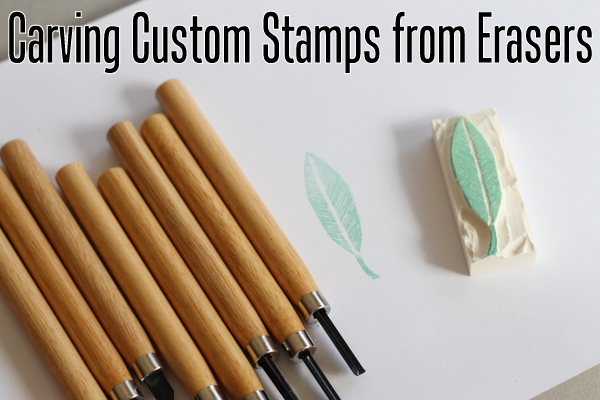
If you’re looking for a unique craft, making a custom stamp you can use again and again on all kinds of projects.

how to make stamps from erasers - the country chic cottage


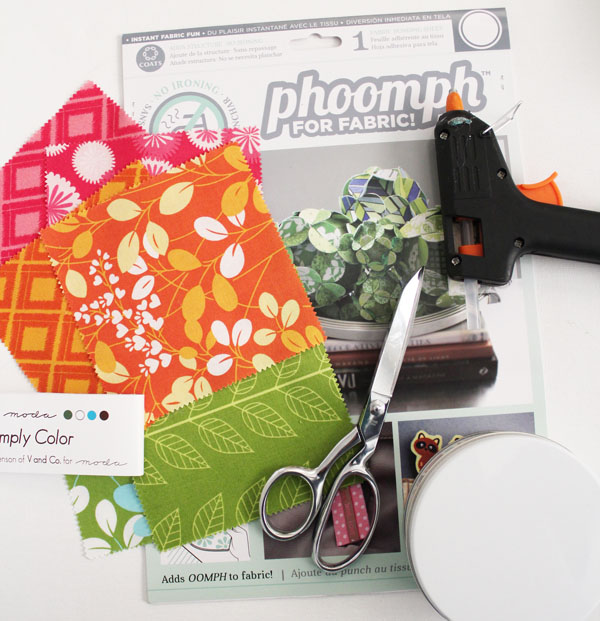
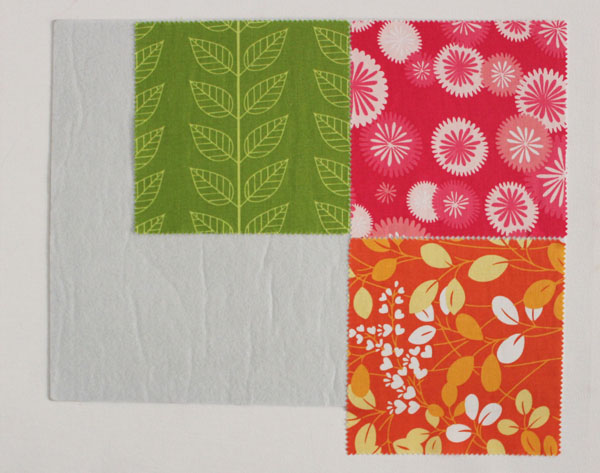
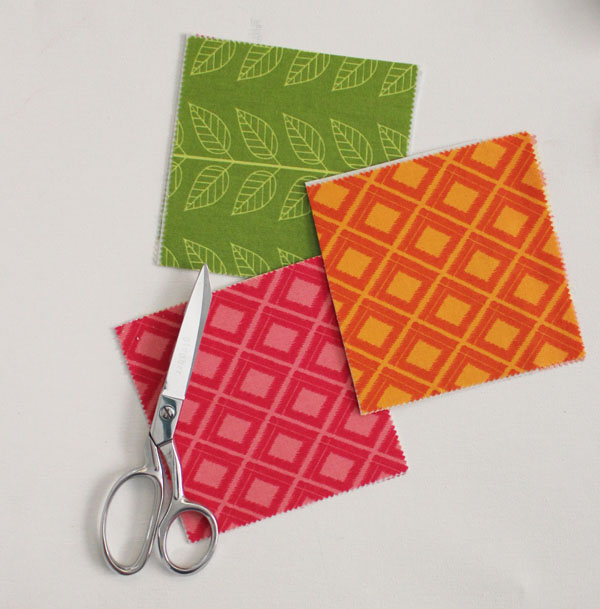
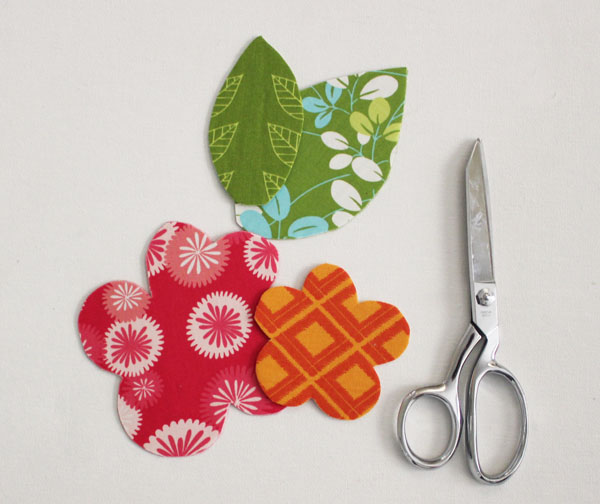
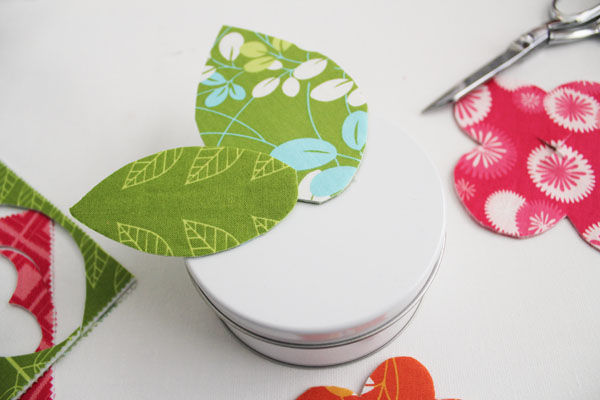
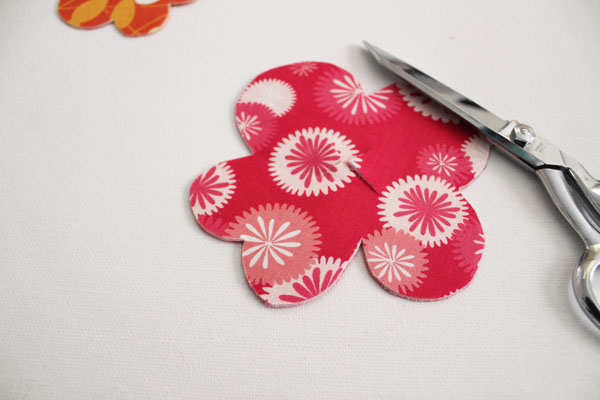
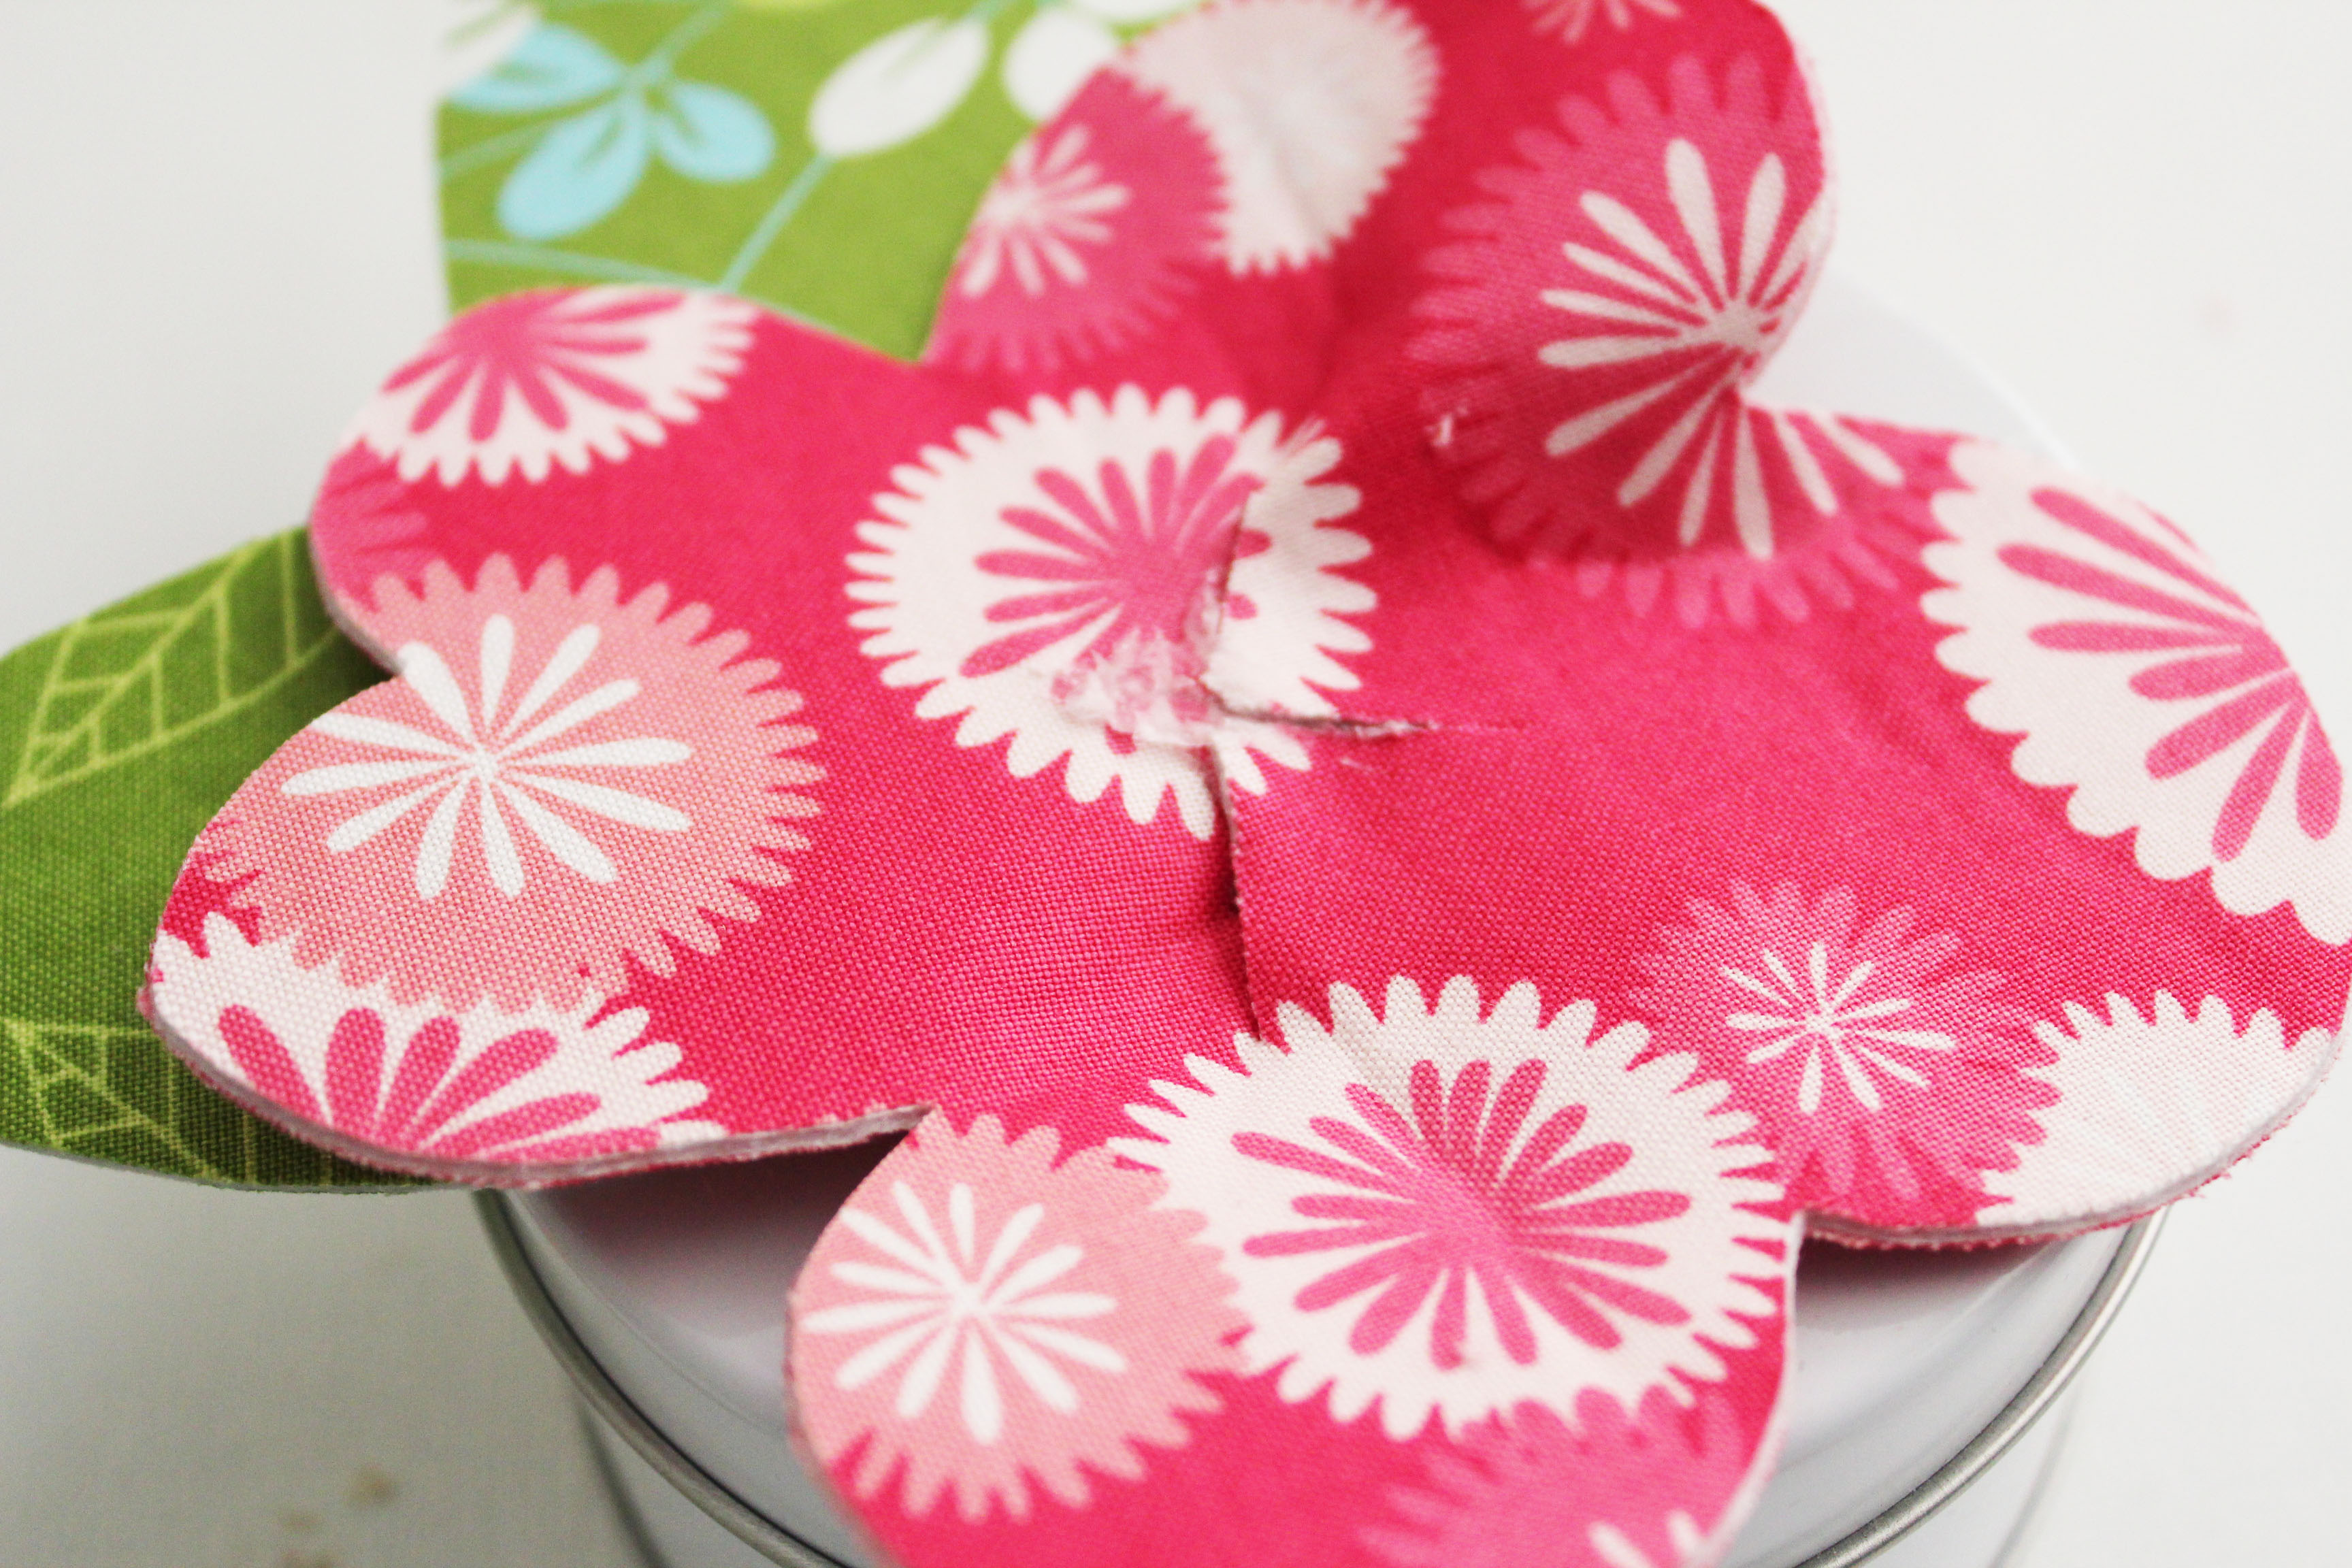
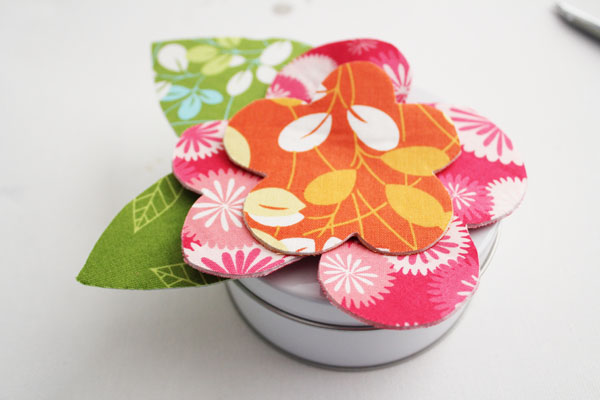
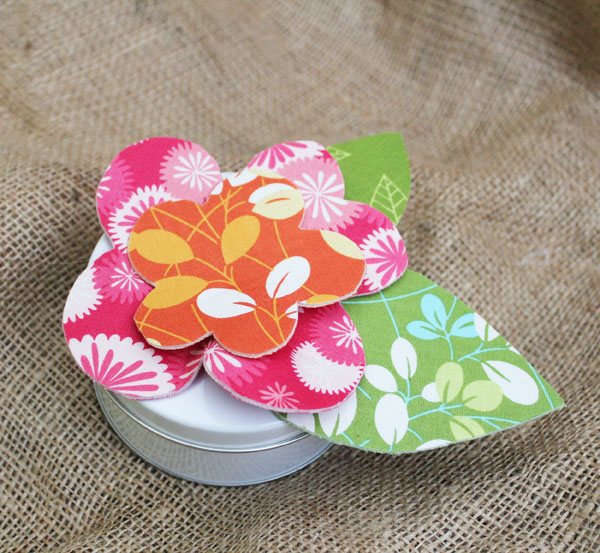
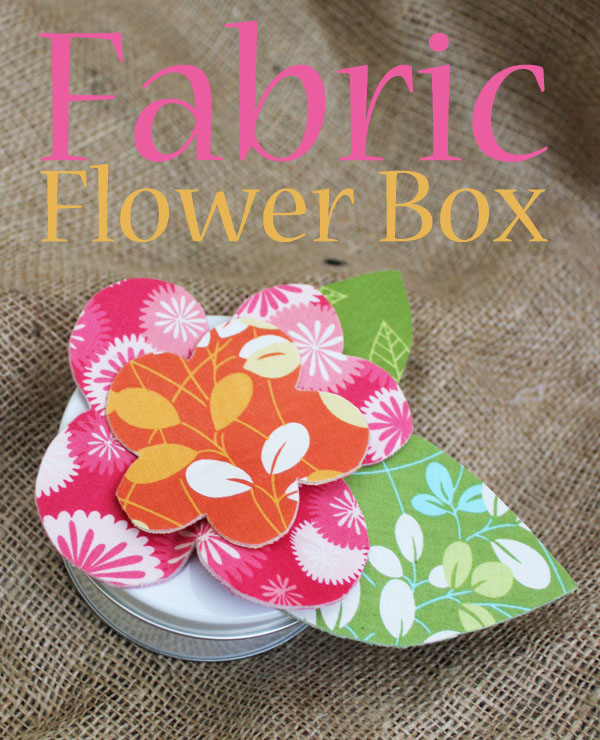
I made a fabric flower embellished gift box.

fabric flower box

We still have lots more Craft Lightning to come… be sure to swing back by tomorrow!

Flower Topped Gift Box

We all have boxes lying around that with a little embellishment could be great gift boxes. Because a gift box like this is a gift itself! And you won’t believe how easy this gift box is to put together.

fabric flower box


This project is a part of Craft Lightning Week. Craft Lightning projects take 15 minutes or less (sometimes much less). Angie from The Country Chic Cottage and I share a new Craft Lightning project each morning, and then each afternoon we do a roundup of Craft Lightning projects that our friends from around blogland have done. We have dozens of bloggers joining in this week with fun, fast crafts.

supplies for phoomph flower boxTo make your own Flower Topped Gift Box, you need:
1 Sheet of Phoomph

6 charm squares (these are V and Co by Moda)
Scissors
Small Cookie Tin
Hot Glue


Start by attaching the charm squares to the Phoomph. Charm squares are 5″ squares of fabric sold in a package that includes the entire line. I picked 2 green for the leaves, 2 pink for the bottom flower, and 2 orange for the top flower.

stick squares to phoomph
Phoomph is a new product that adds stiffness to fabric. Stick the fabric to either side and it “phoomph”s up your fabric.

Peel the paper off of one side of the Phoomph, stick on the squares. Peel the paper off the other side and stick the coordinating fabric squares to the back. Make sure that you’re lining them up so that the pink is pink on both sides, and that the other colors match on both sides as well.

Cut the Phoomph to separate the fabric squares.

trim colored squares

Cut the bottom square into a large flower, the top into a small flower, and the green into a large and small leaf.

cut shapes

Glue down the leaves to the top of the box with hot glue.

cut shapes

Cut an X into the center of the large flower

clip center of flower

When gluing down the large flower, pull one side of the X towards the other. Glue down securely

glue over to side

Glue the small flower on top. All set and ready to enjoy!

finished flower box

Make sure to stop back by this evening and all week long for more Craft Lightning projects!

cute flower on a tin box

Craft Lightning Roundup – Day Two

YAY! More awesome quick crafts for Craft Lightning this week! Here are some awesome tutorials from bloggy friends… and each can be done in 15 minutes or less!

I’ve been doing some gardening (and some wine drinking), so I’m excited about these garden markers from Wait ’til Your Father Gets Home.

Wine Cork Garden Markers - Wait til your Father Gets Home

I have an aunt who finds the most fun magazine pages to cut up and paste onto envelopes, so I love this idea from Creating Really Awesome Free Things – using magazine pages as envelopes.

magazine-envelope - Creating Really Awesome Free Things

These mini notecards from The Girl Creative are so fun and simple… and I love the pops of color added by the Washi Tape.

Mini-Washi-Tape-Notecards - The Girl Creative

Planting herbs is on my to do list, and I love the idea of getting my cutting garden done in less than 15 minutes with this herb garden from One Project Closer.

Herb-Garden by One Project Closer

I love the idea of celebrating the beauty of nature like Mom’s Crafty Space did with this awesome butterfly wing necklace.

DIY Butterfly Wing Pendant - Mom's Crafty Space

Over at the Country Chic Cottage, I’m sure you saw this bright and fuzzy Neon Pom Pom wreath. How fun is this? And it would make a great kid’s craft!

neon pompom wreath - the country chic cottage

If you stopped by this morning you saw the Fast Felt Cowboy Vest that I whipped up for my preschooler.

Felt Cowboy Vest Tutorial - Make it in 15 minutes!

I’ll be featuring YOUR projects on Saturday… make sure to link them up to the Craft Lightning Link Party!

How to Make a Cowboy Vest in 15 Minutes

My son recently dug into his old Halloween costumes and found the Cowboy vest he wore when he was 2. Nearly two and a half years later, it doesn’t fit anymore, and he was disappointed. So he asked if I could make a Cowboy Vest for him. Of course I could. This vest is super easy to make, and I was able to whip it up for him in just a few minutes. The original vest had a matching belt with holsters and felt guns, and whipstitching around the edges of the vest. This vest isn’t nearly as fancy. I might later add whipstitching around the vest to add some color and interest, or if my son really wants for it and asks for it expressly.

Felt Cowboy Vest Tutorial - Make it in 15 minutes!

The timing of his asking was perfect because this week is Craft Lightning Week! All week long I’m partnering with my friend Angie from The Country Chic Cottage and we are each sharing a super-quick 15-minute-or-less project with you in the morning, and then a round-up of great quick projects in the evening. This cowboy vest is the perfect Craft Lightning project.

To make your own felt cowboy vest, you’ll need:
Off-white felt. For my size 5-6T son, a half yard is plenty
Sharp Scissors
Sewing Machine (though you could use glue)
t-shirt that fits the child (for measuring purposes only)


Fold your felt into quarters. Fold the shirt in half and lay it down on top, with the folded edge of the shirt up against the folded edge of the felt.

lay out t shirt


Cut roughly the shape of the shirt. Cut arm holes instead of sleeves – make the arm holes nice and roomy.

cut the vest shape


Unfold, and fold again as shown in the picture. Cut along the front fold, and then cut the front collar into a v-neck shape.

cut the vest open


Stitch the two side seams quickly together. You could use fabric glue for this part if you don’t like to sew.

stitch down sides


Once you’ve stitched the sides, you’re all done – you have made a cowboy vest! Let your child try it on and you can take pictures of him with a super cheezy smile!

cowboy vest and a cheezy smile

Linked up at:

seven thirty three

Craft Lightning Roundup – Day One

craft lightning button 150It is the first day of Craft Lightning, and I’m so excited to share all these fun craft projects with you! Angie and I have put together a HUGE group of amazing bloggers to join in this week. Each day we’ll be rounding up projects from several of our blogging friends who are all sharing their own Craft Lightning – Crafts that can be done in 15 minutes or less!

Each morning we’ll be sharing original fast crafting tutorials with you, so be sure to check back again and again… and each afternoon we’ll do a roundup of fast crafts from our friends on the web.


Mother’s Day was yesterday, but maybe you missed making the perfect Mother’s Day gift? This photo and quote magnet from Lisa Stuff is a great idea!

mother's day magnet


I have tons of postcards and such that have come back with me from trips. Instead of hiding them in drawers I should frame my travel memorobilia like Decor Adventures does!

Framed Travel Memorabilia - Decor Adventures


Want to update an old vase? I love the idea of wrapping rope around an old vase to give it new life like these rope wrapped vases from DIY Inspired.

Rope Vases at DIY Inspired

I have some seriously messy drawers in my house, but that might all change with this simple and easy tutorial from Condo Blues on making a Drawer Organizer out of yardsticks.

yard stick drawer organzier - Condo Blues


This Monogrammed Ring at HomemadeVille is super simple to make, and I love that you can customize it. You’ll never believe its humble beginnings, either!

monogrammed ring


My Craft Lightning partner, Angie, made this great Ballard Knock off Stool. She has a great eye for thrifting, and you’ll never believe how this looked before she took a can of spray paint to it!

ballard knock off spray painted garden stool


In case you missed my tutorial from this morning, I made TWO pairs of earrings in 15 minutes. Super easy to do when you have the right supplies!

Falling Stars and Tumbling Hearts earrings - so quick and easy you won't believe it!

If you have a 15 minute craft of your own that you’d like to share, please link it up at the Craft Lightning Link Party! I’ll be back tomorrow with another fast craft – and if you have a lil’ guy in your life, you WON’T want to miss this one!

Quick Earring Crafting – Falling Stars and Tumbling Hearts

The secret behind these star and heart earrings is the supplies you start with to make them. Which is really the secret behind all quick crafting. If you have the right supplies, it makes crafting much easier. And having the right supplies helps you to be successful.

Falling Stars and Tumbling Hearts earrings - so quick and easy you won't believe it!

This week, Angie from The Country Chic Cottage and I are doing Craft Lightning Week – a whole week of quick crafts that can be done in 15 minutes or less. Every morning this week I’ll share with you a quick craft tutorial of my own, and every evening I’ll do a round-up of quick crafts from some of my blogging friends who are sharing in this fun week as well.

I wanted to kick off Craft Lightning week with these fun earrings because you can actually make both pair of earrings in under 15 minutes. They are super inexpensive to make, but look like you purchased them at a department store. I’m sure you want to know all the details, so here is how you can make your own tumbling hearts or falling star earrings.

supplies to make star and heart earrings

Start with these supplies:
Heart and Star Jump Rings
Regular Circle Jump Rings
Pliers
Earring wires


Start with one set (I chose the heart). Connect the jump rings by opening up a single jump ring, adding two jump rings, and then closing the ring. Repeat to make a chain.

open jump rings to connect

Use half the jump rings on one earring, and half on the other. Once you’ve made a chain with half the jump rings, attach the chain to the earring wire with a regular circle-shaped jump ring.

connect hearts to make earrings

Repeat with the other earring to make a set.

tumbling hearts earring tutorial

You follow this same process with the stars to make a set of star earrings.

put stars together

I’m not sure which I love more – the hearts or the stars…

Star Earring Tutorial

Linked up here:
BWS tips buttonBWS tips buttonSumo's Sweet Stuff

Craft Lightning Week!

craft lightning button

It is time to shake things up around here! I’m teaming up with Angie from The Country Chic Cottage again this week for 5 days of lightning fast crafts! All week each of us will share a new quick craft in the morning, and do a round-up of quick crafts from some of our friends around the web in the afternoon/evening.

We like to do this several times a year to show that there really is time to fit crafting into your life. Craft Lightning takes 15 minutes or less, and we include all kinds of crafting mediums – painting, sewing, jewelry, home decor, and more!

We love having everyone join in on Craft Lightning, so if you are a blogger with a quick craft you’d like to share, please share it below. Maybe we’ll feature some of these projects!

If you link up here, we’d love it if you added the Craft Lightning button to your post!

<center> <a href="https://30minutecrafts.com" target="_blank"><img src=" https://30minutecrafts.com/wp-content/uploads/2013/05/craft-lightning-button-150.jpg" style="" border="0" /></a>


Pennant Banner Birthday Decorations with Tissue Paper and Mod Podge

tissue paper pennants

These pennant banner birthday party decorations are super easy to make, and don’t take long at all. Because they are made with tissue paper, they catch the light beautifully and are a fun touch to any party. I made these pennant banners in orange for a baby shower, and now I’m sharing how you can make them yourself!

To make tissue paper and Mod Podge pennants, you need:
Tissue Paper
Mod Podge
Twine or String
Paintbrush
Garbage bag or Plastic Tablecloth


Start by spreading the plastic tablecloth or garbage bag on your work surface. Then spread out the string.

Fold your tissue paper into half, and then into half again making a long skinny rectangle. I reduced my thickness to 5 sheets of tissue paper at a time, and then folded just the 5 sheets.

Cut the tissue paper into triangles. Because of the folds in the tissue paper, this will actually make some diamonds and some triangles. Keep the diamonds, put the triangles aside for another project (like the Mod Podged Dinosaur Wreath I made).

fold paper in fourths and cut

Put the diamonds out on your work surface, along the string.

Spread Mod Podge on the bottom half of each diamond.

put mod podge on pennants

Fold the diamonds over to make triangles, sandwiching the twine between the layers, up by the fold.

line up pennants

Repeat to make a banner the length you need. Let the Mod Podge dry for several hours or overnight. Hang up your pennant banners and celebrate!

birthday decorations with tissue paper

Linked up here:
Today's Creative Blog homework

Funky Sunglasses Case from Quilt Block

When I’m not doing fast crafts, I’m often quilting. Like most quilters, I have random quilt blocks lying around. Some didn’t make it into a quilt. Some I didn’t like the fabric choices for that block. I love the idea of taking these quilt blocks and turning them into something useful, like this Funky Sunglasses Case made from a crazy quilt block. Super simple to make, really all you need is a zipper and this great tutorial, and you’ll have a fun and funky sunglasses case that will keep your shades protected all summer.

funky sunglass case - the sewing loft

Pin this to Pinterest for the next time you take a quilt class and end up with random blocks in your stash… but be sure to pin from the original source.

Last Minute Mother’s Day Craft Ideas

Lots of last minute Mother's Day Craft ideas!Mother’s Day. It is almost here. And if you’re looking for a last minute craft idea, I’ve got over 25 of them to help you get ready for Mother’s Day… and they each can be done in less than 30 minutes! So send mom out for a gallon of milk (or even better… a pedicure!), and whip up a crafty surprise for her. Or, if mom would rather hang out in her sweats, let her join in on the crafty fun. But don’t leave a mess for her to clean up!

And to all moms everywhere – thank you for all that you do!