Hey! I’m a guest over on Newlyweds on a Budget today – want to learn a little more about me (sordid secrets and all)? Go check out what she asked, and how I answered!

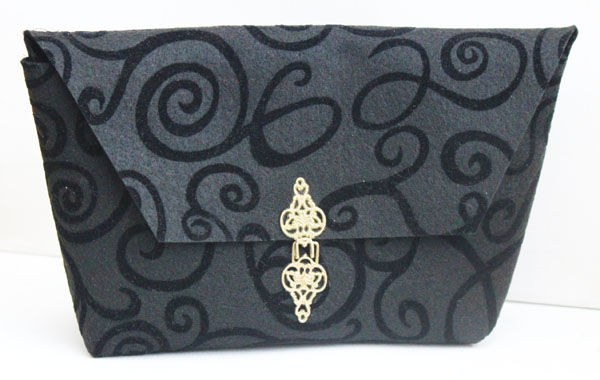
About a week ago I saw this collection of bags, totes, and clutches over on Paper & Stitch. Second row, right side – a circle clutch! How great is that! I love the idea of making a clutch in the shape of a circle, and I just knew I could whip one up in 30 minutes or less.

Want to make your own circle clutch? Here is what you need
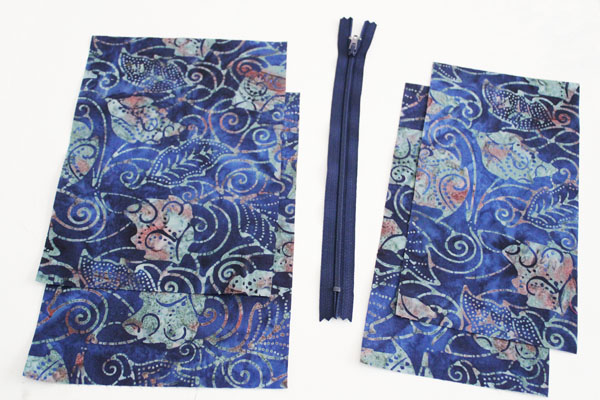
Fat Quarter of Fabric
Coordinating 8″ Zipper
Stabilizer (affiliate link: I used ByAnnie Soft and Stable)
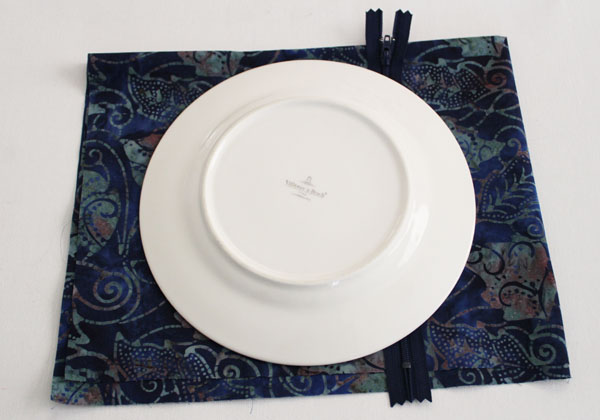
Small Plate
Chalk pencil
Fold the fat quarter into quarters. Put your plate on top to make sure that it is the right size. You want about 1/4 inch on all sides. Then cut the fat quarter into quarters. Put aside two pieces for later.
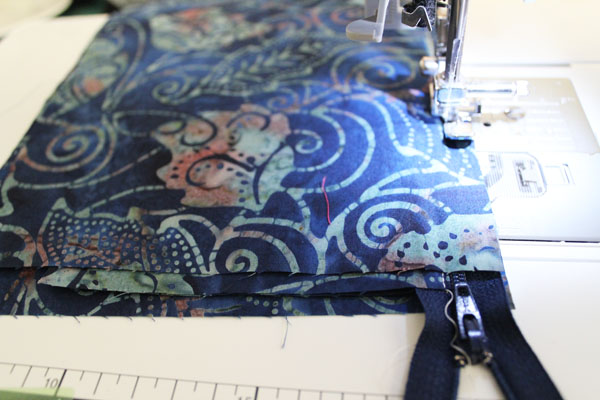
Now cut the remaining two layers where you want the zipper to go. I wanted my zipper off-center.
Attach the zipper. Put the zipper foot on your sewing machine, and stitch the two small pieces to one side of the zipper by laying them right sides together with the zipper in between. Press the fabric open to the opposite side and top stitch down.
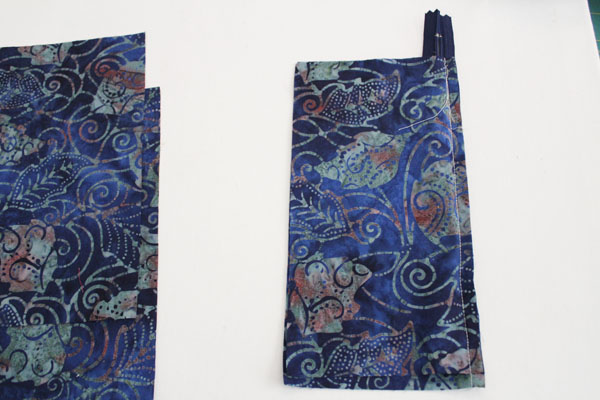
Repeat with the fabric on the other side, attaching it to the opposite side of the zipper.
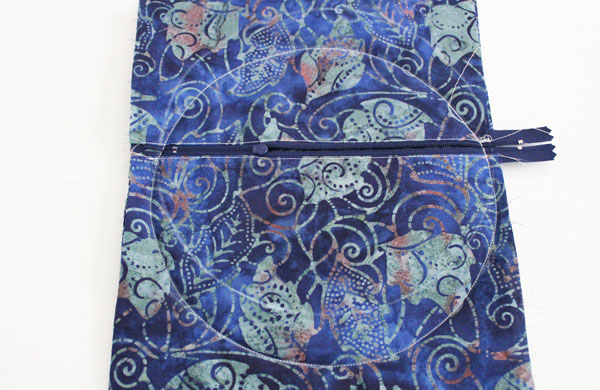
Put the plate on top again, and trace with a chalk pencil. You can see below that I traced it twice – the first time the zipper was more centered than I would like, so I just re-traced.
Stack the pieces: One of the pieces you reserved on the bottom (right side down). Then the Stabilizer. Then the other extra piece that you put aside in the first step (right side up). Then the zippered piece on top of that. Pin through all the layers.
I use the Soft and Stable because it adds a little structure as well as stability. It is a foam/batting/stabilizer that is made to use in purses.
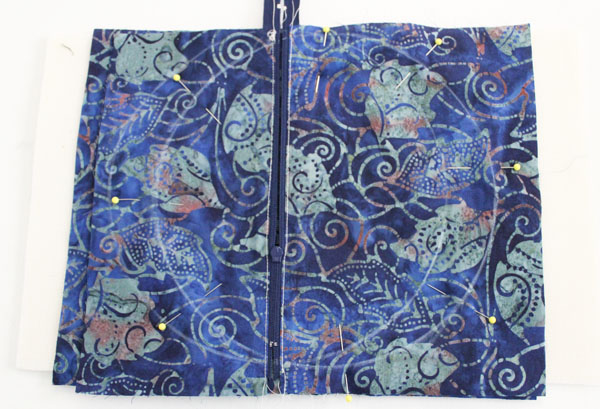
STOP HERE: Make sure to open the zipper at least halfway open. If you don’t open the zipper at this point, you’ll have a tough time turning the purse right side out!
Stitch on the line, all the way around. Be extra careful when stitching over the zipper.
Trim the circle about 1/4″ from the stitching.
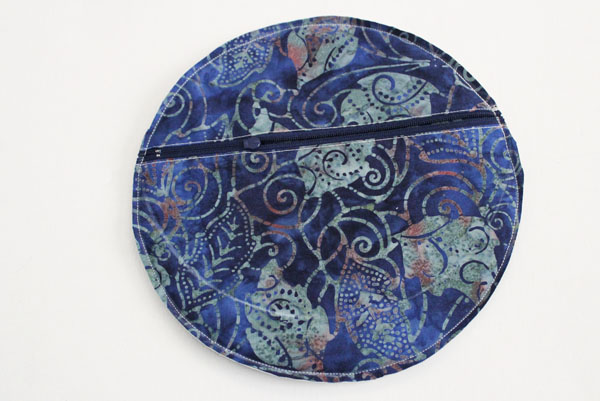
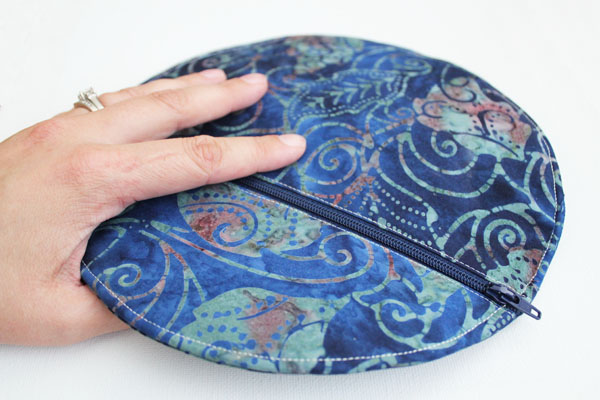
Turn the purse right side out through the open zipper. You could have a finished clutch at this point, but I wanted mine to look completely finished, so I put the walking foot on my sewing machine, and stitched all the way around to secure the purse and give it a finished look.
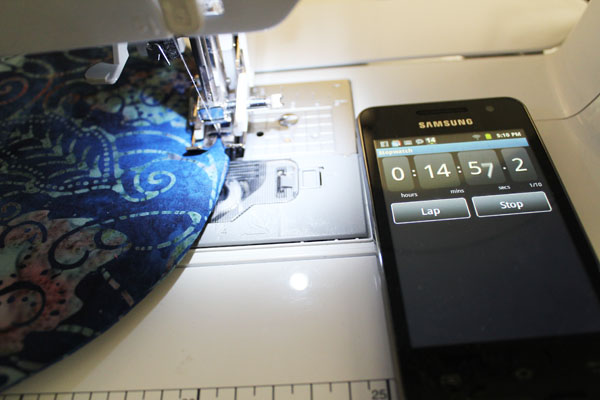
Yes. That is my timer. I wanted to see how long it took to make this project… I can’t believe I whipped this up so quickly!
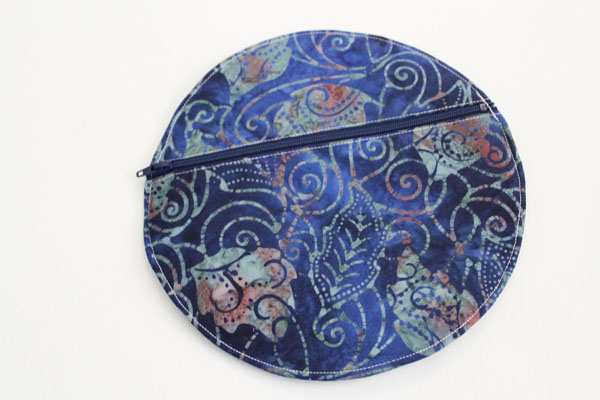
After adding the top stitching, I was all done! Just need to toss in my keys and phone, and maybe a lip gloss… and I’ve got the perfect grab and go purse to go with any outfit!
Yup. This clutch is perfect to pair with a dress, or to dress up a pair of jeans! And it was super simple to make!