Wand You be my Valentine – Free Printable Valentine

Printable Valentine - Print and cut the PDF or use the Silhouette file to cut faster

Valentine’s Day has long been one of my favorite holidays. Way back to grade school. I loved making and passing out Valentines, and I loved getting a big box filled with Valentines from my classmates. So many bad puns, corny jokes, and sweet treats – how can you go wrong?

This week I’ll be sharing a bunch of free printable Valentines. Print them off, add the name of the child giving the Valentine, cut them out, and attach the appropriate treat. Super simple, right?

If you have a Silhouette, I’ve made it even easier! For each of these Valentines, I’m giving two options – a PDF for readers who don’t have a Silhouette cutting machine, and a Silhouette file if you do have one. With the Silhouette file, you can print and cut out the Valentines super fast. It will even cut any holes!

Cut the hearts on the Silhouette

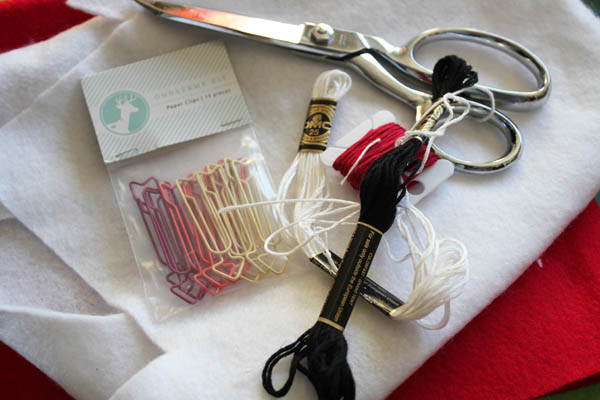
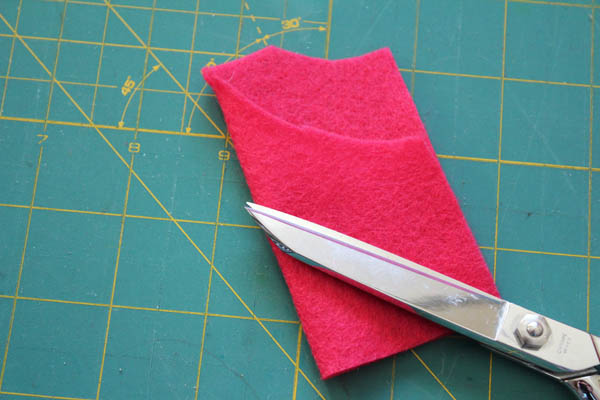
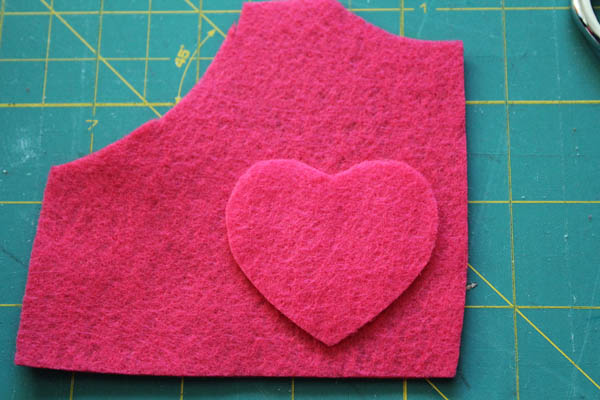
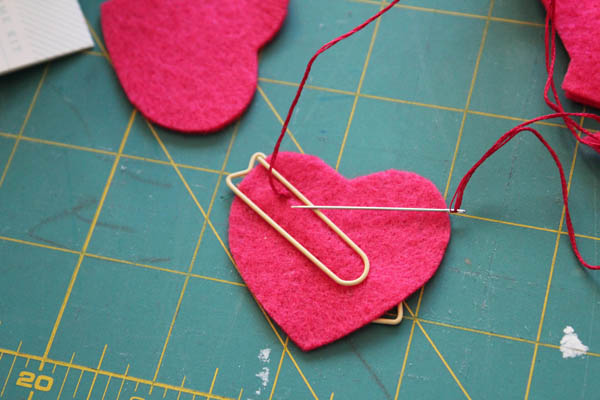
Today I’m sharing this simple heart valentine with a wand. Print out the Valentine, cut it out, add your child’s name, and punch two holes to insert the wand. I purchased the wands in the Valentine’s section of my local craft supply store, as well as cardstock to print the Valentines on.

Wand valentine printable

So easy to make enough Valentines for the whole class!

Wand you be my Valentine - Classroom Valentine Printable

Sign up for our email list to get access to all of our Valentine’s files:


FREE Valentine’s Printables
Sign up for our email list to get access to the free Valentine’s Printable files!
You’ve successfully signed up! Check your email for details.

Stuffed Felt Hearts with Paperclip Arrows

tutorial for stuffed paperclip hearts

Last weekend I was at CHA, the big Crafts and Hobby Association tradeshow. There are so many fun things about CHA, but one of the MOST fun for me is just walking down the aisles and seeing all the fun craft supplies! It is like a belated Christmas, just getting to see all the good stuff coming out!

One of the booths that caught my eye was the Freckled Fawn. For lots of reasons, but the biggest was the paperclips. I don’t know if I’ve shared it here before, but I have a passion for paperclips. Back when I worked in Advertising, I loved clipping papers together with stars, smiley faces, and other fun paperclips. Little things. Little things make me happy.

I was hoping to convince them to part with a couple of their adorable arrow paperclips, and those gals gave me a whole package! If you don’t understand why a package of paperclips that costs less than $5 can make a person deliriously happy, I have no way to explain it to you. For those of you who do understand, welcome! You are my people.

Now that I had the highly coveted paperclips, I needed to create something. The Freckled Fawn folks are papercrafters, so I decided to go crazy and use the paperclips on felt (ps – I think adding whipped cream to ice cream is also going crazy. And putting sprinkles on top of that is overboard… but I like it).

supplies for stuffed heartSo, if you’d like to make your own stuffed paperclip hearts, here’s how you do it.

Start with:
Scraps of Felt
Freckled Fawn Arrow Paperclips
Coordinating (0r contrasting) colors of embroidery floss
Needle
Tiny bit of stuffing (I used Polyfil)

Fold a piece of felt in half to cut a heart shape. If cutting heart shapes makes you nervous, print off a heart shape from the computer and use it as a template. My heart was about 2″ x 2″, but I didn’t measure it out.

fold felt and cut heart

I put the heart on top of another piece of the same colored felt, and used it as a template to cut the back of my little stuffed heart.

cut second heart

Then I put the paperclip on the front heart.

add arrow paperclip

After threading my needle with 3 threads from the embroidery floss (cut a length of floss about the length of your arm, then split the 6 threads into two segments with 3 threads each). I did a couple stitches on the back, not going through the full layer of the felt (so that you can’t see it on the front), to secure the thread.

start thread

Then I started a simple blanket stitch.

stitch the heart

If you’ve never done a blanket stitch, watch this 2 minute video. She shows you how to start (she uses a knot, which is fine), and how to end the stitch as well.

 Once I got about 2/3 of the way around, I added a little bit of stuffing. About a teaspoon full (are we allowed to use cooking measurements in crafting? I hope so!). You don’t want to over-stuff the heart… it looks nicer when it is lightly stuffed. The arrow paperclip moved a little bit while I was stuffing, but it was super simple to move back in place.

stuff the heart

Then I finished stitching, and tied off the end (see the video above for details on how to do that).

finish the end of the thread

I buried the end of my thread by inserting the needle close to my stitching, then exiting it about an inch away in the body of the heart. Then I pulled the thread tight and clipped it right up against the felt. The thread tucks right back in, and the end is hidden!

bury the thread

Super fast, super simple.

finished paperclip heart

I might add a pin-back to the back, and wear it as a sweet Valentine’s pin. I could add a hair clip and put it in my hair. These little poofy hearts are just so sweet.

I might have gotten a little carried away making them.

stuffed paperclip hearts

But they were so addicting!

A big THANK YOU for the gals at the Freckled Fawn for letting me abscond with a package of these adorable paperclips. If you’re addicted to cuteness (who isn’t?), you might want to check out their adorable monthly embellishment kits.

Fast and Easy Valentine’s Day Crafts

Over 30 Fast and Easy Valentine's Crafts

Valentine’s Day is a great time for fast and easy crafting. Between all the cheezy heart decor and corny Valentines, you can’t go wrong with these great fast and easy Valentine’s Day crafts. Whip up one, or several. They each take less than 30 minutes to make, and most you can whip up from supplies you already have lying around the house!


Silhouette 30% off Sale!

bloggerpromo_january

Hey there!

Did you get a Silhouette for Christmas? Or did you have one already? Looking to stock up on supplies for all the Valentine’s/Easter/St.Patty’s crafting these next few months?

Well, I’ve got you covered. But only if you act fast. Because today is the LAST DAY of this amazing Silhouette sale.

30% off. That’s right – nearly a third off of just about anything you can buy at www.silhouetteamerica.com if you use the promo code MINUTE.

What does “just about anything” mean? Here are the deets. The 30% discount does NOT apply to the machines, gift cards, $10/$25 download cards, shapes or subscriptions, or out of stock items.

The 30% discount DOES apply to all other physical materials and supplies that you toss into your cart. It also DOES apply to the Silhouette Studio® Designer Edition Software. If you don’t have that yet, now is a great time to snag it – just $35 when you use the promo code MINUTE at checkout.

But act fast. Head to www.silhouetteamerica.com right now. This deal ends today!

Craft Lightning Day 5 Wrapup

How is it Friday already? We’ve finished up our final day of Craft Lightning! I want to share with you all the fun and fast 15-minute projects today’s bloggers whipped up. Seriously, y’all – just FIFTEEN minutes to make any one of these Valentine’s Day Crafts! Can you believe it?

Dinah from Inheriting Our Planet made a cute Owl Valentine’s Card. Whoooo thinks this is super cute? (sorry! couldn’t resist!)

handmade-owl-valentines-card-4

This blingy heart garland was made by Sarah over at Bombshell Bling. You’ll have to go check out her “secret ingredients” for making it so quickly!Quick-Cheap-Heart-Garland-Tutorial-from-Bombshell-Bling


Over at Patchwork Posse, Becky made some heart hand warmers. These are upcycled out of old sweaters – how smart is that?

heart-hand-warmers2

These Valentine’s Decorations actually glow in the dark! You’ll have to see what repurposing Pauline from Club Chica Circle did to whip these up.

Easy-Valentines-Decor-Craft

Ariean from One Krieger Chick made some simple yet fabulous heart art. And if you want, you could change this look up for any holiday!

Simple-Heart-Art-in-15-minutes

I’m not going to spill the beans and let you know what Cyn from Creative Cynchronicity used to make this Mug Cozy… you’ll just have to click on over and be as surprised as I was! That Cyn is so clever!

sock7text_thumb

Angie from The Country Chic Cottage, my partner in craftiness for this fabulous week of fast crafting made some conversation heart printable treat labels.

conversation heart printable treat labels-002

I got crafty with hardware supplies for today’s project, making a heart ornament out of nuts. I have to say I’m really “nuts” about this craft!

I'm nuts about you Valentine's Heart Ornament

I hope you enjoyed hanging out with us for this series. Come back tomorrow for a full wrap-up of the entire week, just in case you missed anything!


I’m Nuts About You – Heart Ornament

I'm nuts about you Valentine's Heart Ornament

I think it is fun to find things at the hardware store to craft with. Taking an industrial material and making it crafty and fun. Like this heart made out of nuts from the hardware store. Simple to make, you can give it to your Valentine as a way to show them that you’re “nuts” about them!

This tutorial is my last of our Craft Lightning Valentine’s Day Edition – Valentine’s Day Crafts that can be done in 15 minutes or less. Tonight I’ll do a roundup of the other bloggers who have joined in, including my partner for the series, Angie from the Country Chic Cottage. And tomorrow I’ll do a big wrap-up. If you missed any of my projects, go check out my Doily Earrings, Duck Tape Frame, Doily Flower, and Red Hot Roses.

To make this heart out of nuts, you need:
Supplies for I'm nuts about you ornament25 Nuts from the hardware store – they should all be the same size. I went for smaller, lighter nuts, but go with what works for your project.
Krazy Glue (the craft gel formula is what I used, and it was awesome)
Ribbon
Scissors
Paper Towel

Just a note: I originally made this ornament using a different glue. I met the folks from Krazy Glue at a recent event, and decided I’d make the ornament again using the Krazy Glue. Y’all: get the Krazy Glue. The ornament was so much easier to make because the nuts bonded completely and almost instantly. There was no waiting for things to try. Yes, they gave me the product for free but I’m hooked on it because it is genuinely amazing stuff.

I started by holding on to one nut. This will be the point at the bottom of the heart. I held onto this while building the heart, until it was completely made. I glued on two nuts. It only takes a small touch of glue on the two or three flat surfaces, and then hold the next nut in place for a few seconds. Then repeat.

put nuts together

Repeat the process over and over, until you have a double-row of 6 nuts. This is the side of the heart.

Line up nuts to make heart

Start building up, creating your heart.

continue stacking nuts

When you have all the nuts in place, put the heart down on a paper towel. This is just in case you have any drips on the back, you probably don’t want the heart to get stuck to your work surface.

set down heart made out of nuts

Add a ribbon through one of the nuts in the top, tie a knot, and you’re all done!

Heart made out of nuts

Be sure to stop back by tonight and tomorrow as I wrap up this awesome Craft Lightning week!

Craft Lightning Day 4 Wrapup

I can’t believe it is day 4 already! These Craft Lightning weeks always fly by! I love partnering with Angie from the Country Chic Cottage to do these Craft Lightning weeks, and getting our blogging buddies to join in makes it even more fun!

Today we have another group of awesome crafters joining in. Check out the great Valentine’s projects they were able to craft in just 15 minutes or less!

Justine from Sew Country Chick showed us that she’s just as lethal with paint as she is behind the sewing machine by making this Valentine’s mug. Perfect for coffee on Valentine’s day. Or any other day.

stenciled mug

Lisa at Stuff-N-Such has a collection of jewelry and other treasured finds, which she used to bling up this awesome Valentine’s Brooch.

Valentine's Day Brooch

We all know that Jen from 100 Directions makes the most adorable printables (spoiler alert: I’m working with her on some fun stuff for 2014), and she didn’t disappoint with these great glowstick valentines.

Valentine you make my heart glow

Who doesn’t love a kiss on Valentine’s Day? Debbie from Refresh Restyle made these cute kiss Valentines that are much less perishable than the straight-from-the-lips variety.

Valentine-Kisses

Over at Mrs. Greene, Rhonda shared a super fun way to turn a strip of fleece into a Valentine’s Hairband. This would look super cute on a bun. Or in Green for St. Patty’s. Or… well… I could go on…

DIY Fleece Hair Tie

Angie over at The Country Chic Cottage made some Valentine’s Pops. With eyeballs. Seriously, y’all. WITH EYEBALLS. I didn’t think I could love her any more than I already do, and then she adds the eyeballs.

valentine's day pops

I whipped up some Red Hot Roses in under 15 minutes. Great to give to a smokin’ hot Valentine.

Simple Red Hot Roses

Tomorrow we share our final craft projects for the series (I can’t believe it is almost Friday already!) Be sure to swing back by to see my hardware store valentine, and check out our final roundup!


Red Hot Roses

Simple Red Hot Roses

I’m so excited to share with you my Red Hot Roses! This is such a fun Valentine’s gift to create for someone you think is RED HOT! Or, for a valentine who you know loves cinnamon hearts. These Valentine Roses won’t die… they just need a little dusting every now and then.

I made these roses in less than 15 minutes as part of this week’s Craft Lightning series. Craft Lightning is a series my bloggy buddy Angie from the Country Chic Cottage and I put together. You can go check out the other posts from this Valentine’s edition of Craft Lightning. Those are my Doily Earrings, Duck Tape Frame, Doily Flower, and the Day 1 & 2 Recap, and the Day 3 Recap.

supplies for red hot rosesThese Red Hot Roses aren’t at all tricky to make. To whip them up, you’ll need:
Roses from the floral section at your Craft Supply Store
Hot Glue
Glass bulb ornaments (plastic is fine too)
Red Hot Candies


Start by opening up the flower so that you can see the very center of the flower.

open up the rose

Fill that center with hot glue. Really tuck the tip of the glue gun right down into the center, and just fill it with hot glue.

fill center with hot glue

Insert the metal ring at the top of the ornament into the hot glue. Hold in place for a minute or two, then set down for about 5 minutes to really let the hot glue set. Don’t touch the metal or the area with the hot glue, because it is HOT!

put ornament in place

Once the hot glue has set, carefully remove the glass bulb from the metal cap. Add about 2 tablespoons of cinnamon hearts to the glass bulb. You don’t want to add much more than that, because the bulb will get too heavy for those two little wires to keep it in place.

add red hots to ornament

Carefully pinch in the two wires, and put the bulb back in place.

put ornament back on

Your Red Hot Roses are all finished! Enjoy them at all angles…

make red hot roses

red hot rose

red hot roses

And be sure to come back tonight for a wrap up of today’s Craft Lightning Valentine’s Edition projects from other great fast crafters around the ‘net!

Craft Lightning Day 3 Wrapup!

I love Valentine’s Day, and I’m loving it even more as I see all the awesome projects my fellow bloggers have whipped up for Craft Lightning! Craft Lightning is a series I do with Angie from the Country Chic Cottage, where we and our blogging friends share craft projects that can be done in 15 minutes or less! Check out the awesome projects shared today!

Instead of just giving candy on Valentine’s Day, how about getting in a kissable mood with a mason jar filled with minty fresh products like this one by Tracy over at ScrappyChick?

Kissable Valentine

These stitched up hearts by Erin over at My Very Educated Mother are a great place to tuck a treat (or two)!

Heart Pocket

I’ve seen lots of conversation heart crafts, but this Conversation Heart Tree by Heidi over at Happiness is Homemade made me squeal with joy. Seriously, how cute is this?

Conversation Heart Tree Art

At first glance this Mason Jar Valentine by Malia at Yesterday on Tuesday looks like just a jar filled with chocolate kisses… but she’s got printables and secret surprises tucked inside.

Mason-Jar-Valentine

Nancy over at Do Small Things with Love made these great little felt treat bags. So much love… and made in so little time!

simple felt bags

Over at Happy Go Lucky, Kara made a sweet Valentine’s gift for her Reese’s-loving hubby. Check out her We Love You to Pieces Valentine!

We Love you to Pieces

Angie from the Country Chic Cottage made these great Valentine’s treat bags for boys. As a mom of 2 boys, I can totally appreciate these!

valentine's day treat bags

And I whipped up a simple flower made out of heart-shaped doilies. Fast and easy to make Valentine’s Decor.

Doily Daisy

If you missed it, go check out yesterday’s wrap up of days 1 and 2!

Doily Flower

Doily Daisy

I’m doing Craft Lightning Valentine’s Edition this week! Angie from The Country Chic Cottage and I are sharing crafts that take 15 Minutes or less, and we’ve found an awesome group of bloggers who are sharing fast Valentine’s Crafts this week as well. You can check out the Doily Earrings I shared on Monday, or the Duck Tape Valentine’s Frame I shared yesterday. Also go see the Craft Lightning Valentine’s Day roundup from yesterday… some seriously awesome fast and simple Valentine’s Day Crafts!

Today I’m sharing a super simple Doily Flower. This Doily Daisy is easy to make. I made mine with three layers, but if you want something even more simple, you can have just one or two layers.

Doily Daisy SuppliesTo make the Doily Daisy, you need:
Daisy from the floral section at your Craft Supply Store
Heart-shaped Doilies (5 red, 5 pink, 5 white)
Scissors
optional: stick and green floral tape


Start by cutting your doilies. I cut the center out of the red one, leaving the bottom so that I could add the petals to the flower. I stacked all 5 and cut them all out at the same time.

Cut Red Petals

Then I did the same with the pink doilies, trimming off the outside, but making sure to leave the point at the bottom. Again, I cut all 5 at the same time.

trim pink doilies

I disassembled my flower from the craft store, pulling the center out and removing the petals (if you want to do something fun with the petals, go check out my “Will you Beer My Valentine” project [which also works well with soda]).

I flipped the center upside-down, then put the red center pieces on by inserting the stem piece through the bottom hole one the doily. I placed them in a spread-out pattern.

put red petals on

Then I added the pink petals. I staggered them so that the center of each pink petal was roughly lined up with where the edges of the red petals met. This gives the flower a fuller look than stacking the doily flower petals right on top of each other.

add pink doilies

I repeated this process, this time adding the un-cut white doilies. Then I added the green piece from the flower back on.

put the white doilies and green stem back on

I put the stem back on… and my flower was done! However, this finished flower is significantly larger than the original, so the stem felt too small. I added a larger stick next to the stem, and secured it in place with floral tape, so that the flower would have a stem that seems more in keeping with the size of the flower.

Finished Doily Daisy