Craft Lightning Super Spooky Edition – Day 4 Roundup!

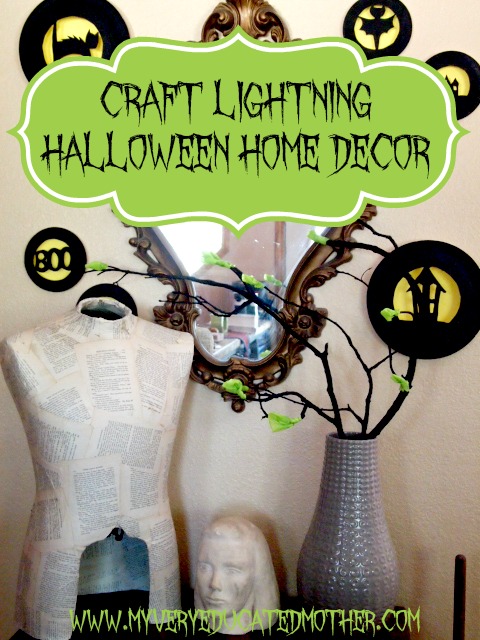
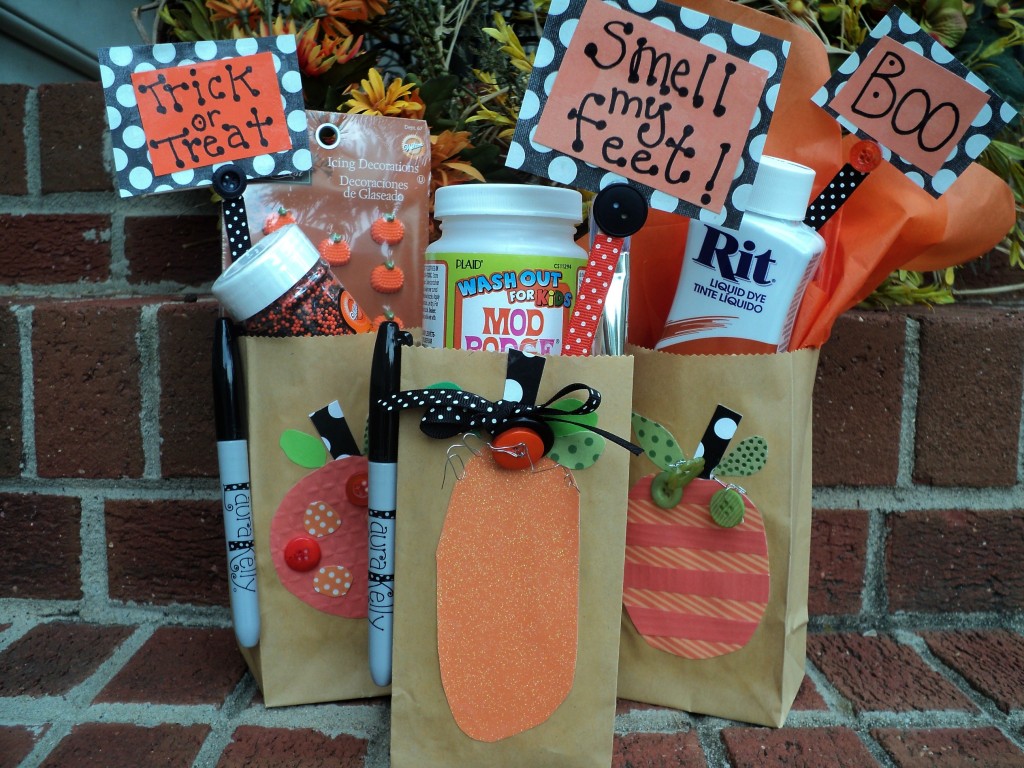
I can’t believe that tomorrow is the last day of Crafty Hangouts – Super Spooky Edition. We have had some amazing bloggers join us this week, with some seriously awesome Halloween Crafts. But we’re not done yet! Here are today’s amazing Halloween crafts – and remember that each of these crafts can be done in 15 minutes or less. That’s right, if you have 15 minutes to spare, you can make any of these great fast crafts! If you are just joining in, make sure you check out the Day One, Day Two, and Day Three roundups!

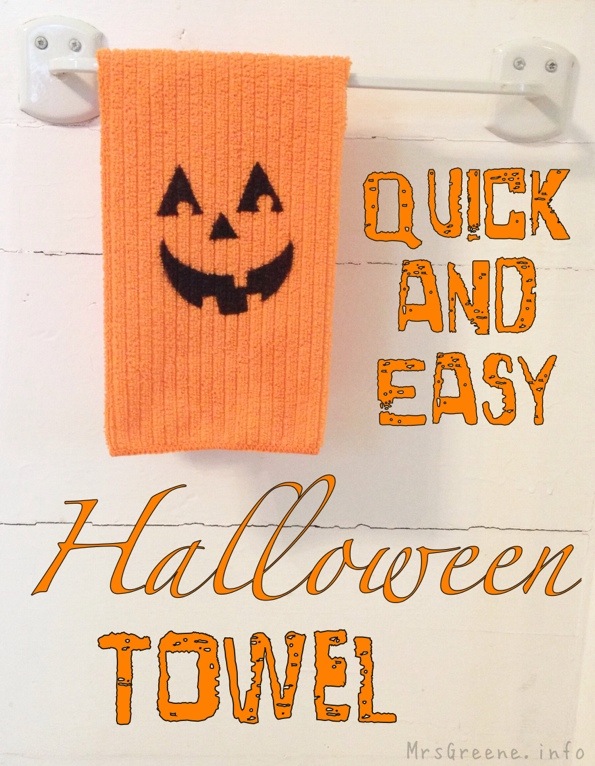
Dress up your kitchen or bath with these fun Jack O Lantern towels that Mrs. Greene made. Super fast, and super cute!

Halloween Towel - Mrs Greene info

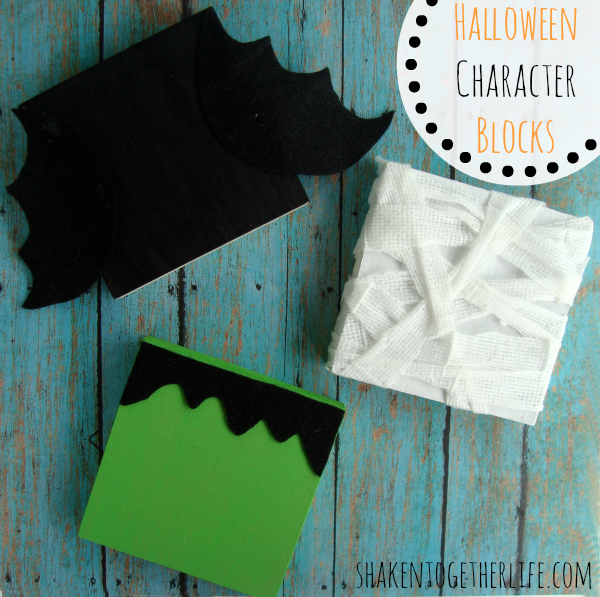
I love these minimalist Halloween blocks made by Shaken Together Life. They take all the cute and whimsy of Halloween… and then make them modern! Love.

Halloween Wooden Blocks - Shaken Together Life

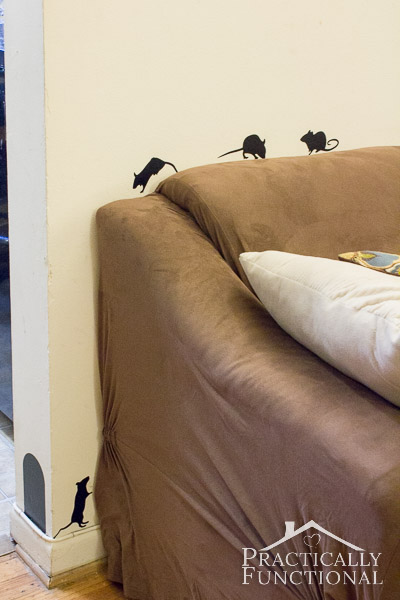
Last week, I saw a mouse running across my patio. My first thought was that it was cute. My second thought was that I didn’t want it in my house. Because no matter how cute a little mouse is, it is a whole lot less cute if it decides to become master of your domain. That’s exactly what makes these adorable mice silhouettes that Practically Functional whipped up just a wee bit spooky…

Mouse Silhouettes - Practically Functional

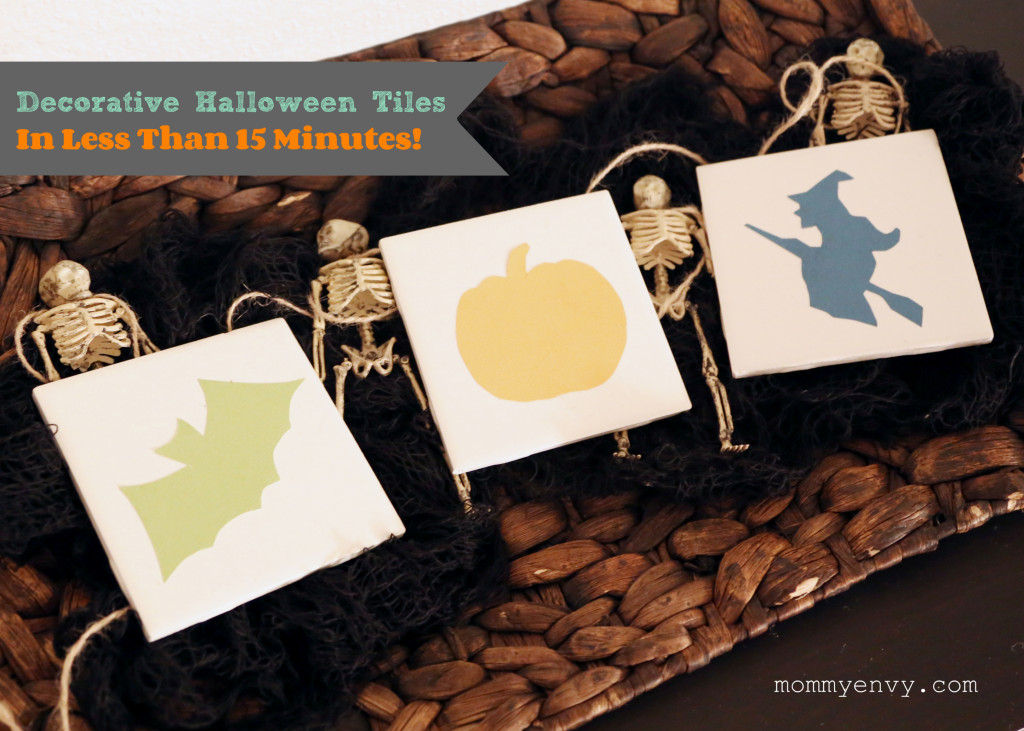
These Halloween tiles that Mommy Envy made would make great coasters. You can make a set and give them as a hostess gift at any Halloween parties you’re invited to this fall.

Decorative Halloween Tiles - Mommy Envy

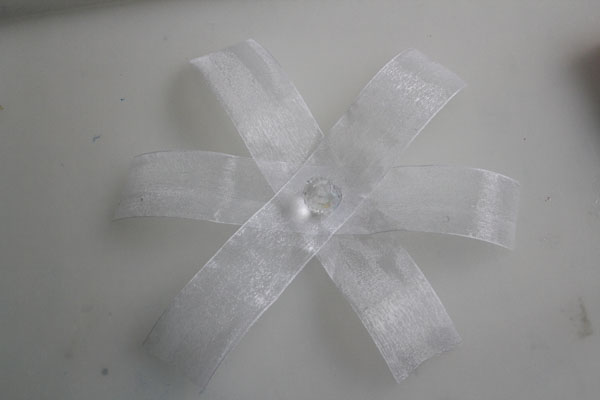
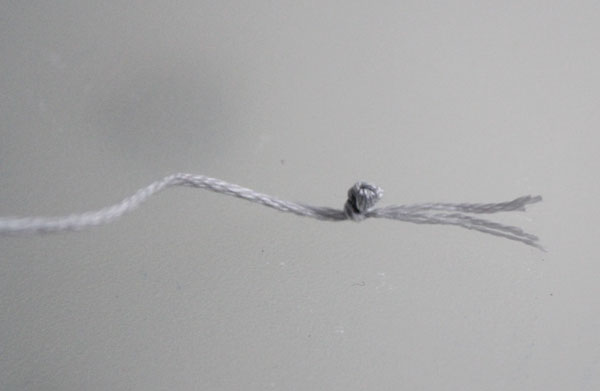
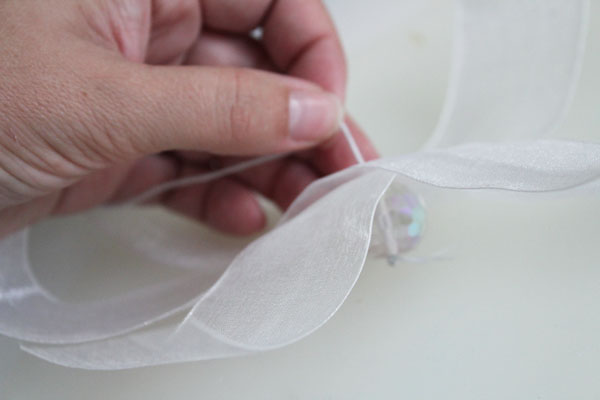
If you’ve got a girly little goblin in your life, this Halloween Rosette Headband by Happiness is Homemade is just perfect for fall accessorizing.

Halloween Headband - Happiness is Homemade

Angie from The Country Chic Cottage is my crafty partner in putting together this fast crafting series, and she whipped up these spooky eye cake pops in just 5 minutes. An awesomely gross treat for your Halloween party!  spooky eye cake pops - The Country Chic Cottage

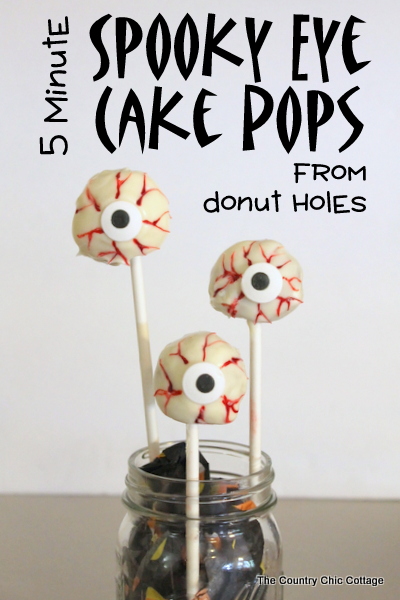
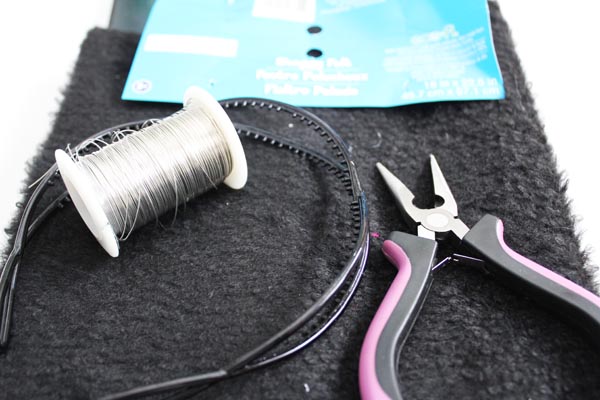
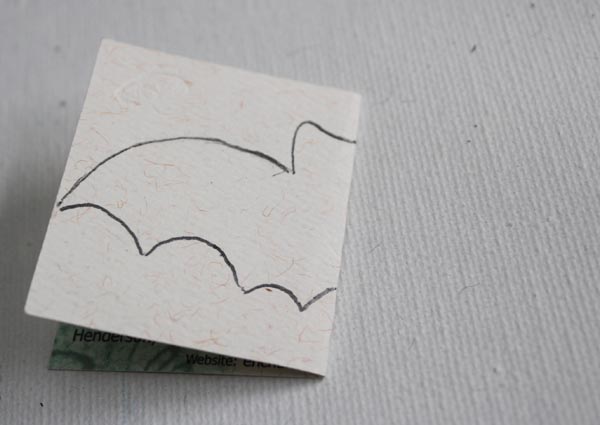
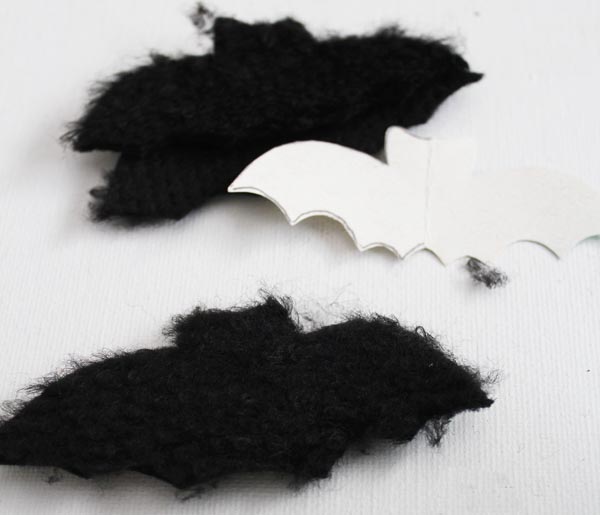
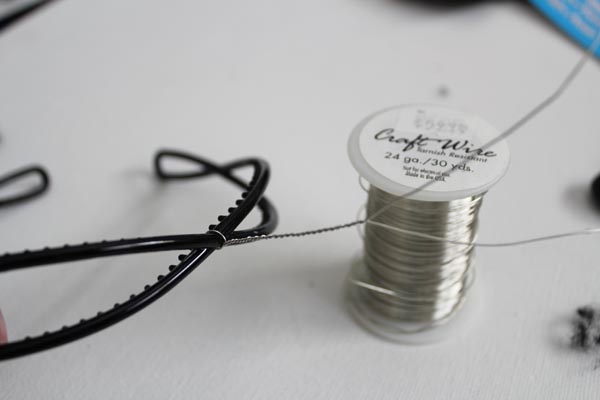
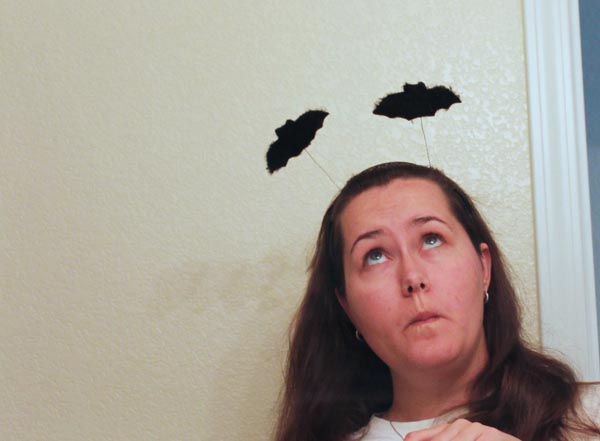
In case you missed my post today, I got batty with a fun bat headband. Fast and simple to make, you can whip one up yourself in just a few minutes!

going batty headband on 30 minute crafts

Make sure to swing back by tomorrow for our final day of Craft Lightning Halloween edition – it is going to be spooky fun!

Batty Headband

going batty headband on 30 minute crafts

This bat headband would make a great substitute for a Halloween costume, and is very work-friendly. Wear it when you can, but take it off for meetings. It is a fun way to celebrate Halloween without going over the top! If you want to add multiple bats to this bat headband you can… I decided to just add two.

This project can be done in 15 minutes or less, as can all the Super Spooky Halloween projects we are doing as part of Craft Lightning week this week. Angie from the Country Chic Cottage and I are hosting Craft Lightning Super Spooky Edition this week. Every morning, we share a fun, fast Halloween craft that can be done in 15 minutes or less. Every evening, we round up crafts from around the web that our bloggy buddies have created as part of this series. There is so much spooky craftiness going on! You can swing by this evening to get today’s roundup, but be sure to catch up by checking out Day 1, Day 2, and Day 3.

headband suppliesToday I’m sharing this super simple Going Batty Headband. Here is what you need to make your own:
Felt (I used loopy, textured felt, but any black felt is fine)
Headband
Sturdy Wire
Pliers
Scissors
Small piece of Cardstock (a business card works great)
Hot Glue


Fold your business card in half, and draw half a bat on it. It doesn’t have to be perfect.

draw bat shape

Cut out the bat. This will be your template.

cut out bat

Lay the template on the felt and cut two layers at a time. Cut twice for a total of four felt bats.

make four bats

Cut 8″ of wire. Fold in half and twist around the headband. Repeat on the other side with a second 8″ of wire.

twist wire

Trim the two wires to the same length. Separate the two layers of felt. Insert the twisted wire, and hot glue together.

glue together

Repeat on the other side with the other set of bat shapes.

batty headband

Then go make funny faces at yourself until later tonight, when I come back here with our Day 4 Craft Lightning Roundup!

finished going batty headband

Craft Lightning Super Spooky Edition – Day 3 Roundup!

All jokes about Geico commercials and camels aside… it is Wednesday, and time for another Craft Lightning Roundup! I have NINE amazing (and fast) Halloween craft tutorials to share with you! Angie from the Country Chic Cottage and I put on this series every couple of months, usually around our favorite holidays, and it is so much fun to see how many other bloggers were inspired by fast crafts for Halloween! In case you missed our Day 1 Roundup and Day 2 Roundup, be sure to go check those out – these Halloween crafts have been spooky good fun!

Every Halloween, there are kids who show up at my door, not wearing a costume, with a pillowcase in hand. If they were to decorate their pillowcase like this no sew pillowcase trick or treat bag from Nellie Bellie, I guarantee they’d get an extra handful of candy!

trick or treat bag - Nellie Bellie

The only time I have ever uttered “Pretty” and “Cockroach” in the same sentence is to say, “Wow, I think that cockroach is pretty dead”. Until now. Can you believe that Laura over at The Shed Blog whipped up some pretty cockroaches? The impossible really should have taken her more than 15 minutes…

Pretty Glittered Cockroaches - Pet Scribbles

Terra Cotta pots are always begging to become fast crafts… and I love these terra cotta ghost pots by 7 Alive… aren’t they adorable? The bows really add that extra touch…

Terracotta Ghost Pots at Seven-Alive

I’m going to tell you a secret: I can’t watch scary movies. At all. They just freak me out. And so do branches scraping at my window at night. Is there anything more scary than a simple set of branches? Not at 2 am! That’s why I love these branches as Halloween Decor by My Very Educated Mother.

OLYMPUS DIGITAL CAMERA

I’m a big, big fan of simple jewelry. Especially for holidays. Who wants to spend a ton of time on earrings that can only be worn one month out of the year? But you still want them to look cute – like these Foam Halloween Earrings by Kara from Happy Go Lucky.

Halloween Earrings - Happy Go Lucky Blog

If you like cute Halloween decor, then you’ll love this next craft. Sparkly skeletons from Bombshell Bling. And with a name like Bombshell Bling… she really brought out the bling with this craft! My son says skeletons are scary… but I think he’d be in love with this sparkly duo!

Glitter Skeletons - Bombshell Bling

I was at Michael’s today, and I saw these teensy frames in their discount bins. I knew that there was a great crafty use for them, but couldn’t think of it at the time, so I passed them up. Now I will have to go back tomorrow, because these BOO frames by Yesterday on Tuesday are adorable.

Boo frames - yesterday on Tuesday

Angie from the Country Chic Cottage, my co-mastermind behind Craft Lightning, has another fun Pottery Barn Inspired creation… a fun bone hand vase. You won’t believe how inexpensive this was for her to make!

bone hand vase - the country chic cottage

My quick craft today, in case you missed it, was a fun little ghost ribbon tassel. Simple to make, it is almost a no-sew craft. You just need to thread a needle and poke it through in a couple places… no real stitching required, and he would look cute anywhere!

Ghostly Ribbon Tassel

Be sure to stop by again tomorrow for more fun and fast Halloween crafts… we’ll be continuing this series through the week, so you’ll want to come back to see all the lightning fast ways that you can craft for Halloween!

Ribbon Tassel Ghost

Ghostly Ribbon Tassel

This ribbon tassel ghost is a craft that can be made in about 10-15 minutes. It does require a teensy bit of sewing, but not really. You don’t have to stitch fabric together, and if you are unsure about your stitches, you can always add a dab of glue to keep them more secure. So, I call this one a “virtually no sew” project. Because if you’re someone who has a fear of needles (both at the doctor and in the craft room), this project is totally do-able.

This project is my third in our Craft Lightning series. Angie from The Country Chic Cottage and I get together to do a week-long series of super fast crafts – crafts that can be done in 15 minutes or less… and then we get out blogging buddies to join in and share their fast crafts as well. This Craft Lightning week we’ve dedicated to super spooky crafts for Halloween. Ghosts, goblins, bats, monsters… oh my!

supplies for ghost tasselIf you want to make your own ribbon tassel ghost, here is what you need:
2″ wide iridescent ribbon (satin would be ok too)
Large crystal or white bead (about 1″ in diameter)
Embroidery floss (I used grey – white or pearl would work too)
Needle with a big enough eye for all the strands of floss. It doesn’t need to be sharp for this ribbon, but will need to be sharp if using satin ribbon.
Multisurface Paint in Black
Paintbrush
Scissors


Start by cutting 3 lengths of ribbon, each 8″ long. Lay them out in an asterisk formation, with the bead in the middle.

fan out ribbon pieces

Cut a length of embroidery floss. I like a piece from the tips of my fingers to the center of my chest, but work with whatever you are comfortable with. We are using all the threads in the embroidery floss, so no need to split them up. Tie a knot at one end, and thread the other through the needle. Your knot needs to be big enough that it won’t slip through the hole in the bead. I tied several knots on top of each other to get a big enough knot.

tie knots

Guide the needle up the center hole of the bead, through the other end, and through the layers of ribbon. The knot at the bottom should keep the thread from going all the way through.

send bead up

Then guide the needle back down, about 1/8″ away from where you came up.

send needle back down

Don’t pull the thread all the way tight. Leave a loop at the top for hanging your tassel, and tie a knot to secure the thread at the base.

tie knot

Pull all the ribbon tight around the bead, and pull the thread so that it comes out between the ribbons.

ribbon tight around bead

Wrap the thread tightly around the ribbon at the base of the bead. Wrap as much or as little as you like. You should probably wrap at least 6 times or so.

pierce needle through

Pierce the needle through all the layers. You can pierce it at the top of the thread, or in the middle. Repeat this process, going back and forth 3 or 4 times to secure the thread.

trim off thread

Cut off the thread at the base. If you’re unsure that your thread will hold, add a light layer of white school glue over the threads. When the glue dries, it will help keep them secure.

Paint on the eyes and mouth with paint. You might want to test your paint on a scrap of ribbon to make sure that it won’t bleed. This MultiSurface paint worked perfectly.

paint on eyes and mouth

Once your paint has dried, you can hang up your tassel! Use this fun ribbon ghost tassel as part of your decor – you can hang them on doorknobs, from banisters, tack them to the ceiling, hang them from your purse or backpack… tassels are so versatile!

finished ribbon ghost tassel

If you haven’t seen the other fun posts in this series, be sure to catch up by checking out the Craft Lightning Day 1 Roundup and Craft Lightning Day 2 Roundup… and come back later today to catch the Day 3 Roundup… there is sure to be lots more fun and spooky Halloween crafts!

Craft Lightning Super Spooky Edition – Day 2 Roundup!

Holy Smokes, y’all… I have EIGHT fast, fun Halloween crafts to share with you today that are going to knock your socks off. There is something about Halloween that really gets us crafty types excited. Maybe it is a chance for us to get cute and creepy at the same time, or maybe we’re just warming up for Holiday crafting… in either case, these crafts are awesome. As is to be expected if you saw the Craft Lightning Day 1 Roundup.

So, shall we get started? You’re going to love it!

This Halloween Easel is so stinkin’ adorable! You can find the instructions for making it over on 733 Blog… and would you believe that easel is made out of popsicle sticks? It is! I had to do a double-take myself… looks like popsicle sticks just got an upgrade…

mini-art-easel - 733 Blog

Sew Country Chick made this Along Came a Spider Headband. This would be great to wear to a party, or to use as a simple costume. You could wear a polka-dot shirt and white pants, and say that you’re the tuffet that Little Miss Muffet was sitting on before the spider scared her away! No matter how you wear it, this is a great Halloween craft!

Along Came a Spider Headband - Sew Country Chick

You’ll find this Spooky Word Art over at Organize your Stuff Now. So fun and simple to make! It doesn’t show in the photo, but she used some great sparkly black paint for the frame. That’s exactly where I like my sparkles… in the paint.

Spooky Word Art - Organize Your Stuff Now


This Popcorn Treat Box comes from 100 Directions. It is a printable, so you don’t need any serious crafty mojo to make it, but it would be the perfect thing for a spooky movie night this October, or to pass out Caramel Corn or (my favorite) Kettle Corn at a party.

Popcorn Treat Box - 100 Directions

This bat brooch from Do Small Things with Love is so much fun – I love the different sized buttons! And whip stitching this guy together doesn’t take too long at all! These would be great to use in all kinds of ways, not just brooches… attach to a bobby pin for a cute hair accessory, or clip onto a gift bag for an instant dose of cute!

Felt Bat Brooch - Do Small Things with Love

I have some Day of the Dead projects planned… and this shrink plastic Dia De Los Muertos jewelry from Tried and True is just awesome… I love how colorful it is! Shrink Plastic is great for vibrant pops of color.

Day of the Dead Jewelry - Gerbera Designs

Angie from The Country Chic Cottage puts on these week-long Craft Lightning series with me, and she always comes up with the cutest stuff! I’m not sure if “bradded” is a word… but it totally should be! These bradded pumpkins are such a great idea for a quick and easy craft!

bradded pumpkins - The Country Chic Cottate

My Craft Lightning project today was super simple, and also easy to do with kids – these Peg Mummies! No messy paint or glue, they are fast and easy to make in just a few minutes!

peg mummies with google eyes

If you want to join in, be sure to link up your fast Halloween craft to the Craft Lightning Linky, and come back tomorrow for even more fun, fast, and spooky crafts!

Peg Mummy with Google Eyes

It is day two of Craft Lightning! If you’re new around here, you don’t know that Craft Lightning is a series that I do with my bloggy friend Angie from The Country Chic Cottage where we each do a super-fast craft each day for a week. And I mean SUPER fast. Like 15 minutes or less fast. And then we convince a bunch of our bloggy pals to join in throughout the week. Angie and I share our fast crafts in the morning, and then in the evening, we share with you the fast crafts from our friends. It is like a fast-craft-a-palooza. And this week we’re getting ready for Halloween – lightning fast!

peg mummies with google eyes

When I saw this white floral tape at the craft store, I just KNEW I needed to whip up some mummies. And these google eye peg mummies are such fun, simple Halloween decor! You can use whatever size pegs you like, and since they only take a few minutes to make, you can whip up an entire army of mummies to stagger across your mantle, tuck into Halloween displays, or even use them to replace the traditional game pieces on your favorite board game! If you want to use them as game pieces, just pick up the google eyes that come in different colors, so you can identify the pieces.

peg mummy suppliesReady to make your own peg mummy with google eyes? Let’s get started! You need:

White Floral tape (found at the craft store in the floral department)
Wooden Peg doll
Google Eyes


Start by wrapping the floral tape around the peg. Floral tape is naturally sticky, all you have to do is stretch it a bit as you wrap, and it will stick to itself.

wrap mummy peg

Once you’ve wrapped it add your google eyes. If it makes you feel better, you can secure them with a dab of hot glue.

add google eyes to mummy

Carefully wrap the floral tape above and below the eyes to secure them in place, and complete the look of the mummy.

finished mummy

It is that simple!

Be sure to come back tonight so I can share all the other fun and fast Halloween crafts our bloggy friends are putting up today! And in case you missed any of the week so far, you can catch up by checking out yesterday’s 5 minute bead spider and Craft Lightning Day 1 Roundup.

See you soon!

Craft Lightning Super Spooky Edition – Day 1 Roundup!

Craft Lightning is one of my favorite ongoing series. For lots of reasons. I love hanging out with Angie from The Country Chic Cottage, who puts these events together with me. I love having other bloggers join in, and I LOVE all the fun projects. Seriously, y’all… check out what today’s awesome bloggers have come up with!

The Creative Mom has these Halloween candy dishes – she made 4 fun designs! How fun! I want to paint up a whole family of Frankensteins in different sizes!

Halloween Candy Dish on The Creative Mom

Over a 4 You With Love, you’ll find this Washi Tape candle. Who doesn’t love Washi Tape? And it is PERFECT for quick crafting! A great way to add color and texture in almost no at all time!

15 minute Halloween candle from 4 you With Love
These Pumpkins from DIY Inspired are lots of fun. I love the shine and subtle pops of bling. This would look great on a mantle… and can you believe it was done in just 15 minutes? With the help of a 3-year-old (and you know that kind of “help” makes things take just a little longer, right?)

Halloween Pumpkin Display by DIY Inspired

Laura Kelly always comes up with cute projects… these Halloween treat bags are great for “Boo”-ing your neighbors, or just because! I love them!

Spooky Treat Bags by Laura Kelly Designs


My partner in crafting, Angie from The Country Chic Cottage, made these fun treat bags out of Duck Tape! Oh, the possibilities! DIY Halloween Treat Bags made with Duck Tape at The Country Chic Cottage

And earlier today, I shared with you a bead spider that you can whip together in just 5 minutes! How fun would it be to make a whole trail of these, Harry Potter style across a window ledge?

5 minute spider craft

If you have a 15 Minute Halloween craft you’d like to share, please add it to the Craft Lightning Linky – we’d love to see it!

Bead Spider Craft

5 minute spider craft

Yippee! It is another awesome week of Craft Lightning! Angie from The Country Chic Cottage and I are getting together for another week of fast crafting… this time we’re getting ready for Halloween with lots of quick crafts. You’ll be ready for the spookiest holiday of the year in just a little time!

Last week I shared a fun spider web in an embroidery hoop while doing a video craft… and I promised I’d share with you a spider to go in it. This bead spider can be made in just 5 minutes. Yes, incredibly easy to make!

parts for bead spiderThe supplies are super simple as well. Here is what you need:

Large Beads (they should have a large hole)
Googly Eyes
Black Pipe Cleaner
Scissors
Hot Glue (optional)


Cut the pipe cleaner into quarters.

bead spider supplies

Thread two of the quarters through the hole. The hole should be nice and big to fit two pipe cleaners through.

bead with large hole

Center the bead on the pipe cleaners you have threaded through.

thread pipe cleaners through

Twist one of the pipe cleaners on one side, close to the bead.

attach side legs

Repeat on the other side.

twist legs on spider body

Adjust all the legs, and trim any that are too long.

trim spider legs

Put on the Googly eyes… use the hot glue to make them secure.

finished bead spider

And just like that… you’ve got an adorable spider!

Make sure to swing back by this evening for a roundup of great Halloween crafts that take 15 minutes or less… from some of my favorite bloggers on the net!

Craft Lightning Super Spooky Edition! {Link Up}

I’m teaming up with one of my favorite DIY bloggers again – Angie from The Country Chic Cottage! She and I team up every so often to put together fun Craft Lightning Series. That’s a week of crafts that take 15 minutes or less. Each of us shares a quick craft each day, and we have blogging friends from around the interwebs join in and share their own 15 minute crafts as well! So each morning, you can swing by here to see my super spooky 15 minute Halloween craft… and each evening you can come back for a round-up of more fun super spooky crafts created by others!

We’d love to have you join in! If you have a super spooky craft to share, that can be done in 15 minutes or less, add it to the linky below. And I’d love it if you added the button to the bottom of your post as well, to share the fun with everyone!


<a href=”https://30minutecrafts.com” target=”_blank”><img src=”https://30minutecrafts.com/wp-content/uploads/2013/08/craft-lightning-super-spooky-edition-button.jpg” style=”” border=”0″ /></a>


Quick Halloween Crafting

super easy spiderweb craftHopefully you’ve been keeping up with us over at Crafty Hangouts this week. Crafty friends from all around blogland have been sharing fun Halloween crafts on live video this week. In case you missed it, here are some fun fast crafts that my bloggy friend Angie from the Country Chic Cottage and I whipped up together. I made this super-simple spiderweb using just three supplies – yarn, an embroidery hoop, and black floral tape. Did you know that they made black floral tape?

And yes, as the video alludes, I will be sharing how to make that cute little spider to go with this web during next week’s Craft Lightning week! EEK! I can’t believe it is Craft Lightning time already, but it is! We’re rounding up some of the craftiest bloggers available to make some spooky crafts in just 15 minutes or less! Join in next week for that… but in the meantime, be sure to watch this video: