Thrift Store Jewelry in 10 Minutes

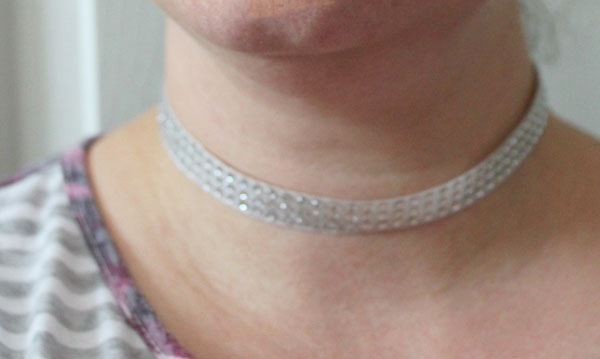
I headed off to the thrift store and picked up some jewelry that I thought had promise… and Angie picked up some thrift store artwork, and we each re-made these projects to match our own tastes! Check out the fun upcycles we came up with, turning items you can find at any thrift store into custom pieces that we can enjoy!

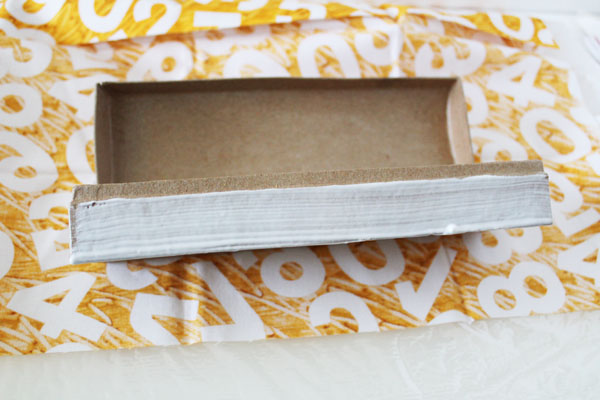
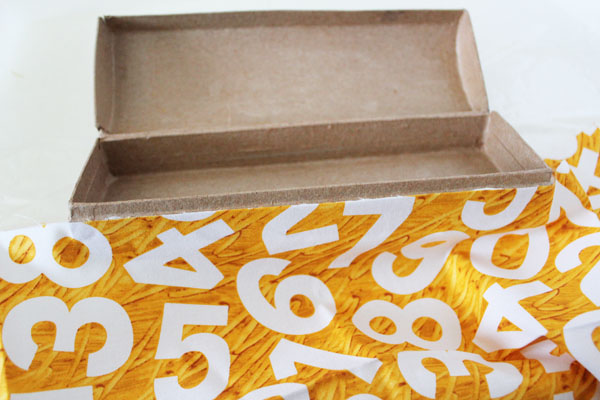
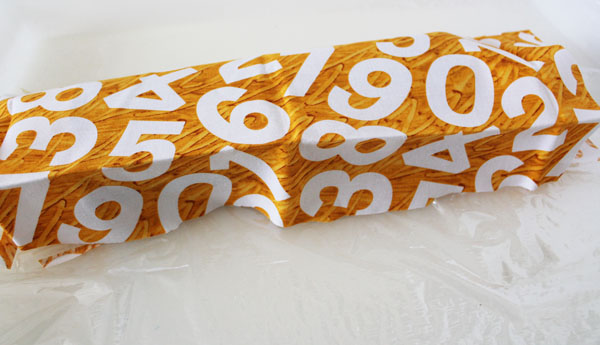
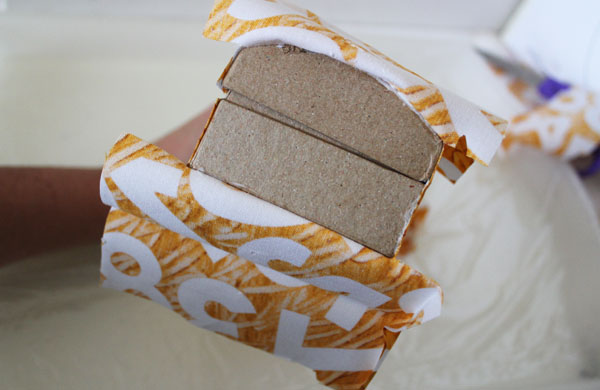
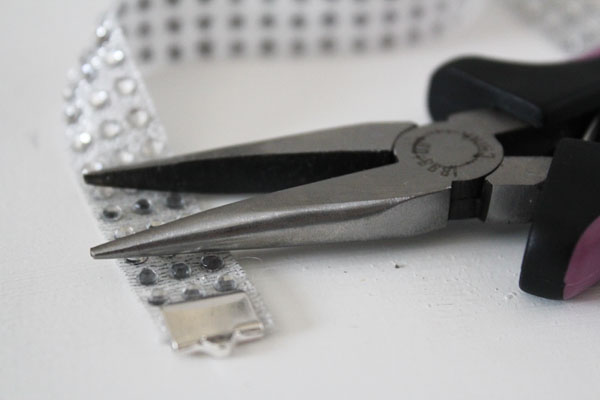
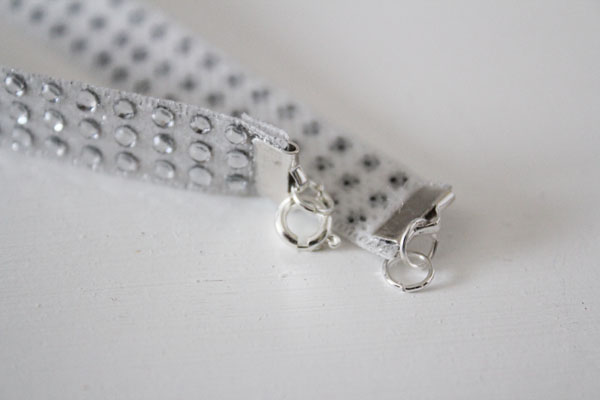
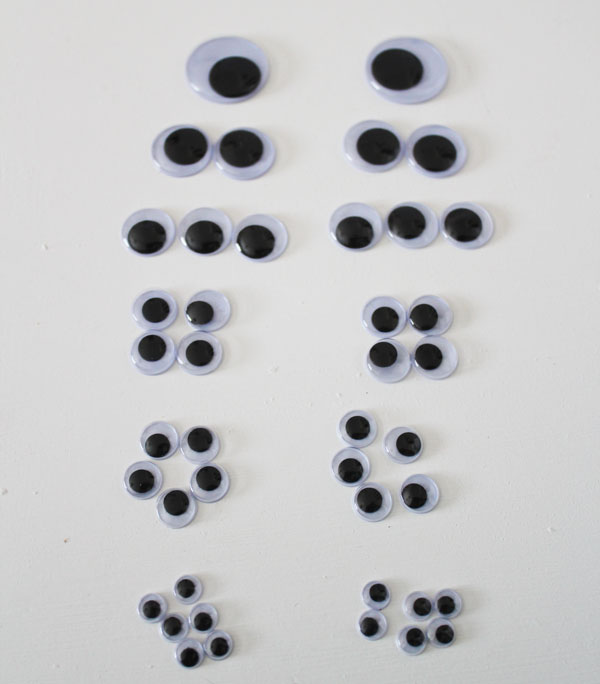
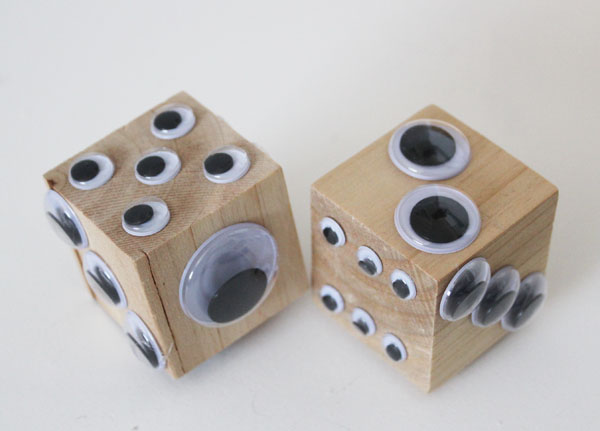
Chances are you already have your transformative items at home – I used pliers, chain, and eye-pins to rework my jewelry. Angie used Mod Podge and scrapbook paper. So simple!

If you want to see more fun, fast crafting videos, check out the entire series at Crafty Hangouts.com!

Craft Lightning – Day 4 Roundup

Tomorrow is the last day of Craft Lightning – but there are still a bunch of fun fast crafting tutorials to share before the end of this fun series. Check out all these crafting tutorials that take 15 minutes or less in the day one, day two, and day three posts. I’m loving today’s fast crafting tutorials from some of my friends around crafty blogland… check out these fun projects!

Kara from Mine for the Making updated some simple leggings by adding hearts to the knees! Don’t you just love these heart leggings? I think I could totally rock these!

Hand Painted Leggings - Mine for the Making


Every spring, I struggle with the best way to mark my garden – I love this idea from CraftSnob… using wooden spoons as garden markers!

Wooden Spoon Garden Label - Craft Snob

I’m in the process of reorganizing my craft room, so I always love fun, fast ways to add cute storage. This simple storage from DIY Inspired is super cute, and I love the pops of color the handles give!

Craft Storage Jars - DIY Inspired

My friend Colleen also came up with some cute storage – these containers embellished with Washi Tape look great in her new kitchen!

Washi Tape-Kitchen-Update - Mural Maker 1

These DIY Leather Tribal Earrings from Sew Country Chic are awesome! I seriously love them – and they’re easy to make!

DIY Tribal Leather Earrings - Sew Country Chic

How pretty is this Ombre Luminary over on Laura’s Crafty Life? Simple to make, you could make several to use as centerpieces for a party!

DIY ombre luminary - Lauras Crafty Life

How fun is this metal bracelet from Creative Cynchronicity? She even has a special technique for giving it an embossed look!

Metalic Bangle Bracelet - Creative Cyncronicity

Angie from The Country Chic Cottage puts on this Craft Lightning series with me, posting a new fast crafting tutorial each day . Today she got crafty in the kitchen, making a 3 minute, 3 ingredient cream pie -yum!

3 minute 3 ingredient quick and easy cream pie

And I made a no sew zippered fabric box!

No Sew Zippered Fabric Box

Come back tomorrow for the final day of Craft Lightning!


Zippered Fabric Box

No Sew Zippered Fabric Box

I whipped up this zippered fabric box because I’ve recently developed a passion for zippers. So much fun to add to projects! I even wrote a series on Answers.com about zippers that includes 3 ways to attach a zipper, 7 fun zippered projects, and 5 No-Sew ways to Craft with Zippers. I was inspired after writing that last article to create a no-sew zipper project. I stitch zippers in all the time, gluing on a zipper seems like a fun way to change it up – and a great fast craft!

It is already the fourth day of Craft Lightning week! Angie from The Country Chic Cottage and I are sharing a fun, fast craft tutorial that takes 15 minutes or less each morning, and each evening, we’re rounding up fast crafts from our friends around blogland – that’s right, we’ve pulled our blogging friends in on this fast crafting trend, and we have over 20 other bloggers sharing their own fast crafting tutorials. You can join in too – share your own fast crafts tutorial in the Craft Lightning Linky.

zippered fabric box suppliesIf you want to make your own no-sew zippered fabric box, here is what you need:

Fabric (I used a fat quarter and had plenty left over)
Cardboard box (I used this one from Consumer Crafts)
Matte Mod Podge (you can use gloss, but I find that matte works better on fabric)
Long zipper (this one is 24″)
Scissors
Hot Glue
Large Paintbrush
Plastic Wrap


Start by applying the matte Mod Podge to the front edge of the box.

use matte mod podge

Secure the raw edge of your fabric to this edge. If your fabric doesn’t line up completely, that is ok. It will be covered by the zipper later.

secure fabric to front edge

If you haven’t already, at this point trim down your fabric. Make sure to give yourself an inch or so extra fabric on all sides, just to be safe.

trim fabric to size

Continue securing the fabric to the box all the way around with Mod Podge. Trim off the excess fabric flush with the box.

cut away excess fabric

Cut the fabric on the sides of the box so that it is attached at the top and bottom.

attach fabric to sides

Secure the fabric on the sides with Mod Podge and trim flush. Your box is now covered in fabric!

fabric covered box

Time to add the zipper. Use a line of hot glue on each edge of the zipper and attach the zipper to the box, starting about 2″ along the back. Starting the zipper at the back of the box instead of the back will help the box open fully.

start gluing on the zipper

Here are some tips to help you when applying the zipper:
Open the box about 1/4″ as you apply the zipper. This will give more room for the zipper to open and close.
Make sure to keep the glue to the very edges of the zipper – glue near the zipper teeth might result in a box that won’t unzip
Don’t wrap the zipper tightly around the  corners – wrap it loosely so that the zipper can easily go around the corners.

Cut off any excess zipper and wrap it around the back of the box. Either miter the corners by folding them under, or add some extra glue to keep the zipper pull from coming off.

finish zipper ends

And just like that you have a simple to make, no-sew fabric covered box!

make a simple no sew zippered fabric box

Come back this afternoon for a round up of more quick crafts as Craft Lightning Week continues. If you’ve missed anything this week, you can catch up by reading the day one roundup, day two roundup, and day three roundup.

Craft Lightning – Day 3 Roundup!

We’ve already made it to day 3 of Craft Lightning Week! I love all the fast crafting inspiration that comes from all these fabulous bloggers! It is amazing that just about every medium and every crafty point of view really has an opportunity to create a fast craft. Not every project has to take forever. Sure, there is something to be said for a painting, quilt, sculpture or piece of jewelry that took hours, days, weeks, or even months to create. I have a stitching project that I imagine will take years to finish. But being able to craft and have a finished piece in less time than it takes to watch an episode of Big Bang Theory is pretty impressive… even more impressive is that many of the crafts being shared this week can be completed in the time it takes to watch the commercials in Big Bang Theory (assuming that you’re not fast forwarding through them on your DVR).

Here are today’s Craft Lightning fast crafts from bloggers around the interwebs – they’re all joining in on Craft Lightning this week… if you’d like to join in as well, be sure to link up in the Craft Lightning Linky.

This bow is quick and easy to make – it is so full because it wasn’t tied in a traditional knot. Learn how to make your own decorative bow over at Tried and True.

quick bow tutorial at gerbera designs

Adding decor pieces to your home can be expensive – that’s why it is great to include a few (or quite a few) knockoffs. These Anthro knockoff letters would look great in almost any space – get the tutorial from Craft Quickies.

Anthro Knockoff Metal Letters - Craft Quickies

Add confetti to a party tablescape, a birthday gift, or even tuck some confetti inside a birthday card you mail a friend. You can customize both the colors and shapes of your custom confetti, learn how it is done at Dreamsicle Sisters.

Make your own confetti - Dreamsicle Sisters

Mom Endeavors shows you how to keep life, and all of those essential details organized with a DIY magnetic dry-erase calendar.

Magnetic dry-erase calendar - Mom Endeavors

Stencil Wooden bangles with this easy tutorial by Happiness is Homemade. I love the colors of these bangles – so fresh and modern!

Painted-Wood-Bangle-Bracelets - Happiness is Homemade

Jamie from CRAFT had fun with an old tin can – she made a fun pencil holder that is anything but ordinary – yet extraordinarily quick to make.

Tin Can Craft - Creating Really Awesome Free Things

Rhonda from Mrs. Greene made an equally easy photo holder using a clothespin. Simple and easy to make, you could make several to line the mantel with.

Clothespin Photo Holder - Mrs Greene

My partner in craft for this series is Angie from The Country Chic Cottage. Each day, she and I share a fast crafting tutorial, and each evening, we share a roundup of the quick crafts our bloggy friends have made for the day. Today, Angie made a sea glass monogram – I love the way that this looks! The sea glass adds so much!

sea glass monogram - the country chic cottage

I made super simple Mine and Yours wineglasses – these can be made in just a few minutes with only a few supplies. Super easy!super simple mine and yours wineglasses at 30 minute crafts dot com

Come back tomorrow for more great quick crafting tutorials!

Yours and Mine Wine Glasses

I love a little bit of whimsy. Ok, if I’m totally honest – I like a whole lot of whimsy. I even like saying the word whimsy. And these wine glasses add just a little bit of whimsy to any occasion! How fun is it to say… “oh, this wine glass is yours, and that one is mine”? Just to have your partner say… “You’re mistaken… see… this one is yours and that one is mine!” So much fun to switch wine glasses back and forth throughout the night… “Mine is empty… looks like yours needs to be refilled too…” And that is how you go through a bottle of wine in no time, and open up another!

super simple mine and yours wineglasses at 30 minute crafts dot com

These glasses are super simple to make, they don’t really need a tutorial. All you need is a tip on what supply to use. That’s right… I said supply, not supplies! You really need four things to make these wine glasses… maybe five. I’ll take you through them, and which one is uber important.

You first need wine glasses. I picked small-ish ones, but this would be fun with large glasses or champagne glasses (perfect for a wedding toast, or for the bride and groom to use at a rehearsal dinner). You need alcohol and a paper towel to prep the wine glasses. And you need an oven to bake the glasses in according to the instructions on the package so that the writing is dishwasher safe. So the oven might count as a fifth supply. But the fourth… the fourth is a DecoArt Glass Paint Pen.

wine glasses and DecoArt glass paint pen

These paint pens are genius. Glass paint is tricky to use. It is hard to get a smooth, even look from it. It works best with a sponge and stencil, and not every design can be created with a sponge and stencil. These glass paint pens come in a full array of colors (I used silver here), and you get smooth, even coverage. I’m in serious love with these! Plus, like glass paint, they work on glass, ceramic, mirrors… and are dishwasher safe one you cure them according to the directions!

So… run out and get yourself some glass paint markers, and start writing on all your dishware. It is addictive!

write words on the wine glasses

This project took less than 10 minutes to make, and is part of a week-long series I’m doing with Angie from The Country Chic Cottage called Craft Lightning. Each day we share with you an original tutorial that takes 15 minutes or less… and a roundup of quick craft tutorials from our friends around blogland. If you want to catch up, you can see the Craft Lightning Day 1 Roundup and Craft Lightning Day 2 Roundup. Make sure to come back tonight for yet another roundup, and keep coming back all week long…

See you soon!

Craft Lightning – Day 2 Roundup

Day 2 of Craft Lightning already! If you missed the Day 1 roundup of awesome fast crafts, be sure to go check it out! I can’t believe how many awesome bloggers are joining in on Craft Lightning this week. Maybe I shouldn’t be so surprised… fast crafting is nothing new… but with as busy as our lives have gotten, for those of us who feel a need to craft, having the opportunity to do some fast crafts is essential!

Here are today’s awesome fast craft tutorials as part of Craft Lightning:

Jen from 100 Directions made a fun Mustache bag out of a t-shirt… and even more fun, the mustache stamp she used is one she designed – but you can buy in stores (I know, pretty cool, right??)!

Mustache Art Bag - 100 Directions

If you’re looking for an interesting project to keep the kids busy this summer, check out the Moon Dough made by Freestylin Beth.


moon-dough from Freestylin Beth

These dyed beads at Uncommon Designs make an awesome Dyed wood beaded necklace that you can make in whatever colors you like!

dyed-wooden-bead-necklace at uncommon designs online

Have an old kids book that you can’t let go of? How about making an easel calendar like this one from Lisa Stuff.

book_easel_calendar from Lisa Stuf blogspot

Reasons to Skip the Housework made this fun and colorful centerpiece… you could whip this up while dinner is in the oven, or in between flipping pancakes for breakfast!

Simple Centerpiece - Reasons to Skip the Housework

Looking to add some interest to your fridge? How about big fun flower magnets on your fridge like these that Laura Kelly made!

Giant Flower Magnet - Laura Kelly Designs

   You’ll find the tutorial for this Washi Tape Headband over at Lovin’ Our Chaos… what a fun, fast accessory!

Washi Tape Headband - Lovin Our Chaos

These embossed metal magnets were made by my partner in craft for this Craft Lightning series – Angie from The Country Chic Cottage.

embossed metal magnets - the country chic cottage

And I made a super simple ribbon choker – I used a sparkle ribbon, but you can use any ribbon that you like!

Quick ribbon Choker

If you have your own lightning fast crafts, please add them to the Craft Lightning Linky… and come back tomorrow for more Lightning fast crafts!

Simple Ribbon Choker

Quick ribbon Choker

This simple ribbon choker takes only a few supplies and a few minutes to make. When you want to add a little bling to an outfit, you can… in just a few minutes!

I’m sharing this post as part of Craft Lightning Week – Angie from The Country Chic Cottage and I are teaming up with Craft Bloggers from all over the net to share craft tutorials that can be done in just 15 minutes… or less! These quick crafts will keep you inspired and crafting through the rest of the summer and into the school year! Come back this evening and I’ll have a roundup of quick craft tutorials from my crafty friends!

supplies for ribbon chokerNow… on to today’s project! To make this simple ribbon choker, you’ll need:
Sparkly ribbon (you can use regular ribbon if that is what you have on hand)
Ribbon clamp fasteners
Pliers
Jump Rings
Necklace Clasp


Start by measuring the ribbon around your neck. At the point you need to cut, pick off two or three rows of gems using your pliers.

remove gems

Fold over the end of the ribbon, and add a clamp. Squeeze tightly with your pliers! If you’re worried about the pliers leaving scuff marks, put a small piece of fabric or paper towel between the pliers and the clamp.

Add clamp

Add the necklace clasp to each side using the jump rings.


add clasps with jump ringsThat’s it!

Simple Sparkly Ribbon Choker

Be sure to come back this evening for more great Craft Lightning tutorials!

Thrift Store Mason Jar Makeovers

woven ribbon mason jar

Are you in love with the Mason Jar trend? Angie and I are! We made this video as part of our Crafty Hangouts series using mason jars! Did you know that you can find Mason Jars at the thrift store? In fact, the thrift store is a great place to look for mason jars to use in crafting – they are often much less expensive than at any other store!

Angie is using glass paint to decorate her mason jar – she’ll be painting it like a watermelon. I found a fun mason jar frog insert at JoAnn’s (here is the amazon affiliate link for the  mason jar frog insert, if you can’t find them in your local store)


Check out more awesome crafty videos at Crafty Hangouts.com!

Craft Lightning – Day 1 Roundup

It is the first day of Craft Lightning – a week where I get together with Angie from The Country Chic Cottage, and we enlist bloggers from around Crafty Blogland to join us in creating crafts that take 15 minutes or less! I love this week because although I love all kinds of crafting, I can’t try it all (though that is on my bucket list), and I surely can’t be an expert at it all (that’s on my bucket list too…). By bringing in all kinds of crafty bloggers, we’re able to share so many more fun styles, techniques, and ideas for fast crafting. I always get inspired!

Let me get started in sharing today’s crafts with you!

The Bold Abode made a fun Washi tape and Popsicle Stick frame! How cute is this! I LOVE the touch of washi tape!

Washi tape popsicle stick frame - the bold abode


This Ombre Glitter Wall Art comes from Two Thirty Five Designs. Yup… I said Ombre Glitter! You’ll have to see how she does it… the process is super simple and the results… well… see for yourself how cute this is!

Two Thirty Five - Ombre Glitter Art


Watermelon is very popular this summer… if you haven’t gotten enough of this summer staple (is that even possible?), you’ll want to make this Watermelon Garland from Shaken Together Life.

easy-watermelon-slice-garland-tutorial-at-shakentogetherlife


The Sewing Loft made a fun Flower Headband – this is great for keeping the hair out of your face (or the young girl in your life) during the rest of this hot summer… but also perfect for adding some style to a back-to-school wardrobe!

Flower-headband- at the sewing loft


The Happier Homemaker made a drawstring bag business card holder without pulling out her sewing machine! What a great way to carry cards… and you can say “I made it!”

no-sew-drawstring-bag business card holder - the happier homemaker


These DIY Hairclips are from The Girl Creative – Super simple to make… I just love them! So many ways to customize the colors… and super simple to make!DIY-Hair-Accessories - the girl creative


My partner in Craft, Angie from The Country Chic Cottage made a DIY Wedding Candle Wrap. What a simple and inexpensive way to add some sweet DIY to wedding decor!

diy wedding candle wrap - the country chic cottage

And I made some Googly Eye Dice – a fun way to spice up your next family game night!

Googly eye dice at 30 Minute Crafts

Be sure to come back tomorrow and every day this week for more fun, fast DIY tutorials! If you have your own Craft Lightning project that takes 15 minutes or less to create, please add it to the Craft Lightning linky party!

Googly Eye Dice

Googly eye dice at 30 Minute CraftsGoogle eyes, goolgy eyes, wiggle eyes… whatever you call them, I love to craft with them. Throw two googly eyes on anything, and you’ve got the perfect 10 second craft! I have lots and lots of googly eyes around the house, so making this set of googly eye dice was simple. If you have kids, substitute these dice on your next game night, and watch the giggles multiply. Of course, I’m sure Vegas wouldn’t consider them legal for playing craps – I’m sure the googly eyes change the odds in all kinds of unpredictable ways – but for a simple family game night, these dice are easy to make and fun to use.

I made these dice as part of Craft Lightning week! My friend Angie from The Country Chic Cottage and I are doing another week of Craft Lightning – Crafts that can be done in 15 minutes or less! Yup – Lightning fast! And, we’ve rounded up a whole group of friends to join in with us. Each morning, Angie and I will share a Craft Lightning tutorial… and each afternoon we’ll share with you Craft Lightning tutorials from our friends around the web! Let’s get started on this fun googly eye craft…

supplies for googly eye dice

To make your own googly eye dice you need:
A package of wiggle eyes. I used assorted sizes, but you could use all the same size
Hot glue gun
Wooden blocks – Mine are 1.5″
Pencil or pen


Start by sorting your googly eyes. I wanted to use the largest eyes on the side with just one, and go down to using the smallest on the side with six, just to add a little interest.

google eyes

Mark the sides of the blocks with a pencil or pen. You might not know that dice are not randomly numbered – the top and bottom of each die always add up to 7. So, if 6 is on the top, 1 is on the bottom. If 5 is on the top, 2 is on the bottom. And so on… If you want to be more accurate, you can grab a pair of dice from a board game to compare as you are making your googly eye dice.

add pencil marks

Using a hot glue gun, carefully put your googly eyes on the dots.

google eye dice are a fun alternative to regular dice!

That’s it! You’re all set! Now start using your fun and whimsical dice at your next game night!

Be sure to check back this evening for even more fun quick and easy Craft Lightning projects!