Super Quick Snack Sacks!

I’m loving these little reusable snack sacks from Sew Can Do. For lots of reasons. One might be that we have been out of zippered plastic bags for a week, despite two trips to the grocery store. And these little bags replace zippered bags. I defiantly love that they are customizable – you can make them girly, all boy, neutral, or whatever you like. I also love that each kid can have their own fabric on the outside so they automatically know which one is theirs. I’m totally in love with the fact that these bags hold grapes and apple slices as well as they hold crackers. AND I love that they are quick to make. Not just because I love quick crafts… but because if one of these filled with apple slices somehow gets stuck under one of the seats in the car, and I find it a month later… if the inside is disgusting, I don’t have to question throwing it away. I’ll toss it without guilt, knowing I can whip up a new one in the time it takes Oso to follow his three special steps!

Ultimate Reusable Snack Sack Sew Can Do

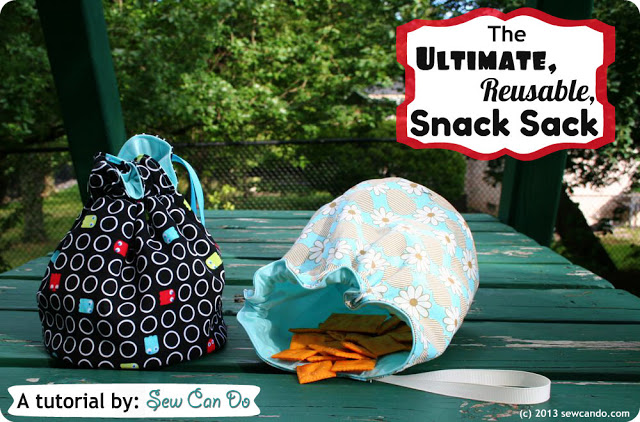
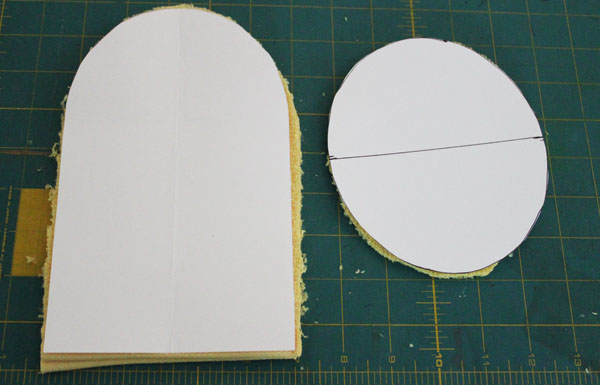
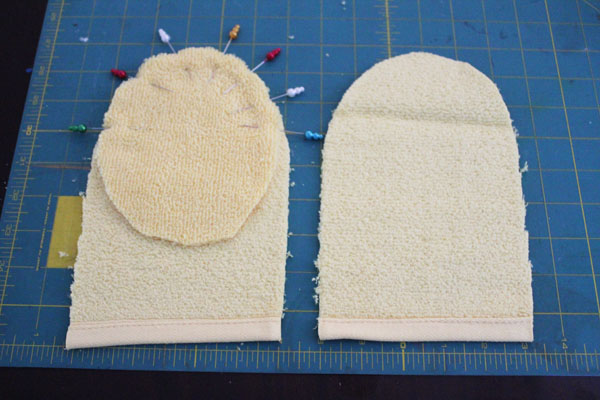
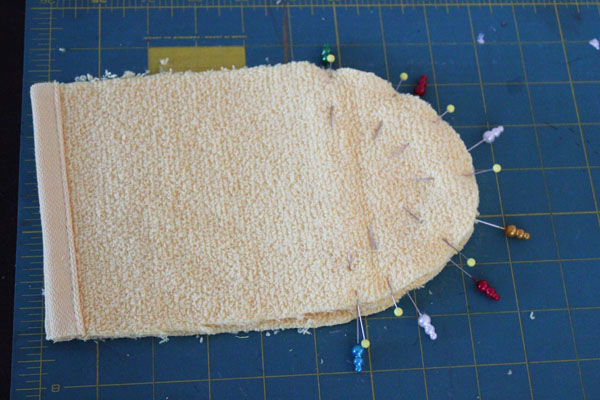
If you scroll all the way down to the end of the reusable snack sack tutorial, you’ll find a bonus tute for a reusable snack pouch. Score!

PUL Sandwich Bag - sew can do

Pin these projects for your next marathon-sewing session – so that you can replace your plastic zip-top bags. But be sure to pin from the Original Source.

Back to School Giveaway!

I’ve teamed up with some of my best blogging buddies to bring you a fun giveaway that’s easy to enter! Just follow these awesome bloggers on their various social media channels (whichever of the following you use: Facebook, Pinterest, Instagram, Twitter, or Google+), to be entered to win a $300 Visa Gift Card! Super easy, right? So… I won’t waste any of your time. Scroll down to the bottom of this post, make sure to give the Rafflecopter widget time to load, and have fun entering!

300visagiftcardgiveaway

 
a Rafflecopter giveaway

DIY Disney Planes Shirt

DIY Disney Planes Shirt

It has become something of a tradition for me to make a shirt for my son each time we go see a movie. I made him a Mike Wazowski Shirt when we went to see Monsters U, and a Gru-Logo Shirt when we went to see Despicable Me II. We saw a pre-screening of Disney’s newest movie, Planes, earlier this week, and I made my son a special shirt to go to the movie… and yes, I whipped it up in just 30 minutes!

My son is a HUGE fan of the original Cars movie, and loves the second Cars movie almost as much. He is a big fan of “Mater’s Tall Tales” as well. There was no question that he was going to love Disney’s “Planes”. Even before the movie started, he was telling the moviegoers in the seats behind us that “this movie is going to be awesome!” At the end, he wanted to see it again. So did I. I really loved this movie.

In a nutshell, Disney’s Planes is about a small-town plane, Dusty Crophopper, who has big dreams. He overcomes a lot, and meets many fun characters, as he strives to achieve his goals. At the end, you’re so in love with the characters and the entire story that Disney weaves for you that you almost don’t care if Dusty makes it… almost. The movie is fun all the way through, with almost no “boring” or “dead” spots that fail to keep the kids entertained. My son was riveted throughout the whole movie. The only thing I might have liked to see more of was cameos from the original movies. For a movie that billed itself as “From the World of Cars”, I would have liked to see more of the original Cars characters.

The movie opens this weekend, and if you’d like to take the little one in your life to go see it, with their own special Dusty Crophopper shirt, this is how it was done:

Supplies:
Blue shirt
Paintbrushes
Paints: I used 2 colors of orange, black, white, blue (for the eyes) and silver.
Freezer Paper
Chalk pencil

Start by ironing the freezer paper to the inside of the shirt, with the shiny side facing the front. There is a lot of paint on this shirt, and if it seeps through without something between the two layers, you might find yourself with a stuck-together shirt!

Then sketch out a quick outline of the character – in this case, Dusty – with the chalk pencil. You can find chalk pencils in the quilting section of your local fabric or craft store. The white chalk stands out on dark colors like this blue, but wipes or washes away cleanly after you are done. There are lots of other pens you can use – in my experience, the chalk pencil is the best in this situation.

trace out design

Start filling in areas with paint. I moved quickly, painting in large strokes. You can see I used the stopwatch app on my phone to keep track of how long it took me to paint everything in.

paint in areas

Once you’ve painted everything in, you can add some highlights if you like, or go over any thin areas of paint with a second coat.

filling in paint

You don’t want the paint too thick because it will make the shirt very stiff. I used very thin fabric paint, and though the shirt was still a little stiff, it will be fine after a couple cycles through the wash.

finish painting DIY Disney Planes shirt


Mini Canvas with DCWV

Mini decorative canvas

The mini canvas over at the DCWV booth at CHA was packed every time I walked by. This quick and easy craft is so fun, and so customizable! Pick your own colors, your own quote, and you have a completely different project!

mini canvas suppliesIf you want to make your own custom quote mini canvas, here are the supplies you’ll need (I’ve added Amazon affiliate links here in case you have trouble finding the supplies):
DCWV – Quote Pages
DCWV Scrapbook papers
Mini Canvas
Butterfly Punch
Paint
Foam Paint Brush
Mod Podge
Sparkle Mod Podge
Mesh Screen (optional)


Start by painting the edges of the canvas.

paint edges

Cut the scrapbook paper the size of the canvas, and secure on top with Mod Podge. Add quote on top.

add quoteCover with Sparkle Mod Podge.

coat in sparkle mod podge

Punch butterflies out of scrapbook paper, fold wings up and secure with a dab of Mod Podge in the middle of each butterfly.

attach butterflies

If you want to add some extra embellishment, put a screen down, paint over it at the corners, then remove the screen.

embellish with paint

Wait for your canvas to dry before you hang your mini quote canvas.

covered in sparkle mod podge

Spray-Dye Scarves

Spray Dye Scarf

Tulip came out with new one-step tie-dyes in super convenient squeeze bottles, bringing back tie-dye in a BIG way. Suddenly tie-dye was easy to do, fast with kids, and even more fun for moms (with less steps and much less clean-up). I’ve played with the squeeze-bottle tie dyes, making a tie dye sampler quilt and tie dye zippered pouches.

At CHA I got to see Tulip’s latest and greatest – tie-dye in spray bottles! The squeeze bottles are still great for traditional tie dye, but the spray gives even more options for adding and blending colors.

At the trade show, Tulip had their new spray bottle tie-dyes and silk scarves for us to try them out on. I loved how my scarf turned out!

To make your own spray dyed scarf you need the following (I added amazon affiliate links to help you find these items if you need):
Tulip Spray Dye Kit
Tulip Fabric Sparkle Spray
Silk Scarf

First, lay out the scarf on your protected work surface. Prepare your spray dyes – just add water to the fill line and shake.

spray dye supplies

Start by spraying one color, then spray the other color in the empty areas.

start spraying

Spray on the shimmer spray.

shimmer sprayJust let the scarf dry, and you’re all done!

Tulip Spray dye Scarf

Super Fast Button Ring with Aleene’s Adhesive

Super fast button ring

While at CHA, I got to try many of the make and takes. Brands have small, quick crafts, called make and takes, at their booths so that potential vendors can try out the product, and fall in love with it. I love this Aleene’s Jewelry and Metal adhesive. Perfect for quick crafts like these great stacked rings!

supplies to make the fast ringI Love To Create, the makers of Aleene’s glue, had everything on hand to make these rings. I’ve added amazon affiliate links here to help you find the supplies if you don’t have them on hand:

Filigree Ring Blank
Buttons (you could use scrabble tiles, gems, or whatever you wanted)
Aleene’s Jewelry & Metal Glue


The process of making the rings is super simple:

Put one of the Jewelry and Metal Glue tabs on the ring blank. Peel off the red protective dot to leave the clear adhesive.

adhesive dot

Put a button on the glue. Repeat until you have stacked your ring as tall as you would like.

stacked ring

That’s it! Super simple to make a cute ring!

ILTC Button Ring

Thanks to the folks at ILTC for having such a fun make and take! They had a second make and take I’ll be sharing later this week as well, but you can always find tons of fun Aleene’s craft projects here.


Fast Floral Necklace

fast floral necklace

Don’t you love this floral necklace – you won’t believe how fast and easy it is to make! I made this necklace in about 10 minutes… it only takes a few minutes, and the right supplies to whip it up! Grab your supplies and whip up your own fast floral necklace.

At the end of July I went to CHA (pronounced spelled out as “C-H-A”, and not “cha” as in “gotcha”, in case you were wondering). CHA is the Crafts and Hobby Association trade show. I was super lucky because it was held in my own backyard – right here in Vegas! I’ve gone to CHA a couple of times, and there is so much to like about it… but I have to tell you that my favorite part of CHA is the make & takes. Many of the brands showing their products at CHA offer a make-and-take at their booth. This make and take allows stores considering purchasing the product to see what it does, gives them ideas for classes to offer in their stores, and is super fun.

supplies to make a floral necklaceI love make and takes because they all take less than 30 minutes! And I love a good 30 minute craft! I made this simple necklace at the Blue Moon Beads booth. Let’s get started on the step-by-step tutorial, shall we? Here is what you need (I’ve added some affiliate links to help you find these supplies if you want them):

Necklace
Jump Ring
Pendant Blank
Petal Pebbles
Scrapbook paper (this is from DCWV)
Adhesive Glue Dot


This is a super easy craft, great to do with a group of teenagers or at a craft-and-wine night where you want a quick and easy craft, and then plenty of time to dish and drink.

Just put your Petal Pebble on the scrapbook paper. The Petal Pebble is basically a sticker with a pressed flower already inside. Genius, right? Then trim the scrapbook paper flush with the Petal Pebble.

trim around sticker

Use the adhesive dot to attach the scrapbook-paper-backed Petal Pebble to the center of the pendant blank.

attach jump ring

Then open the jump ring, attach it to the top of the pendant blank, and string the pendant onto the necklace! So easy!!

petal pebble pendant

Thanks to Blue Moon Beads for having such a fun make and take project! And be sure to come back all week long as I share more of these fun and easy make-and-take crafts!

Quick Chalkboard-Top Table with Lullaby Paints

I don’t do a whole lot of home decor tutorials on this blog because let’s face it – most decor projects are massive. It would be pretty impressive if I could overhaul a china hutch or reupholster a couch in half an hour. Even not counting drying time, furniture just needs so much hands-on work that there is no way that I can do that… and have it look presentable, that is.

chalkboard table top

When Lullaby Paints contacted me about trying their chalkboard paints, which come in many colors, the timing was perfect. I have a coffee table in my front room that is a hand-me-down from before my husband and I got married. Neighbors of ours were moving (to hike the Appalachian Trail!) and couldn’t put all their things in storage. They gave us this great coffee table. I’m not sure what the whole story behind the coffee table is, but for some reason they painted the top black. I really like the top black, and if you see a black background in any of my photos, chances are high that I’m taking the photo on that coffee table.

We’ve now had the table 7 years, and it is starting to get some wear. And, I had been thinking about coating the top in chalkboard paint for some time. Fun to be able to write messages on the top welcoming guests, or to label things when I take photos.

coffee table

Lullaby Paints has chalkboard paints in all kinds of colors, but I really liked my black tabletop, so I stuck with basic black. The kit is awesome – it had everything I needed. No digging around in my craft room for a foam roller brush or tray to pour the paint out on. It was all included. And I love the squeeze bag the paint is stored in. I was able to put the cap back on when I was done, and with no excess air in there, I’m confident it will store well until I want to play with it again. They even included painter’s tape and chalk!

Lullaby Chalkboard Paint

Painting the table top was simple. I cleaned and wiped down the table so that I had a clean surface to start. Then I painted one coat of Lullaby Paints chalkboard paint in one direction, walked away to let it dry, then another coat at 90 degrees from the first, then let that dry.

allow paint to dry

Waiting for the paint to dry was probably the hardest part. Luckily the paint dries fast!

After everything has dried, you cure the paint by rubbing the side of a piece of chalk all over the painted area. Wipe it away, and you are ready to play on your new Chalkboard top table!

cure chalk paint

Lullaby Paints sent me enough paint that I probably could have done two tables this size, and still have had paint leftover. I had some wood leftover from a past project, so I painted one side of it with the chalkboard paint so that I’ll have a more mobile chalkboard backdrop to use in future photo shoots.

paint chalkboard on raw wood

I was a little worried at how the Lullaby Paints would be on the un-primed wood, but it was perfect! Just as easy as painting on my coffee table.

I love my newly painted coffee table, and have already taken photos on the table top. My son loves it as well, and has drawn all over it with chalk!

If you want to learn more about Lullaby Paints you can find them on Facebook, Twitter, and Pinterest.

Disclosure: This review reflects my true experience with Lullaby Paints. I was provided this product free of charge and agreed to review the product. This site is not associated with or sponsored by Lullaby Paints.

Craft Lightning – Day 5 Roundup

It is the final day of Craft Lightning! I teamed up with Angie from The Country Chic Cottage, and all week we’ve been sharing our own fast crafting tutorials as well as having friends from around blogland join in. What an awesome week it has been… filled with my favorite kind of crafting – quick! All the crafts this week were done in 15 minutes or less! If you missed out on any of it, be sure to go check out day one, day two, day three, and day four of Craft Lightning Week. Below you’ll find today’s roundup… more fun and fast crafts from bloggers around the internet. Proving that you don’t need a lot of time to get crafty!

I’m a big fan of fast jewelry – any time I can make accessories in less time than it takes me to pick out an outfit is a win in my book! And how cute is this 15 minute jewelry set by Seven Alive!?

15 minute Jewlery from 7 alive

Speaking of fast jewelry – these quick earrings at Happy Go Lucky are so much fun! I love the modern look – they’d pair equally well with a little black dress and heels or a t-shirt and jeans.

Handmade_earrings at happy go lucky blog

I love filling my house with photos – but a girl can get tired of stacks and stacks of frames around the house. This quick and easy photo wreath from Decor Adventures is a fun alternative to traditional frames (and way better than keeping photos stored away in shoeboxes)!

Photo-Wreath by decor adventures

I’ve started reading my son a chapter book at night before bed. It makes him feel like a “big” boy… right now we’re using a scrap of paper as a bookmark, but I’m sure he would much rather make a fun popsicle stick person bookmark like these from My Very Educated Mother.

OLYMPUS DIGITAL CAMERA

These fun rustic arrow signs were made for a Ranch Day at school, but would be fun for your little cowboy or cowgirl’s birthday party, and they are super quick and simple to make when you follow these instructions by Delicate Construction.

quick arrow signs

Laura from The Shed Blog made these awesome pipe cleaner dolls… that dog head on top… I die! It is like the perfect cherry on top.

Pipe Cleaner Doll Tutorial - Pet Scribbles

Angie, my partner for this series, added some quick and easy embellishments to a package – I love that it is so easy to add a little flair to a gift!

diy gift wrap tutorial- the country chic cottage

And I came up with a project that has been the hit of bathtime around here – a washcloth puppet! I’ll have to make several more – good thing they are so easy to whip up!

15 Minute Washcloth Hand Puppet

Thanks for joining along all week… I hope that you were inspired by all these quick crafts. If you can carve out a few minutes, you really do have time to get creative and make a project from start to finish! If you have a quick craft of your own you’d like to share, please add it to the Craft Lightning Linky!


Washcloth Hand Puppet

15 Minute Washcloth Hand Puppet

Make washing up more fun with this washcloth hand puppet! You can whip one up in under 15 minutes, and then customize it yourself, or let your kids dress up their own washcloth puppet!

I made this project as part of Craft Lightning Week. All week long my friend Angie from The Country Chic Cottage and I have been sharing craft tutorials that take 15 minutes or less. If you missed any of the fun, go back and check out day 1, day 2, day 3, and day 4. Tonight I’ll be back with a wrap-up from our blogging friends who created their own quick crafts as part of Craft Lightning week, so be sure to come back!

washcloths for puppets

To make your washcloth hand puppet you need:
Simple washcloth puppet template (fill out the form below to download)
2 washcloths (if you have 3 washcloths, you can make 2 puppets)
Optional: Fabric paint or other embellishments (I used Tulip paints)

Note: I used 1/4″ seams, but you can use larger seams if you like. If your seams are larger, it will make your finished puppet smaller. This puppet fits a woman or child’s hand – for large hands, adjust the templates so that they are wider.

To get the Washcloth Puppet Template, subscribe to our newsletter below:

Get the FREE Printable Template!
Sign up for our email list to get your free Printable Template download!
You’ve successfully signed up! Check your email for details.

Start by printing and cutting out the template. It is just two pieces. You need to cut two of the large piece and one oval for each puppet.

cut washcloth

Place the oval on top of one of the large pieces, matching the curves. Pin around the top half of the curve.

pin oval to layer

Fold the oval up so that it is folded in half. Place the second large piece on top, then pin the top layer of the oval to the top large piece.

pin together second layer

Take the puppet to your sewing machine, and stitch along each curve individually.

stitch around curve

Then fold the puppet so that the edges of the long pieces line up, and stitch along each long side.

stitch down the side

Turn the puppet right side out, and you have a puppet ready to embellish!

washcloth hand puppet stitched up


Blue puffy paint from Tulip works great for adding eyes. If you have black paint, you can also add eyelashes.

paint on eyes

Without waiting for the blue to dry, I carefully opened up the puppet, and added a red tongue with red puffy paint.

paint in tongue

Once the paint has dried, you’re ready to start splishing and splashing in the tub!

washcloth hand puppet in just 15 minutes

Come back tonight for more fun 15bminute Craft Lightning projects!