Search Results for: svg

Simple Pretzel Pin for National Pretzel Day

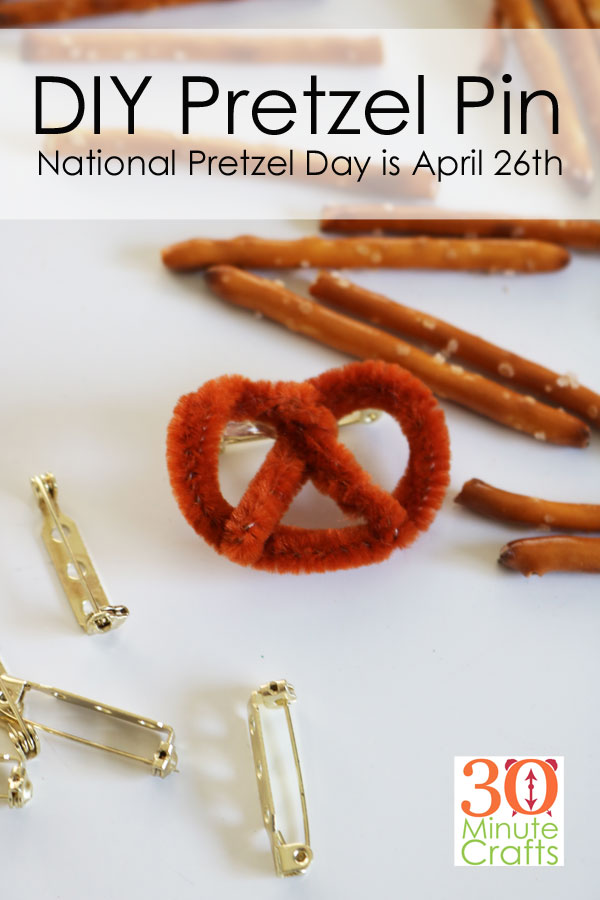
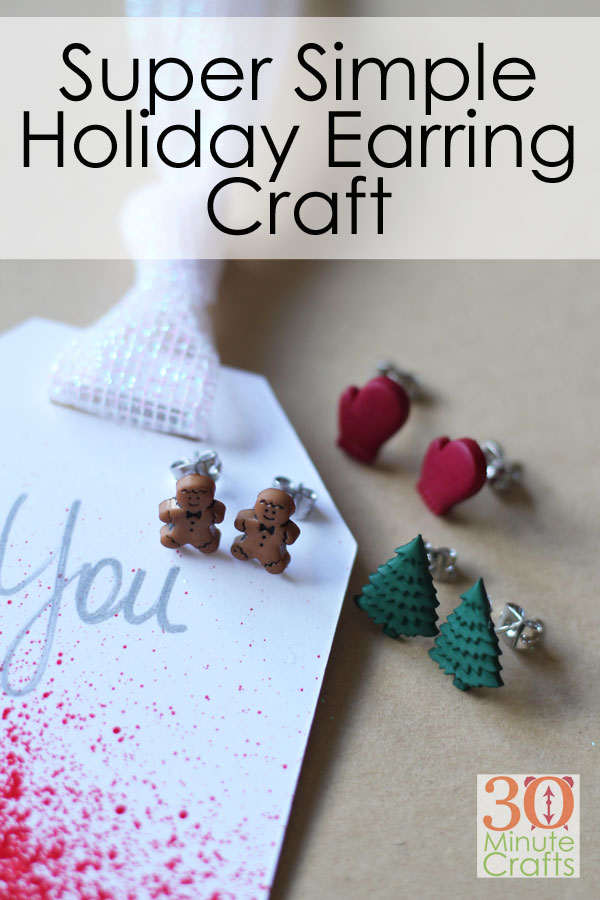
Did you know that April 26th is National Pretzel Day? How do you choose to celebrate this fantastic snack food? I say you make yourself a simple Pretzel Pin that you can wear to proudly proclaim your love of pretzels! And you can whip one up with a few basic supplies, and in just a few minutes!

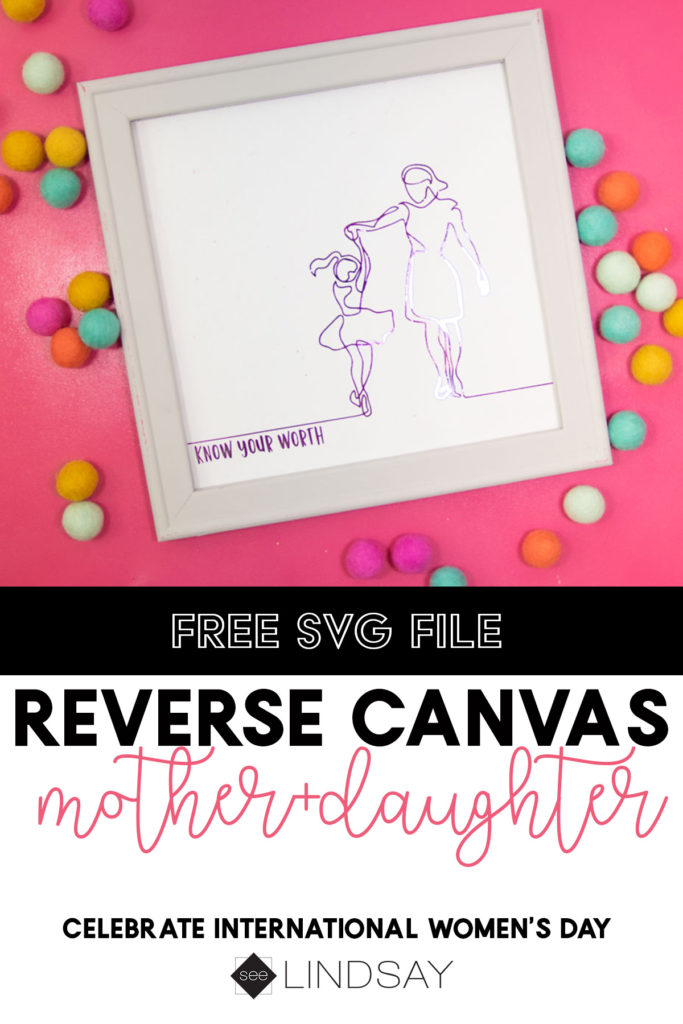
This project is part of Craft Lightning Week. All week long I’m sharing fast crafts that can be made in 10 minutes or less to celebrate obscure holidays. My friends Angie from The Country Chic Cottage and Lindsay from See Lindsay are joining in, along with some of our crafty friends! Be sure to scroll down to check out the obscure holidays they’ve chosen to celebrate!

DIY Pretzel Pin that you can wear to celebrate National Pretzel Day on April 26th

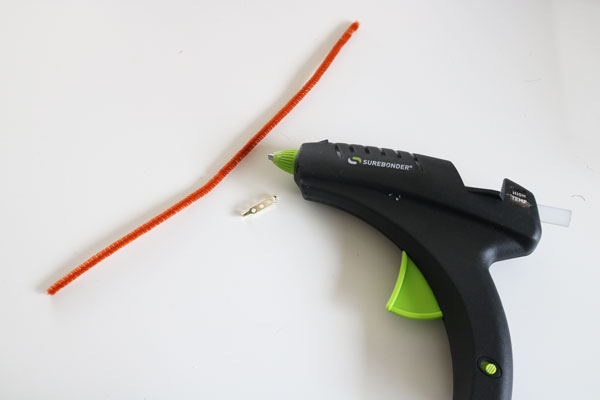
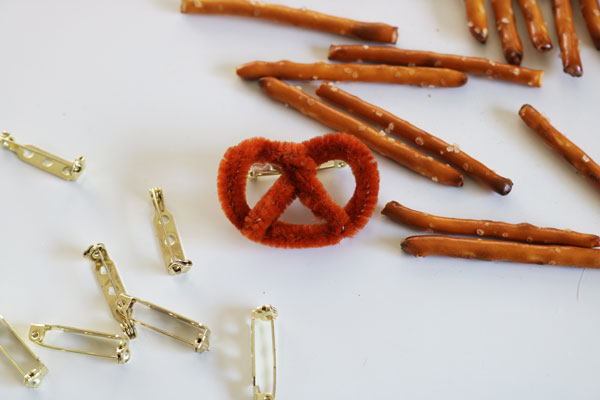
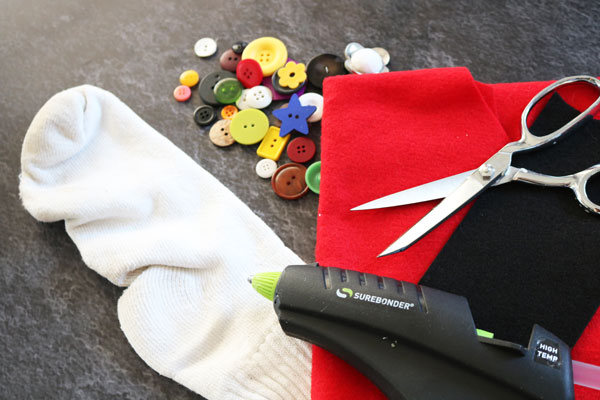
To make your Simple DIY Pretzel Pin, you’ll need:
Brown pipecleaner
Pin Back
Hot Glue

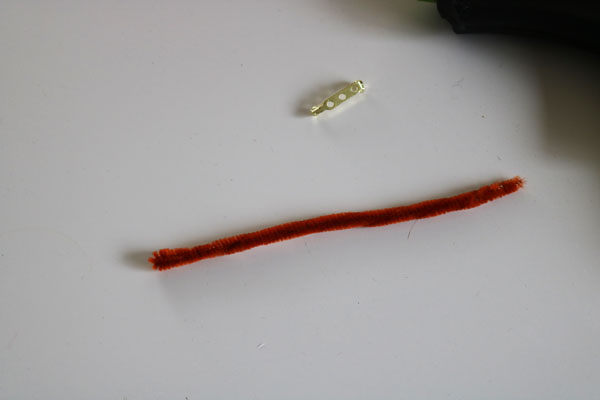
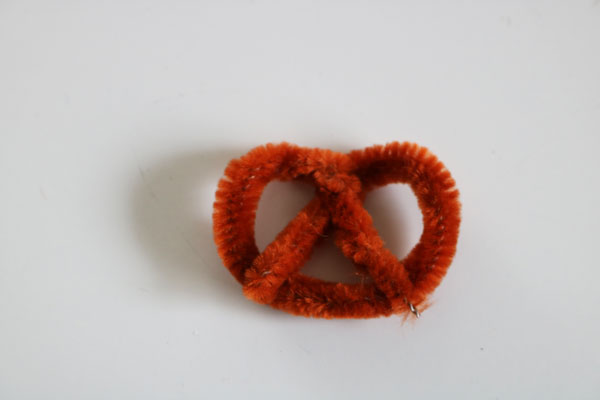
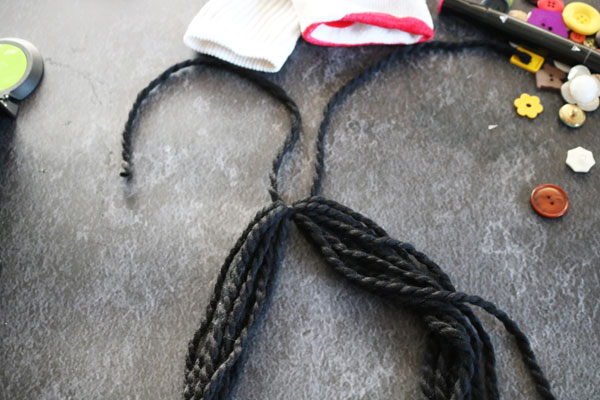
Start by folding the pipe cleaner in half, and giving it a light twist. This makes it a little shorter and a little thicker.

Fold in half and lightly twist

Fold into a loop, and twist about a half inch from the ends.

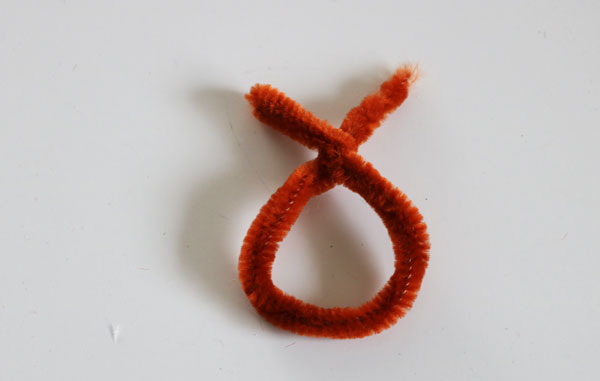
Then bend the ends down to complete the pretzel shape.

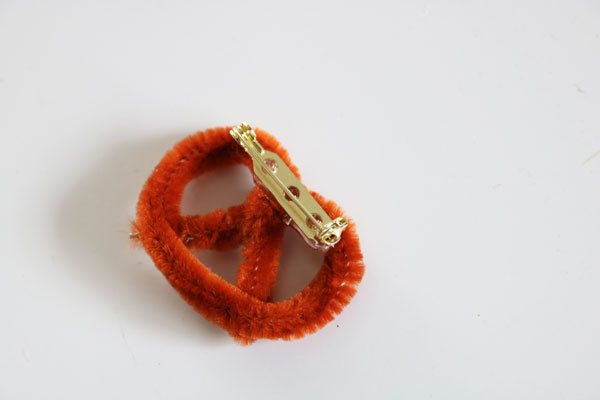
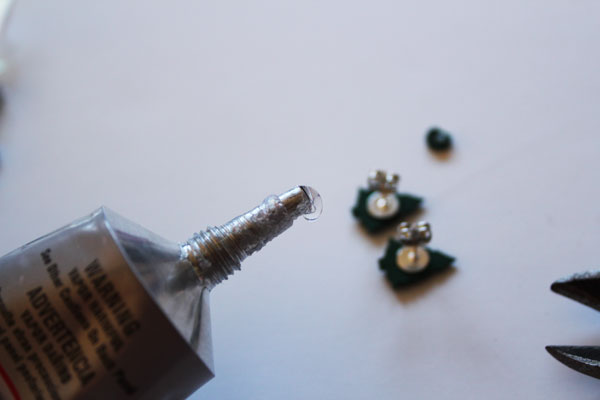
Use hot glue to secure the pin to the back. Allow to cool.

If you like, you can add some clear glitter to look like “salt” on your pretzel!

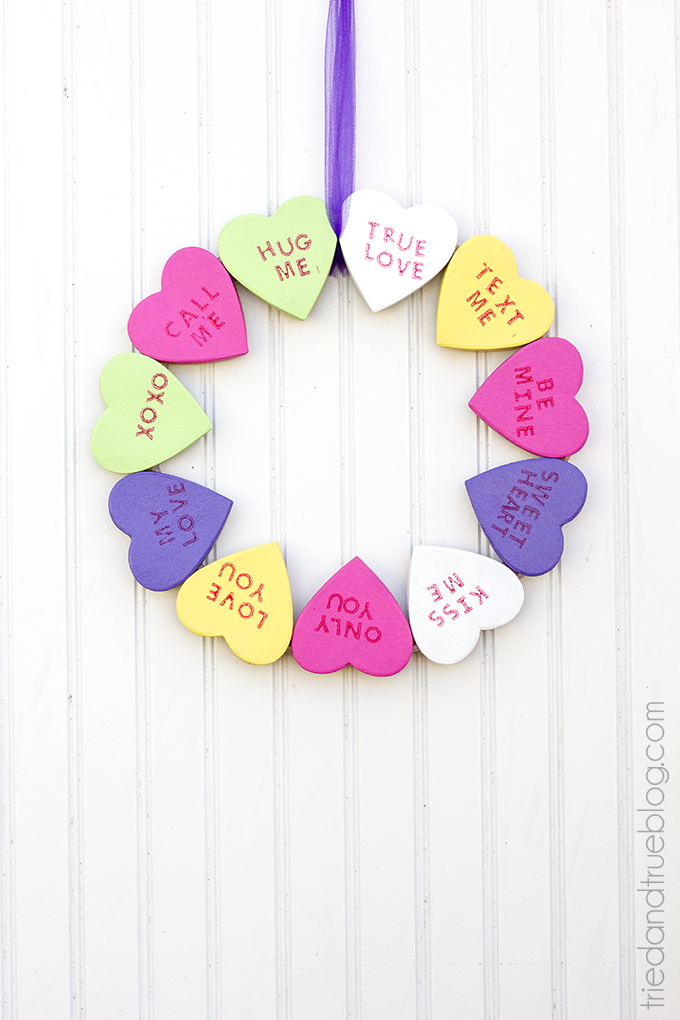
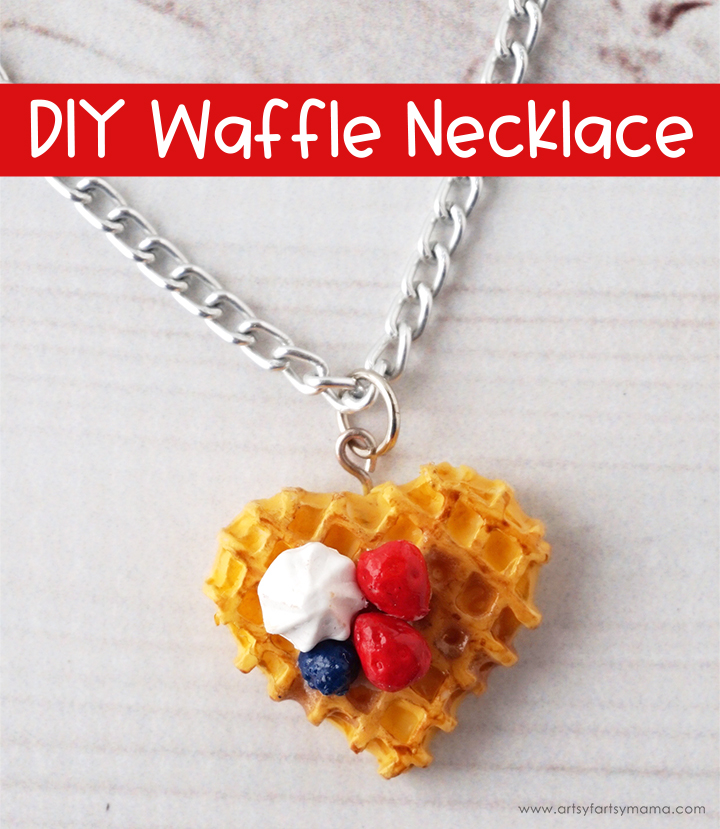
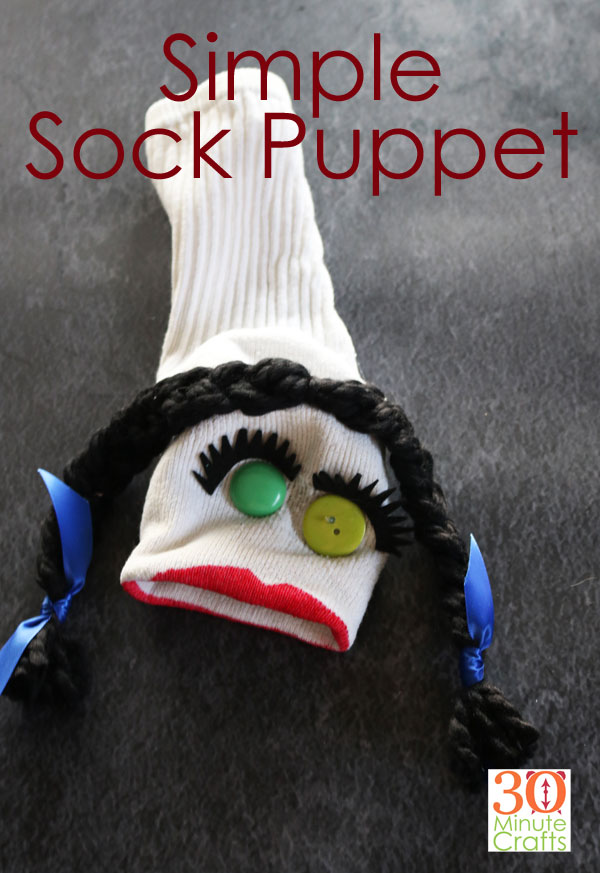
Check out these other simple crafts that celebrate obscure holidays!

Jessica from Everyday Party made this “Wine Not” tumbler to celebrate National Drink Wine Day!
Over at Tried and True, Vanessa is celebrating Valentine’s Day with this Valentine’s Wreath.
Our Crafty Mom shows you how to make a Poetry Journal for Great Poetry Reading Day.
Artsy Fartsy Mama is Celebrating International Waffle Day with the cutest waffle necklace!
Lindsay from See Lindsay shows you how to make a reverse canvas for International Women’s Day.
And Angie from the Country Chic Cottage is celebrating Dinosaur Day with this fun Dino Tagged Blanket!


Sock Puppet from a Lost Sock

Okay, the title was a little misleading. You don’t make a sock puppet from a lost sock. You make a sock puppet from the sock that is left after you have lost its mate. Because the lost sock is gone forever, you might as well enjoy the remaining sock by turning it into a no-sew sock puppet!

This project is part of Craft Lightning Week. All week long we are celebrating Obscure Holidays. And today I’ve made a craft to celebrate Lost Sock day (which is May 9th, in case you are wondering). My friends Angie from the Country Chic Cottage and Lindsay from See Lindsay are joining me, along with some of our crafty friends. See the obscure holidays they picked, and the fun crafts they have come up with when you scroll all the way down.

Simple Sock Puppet - No Sew and easy to make

To make your sock puppet, you’ll need:

Sock
Scissors
Felt
Buttons
Hot Glue
Marker
Yarn
Ribbon

Cut out eyelashes and a tongue from the felt.

cut pieces

Glue the eyelashes, tongue, and button eyes in place.

Draw on lips with a marker.

draw on lips

Cut 9 strands of yarn 18″ long. Use one of the strands to tie the yarn in the center.

tie yarn for sock puppet

Braid each side, tie the ends with the ribbon, then glue into place.

glue hair on sock puppet

Your simple no-sew sock puppet is complete!

sock puppet made from a leftover sock!

Now you can make a whole collection of sock puppets from your socks with mates that have strayed!

Check out these fun and fast obscure holiday craft ideas!

Frog Prince Paperie is celebrating Scrabble Day with this Scrabble letter art.
Practically Functional made this donut shirt for world donut day.
Gingersnap Crafts made this bird feeder for Feed the Birds Day.
How fun are these felt croissants that Me and My Inklkings made to celebrate World Croissant Day!
Leap of Faith Crafts has this night light craft to celebrate World Sleep Day.
Celebrate S’mores day with this printable from See Lindsay
Celebrate Brother’s Day with these Superhero shirts from The Country Chic Cottage.

Super Simple Holiday Earring Craft

I love making simple earrings. Such a great way to add personality to an outfit – and so many earring crafts are so incredibly easy to make. Like this Super Simple Holiday Earring Craft. So crazy easy that when you tell people you made them… you’re going to feel a little big guilty! But you totally DIYed these fun earrings!

This project is part of Craft Lightning Week. All week long my friends Angie from The Country Chic Cottage and Jessica from Mad in Crafts and I have been sharing a 15-minute or less craft project every single day. And we’ve asked a bunch of our crafty friends to join in with us. Be sure to scroll to the bottom of this page for a healthy dose of Holiday Crafting inspiration!

Super Simple Holiday Earring Craft

This post contains affiliate links which help support this site at no extra cost to you.

To make your Super Simple Holiday Earring Craft, you’ll need:

Holiday buttons like these or these
E6000
Post-style Earrings
Wire Cutters

Make sure you have two of each design you’d like to use as a pair of earrings. Use the wire cutters to cut off the button-back of the earring.

trim backs

clipped backs


Use the E6000 to glue the earring posts to the back of the (formerly) buttons.

glue

Allow the glue to set. Overnight is usually enough.

allow to set

It is that easy to make some of the cutest holiday earrings, and at a fraction of what they would cost if you bought them at a retail store!

finished Holiday Earring Craft

I don’t know about you, but I am going to be on the lookout for ALL the cute buttons from here on out! This Super Simple Holiday Earring Craft is an all-time favorite!

Make Simple Holiday Earrings with this super simple DIY Holiday Earring Craft


Want more fun and fast Holiday crafts? Check out these great ideas!

How cute is this Popsicle stick snowflake from Gingersnap Crafts!?

Artsy Fartsy Mama made this sparkly Holiday sign.

Annmakes has a poinsettia bouquet that is prety and practical!

Over at CRAFT you can learn how to make these cute Ugly Christmas Sweater Ornaments.

SAMSUNG CSC

These Christmas Tree napkin rings from Try It Like It are sure to add some cheer to any table.

I love this pretty Joy sign from 5 Little Monsters.

This holiday gift tag from Michelle’s Party Plan-It is so pretty!

Learn how to add some cheer to a plain water bottle at Happiness is Homemade.

My guest co-host, Jessica From Mad In Crafts made these simple paint-pour ornaments.

And my long-time co-host, Angie from The Country Chic Cottage made a video to show you how to make her cute thumbprint tree ornament.


Halloween Treat Bag Tags- And How Does the Cricut Machine Work?

Vying to be the coolest house on the block by giving away awesome treat bags? In charge of snacks for your child’s class at school? Putting on an epic Halloween party? Or just want to put a surprise in your kiddo’s lunchbox? Whip up these cute Halloween Treat Bag Tags to dress up your treats this Halloween! And while we make them, I’m going to teach you a little about how the Cricut Machine works. And, if you scroll all the way down to the bottom of the page, you can enter for a chance to win the newest Cricut machine – the Cricut Maker.

This project is part of Craft Lightning Week. All week long my friends and I are sharing 15-minute or less crafts. Did you see my fun Cricut Antenna yesterday? Because this week, all the crafts are Halloween projects made using the Cricut! My co-hosts Angie from The Country Chic Cottage and Jen from 100 Directions are sharing projects every day this week, and we’ve invited friends from across the internet to join in. Check out their ideas at the bottom of this page.

Halloween Treat Bag Tags

This post contains affiliate links. Making purchases through these links provides me a small commission at no cost to you.

To make these Halloween Treat Bag Tags, you’ll need:

A Cricut Machine (I used the Cricut Maker, but the Cricut Explore series of machines works great for cutting paper as well)
Halloween Scrapbook paper
Coordinating solid color paper
Glue stick
Ribbon
Scissors
Cellophane bags
Halloween treats

supplies for tags

If you want to fussy-cut (cut a specific part) of the patterned Halloween paper, you will need an iOS device (an iPhone, iPad, etc). I’ll show you how to do this with SnapMat. If you don’t have an iOS device, you can still make these tags, but you won’t be able to center the designs.

Start by opening the Two Layer Circle Tags File I created in Cricut Design Space. Everything is all set up, so press the “Make” button in the top right hand corner. This will take you to the mat view. Tap on the second mat to bring up the inner circle of the tags.

Secure the patterned paper to the mat by pressing it in place.

mats for tag project
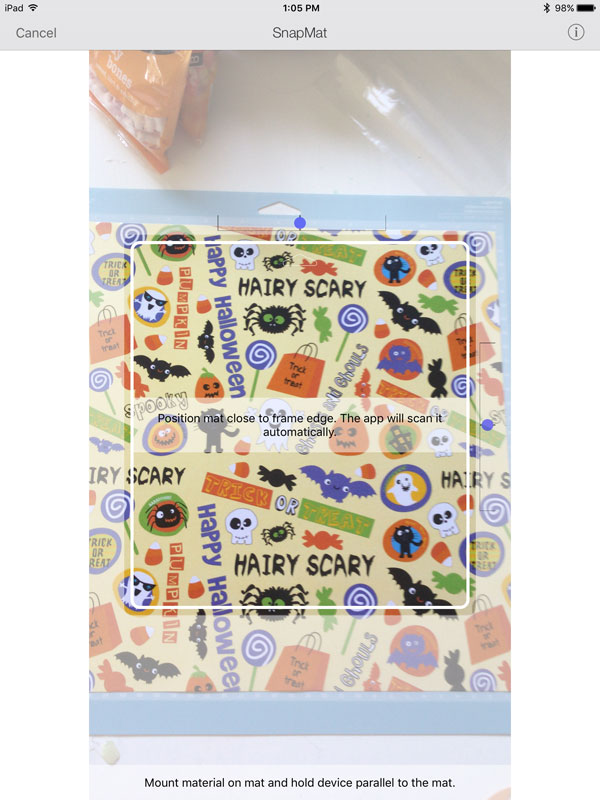
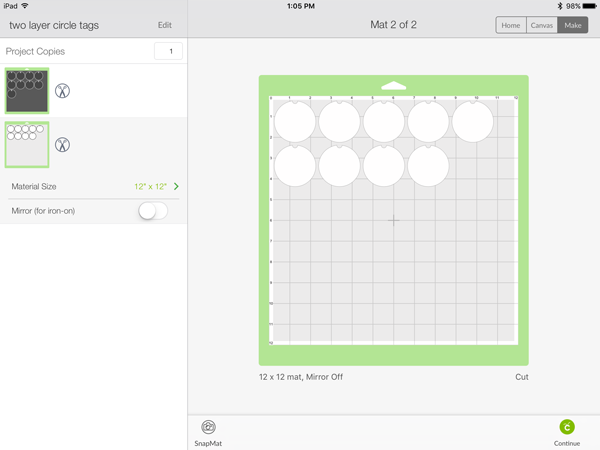
Down in the bottom left corner you’ll see the image of a camera, and the words “Snap Mat”. Tap there. This will activate the camera. Hold the device level with your page, and line up the edge of the mat in the square. I had trouble on the white background, so I ended up moving the mat to the floor so that the dark carpet would provide better contrast.

snapmat on Cricut

Now you can tap on the circles, and move them into place to cut out a specific design on from the paper.

move circles

Repeat with all the circles, and then you can press the green circle in the bottom right corner to continue. Follow the prompts to select the correct material (cardstock), load the mat, and start the machine.

So how does the machine work, exactly?

When I describe a digital cutting machine, like the Cricut, to people who have never seen one, I describe it as a printer. But instead of using ink cartridges, it uses a knife to cut the paper into shapes. With a printer you can print images other people have created, or you can use software to design your own images, and then you send them to the printer to print. That is exactly what the Cricut does – but with cutting.

You can use pre-made files, like the one I created for these Halloween tags, or you can design your own files. And then you send them to the Cricut machine to cut them out. It actually does more than cut – you can put pens in the machine and have it draw for you, or use a scoring tool to have it score lines, or print a design and have the machine cut around it perfectly. But, for the basics, it is a printer that cuts instead of printing.

Once the machine has worked it’s magic, peel off the excess paper, and the cut circles. Then put the background paper on the mat, and follow the prompts to load and cut this paper.

tag cut out

Remove the paper, and you’re ready to assemble your Halloween Treat Bag Tags!

To assemble your Halloween Treat Bag tags:

Just glue a patterned circle onto the colored circle. Line up the hole with the notch for the hole to help you center the design.

glue on

Allow to dry. Then fill your bags with treats, and tie the tags in place. When making a lot of bags, I don’t worry about fancy bows on my ribbons. I tie a clean double-knot, and then cut the ends at an angle. Looks nice without the work of getting a bow to look nice.

Tie on tag

Make all your bags, and you’re ready for Halloween!

finished treat bags

If you want to be even MORE ready for Halloween, check out these fast and fun Halloween projects!

Beth at Cupcakes and Crinoline made this cute Halloween Pillow.

Jessica over at The Organized Mama made this cute Farmhouse Flower Box.

You’ll learn how to make these cut Pumpkin Pillow boxes over at See Lindsay.

Over at Becoming Martha, Sarah has a super cute Halloween sign.

Angel at Fleece Fun made these cute Boo Jars.

My kids are going to insist I make cute Halloween flashlights for them like this one Marissa at Rae Gun Ramblings created.

At Creating Really Awesome Free Things, Jamie is showing you some fun No-Carve Pumpkin ideas.

My crafty co-host Jen made these awesome Jack-o-lantern stickers.

Angie, my other crafty co-host whipped up this Pumpkin pillow.

Save

Cricut Maker Giveaway

a Rafflecopter giveaway

Lego Batman Movie Craft – DIY Bat Signal

This DIY Bat Signal is the perfect craft for any fan of the Lego Batman Movie! Make this DIY Bat Signal to hang in your room. Make your own Bat Signal as a decoration for your Lego Batman Movie Party. Or if you have some creative party-goers, use this Bat Signal as the perfect Lego Batman Movie Craft that they can take home after the party.

DIY Lego Batman Bat Signal - Make this Lego Batman Bat Signal yourself for a Lego Batman Party or for your favorite Lego Batman Movie fan!


And if you’re a fan of the Lego Batman Movie, head to Legoland during Lego Batman Movie Days, we went this past weekend to celebrate the release of the new Lego Batman Movie. Lego Batman Movie Days will be going on next weekend as well… make your own Batmobile and race it on the test track, meet Lego Batman, find all the villains that have taken over Miniland, and help build some Batman Legos!

In the meantime, you’ll want to make your own Lego Bat Signal. Here is what you’ll need:

Hot Glue Gun
Battery-operated LED lights (similar: {affiliate link} here)
Black Scrapbooking paper
Yellow Plastic (a bag from the LEGO store works great!)

Supplies for Lego Batman Movie Bat Signal

Cut out your black paper. You can use these paper templates. Or if you have a cutting machine you can use this Silhouette file, this eClips2 File, or this SVG file for all other machines.

If using the cut files, your side pieces will be scored every 1/4″ already,. If you’re using templates, score the side pieces every 1/4″ to help it curve .

With the hot glue gun, glue the side piece all the way around the back.

glue on side

sides glued on

Cut a hole in the back for the switch on your battery pack.

cut hole for switch

Glue the battery pack to the back. Then coil the lights round and round. You can secure the lights with glue as needed.

coil lights


Glue the circle to a piece of the yellow bag. Glue the Lego Bat shape on top, centering it on the circle.

glue onto plastic

Trim the plastic around the circle. Glue on top of the base.It is okay if glue seeps out. You can trim it away with a craft knife later.

allow glue to come out

Your Lego Batman Movie Bat Signal is complete! Switch on the lights and call the Bat Man!

Make a Lego Batman Movie Bat Signal

Finishe Lego Batman Movie Bat Signal


Valentine’s Chocolate Wrapper

If you’re looking for a Valentine Chocolate Wrapper, than this is perfect for you! This Valentine’s Chocolate wrapper is made to re-wrap a Christmas Chocolate bar. Which is perfect because these Christmas Chocolate bars are still perfectly good in February, and are on sale every January! Stock up on these chocolate bars, and you’ll have a fabulous Valentine’s Day gift at a fraction of the retail cost! All you have to do is print out this Valentine Chocolate Wrapper to re-wrap the chocolate with. 

Valentine's Chocolate - Made from On Sale Christmas Chocolate!

To make this Valentine’s Chocolate, you’ll need:
Russel Stover Santa Chocolate
Valentine’s Chocolate Printable
Scissors
Double-Sided Tape

note: If you can’t find these Santa Chocolates, check out my Valentine’s Chocolate Bar craft instead.

supplies

Cut out the printed shape.

cut on lines

Remove the paper wrapper from the chocolate (leave on the foil). Then wrap in the new paper.

fold around chocolate

Tape flap down with double-sided tape. Your Christmas chocolate has been converted to Valentine’s Chocolate!

wrapped chocolate

I made it a two dollar bill because Valentine’s Day isn’t about big sums of money – it is about two people getting together. Which is also why I left the center of the wrapper blank. You can add a picture of you and your sweetie, write in your names, or do anything you like to make this chocolate bar extra special for the two of you.

Turn Christmas Chocolate into Valentine's Chocolate


If you’re looking for more fast Valentine’s Day crafts, you’ll want to check out these great projects:

Over at Creative Cynchronicity, you’ll learn all about making these Air Dry Valentine’s Ornaments.


My Mom Made That whipped up these Conversation Heart bookmarks.


Find out how to whip up some heart stamped tea towels with Sparkle Living.


You’ll want to hang one of these chocolate cones from Busy Mom’s Helper on every doorknob in your house (good thing each door has two doorknobs)!


Why should Christmas be the only holiday with a countdown calendar – check out this Valentine’s Countdown Calendar from Gingersnap Crafts.


Our crafty guest host, Laura from Make Life Lovely, made these great Valentine’s treat boxes.

Angie from The Country Chic Cottage made this adorable Valentine’s pallet art that made me squeal from the cuteness!

To get the file for this Valentine’s Chocolate, as well as all our other Valentine’s Printables, sign up for our email list here:

 
FREE Valentine’s Printables
Sign up for our email list to get access to the free Valentine’s Printable files!
You’ve successfully signed up! Check your email for details.

Valentine’s Chocolate Bar

Sure, you could grab a chocolate bar from the store and give it to your sweetie, but what is more special that sweets that you made for your sweetie!? And these chocolate bars are crazy easy to make!

This post is part of Craft Lightning week. All week long I’ve been sharing Valentine’s crafts that can be made in 15 minutes or less, along with my co-hosts Angie from the Country Chic Cottage and Jen from 100 Directions, and a bunch of our friends around the internet. Check out their awesome ideas at the end of this post! If you missed any, check out the Valentine’s Doilies, Crystal Heart, Stamp Valentines, and Stampable Jewelry Box.

DIY Candy Bars - Make these easy chocolate bars, and wrap them in these fun wrappers!

You’ll need:
Chocolate Melts
Candy Bar Tray (I found this one at Michael’s)
Candy Bar wrapper printable printed out on paper
Scissors or paper cutter
Aluminum Foil
Double sided tape

supplies for chocolate bar

Place the candy melts in the tray and microwave for 30 second intervals, stirring between each, until melted. Set aside to cool for several hours (will depend on the temperature in the house).

Break apart the bars and wrap with foil. Cut the printable wrappers.

print out wrappers

cut wrappers

Wrap each around the chocolate bar. Trim any excess length

fold wrapper around bar

Tape in place.

add adhesive

Secure the wrapper in place, and your candy bar is ready for your sweetheart!

finished candy bars

Check out these other awesome and quick Valentine’s Day projects:

Cyn at Creative Cynchronicity made this glitter heart canvas.

These shrink plastic earrings that Katie Berry made are simple and cute!


Over at Craftily Ever After, Ashley made these Valentine bird tattoos.


Get your fingers busy with these Valentine’s thumbprint hearts from One Krieger Chick.


Karen at Dragonfly and Lilypads is helping you create a custom beach scene for your valentine.


How cute are these love bugs from Ashley at Cute as a Fox.


These his and hers party favors over at Michelle’s Party Plan-it are easy to make, and a great idea for party decor.


Beth Watson has a genius idea for faux cross-stich.


Jen from 100 Directions shows you how easy it is to make your own Valentine’s card.


And she shows you how to cut your own Valentine’s garland.


Angie from The Country Chic Cottage whipped up these Valentine’s Day Muddy Buddies.


And she made these great Valentine’s Day Mason Jars.


To get this valentine’s chocolate wrapper printable as well as all our other fabulous Valentine’s Printables, join the email list using the form below:

 
FREE Valentine’s Printables
Sign up for our email list to get access to the free Valentine’s Printable files!
You’ve successfully signed up! Check your email for details.

Stamp Valentines

I think what I like most about Valentine’s Day is the puns. And gifts. This stamp valentine is the perfect combination of a pun and a non-candy Valentine’s gift. I combined my love of puns with my son’s love of rubber stamp to make these valentines that he’ll bring to preschool this year – these stamp valentines.

If you like non-candy valentines, check out this googly eye valentine and this dinosaur valentine.

Stamp Classroom Valentines

To make these valentines, you’ll need:
Heart Stamps (I found these at Michael’s)
Mini Stamp Pads
Plastic Bags
Ribbon
Hole Punch
Scissors
Cardstock with this stamp printable printed on it.

supplies for classroom valentine

Cut out the tags and punch a hole in each.

punch hole

Put the stamps and an ink pad in each bag. Tie on the tag.

tie up bag

Done!

you've left a stamp on my heart valentine

More Valentine Craft ideas

Jessica from Mad in Crafts made this fast-food Valentine’s Card.


You can make heart canvasses like these from Albion Gould.


Paula at Frog Prince Paperie made these Birdhouse treat boxes – and is offering up the printable for you to make your own.


You can learn how Kimbo from A Girl and a Glue Gun makes these adorable heart envelopes.


These Love Rocks at Artistic Endeavors 101 are adorable, and quick to make!


Carla Schauer has this fun Valentine’s Bookmark for you to color.


You’ll fall in love with your skin again with this Milk Bath Recipe from Mom off Track.


The Hot Chocolate lover in your life will love this Hot Chocolate card from Scrappy Chick.


Jen from 100 Directions created this awesome ombre nail art.


Angie from the Country Chic Cottage whipped up these cute EOS Lip Balm Valentines (yay for more puns)!


Get the free printable file

To get this “You’ve left a Stamp on my Heart” Printable, as well as all our other Valentine’s Printables, join the email list using the form below:


FREE Valentine’s Printables
Sign up for our email list to get access to the free Valentine’s Printable files!
You’ve successfully signed up! Check your email for details.

Tabasco Valentine

Whether your Valentine has a spicy personality, or likes it hot, this is the perfect way to let them know how you feel! I found these mini Tabasco bottles, knowing they were just the right size for a sizzling Valentine! Here is how to make your own Tabasco Valentine for the hot folks in your life!

You can absolutely include a full-size bottle of tabasco sauce (or another favorite hot sauce if that is more your style). These mini tabasco bottles were just too cute to pass up, though! And of course the “You set my heart on fire” pun is just perfect! Who doesn’t love a punny valentine?

Tabasco Valentine Printable - make this Valentine's Day extra spicy!

You’ll be making this Valentine’s card yourself – but it is super easy! Just a few steps and you’ll be ready to go!

To make this Valentine, you’ll need:

Fire Valentine Printable
Mini Tabasco Sauce bottles (I found mine at World Market)
Hot Glue
Scissors or paper cutter

supplies for tabasco valentine

Cut apart the Valentines. Put a little hot glue on each bottle, then glue in place on the valentine.

If you don’t have hot glue, you can cut two small slits and use a piece of string or ribbon to tie the bottle in place. Be careful when making your cuts – and remember that they don’t have to be very big. Just a quarter inch slit on each side of the bottle is plenty. You may want to add some tape to the back of the card to reinforce the area that you cut, so that the ribbon does not rip through. It depends how gentle you are going to be with the card, and if you used cardstock or just printer paper. 

use hot glue to secure

Done! Gift to your favorite spicy guy or gal!

you set my heart on fire Valentine Tabasco printable

These tabasco valentines are so much fun. If you’re looking for another simple foodie valentine, try the olive valentine or the nutella valentine.

Valentine’s printables like this one are so easy, and you’ll get to say that you made it yourself! Putting in that little bit of effort means so much! And this valentine is as easy as printing, cutting, and adding a little bit of glue.

To get the fire valentine printable, as well as all our Valentine’s Printables, join our email list below:

 
FREE Valentine’s Printables
Sign up for our email list to get access to the free Valentine’s Printable files!
You’ve successfully signed up! Check your email for details.

Here are some other fun valentines to check out:

Valentine Tags with your Cricut

Dinosaur Valentines

It can be hard to find valentines for little boys to pass out to their class. I remember having one brother who was very particular about the valentines he gave to other kids. And he didn’t want to pass on a romantic message to anyone. These dinosaur valentines are easy to give, and have a simple message that most picky kids would be okay passing on. Plus, these are a non-food valentine, which many schools appreciate!

Dinosaur Printable Valentines

For these Dino-mite valentines, you’ll need:

Printable dinosaur valentine printed on cardstock
Paper cutter or scissors
Hot Glue
Dinosaur toys

You can find dinosaur toys at some craft stores in the diorama section. You can also find them at certain educational stores. Another fun option is to choose dinosaur erasers – which provide the fun of a dinosaur toy but also the usefulness of an eraser. There are lots of fun options for making these dinosaur valentines.

supplies for dinosaur valentines

Print out the dinosaur Valentines. Cut them apart. Hot glue the dinosaurs in place.

If you don’t have a low-temp hot glue gun, you can cut small slits in the valentines, and tie them in place with string or ribbon, If you choose this route, cut slits only as large as you need to get the string or ribbon through. And make sure that you print your valentines on cardstock rather than traditional printer paper. Printer paper is flimsy and won’t hold up well to the holes and the string. 

Another option would be to tuck the valentine and the toy in a small bag. Make sure that the age group the valentine is going to can handle small bags safely before choosing this option.

dab of hot glue

Your dinosaur valentines are done! Easy- peasy!

printable toy dinosaur valentines

Get the dinosaur valentines printable file:

To get this dinosaur printable valentine, as well as our other Valentine’s printables, join the email list below:

 
FREE Valentine’s Printables
Sign up for our email list to get access to the free Valentine’s Printable files!
You’ve successfully signed up! Check your email for details.

Check out these other fun non-candy valentines:

Googly Eye Valentines

Printable Valentine: Bubble Valentine