Creepy Hand Craft

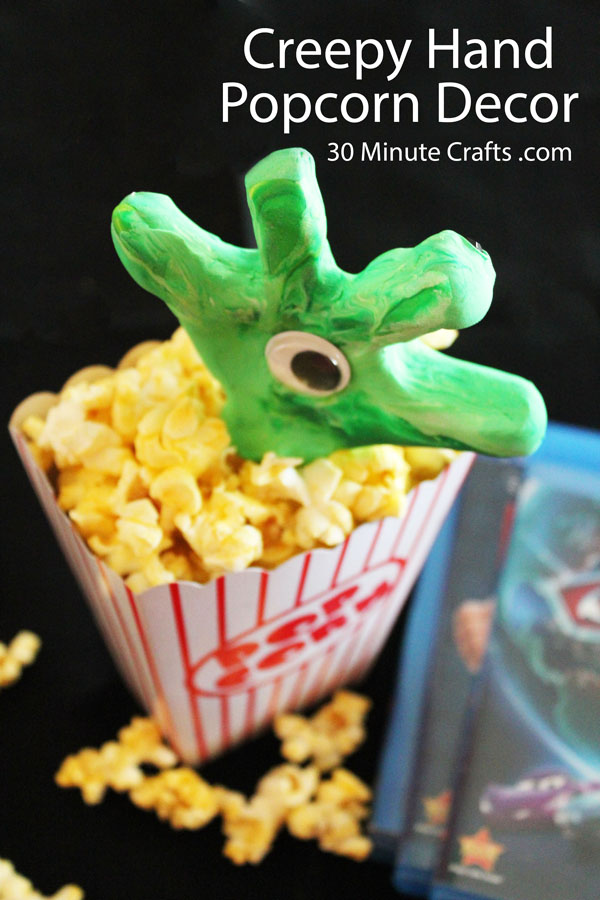
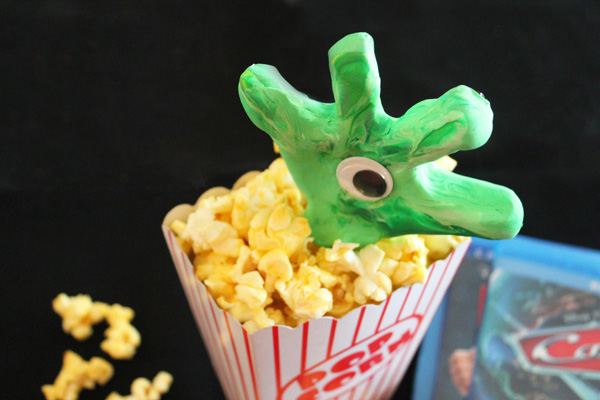
Looking for a fun Halloween craft? Or maybe a fun craft to go along with your favorite movie? This Creepy Hand Craft is so much fun… and great for tucking into a box of popcorn!

creepy hand popcorn decor

I made the hand using supplies sent to me by my friend Laura Kelly. She is awesome! She sent me the cutest box filled with all kinds of crafty goodness… including the box and the popcorn. As part of her popcorn blog hop, she asked me to make something. At first I was stumped. I had no idea! When I got to the bottom of the box, I saw the Sculpey clay, and I KNEW I wanted to make a hand!

I am a clay-scuplting novice. I wish I could make the cute creatures some people are able to… but I don’t have those skills. Luckily, this hand is super easy to make! Really! And in just 30 minutes.

supplies

Here are the supplies I used:
Sculpey Clay
Googly Eyes (Laura knows I’m a fan)
Rhinestones
Hot Glue
Stick or Skewer (I used a Lollypop Stick)

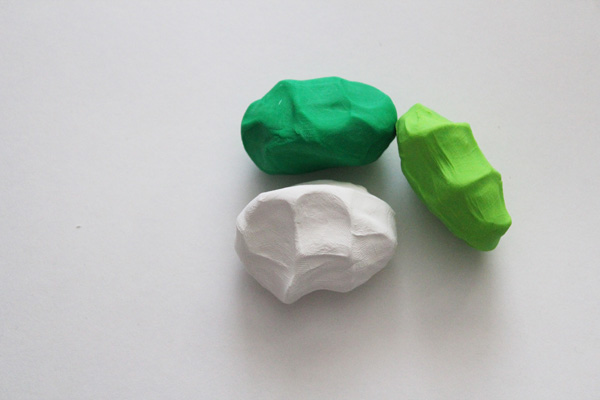
Start by picking your clay. I used 3 colors for a creepy marbled look. I kneaded each one individually to make it pliable.

knead colors

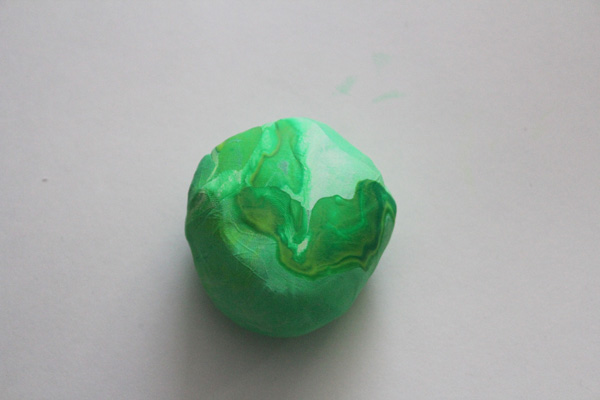
Then I mixed them all together.

mix into ball

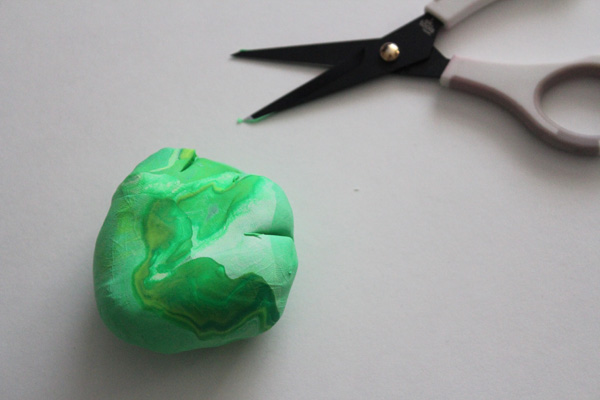
I rolled it into a ball, and then cut three slits into it – this is to split the clay to make the fingers.

cut slits

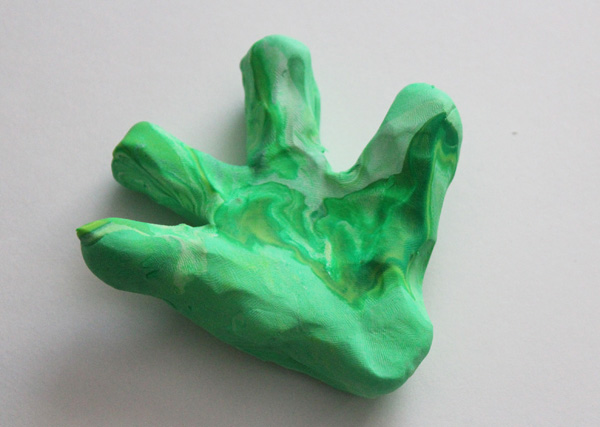
Then I pulled and tugged the pieces made by the slits to create three fingers and a thumb.

shape fingers

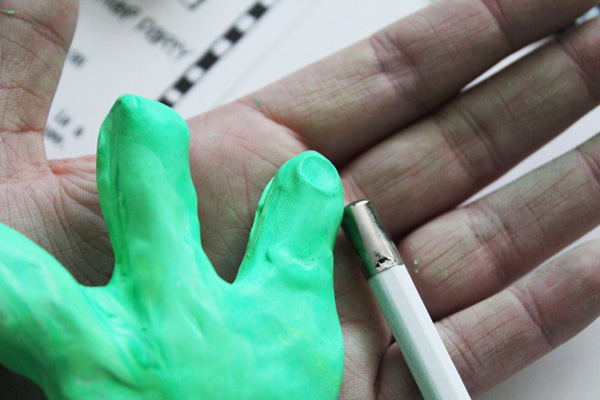
I used the back of a pencil to make indentations for the nail beds. I’m going to add rhinestones here after the hand is baked.

make nail beds

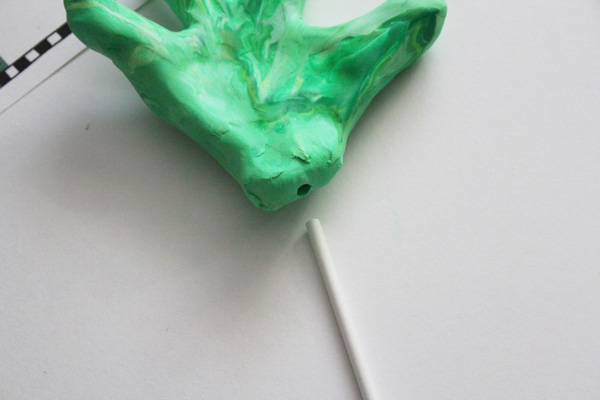
Then I inserted the stick, and wiggled it around a bit. I want there to be room for both the stick and some glue after it bakes.

make hole with stick

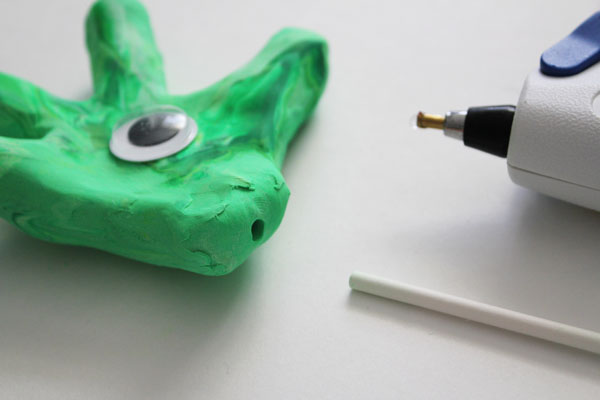
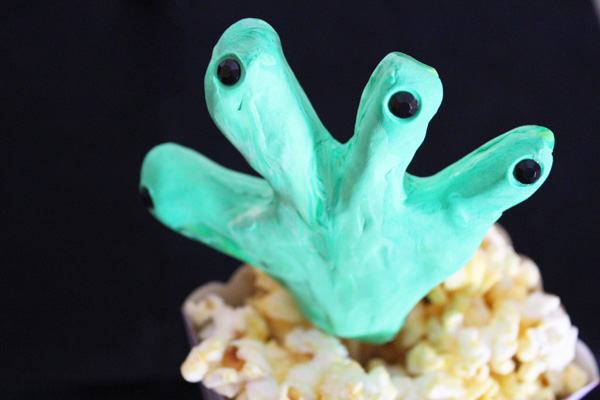
I baked it according to the package instructions, and when it had cooled, I glued in the stick, glued an eye to the center of the hand, and glued the rhinestones onto the finger nails.

glue in stick

After popping my popcorn, I inserted the stick into the center of the popcorn.

creepy hand in the popcorn

I love how the creepy fingernails turned out!

hand popping out of pop corn


Laura is doing an awesome giveaway… for a $50 Fandango Movie gift card, a pack of popcorn boxes from World Market and $45 of I Love to Create craft supplies to decorate with. Be sure to enter!

a Rafflecopter giveaway

And check out all these awesome popcorn box ideas!


Shark Fin Costume Headband

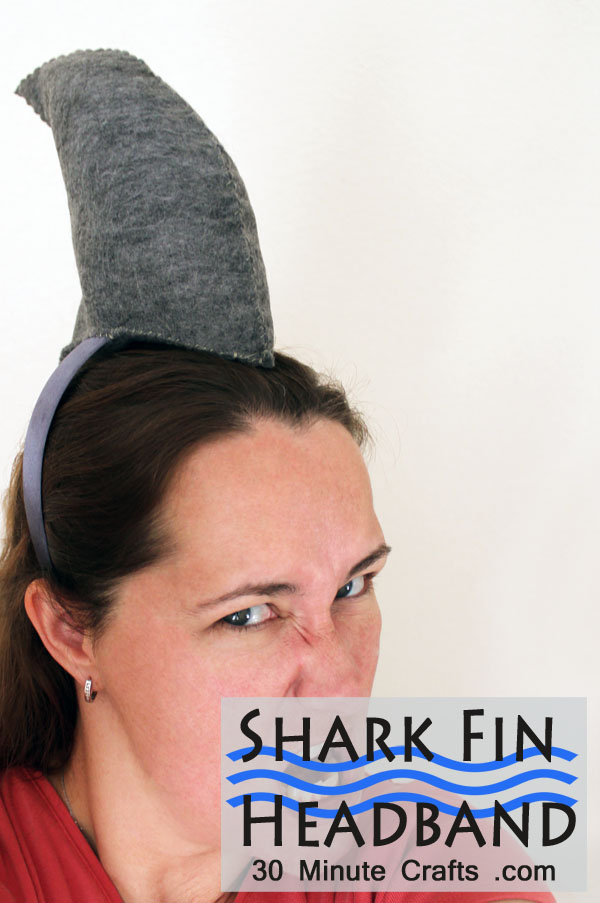
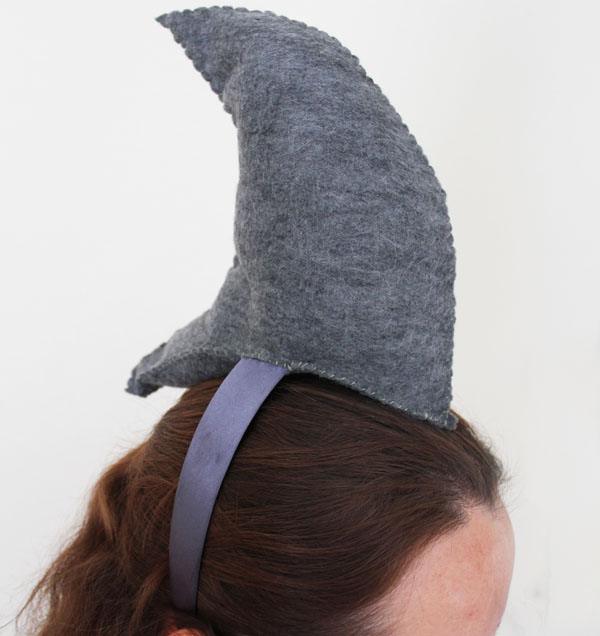
Between Shark Week and Halloween, I can think of all kinds of reasons to wear this Shark Fin Costume Headband. It makes an easy shark Halloween costume, because it is so fast to make. Just pair it with a grey shirt and pants. Even better – add some fake blood to your clothes! I didn’t make this shark fin for Halloween, I made it for my son’s school carnival. The first graders were doing a fishing booth, and we thought it would be fun if a shark came out of the booth every so often to “attack” the kids in line. With candy. Which is way better than a real shark attack, in my opinion… and though I’ve never been near enough to an actual shark to be attacked by one, recent B-movies confirm my suspicions.
Shark fin headband

For this headband, all you need is:
Grey felt (one large sheet or two small ones)
Grey headband (found mine in the wedding aisle at the craft store)
Poly-Fil stuffing
Needle and grey thread
Shark Fin template and base template

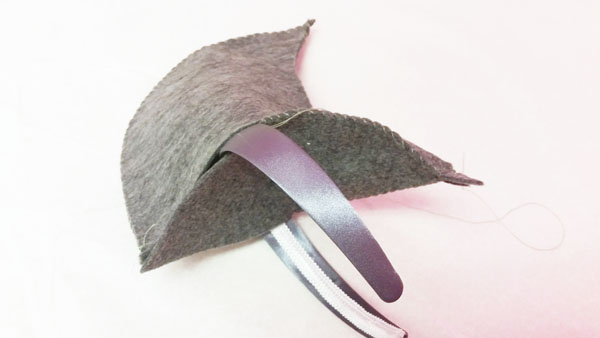
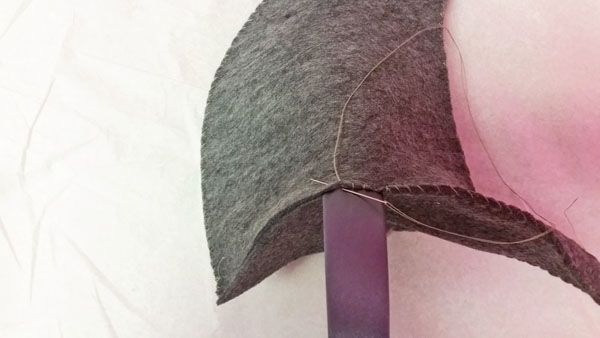
Cut two fin pieces and one base piece from the felt. Match up the two fin pieces, and whipstitch around the two long sides. Match the bottom piece, and starting in the middle of one side, whipstitch towards the back, then around the other side towards the front. Tuck the headband in.

stitch on bottom

Stitch the headband in, on the top and the bottom.

stitch in headband

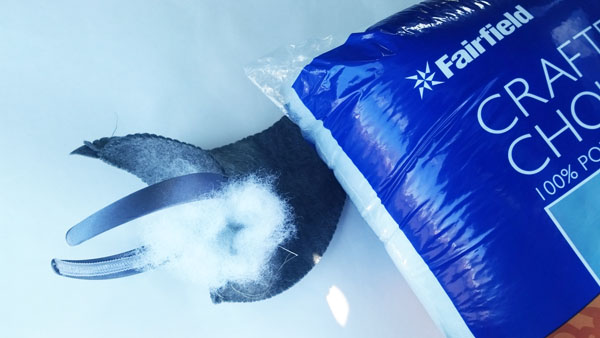
Stuff the fin with Poly-fil. Do not over stuff! The stuffing will help it keep its shape and stand up.
stuff with polyfil

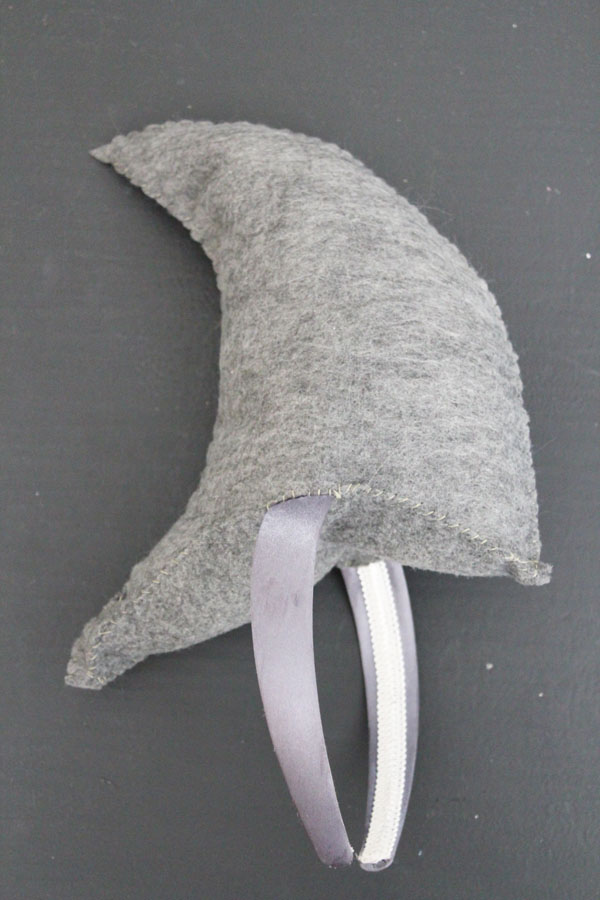
Whipstitch the hole closed, and you’re all done!

make a shark fin headband

wearing shark fin headband

Glitter Elsa Makeup Crown – Frozen Costume

A special thanks to Tulip for sponsoring our hangouts this week! For more awesome Body Art videos, check out Crafty Hangouts this week!

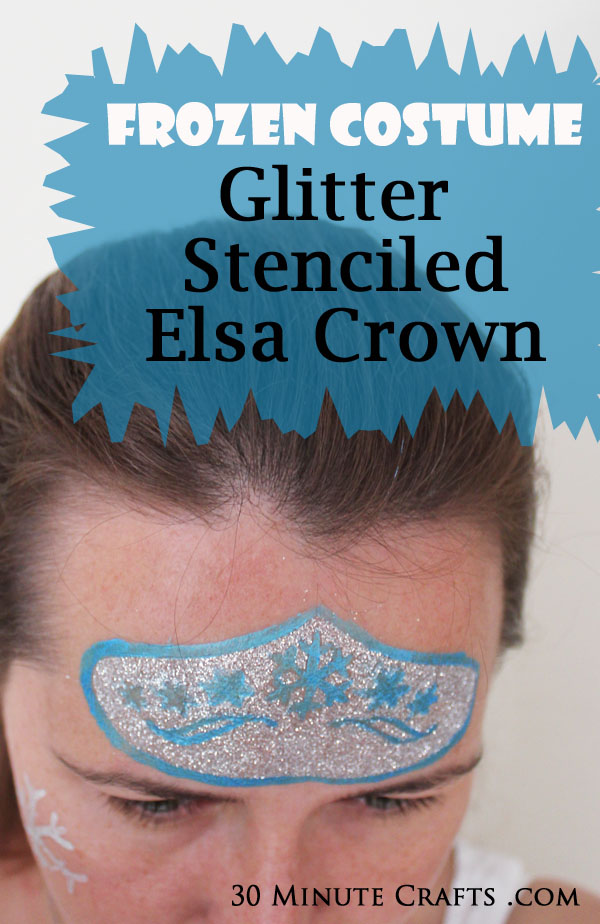
Elsa is the third most popular costume for children this Halloween. The Frozen madness (and Frozen costume madness along with it) hasn’t died down. If you have a child planning to dress up as Elsa this year, I have a fun Glitter Elsa Makeup Crown that you can use!

Frozen Costume - Glitter stenciled Elsa Crown

I used Tulip’s Glitter Tattoos and some of the body art paint to make this crown – you can go to 9:12 on the video if you want to see the crown with just glitter…

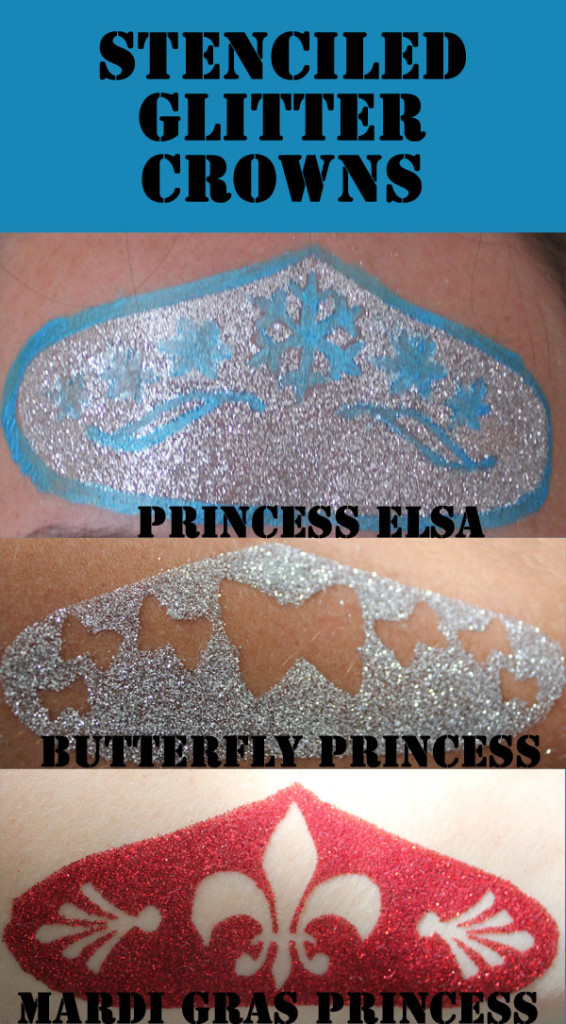
Oh, and you’ll need the stencil. I created three different stenciled crowns, and you can get the three crown stencils here – just cut them with your Silhouette onto sticky vinyl.

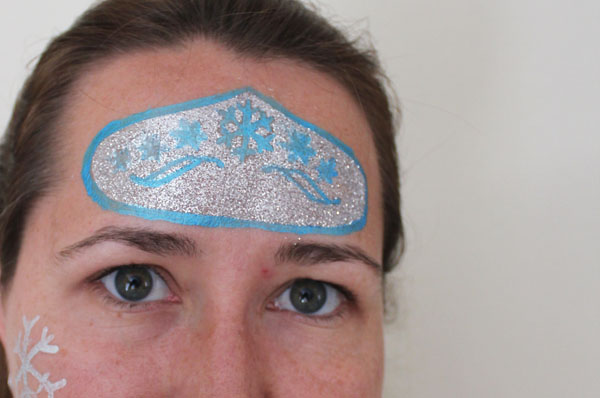
Glitter stenciled Elsa Crown from Frozen Movie
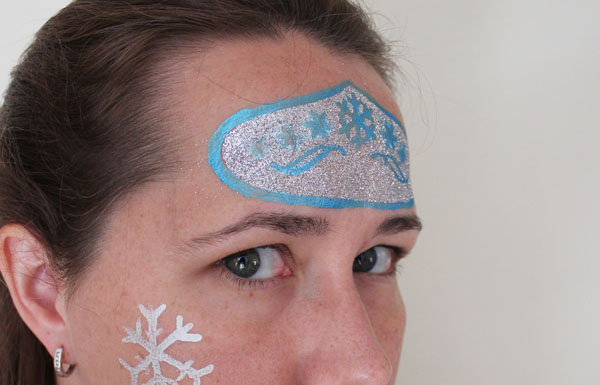
I’m really loving the way it turned out.
Glitter makeup frozen crown
The other two crowns are just as cool – a butterfly princess crown, and a Mardi Gras princess crown.
Stenciled Glitter Crowns
What princess do you plan to be for Halloween?
Save

Lego Mask

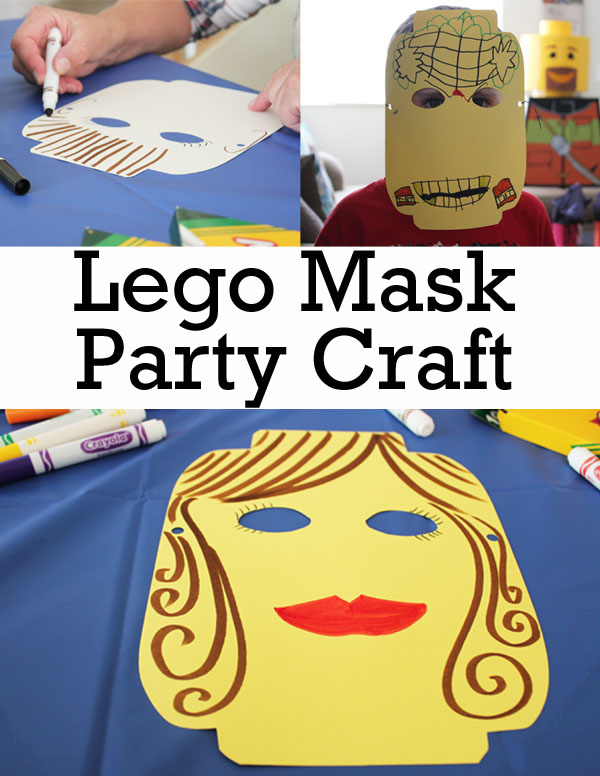
I like having activities and games at birthday parties. For my son’s recent Lego-themed party, I was coming up with fun and inexpensive party games, and I came up with this Lego party craft – a Lego mask! This Lego Mask could also be a great Halloween costume – cut out a mask, and your child can be their favorite Lego character!

Lego Mask Party Craft

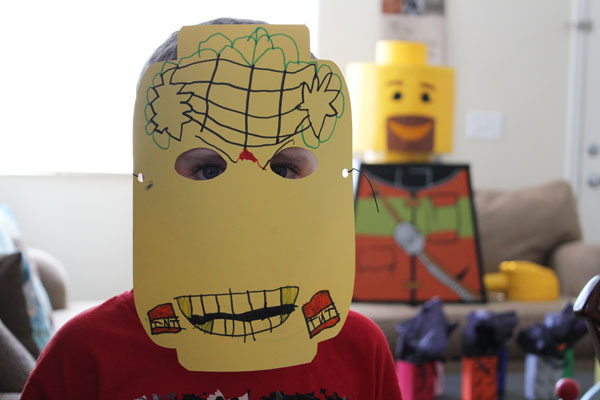
The kids loved making their Lego masks, and running around the party wearing their creations! And they were super inexpensive! Here are all the supplies you need, I’ve added some affiliate links to help you out:
12×12 Yellow Scrapbook Paper
(yellow is traditional, but I cut some white too)
Silhouette machine
Lego Mask Silhouette file (get it here)
Markers
String or ribbon


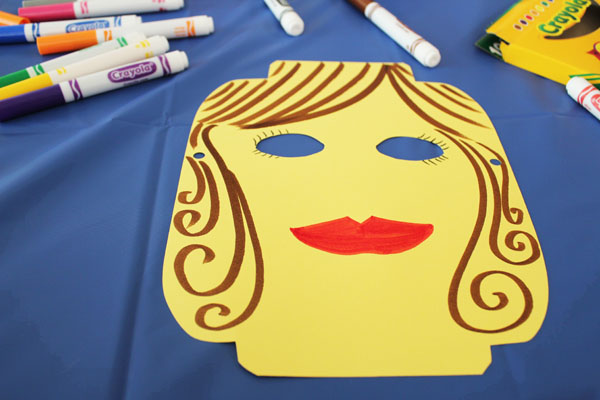
Just cut the masks out of paper using the Silhouette machine.  Give each child a mask and markers, and let them create their own designs! If you want, you can supply Lego heads for the children to look at examples, or you can let them use their own imagination.

lego head mask

Have extra Lego masks available if they make a mistake. Once they are done, tie a string or ribbon to each hole, and help them tie on their mask.

Make a Lego Head Party Mask

This simple mask would be the great start to a Lego Halloween costume as well… simple and inexpensive!


Lego Party Invitations

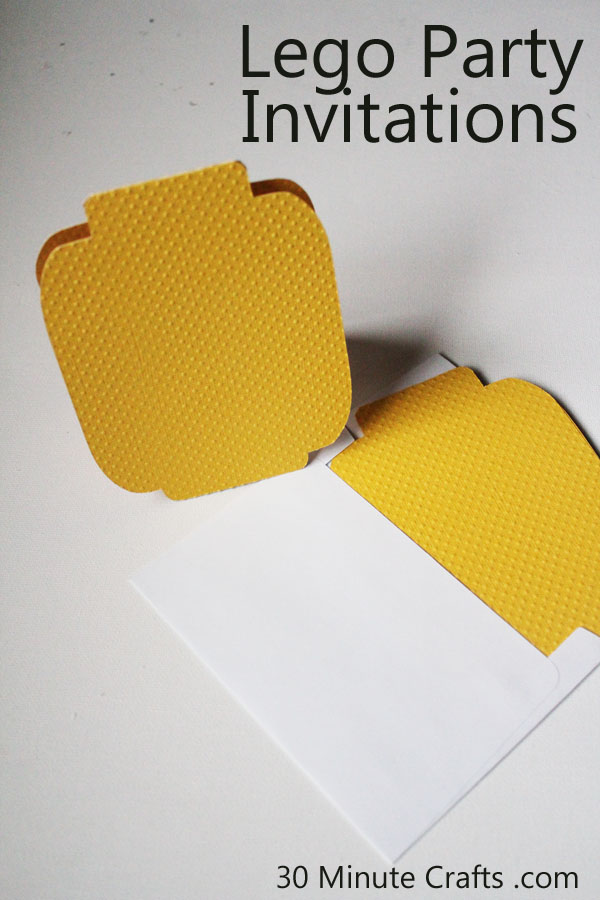
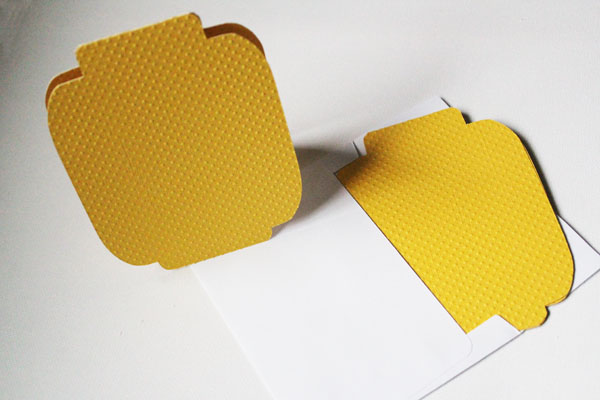
Last month, we celebrated my son’s 6th birthday party going all-out with Legos. The first step to setting the Lego theme was the invitations. I was stumped for a LONG time – how would I make cute Lego invitations? I thought about gluing actual Legos to the invitations – but never came up with a plan I really liked. Until I came up with this Lego head invitation. I love cards that aren’t square or rectangular in shape. These Lego head silhouettes were cut out on my cutting machine – but you could cut them out by hand using a template, if you’re a patient person with a lot of time on your hands.

Lego Party invitations

I cut mine out on this fun yellow paper with bumps on it – which is a nod to the bumps on Lego bricks – it is from Darice, their “Coredinations” line. You can find it on Amazon here (affiliate link): Darice DIY Crafts Spotted Collection Sheet Jillian Dot Tulip 12 x 12 (20-Pack) GX-1470-24 … but you could use regular yellow scrapbook paper as well.


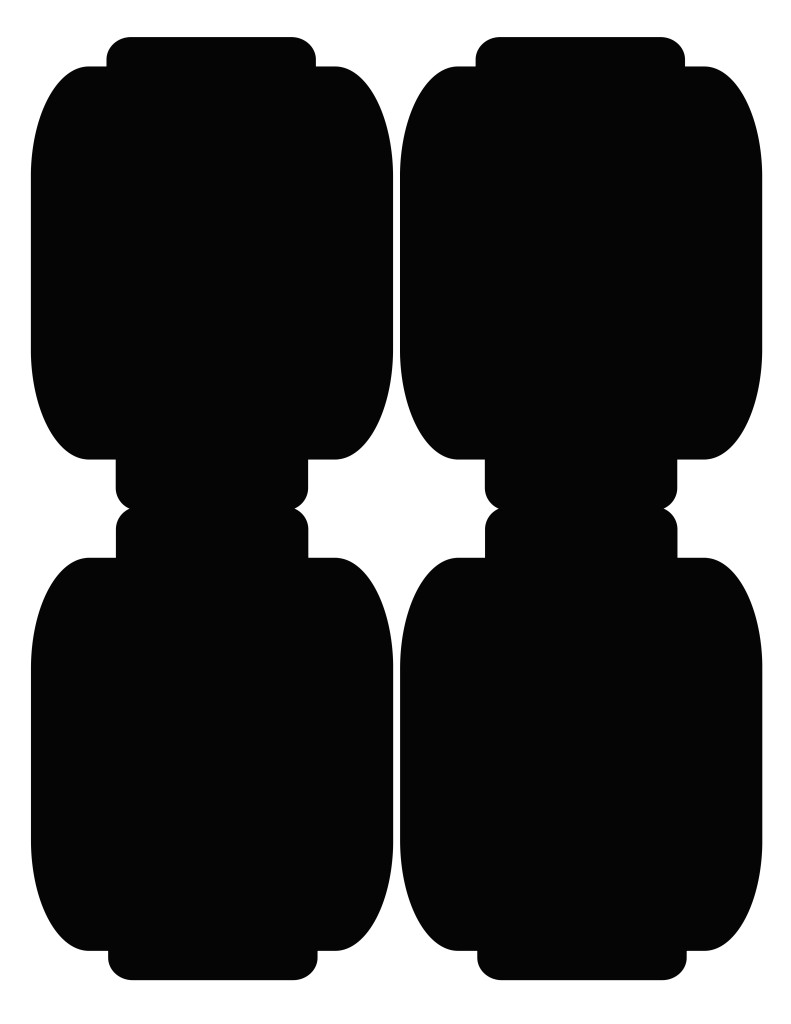
If you have a Silhouette machine, you can cut them out 2 at a time using this Lego Head Invitation Silhouette file if you’ll be cutting them by hand, here is the Lego Head Invitation Template PDF.

lego head invitation

Just cut out the invitations, and fold in half. They fit in a standard A2-size envelope. Type up the invitation details onto 3.5×3.5″ squares, and glue to the inside of each card.

Make your own Lego Party Invitations

If you use regular scrapbook paper, instead of the textured paper, you can draw a face on each invitation – or if your child wants, they can draw a face on each one. Just another way you can personalize the invitations, if you want.


Lego Cupcake Toppers – 2 Ways!

My son is a die-hard Lego fan. So of course he wanted to celebrate his 6th birthday with Lego. Both at school and at home. So I decided to come up with some fun Lego Cupcake Toppers – both for bringing to school and for our party at home.

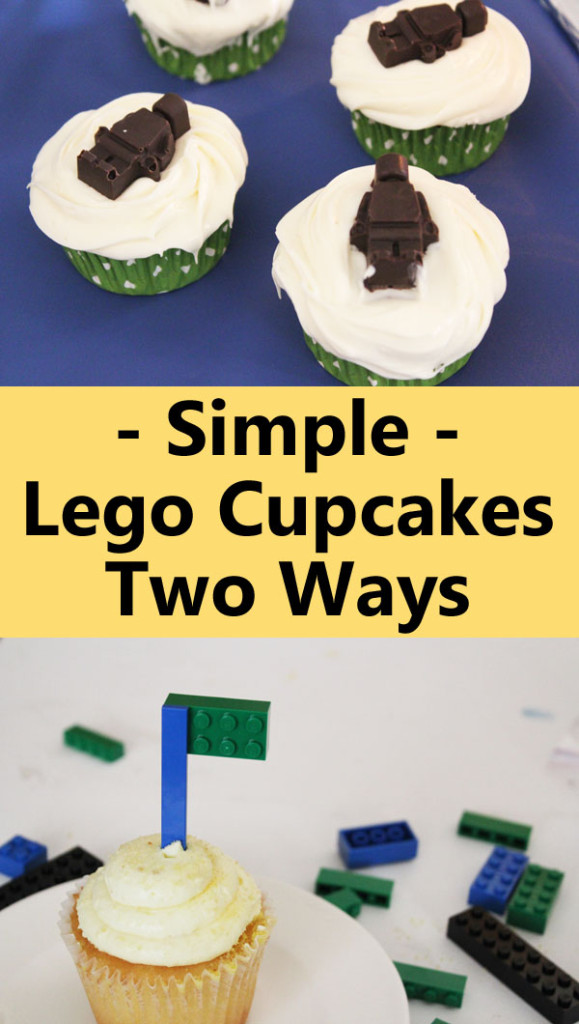
Simple Lego Cupcakes Two Ways

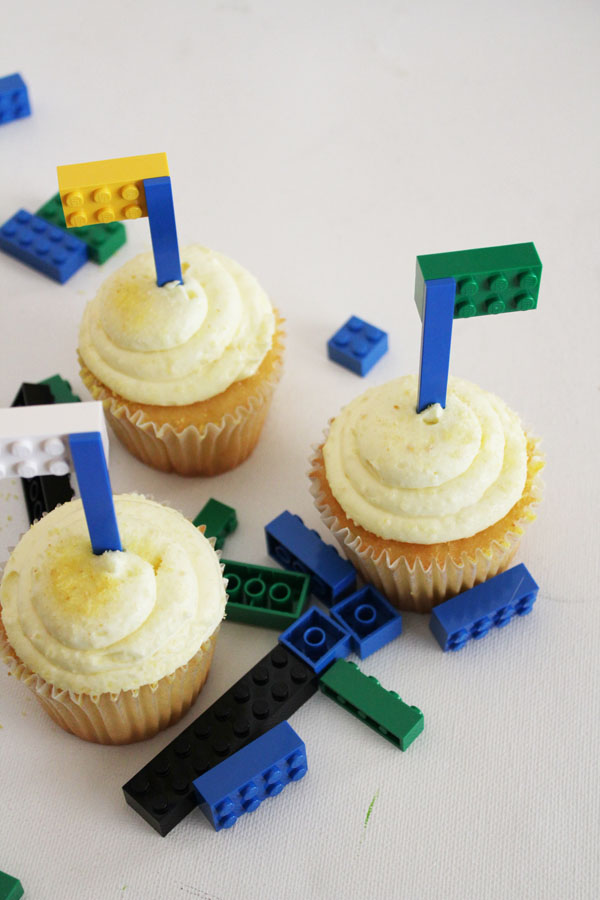
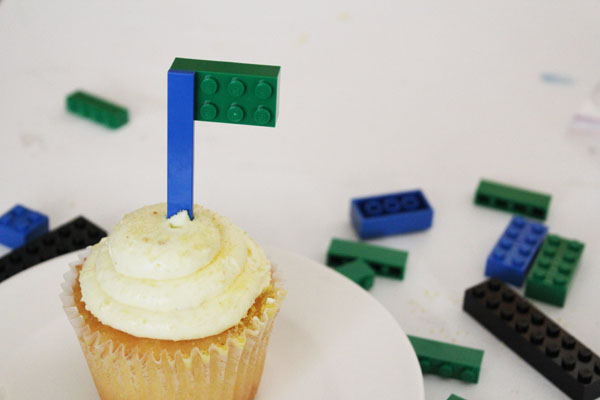
Since my son’s birthday is at the very beginning of the school year, I wanted to do something extra fun. We have a Lego Store in town, so I stood in front of their pick-a-brick section for about 20 minutes, trying to figure out how to engineer a Lego flag cupcake topper from different parts. Originally, my idea was much more complicated – an antenna piece, with another clip-on piece… but the selection on the pick-a-brick wall the day I was at the store wasn’t cooperating. Until I realized that my plan was overly complex. Just two bricks, that was all I needed to make a simple flag to use as a Lego cupcake topper!

Simple Lego Cupcake flags

When I went to the school to bring the cupcakes, I had the flags pre-made, but did not insert them in the cupcakes. Not all parents are fans of toys and food together (I’m usually not), and I couldn’t be sure of how sanitary the bricks were (they had been taken from the pick-a-brick section… no telling how many hands have rifled through those bins), so we passed out the Lego flags and cupcakes separately. If you have time to clean the Lego bricks, you can decide if putting the Legos in the cupcakes is a better option for you.

lego flags for cupcakes

The Chocolate Minifigures were nearly as easy to make!

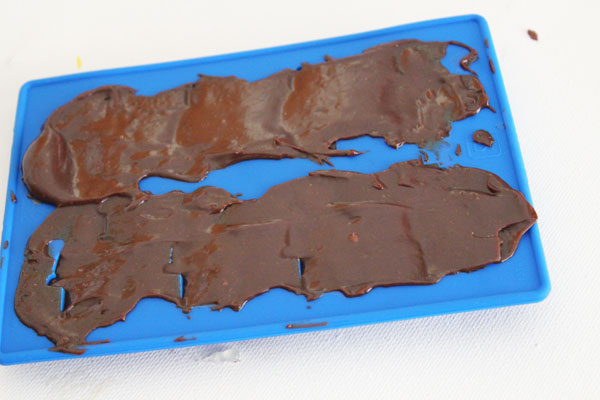
Using a bag of chocolate melts (the wafers found in the baking section of the craft store), I filled the Lego Minifigure ice cube tray (you can buy these at the Lego store or online).

I overfilled these, but if you can *just* fill the cavities, it works much better, and you get cleaner margins.

fill mold with chocolate

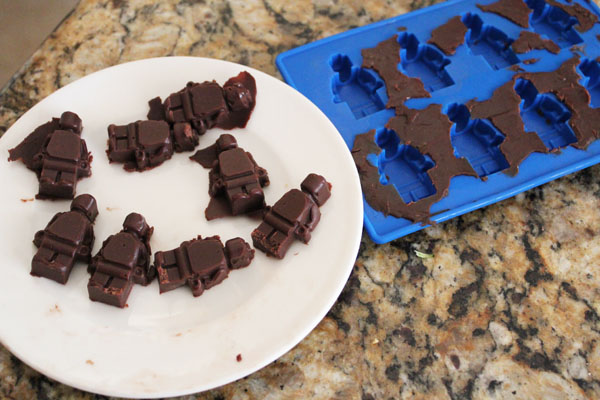
Once the chocolate has cooled and hardened, you can pop out the Chocolate minifigures.

remove minifigures from mold

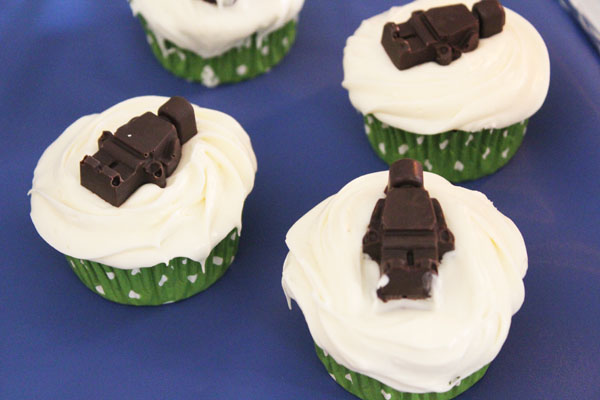
Frost your cupcakes (or use store-bought), and top with the chocolate Lego guys!

chocolate lego minifigure cupcakes


Lego Inspired Gift Bags and Gift Boxes

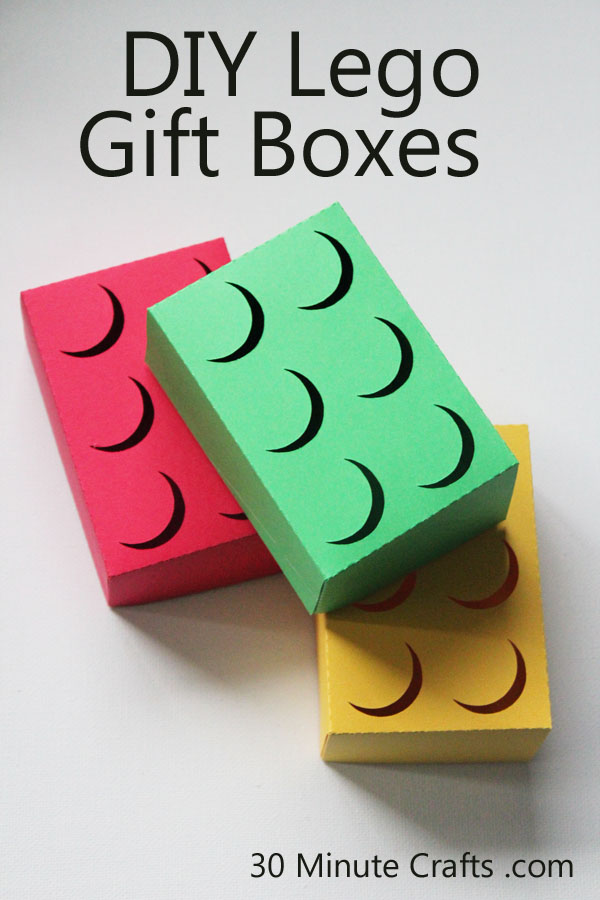
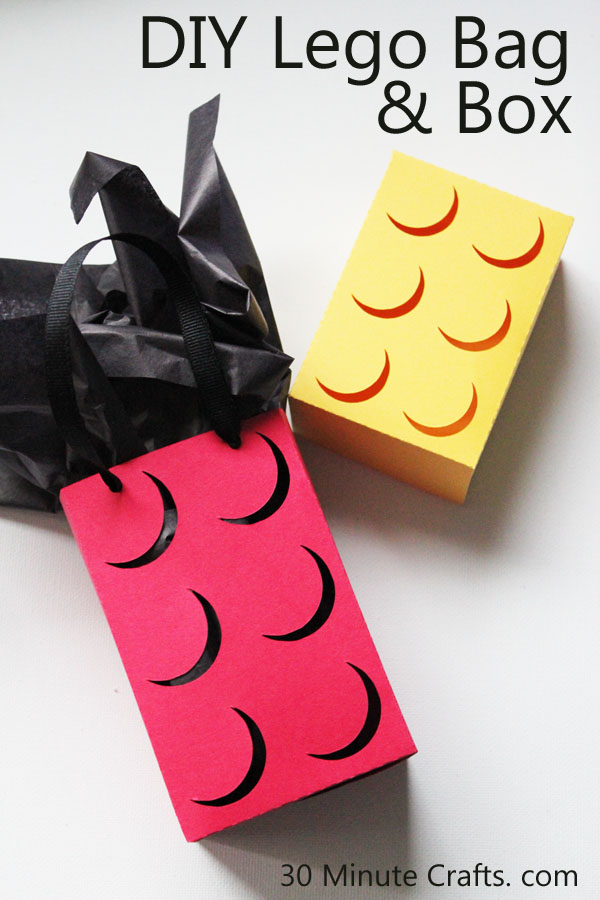
I am so super excited to share these Lego inspired gift bags and gift boxes with you today! My son had a Leg0-themed birthday party last month, and I couldn’t contain my excitement at how well these turned out! I shared a sneak peek photo over on Instagram as I was making them, and now I get to share with you how YOU can make these awesome bags and boxes!

DIY Lego Bag and Box

Most of the DIY Lego Gift Bags that I saw online involved cutting and taping circles to existing bags. Which is fine. But I knew there had to be a better way. Making a Lego gift bag and Lego gift box that was one piece and easy to put together was important to me. Though I wasn’t planning a big party, to try to line up half a dozen circles evenly on each gift bag was not something I cared to do.

These bags were cut on my Silhouette machine. I had a deep love affair with my Silhouette while putting together this party – it did much of the work… all I had to do was design the files, and glue the bags and boxes together! If you want gift bags for your Lego themed party, all you have to do is glue them together… because I’m giving away the Silhouette files to make these awesome bags and boxes! That is right… just giving it away! Here you go:

Silhouette file for Lego inspired gift bag

Silhouette file for Lego inspired gift box

And here are some more detailed directions on how I put them together…

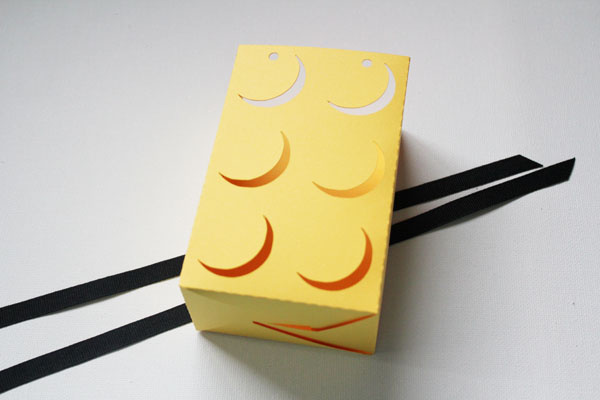
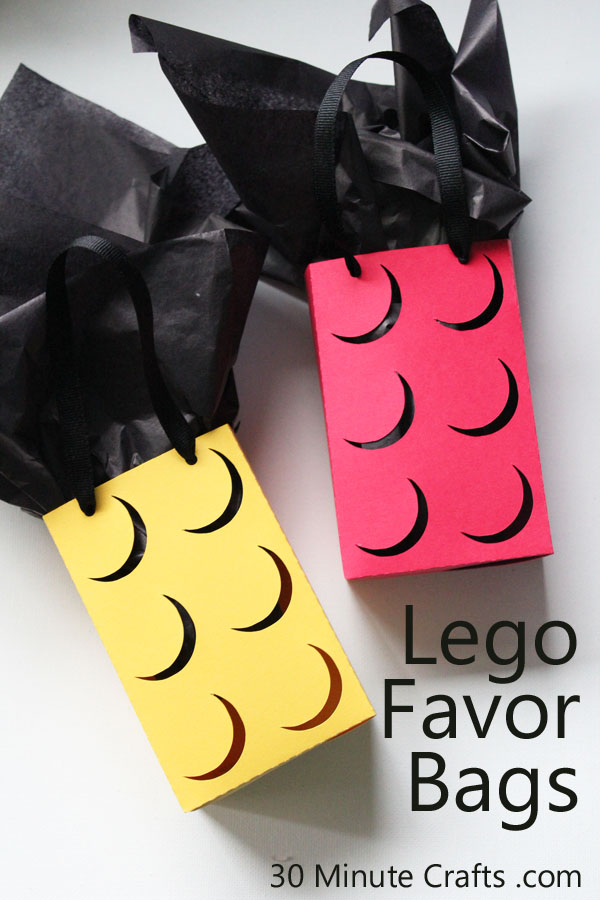
It is so easy to make your own Lego Favor bags for a Lego party

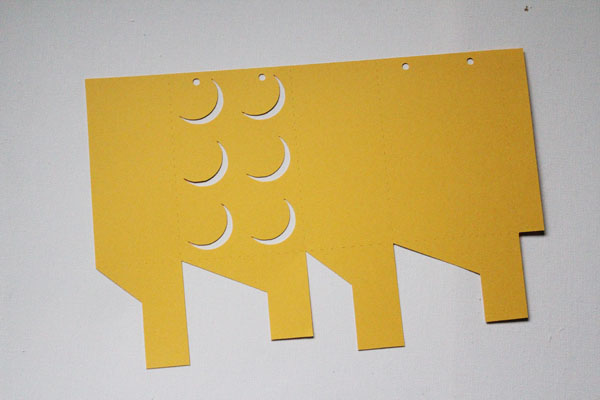
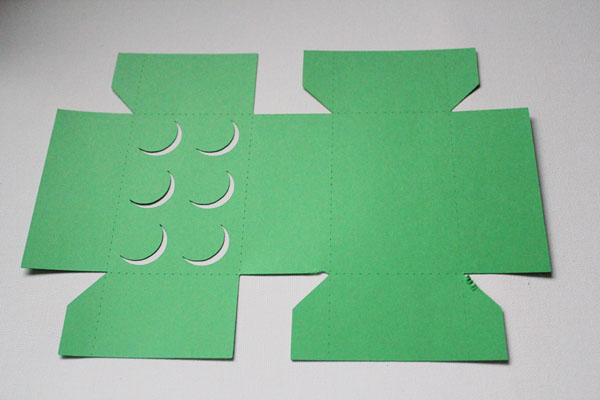
Both the gift bags and gift boxes are made from regular scrapbooking paper. Which is basically a good-quality construction paper. Each is designed to fit on a 12112 sheet of paper. Of course you can scale down the cut file to fit on a smaller paper, but your bag or box will also be a lot smaller.

cut out lego box cutable

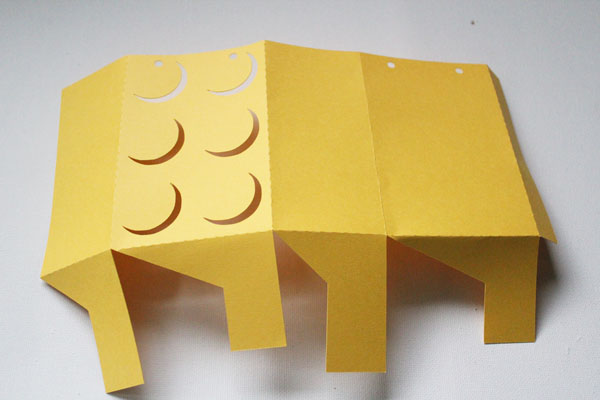
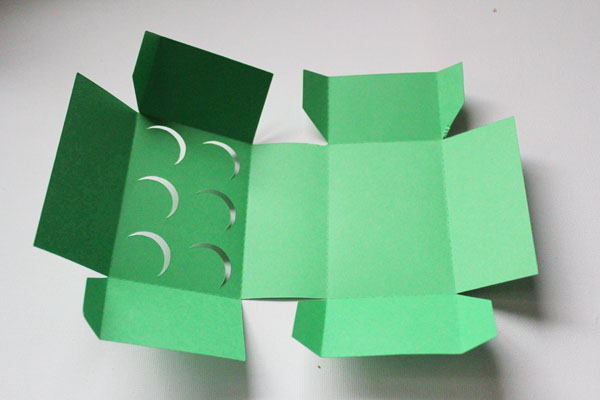
Once the bag was cut, I folded on the score lines – these are dashed cut lines that make it super easy to fold straight lines.

fold along score lines

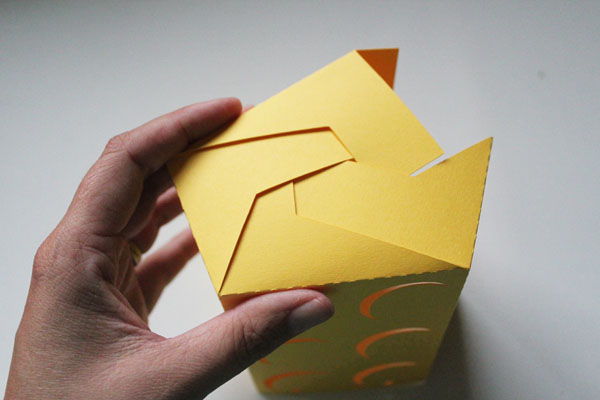
I folded in the bottom, making sure that each bottom flap tucked into the previous flap.

spiral in the flaps

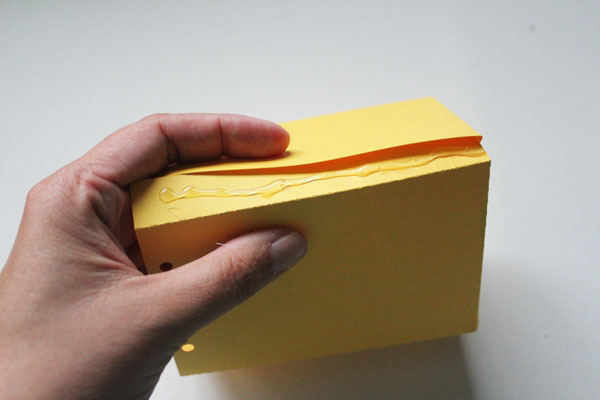
Then used hot glue to secure the side flap. You could use tape or some other kind of glue… up to you. Though you have to be careful not to burn yourself with the hot glue, it dries fast, and was nice and strong.

glue along flap

For the handles, I used plain grosgrain ribbon. Just cut 2 pieces the same length (6 to 8 inches is fine).

cut ribbon for handles

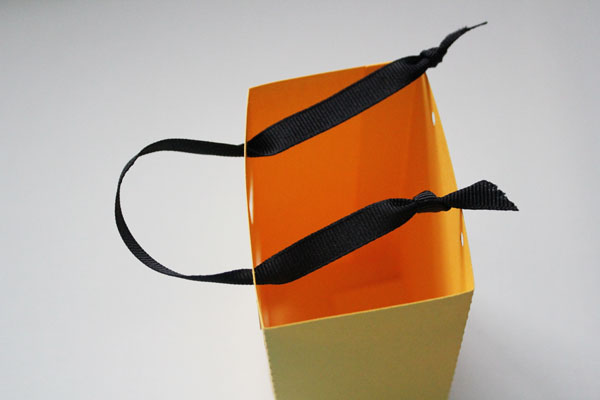
Insert into the hole from the outside to the inside, then tie a knot.

add handle onto favor bag

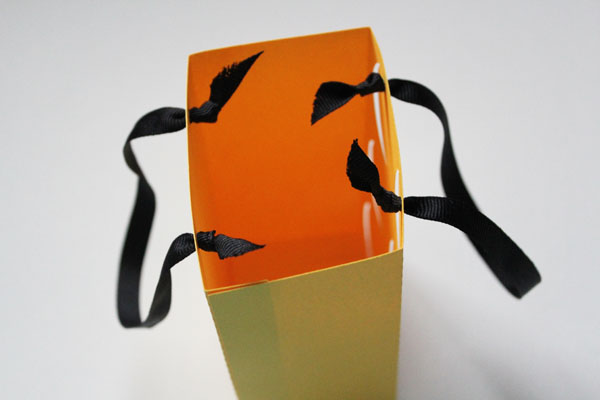
Repeat with the other handle.

tie handles onto lego favor bag

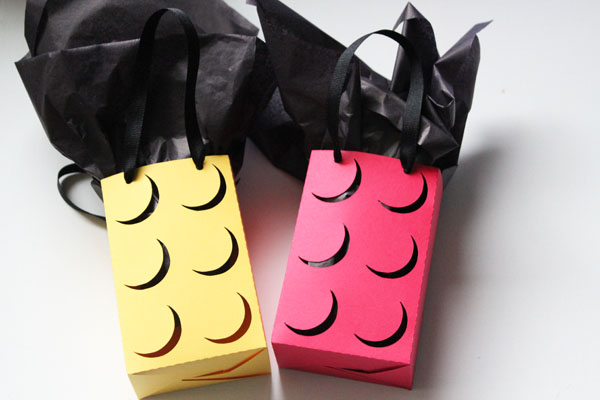
I used 1/2 sheet of tissue paper in each favor bag, and into the tissue paper, I tucked a Mixel. They’re small bagged sets of Legos, and run about $5.00 each. I thought it was a much better party favor than some random candy, a pencil, and a bouncy ball. Plus, any extra party favors I could keep as treats for my boys. It worked for me, but you can put whatever you want in your favor bags – or use them as gift bags.

Make your own Lego favor bags

The box was very fun to put together! I designed the box to hold the items for one of our party games, but you could use it as a gift box or favor box.

DIY Lego gift boxes

Just like the gift bag, the box is cut from scrapbook paper, using the cut file I shared above.

cut out box shape with silhouette machine

Fold on all the score lines.

fold on score lines

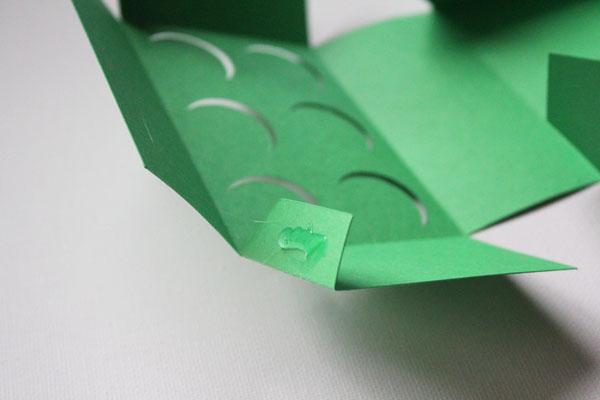
Then glue down the flaps. I used hot glue again, but you can use what you like.

add hot glue to flaps

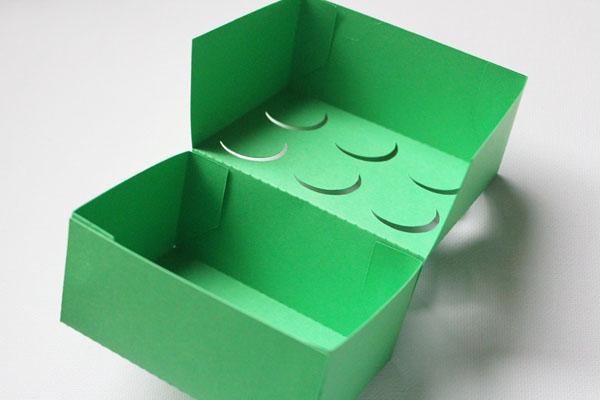
I designed the top of the box so that it is just slightly larger than the bottom of the box. This makes it easier to close.

lego gift box glued together

Super simple!

make your own lego gift boxes

If you don’t like that there are slits in the bag or box, you can always glue a piece of black scrapbook paper to the inside, to cover the holes. That will keep the illusion of the 3D bricks, without being able to peek inside.

Designing these Lego inspired gift boxes and Lego inspired favor bags was so much fun, and they really added to the overall theme of the party! If you use these files, I’d love to hear about it – please let me know in the comments below!

Easy Halloween Hair Bow

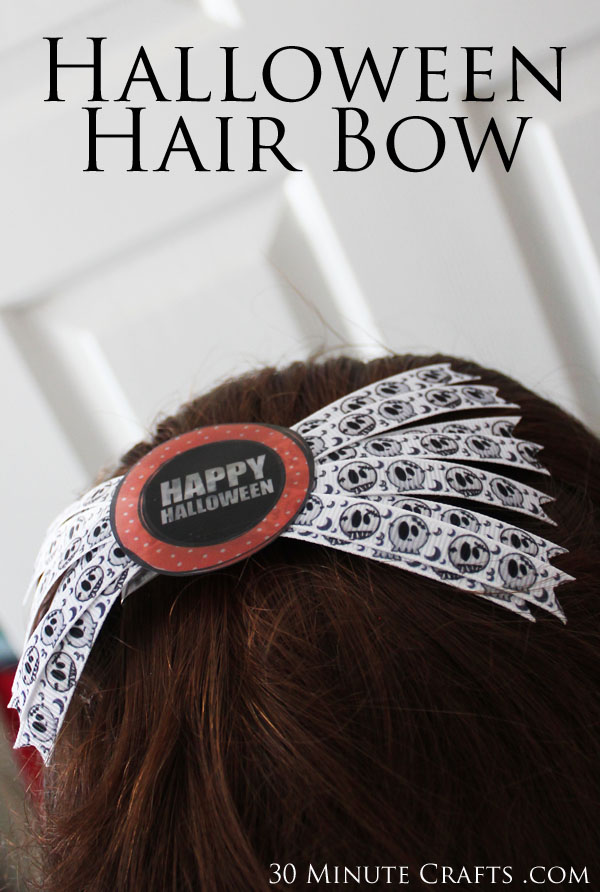
For my last craft project of this printable craft week, I thought I’d use Jen Goode’s awesome printables to make an easy Halloween hair bow. This bow is super simple to make – you don’t need any fancy knot-tying, bow-making, or ribbon-looping skills. Easy!

Halloween Hair bow

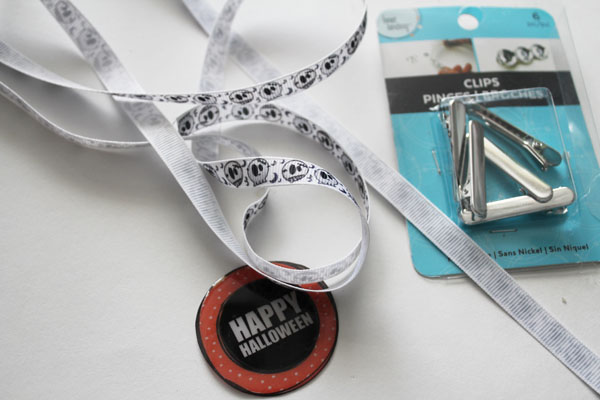
To make the hair bow, you need:
Printed Halloween Shape
Ice Resin
Doming tray (a perler bead tray works great)
Ribbon (this is from The Ribbon Retreat)
Hair Clip
Hot Glue
Scissors

supplies for halloween hair bow

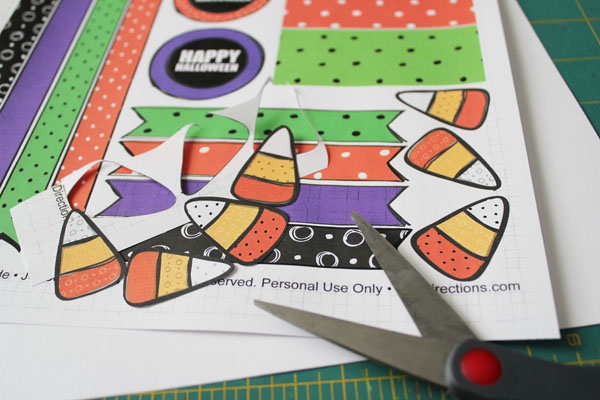
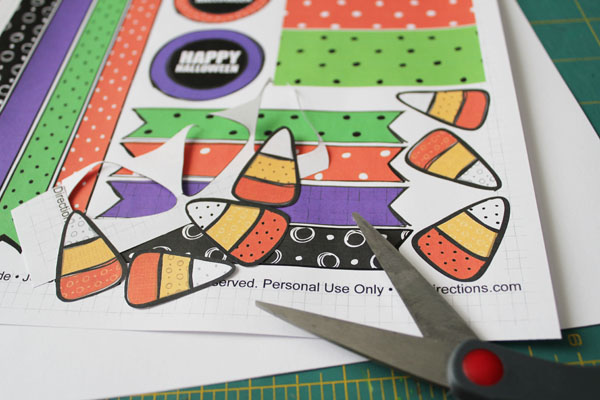
Start by cutting out your shape. I cut mine at the same time as the Printable Candy Corn Earrings.

cut out shapes

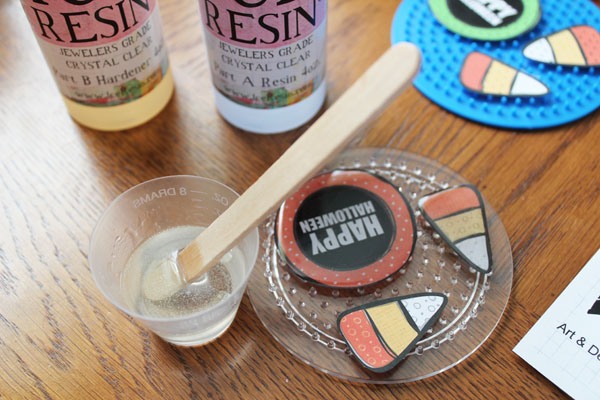
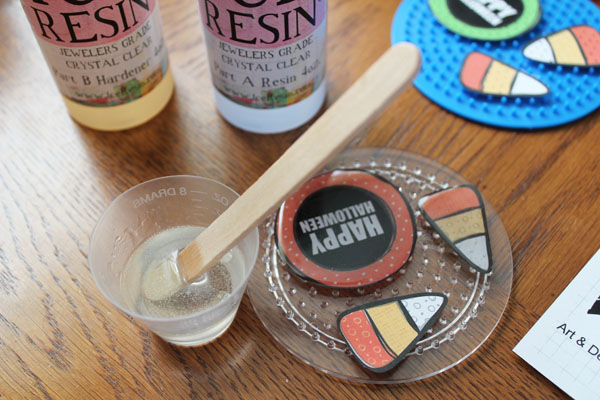
Mix Ice Resin according to package instructions, allow to sit for 5-10 minutes, then pour onto printable shapes so that it domes over the paper. Allow to sit overnight.

mix resin and dome

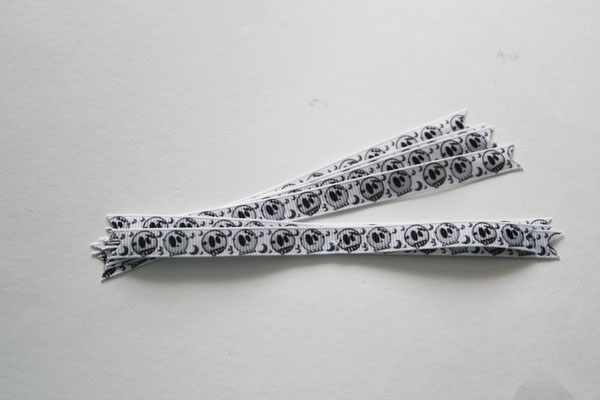
Cut your ribbon. I cut mine about 6″, but you can go with whatever length you like. I notched the ends of each ribbon.

cut ribbon pieces

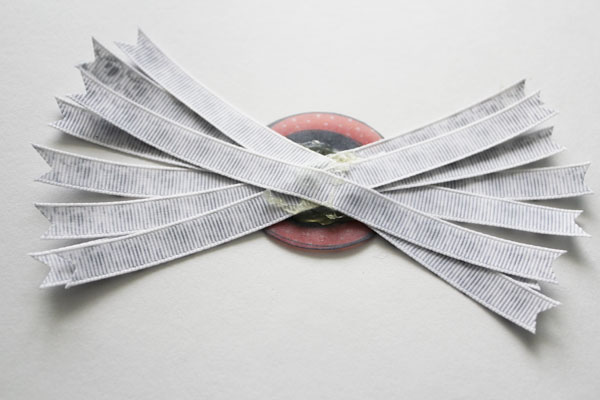
Turn over the resin piece (after sitting overnight, it should be fully set). glue the ribbon to the back, making an X, and then filling in the X by criss-crossing more and more pieces of ribbon.

glue ribbon to back

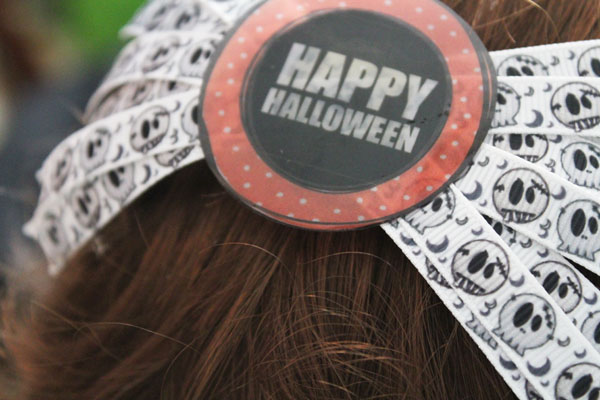
Glue on the hair clip, allow the glue to set, and you’re ready to wear your Halloween hair clip!

finished Halloween Hair bow

I have some bloggy friends who also made craft projects using Jen Goode’s Free Halloween Printables. Check these out:

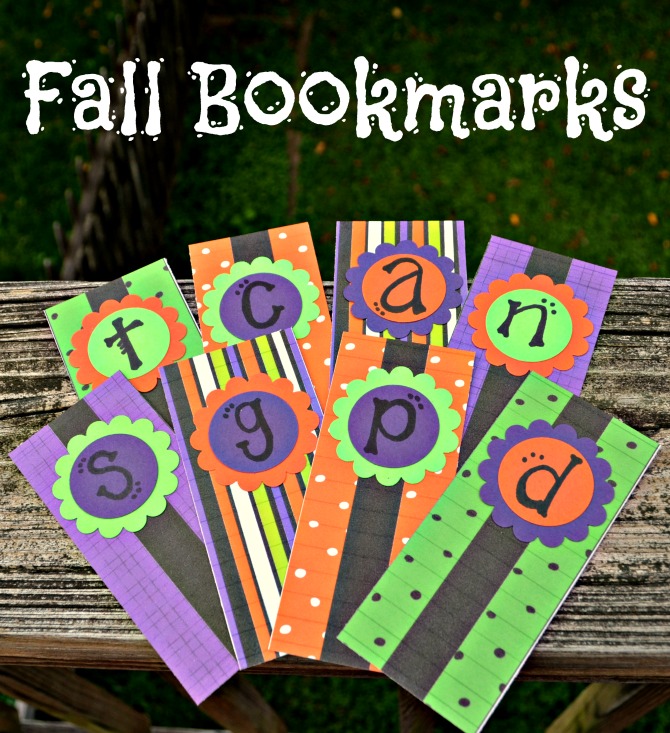
I’m loving these fun and colorful bookmarks from One Artsy Mama:

fall bookmarks


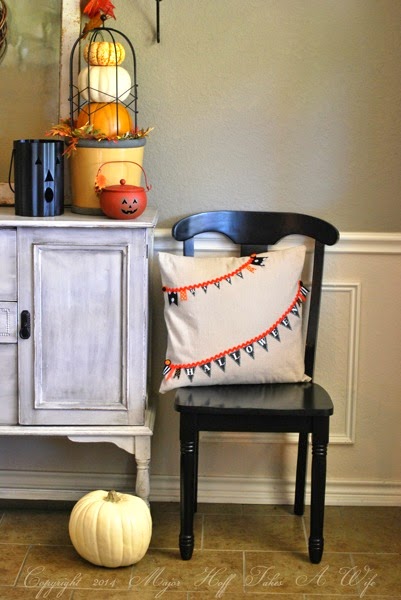
Major Hoff Takes a Wife made this cute no-sew Halloween pillow.

make a no sew halloween pillow to add to your decor

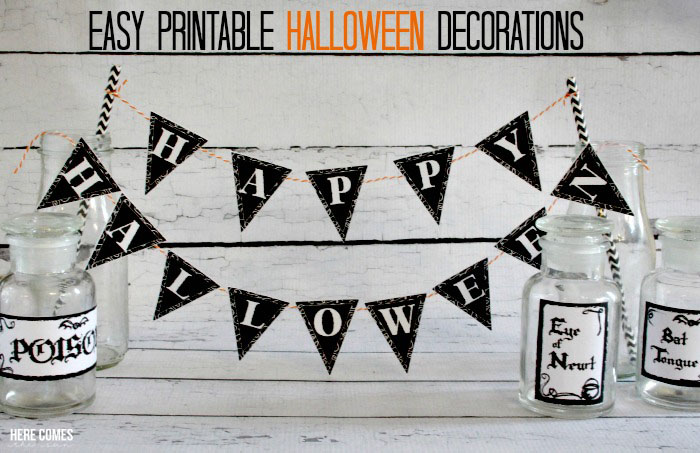
How cute is this Halloween set-up from Here comes the Sun?

easy-printable-halloween-decorations

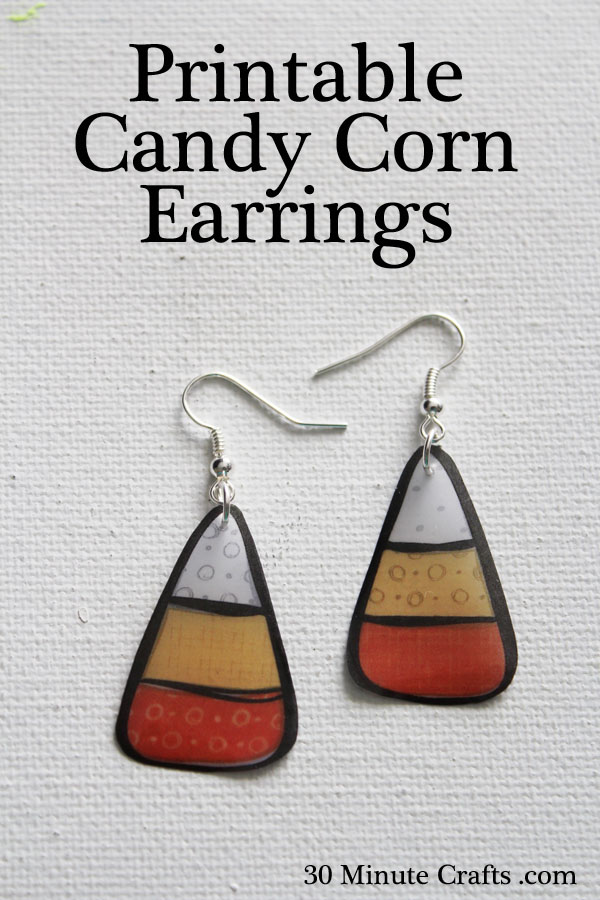
Printable Candy Corn Earrings

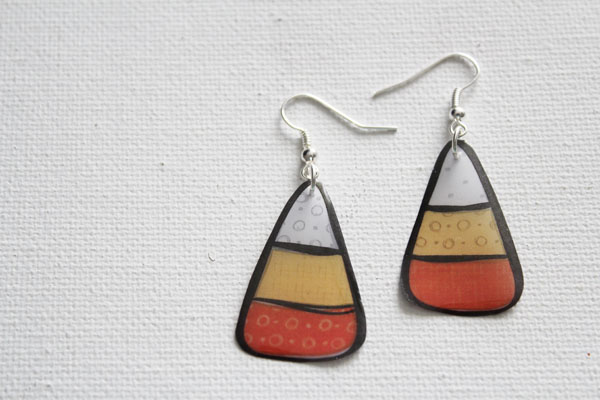
This week, I’m creating crafts using the Free Halloween Printables from Jen Goode. She has several different collections, and I love all of them! Today I’m using the adorable printable candy corns to create these great candy corn earrings!

Printable Candy Corn Earrings

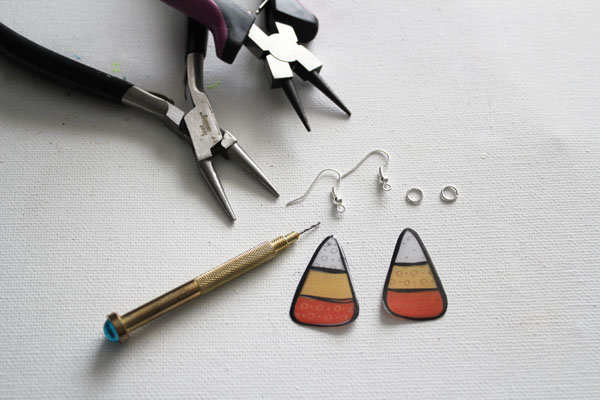
These earrings are super easy to make! To make your own printable candy corn earrings, you need:
Halloween Printable
Ice Resin kit
Doming trays (perler bead trays work well too)
Small jewelry drill
Jump rings
Earring wires

Cut out the candy corns from the printable.

cut out candy corn printables

Mix the resin, allow to sit a little for it to set, then pour on the paper. Allow the resin to reach the edges, but not overflow. Allow to sit overnight.

add resin

Use the drill to drill a hole at the top of each candy corn.

supplies for printable candy corn earrings

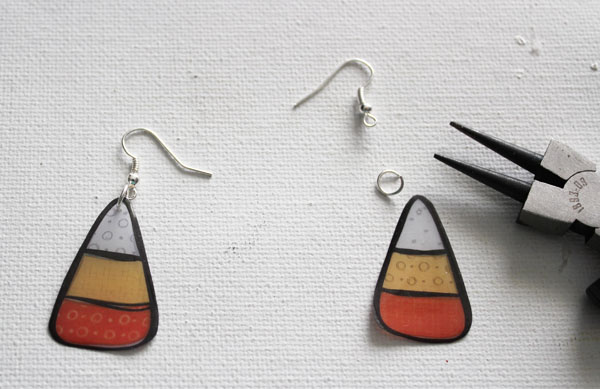
Use the jump rings to attach the earring wires.

earrings from printable candy corn images

Earrings done! Super simple, right?

make your own printable candy corn earrings

Some of my blogging friends also created projects with Jen Goode’s Free Halloween Printables:


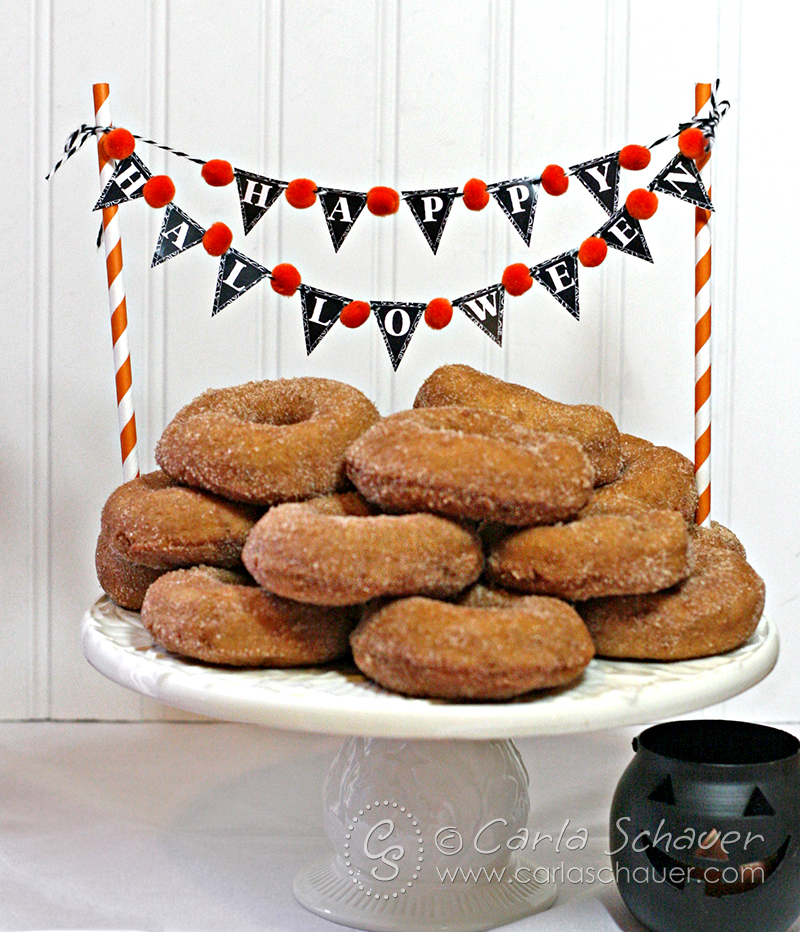
Like this super cute banner that Carla Schauer made, perfect for dressing up a potluck treat.

mini-halloween-banner


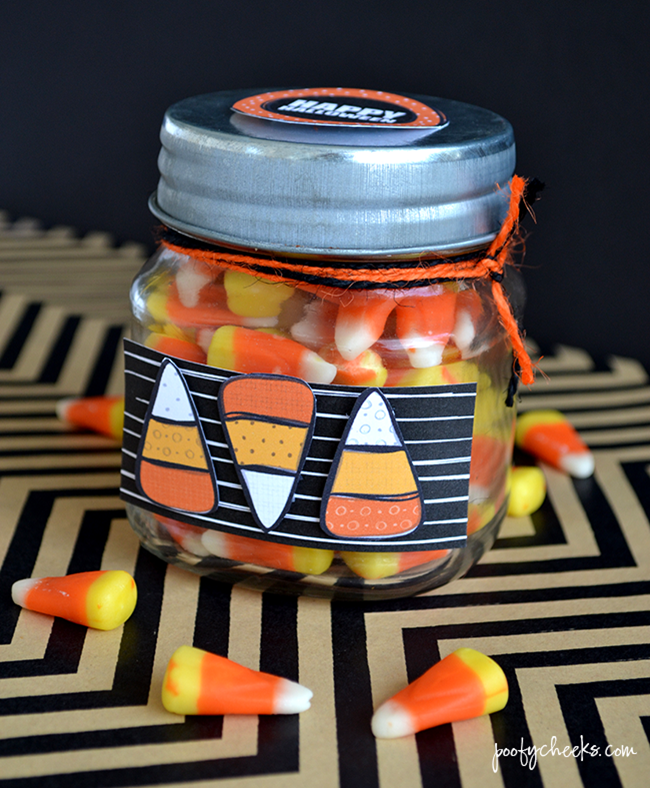
And this candy corn container from Poofy Cheeks blog – making this both a sweet and cute treat!

candy corn jar

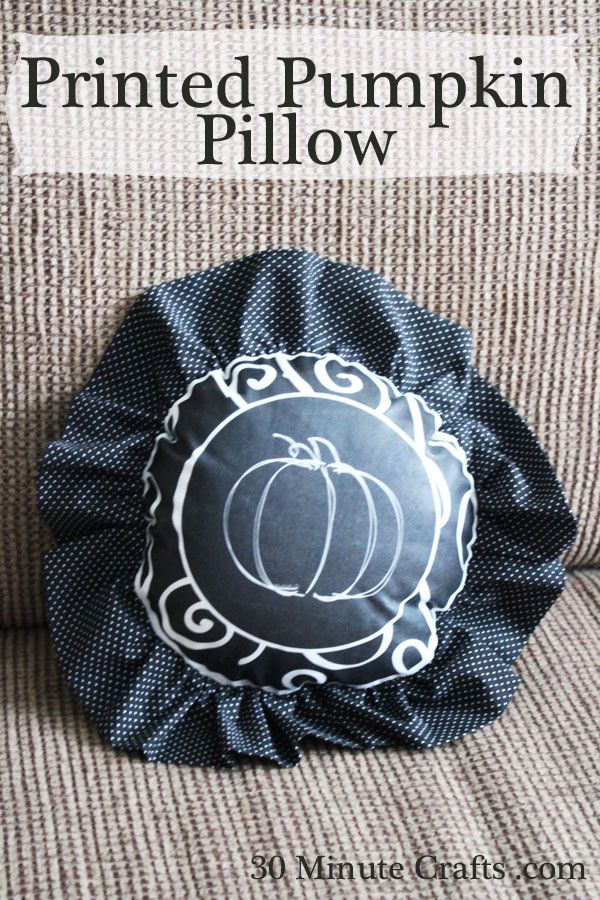
Ruffled Printed Pumpkin Pillow

Pillows are a fun and simple way to decorate a space – the great thing about pillows is that you don’t have to store the whole pillow during the off-season – just store the cover! You can rotate covers throughout the year on the same pillow!

Printed Pumpkin Pillow

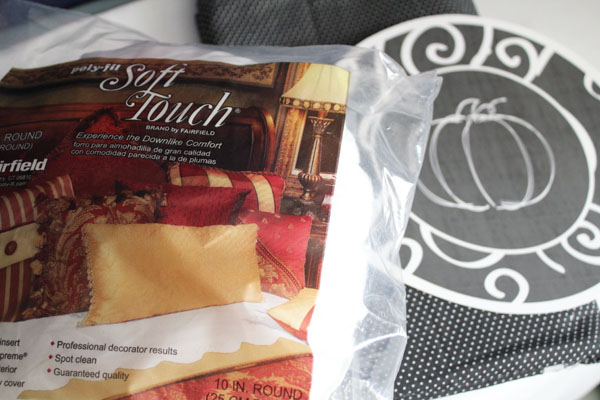
This cute little round pillow was sent to me by Fairfield. I thought it would make a cute Spider or Pumpkin pillow – and when I saw that Jen Goode had a great (and stylish) printable pumpkin – and I knew it would make a great pillow cover! To make your own, you need (I’ve added affiliate links to help where needed):

1/2 yard white fabric
1/4 yard black fabric with white polka dots
Pumpkin printable printed on fusible transfer – enlarge to fill page
8″ zipper
Rotary cutter, ruler, sewing machine
Fairfield 10-Inch Round Pillow

supplies for ruffled printed pumpkin pillow

Okay, I know when you read that supply list, and saw the zipper, you thought I was crazy. But really – installing the zipper is super fast and easy, and WAY faster than hand-stitching the pillow form closed. Really. Trust me. I’ll walk you through it.

First, Iron the design onto the fabric. Cut with a 1/2″ margin all the way around. Cut a second piece of fabric the same size. to make it faster – cut through both layers at the same time.

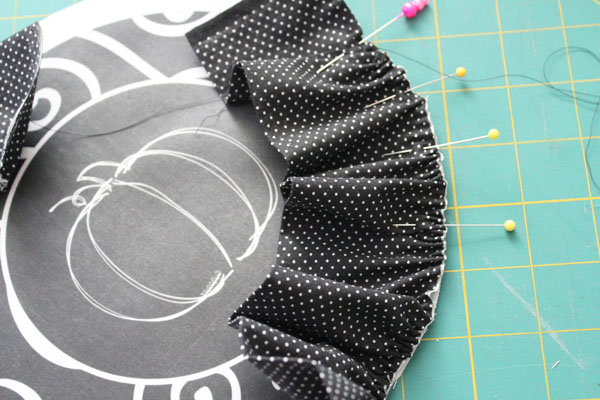
Cut a 6″ wide strip from the 1/4 yard of fabric. Fold in half, wrong sides together, and press. Stitch down the raw-edge side with the biggest stitch your machine will let you. Pull one of the threads (carefully) to create a ruffle. Carefully spread the ruffle along the length of the fabric. Keep ruffling until the strip is just longer (2-3″) than the circumference of your circle. Pin the ruffle all the way around the iron-on (front) piece.

pin ruffle around circle

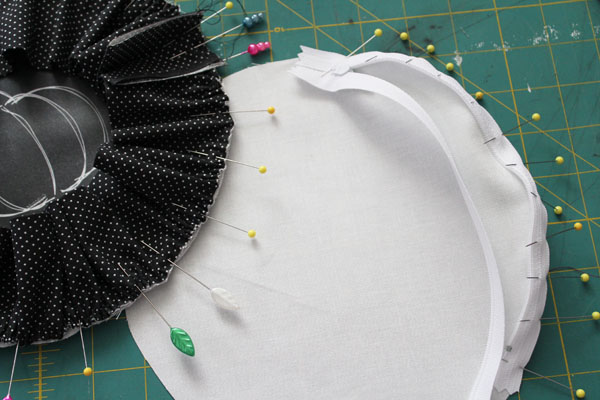
Pin the zipper to the back piece. You’ll want the zipper part on the inside. Just pin along the curve, and sew in place.

pin zipper to backing

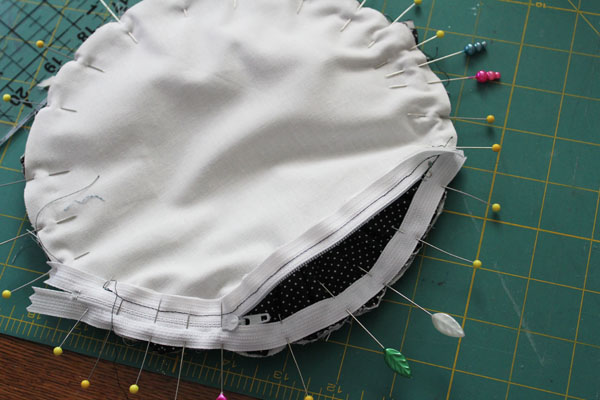
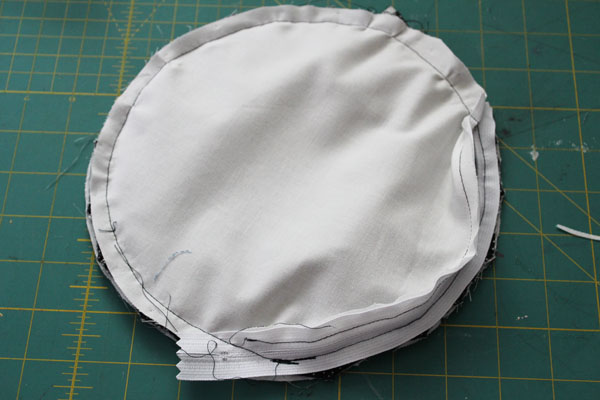
Put the two halves together so that the zipper and the ruffle are on the inside. Pin all the way around – when you get to the zipper, just pin the zipper (the side that isn’t stitched down).  Make sure the zipper is at least halfway open. That’s the #1 trick to working with zippers – before stitching the final seam, make sure to open the zipper part way. Otherwise, it is nearly impossible to open after stitched down.

sew front and back

Now just stitch all the way around the pinned part. If the zipper gets in the way, just stitch up to it, move it backwards, and keep stitching.

sew on front

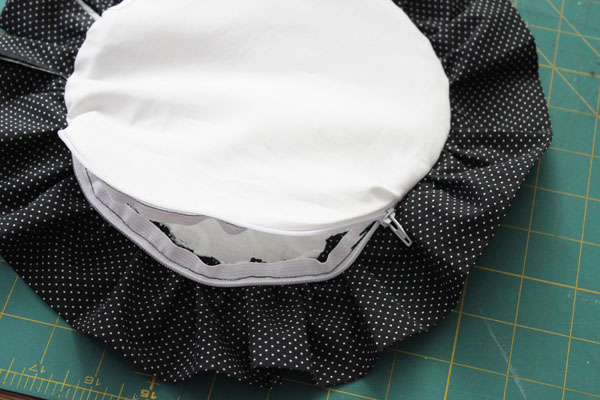
Now flip it right-side-out through the zipper. No need to clip curves (I promise!).

turn right side out

Pop in the pillow form, and your pillow is done! In just 30 minutes! Really!

Oh, and you should check out these other fun projects you can make using Jen Goode’s printables:


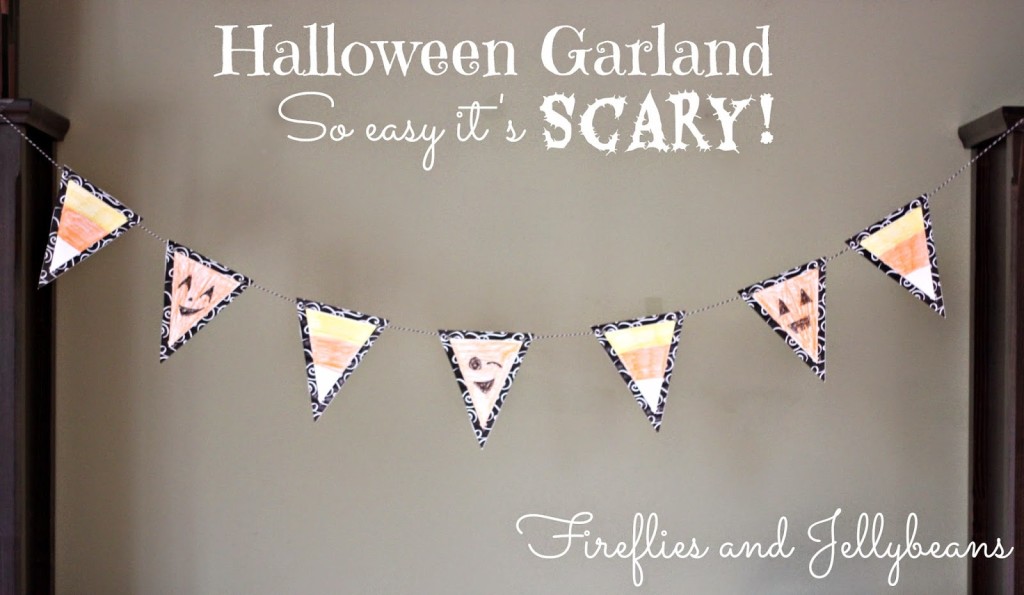
Fireflies and Jellybeans made this cute decorated Halloween banner using the banner printables:

Halloween Garland at Fireflies and Jellybeans

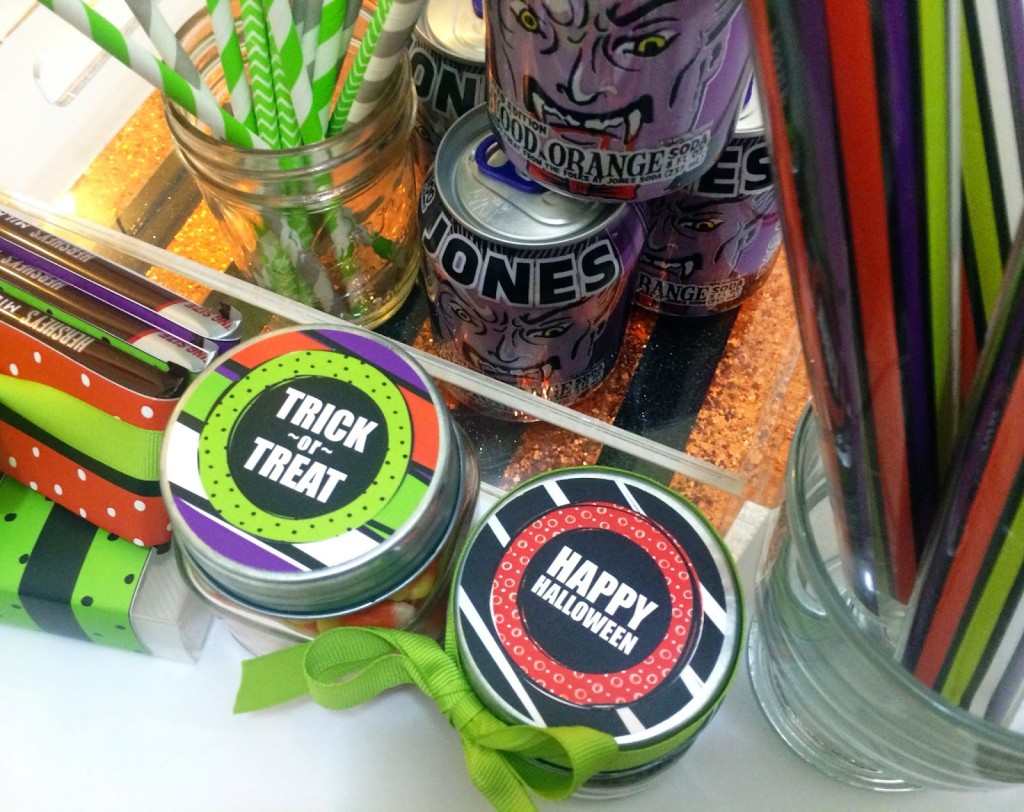
Over at Just My Little Mess, you’ll find the instructions for making these Halloween gift-giving tins.

gift tins

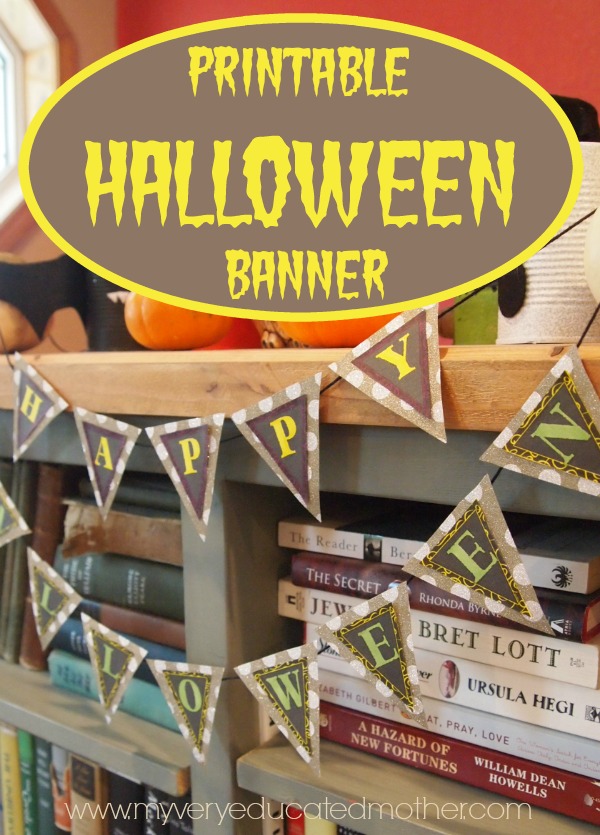
And My Very Educated Mother has another fun take on the printable Halloween banner – I love how versatile it is!

OLYMPUS DIGITAL CAMERA