Dr. Seuss Craft Lightning Day 3 Roundup!

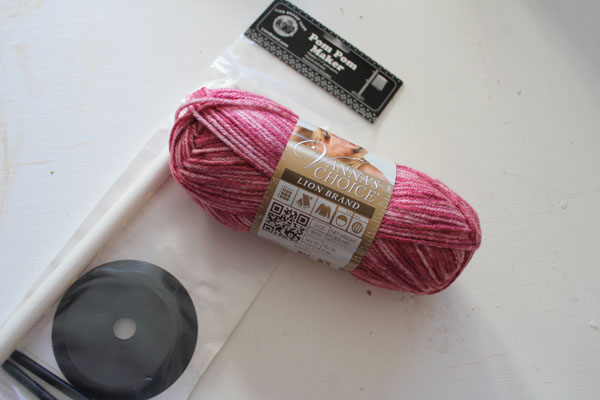
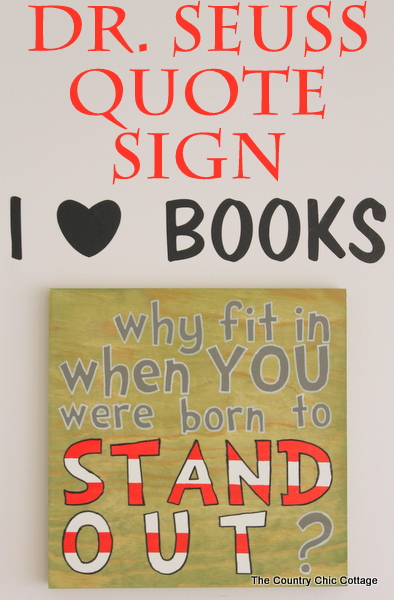
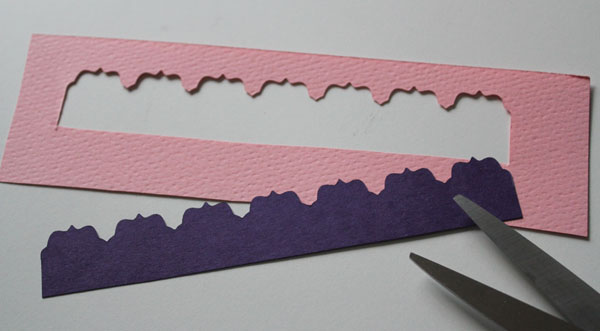
With Dr. Seuss’s birthday coming up, we’ve put together a whole week of fun and fast Dr. Seuss Crafts. Craft Lightning weeks are created when Angie from The Country Chic Cottage and I work together, inviting our craft blogging friends to join in with us. Angie and I create a quick, 15-minute craft each morning, and each evening we share a round-up of the fast and easy crafts our blogging buddies created. This week all of our Craft Lightning projects are Seuss-themed! I’m excited to share all of today’s projects with you!

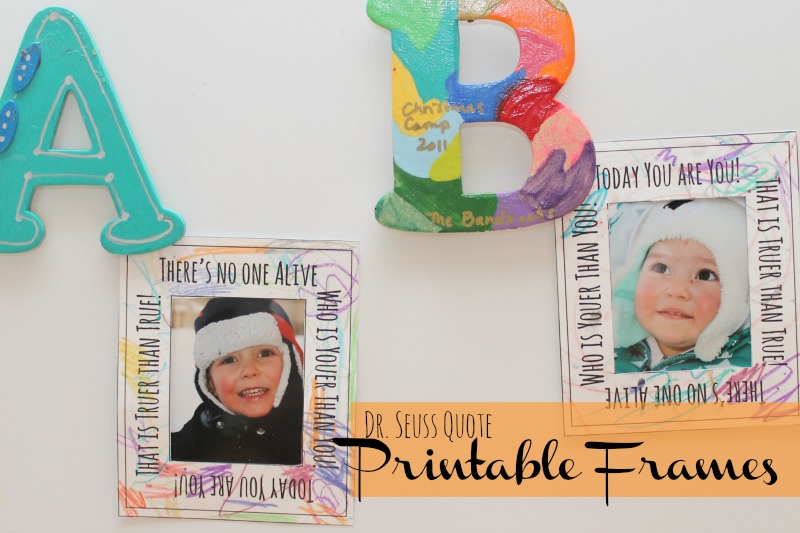
Nancy from Do Small Things with Love created this great color-able picture frame using a quote from Dr. Seuss. So fun for displaying children’s photos!

dr-seuss-coloring-frame

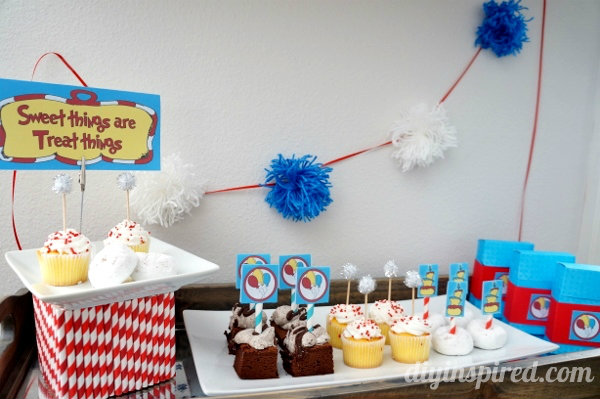
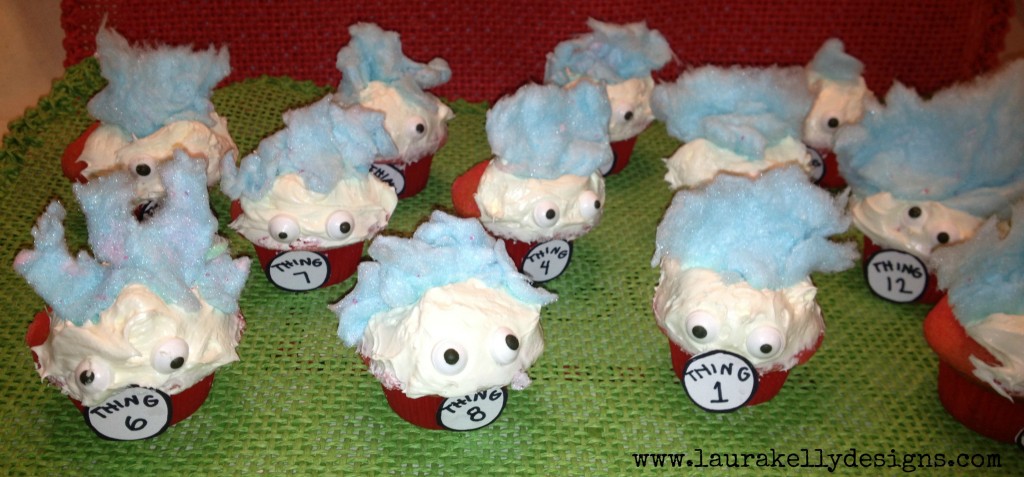
Laura Kelly made this fun Thing 1 and Thing 2 Cupcakes. Super cute for a Cat in the Hat or Dr. Seuss party!

Thing-Cupcake-Row-1024x477

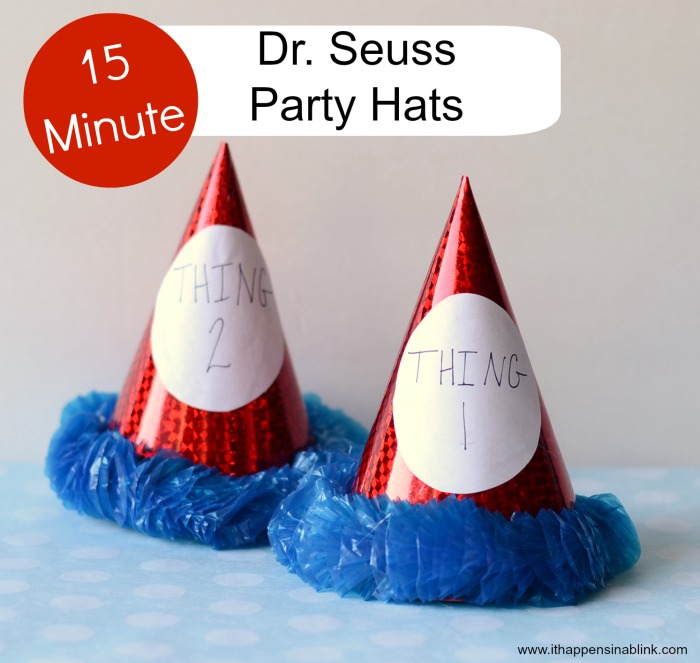
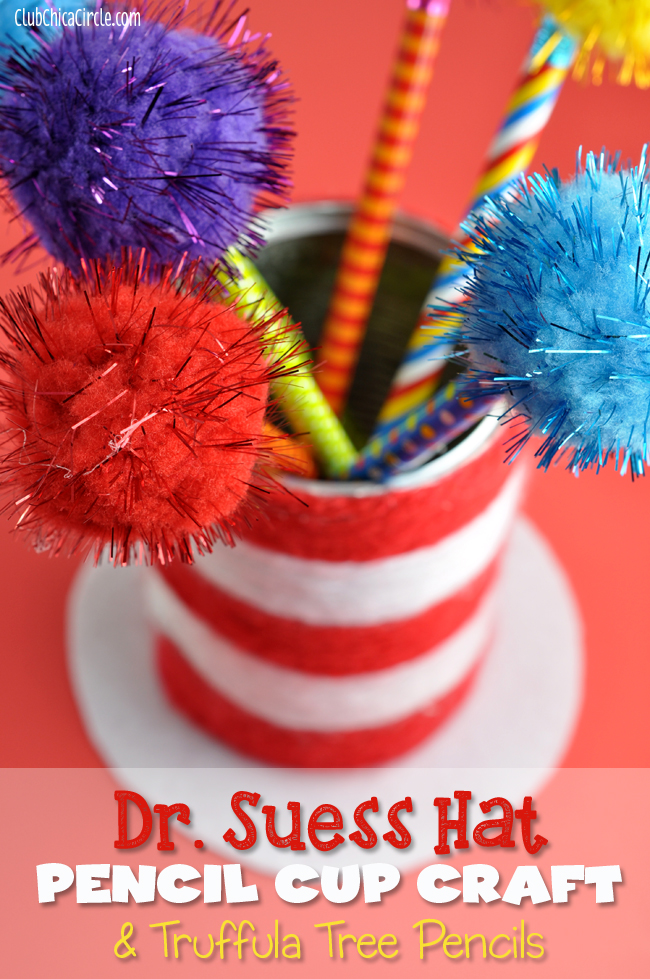
Pauline from Club Chica Circle made a cute pencil holder that looks like the Cat in the Hat’s hat, and some adorable and easy to make Truffula Tree pencils.

Dr-Suess-Pencil-Cup-Craft-and-Truffula-Tree-Pencils

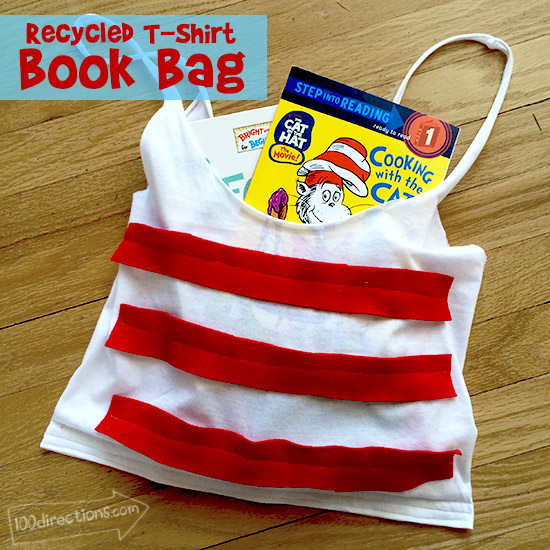
This cute Seuss-Inspired Book Bag was whipped up by Jen from 100 Directions. Only a few stitches to whip up an adorable bag from an old shirt!

dr-seuss-recycled-tshirt-book-bag

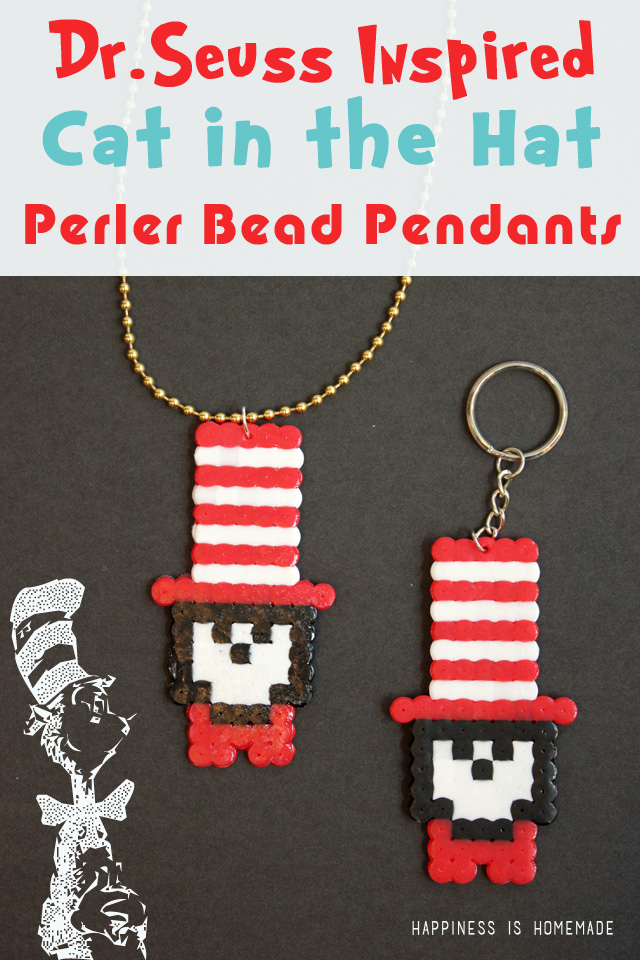
Heidi from Happiness is Homemade used Perler Beads to make this fun Cat In the Hat jewelry. How fun is this? And my kids are HUGE Perler Bead fans… so I see a set in my future.

Dr-Seuss-Inspired-Cat-in-the-Hat-Pendants

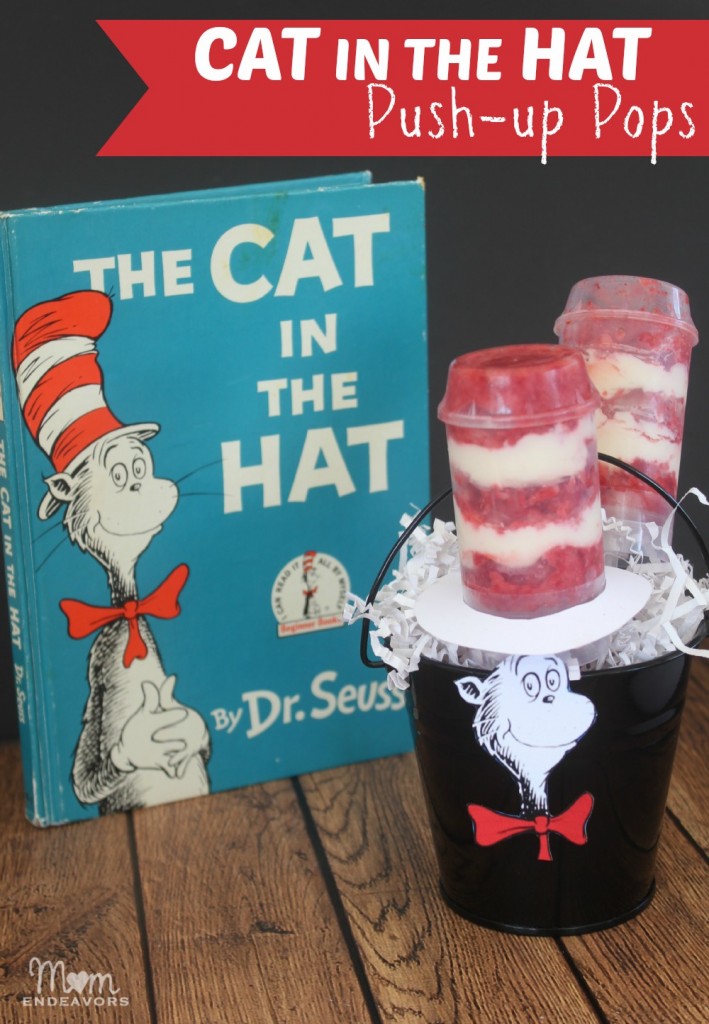
All this crafting can make you hungry! So Sara from Mom Endeavors made these super cute (and very yummy) Cat in the Hat push-up pops! Check out what she used to make them – nom!

Dr.-Seuss-Cat-in-the-Hat-Push-up-Pops-709x1024


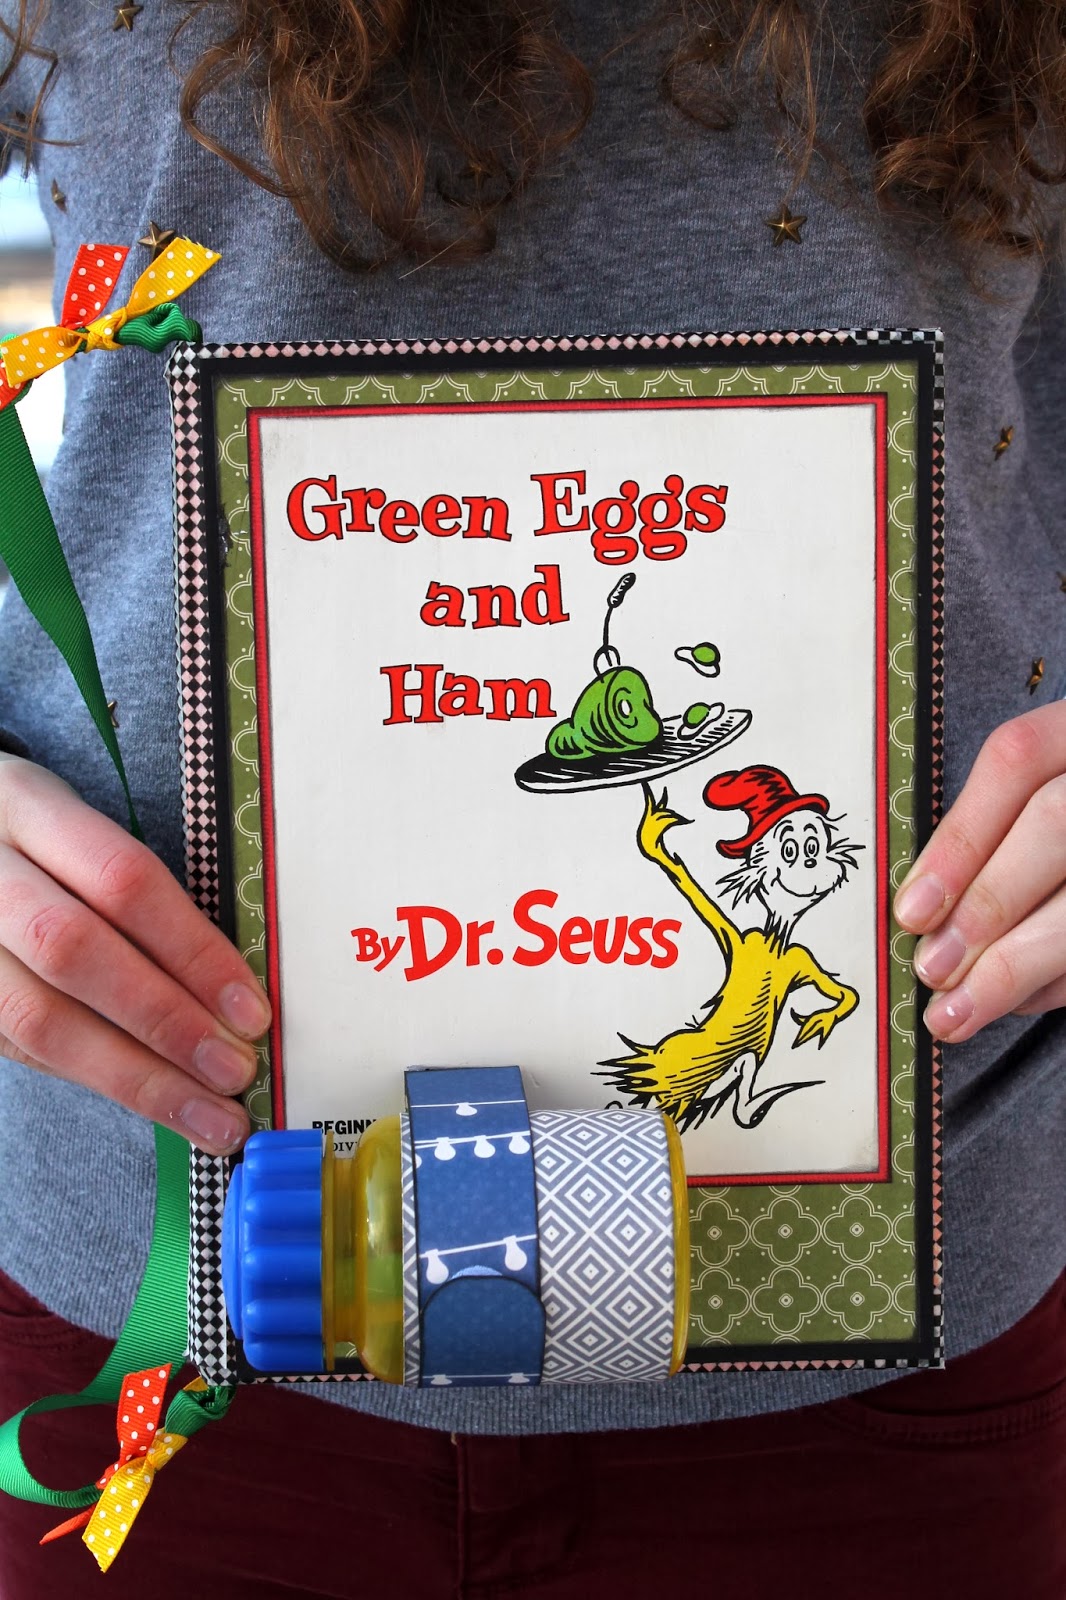
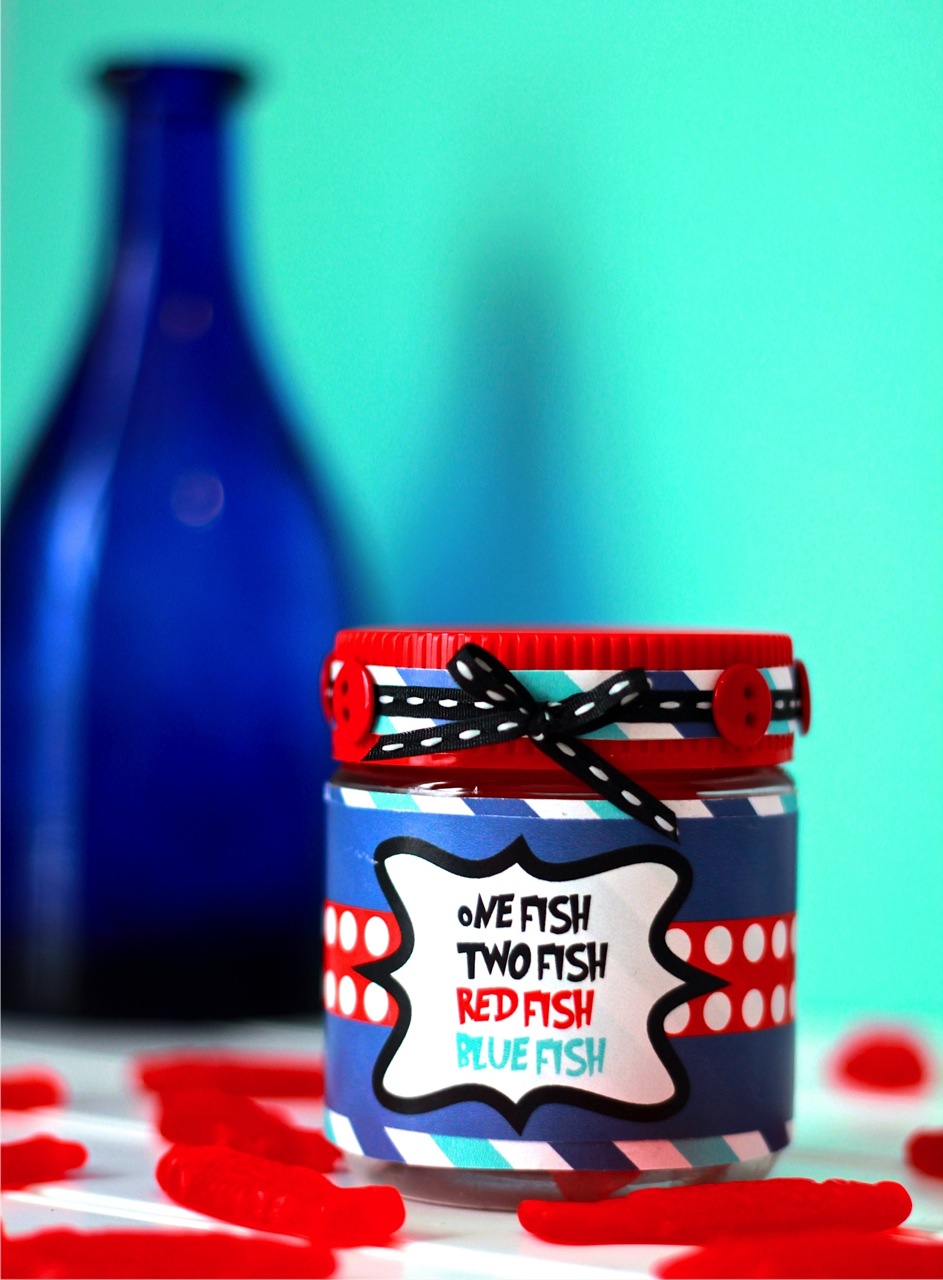
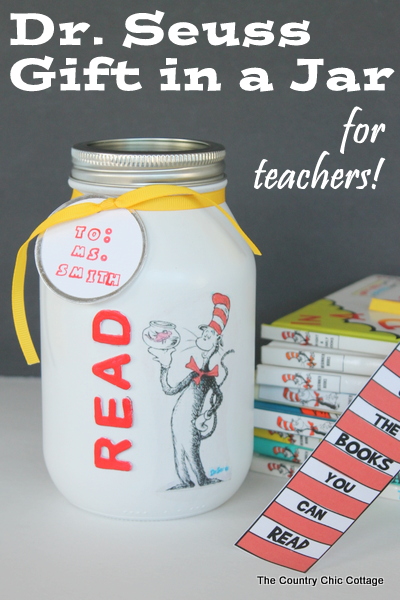
Angie, my crafting partner for the series, made a great teacher gift… though this Cat in the Hat Reading Jar would be great decor in your own house, too!

dr seuss gift in a jar for teachers-004

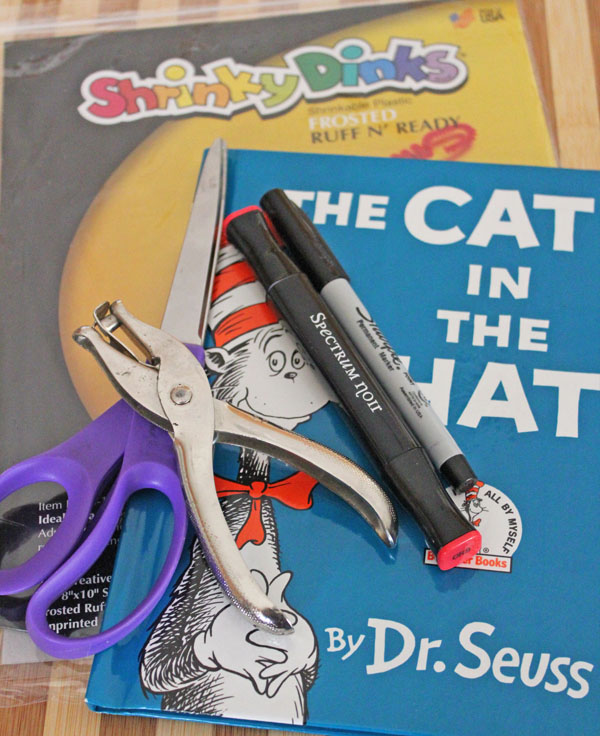
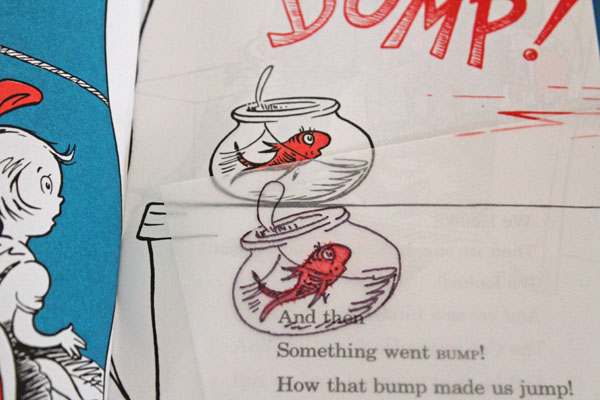
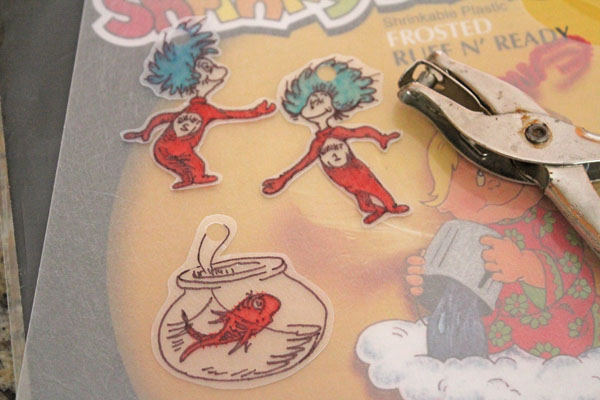
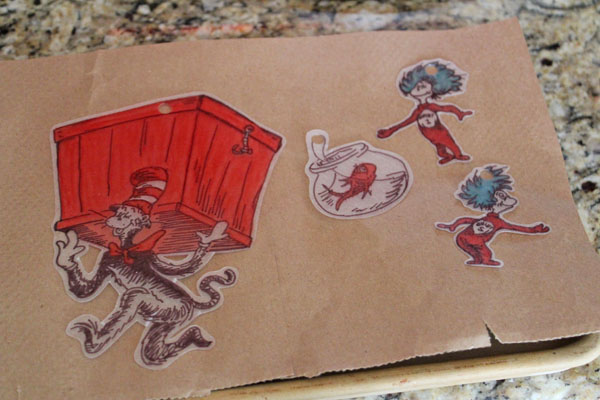
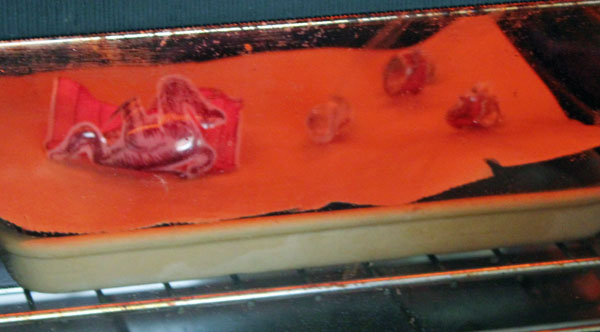
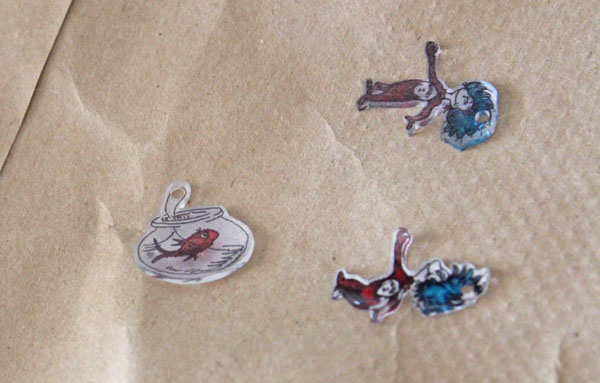
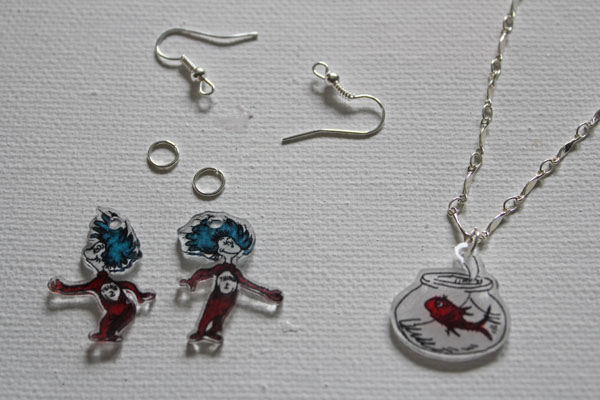
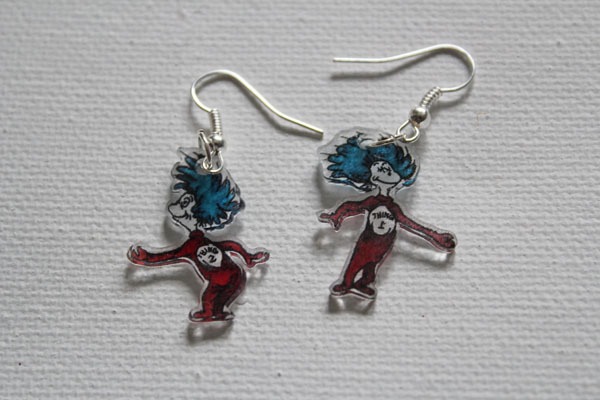
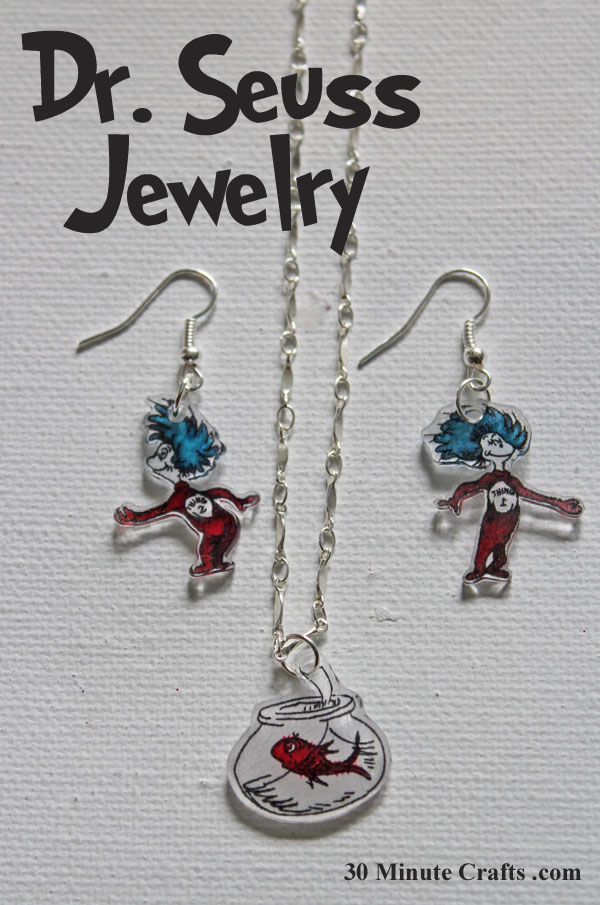
I whipped up Some Seuss Jewelry as well, using Shrinky Dinks. These Thing 1 and Thing 2 Earrings and Fish Necklace were fast and fun to make.

Dr Seuss Jewelry

Make sure to stop by tomorrow and all week long for more Seuss crafts! And if you’re just joining in, be sure to check out the Day One and Day Two Dr. Seuss Craft Lightning roundups!

Cat in the Hat Dr. Seuss Jewelry

Dr Seuss Jewelry

I love making fast and easy jewelry. There are so many ways to whip together some custom jewelry, and I thought a great way to make some Dr. Seuss Jewelry would be to use Shrinky Dinks. You don’t need any art skills to make them – you can just trace your favorite images to make fast and simple Cat in the Hat Jewelry.

This post is part of Craft Lighting Week – a whole week of 15 minute or less crafts that I put on with my friend Angie from The Country Chic Cottage. Every morning she and I share a fast and easy 15 minute craft, and every evening we do a round up of friends in the blog world who are also creating fast and simple crafts with us. This week, with Dr. Seuss’s birthday coming up, we decided to dedicate the week to Dr. Seuss crafting!

Cat in the Hat Jewelry SuppliesThis jewelry is super simple to make. All you need is:
Cat in the Hat book
Shrinky Dink Sheets
Markers
Scissors
Hole Punch
Oven or Toaster Oven
Jewelry Findings – Jump rings, chain, earring wires
Pliers


Start by selecting an image.

trace your drawings

Trace the image. I found it works best to outline the image, color it in, then add any detail lines.

traced fish

I made the water splash bigger, to accommodate the hole punch in the next step. Also, on my Thing 1 and Thing 2, I did the text as a mirror-image so that the text would read correctly on the shiny side when done.

Once you have your images traced, cut them out.

punch holes

Once you’ve traced and colored your images, punch a hole in the top of each. Get them ready for shrinking by placing them on a cut-out from a paper bag.

ready for shrinking

Follow the instructions – it only takes a couple minutes to shrink up your images. They start by curling up, which looks scary! But they flatten out on their own, and that’s when you know they are done.

curl up in toaster oven

Let your pieces cool.

after shrinking

Grab your jewelry findings.

add jewelry components

Add a jump ring to the fish and attach to a necklace. Use jump rings to attach Thing 1 and Thing 2 to earring wires.

thing 1 and thing 2 jewelry

Super simple! Make sure you come back this evening as I share more fun and fast Dr. Seuss crafts… and all week long! And in case you missed it, check out my Day 1 Seuss Craft Lightning and Day 2 Seuss Craft Lightning Roundups!


Dr Seuss Party – Craft Lightning Day 2 Roundups

We’re doing a whole week of Dr. Seuss Crafts here on 30 Minute Crafts. I teamed up with my friend Angie from The Country Chic Cottage, and every day we’re sharing a Dr. Seuss Craft you can do in 15 minutes or less, and every evening we’re sharing up a round-up of Dr. Seuss crafts from our blogging friends that decided to join in on the fun. Today’s bloggers, without intending to, came up with all the crafts you need for the perfect Dr. Seuss party! All you need are some Seuss-errific invitations (Oh the places you’ll go… including my birthday party! … perhaps?), and you’ll have a memorable party for any kid (or kid at heart)!

I can’t wait to share today’s Dr. Seuss Craft Lightning Posts! Even if you don’t have a party on the horizon, consider an impromptu reading party for your kiddos with these fun crafts!

These little Cat in the Hat Treat boxes by Amy over at One Artsy Mama would make fun table decor, and treats for the kids at the table! For a healthy option, you could fill them with goldfish crackers (maybe the colored ones for a little play on “One Fish, Two Fish, Red Fish, Blue Fish”?)!

Cat in the Hat Treat Holder

These adorable Seuss Party Printables from Dinah at DIY Inspired are such a great way to add some Seuss flair to your party. That treat sign? ADORABLE!

Dr Seuss Party

What is a party without party hats? These Thing 1 and Thing 2 party hats created by Melanie at It Happens in a Blink are fun and simple to make.

Cat in the Hat Party Hats

And what do you wear to a Seuss Party? A Seuss inspired shirt, of course! Jessica from Mad In Crafts made this awesome shirt inspired by the colors and whimsy of one of my favorite Seuss books – Oh the Places You’ll Go!

Seuss Inspired Sharpie Shirt

Need snacks for the kids at your Seuss party? What’s a better healthy Seuss snack than a Lorax Cutie? Older kids can make their own, or you can have them made before the party. Either way, Karen at Desert Chica Ramblings is a genius for coming up with these!

The Lorax Snack

If you’re looking for a great Dr. Seuss-inspired gift, or you’d like a craft for older kids at your Seuss party, this book turned traveling chalkboard is a great option. Tracy at Scrappy Chick 101 shows you how to make one (or several!).

Road Trip Chalkboard

It isn’t a party without cute favors, right? Nicki from 365 Days of Crafts made these adorable Dr. Seuss Favors. Filled with Red Sweedish Fish! How Cute is that??


Dr Seuss Party Favors

Pair your fish with a Seuss book that includes this fun bookmark and reading log, and you have a favor that will be enjoyed for years. Grab your Dr. Seuss Reading Printables with Angie over at The Country Chic Cottage.

Bookmark and Reading Log Printable

And I’ve got a great idea for centerpieces for you! Horton’s Clovers from Horton Hears a Who are super simple to make, and you can whip up a whole vase-full!

Horton's Clover

If you missed yesterday’s roundup, be sure to go check out the Craft Lightning Day 1 Roundup for more awesome Dr. Seuss Crafts… and come back all week long for more 15 minute or less Dr. Seuss Crafts!


Horton’s Clover from Horton Hears a Who

Horton's Clover

I love Dr. Seuss’s Horton. Both in Horton Hears a Who and Horton Hatches the Egg. He has such conviction. An elephant is faithful, 100%! So, I thought I’d do a Horton craft as today’s quick 15 minute craft. All week long I’m sharing quick (15 minute or less) crafts based on Dr. Seuss’s books as part of the Craft Lightning Week I do with Angie from The Country Chic Cottage.

supplies for horton's cloverHorton’s Clover is super easy to make. Here’s what you need:
Lion Brand Pom Pom Maker
Yarn (I used Lion Brand in Rose Mist)
Scissors
Heavy-Gauge Floral wire


Start by making a pom pom as shown in the pom pom maker instructions. Do you’ll want a full pom pom with about 70 rotations. Tie off as usual.

Tie pom pom center

Before taking the pom pom off the pom pom maker, twist the heavy-gauge floral wire in place over the central tie.

Secure wire in the center

Then remove the clover, and cut the loops.

the clover from horton hears a who

If you like, you can trim up some of the ends to even up the top of Horton’s clover, but I like it a little jagged. I think it is more Seuss-like that way.

Make Horton's Flower

Make sure you come back tonight for my round-up of all the awesome quick Seuss Crafts that my bloggy buddies are sharing today! And if you can’t wait, make sure you go check out the Craft Lightning Day 1 Dr. Seuss Crafts Roundup.


Dr. Seuss Craft Lightning Day 1 Roundup

I’m so excited for this week! Dr. Seuss is one of my favorite memories from childhood, and this week we’re celebrating all things Seuss with our favorite blogging friends – all sharing quick and easy Dr. Seuss Crafts all week long. Angie from The Country Chic Cottage and I love putting these weeks together, and we have been looking forward to our Seuss week!

Marilyn from 4 You With Love made a super simple Hop on Pop mug using a Sharpie.

Hop on Pop Mug

How cute is this Lorax paper plate shared by Kimberly over at A Night Owl Blog.

Lorax Paper Plate

Shelly from Dolen Diaries whipped up some Seussical mixed-up animals.

Mixed Up Animals

This “Oh The Places You’ll Go” Card was whipped up by Allie at My Card Party.

Oh the Places You'll Go

Ariean from One Krieger Chick made a fun bookmark with pom poms perfect for all Seuss books.

Pom Pom Bookmark

My boys would love these Cat in the Hat Cookies by Katie from Made to be a Momma.


Cat in the Hat Cookies

Mandy from Sugar Bee Crafts and her kids came up with a fun Charades game using Seuss Titles.

dr seuss titles charades

These 5-minute bulletin boards were made by Sarah of Bombshell Bling for her son’s Dr. Seuss-themed bedroom.

5 Minute Bulletin Boards

My partner for these Craft Lightning Series, Angie from the Country Chic Cottage, made this great Seuss Quote sign using a custom stencil.

Dr. Seuss Quote Sign

That’s just the first day! Remember to come back every day, I’ll have a quick and easy Seuss Craft for you every day this week, and each night I’ll share with you a Craft Lightning round-up of Dr. Seuss Crafts from other bloggers.


I Can Sleep With My Eyes Shut – Dr. Seuss Mask

I Can Sleep with My Eyes Shut Sleep Mask

Dr. Seuss has written so many awesome books that we all know and love. I Can Sleep With My Eyes Shut is one of those. It makes my son giggle when we try reading with our eyes shut. He’s still learning to read, and making it a fun, giggly experience is a great way to encourage his reading. So I made this simple, no-sew sleep mask in just 15 minutes. The Cat in the Hat’s squinted-shut eyes and furrowed brow are painted on, helping to make it even more giggle-inducing!

This post is just the first of a whole week of fast and easy Dr. Seuss crafts that I’m doing with Angie from The Country Chic Cottage as part of Craft Lightning Week. All week long each of us will share a quick and easy Dr. Seuss craft in the morning, and then do a round-up of Dr. Seuss Crafts each night.

This Dr. Seuss I Can Sleep with My Eyes Shut Sleep Mask is simple to make one of these sleep masks, here is how:

supplies for I can sleep with my eyes shut maskSupplies:
White Felt
Black Ribbon
Scissors
Black Paint and Paintbrush
Glue


Start by cutting out your sleep mask shape. You can use an existing sleep mask as a template, or just fold your felt in half and cut. You’ll need two pieces of felt cut the same size.

fold and cut felt

Using a page from the book as your guide, paint on the squinted eyes. It doesn’t have to be perfect, Dr. Seuss illustrations don’t have many straight, perfect, or even lines… which makes it great for doing free-hand!

paint eyes on seuss mask

Then paint on the eyebrows. Or, well, unibrow, I suppose. A nice big, broken, squiggly line across the top.

paint on eyebrows

Glue all the way around the edge of the bottom piece of felt, tuck in the ends of the ribbon, and press the top felt down on top. Allow to dry, and you’re all set!

Sleep with My Eyes Shut Sleep Mask

And if you can’t wait until tonight for the Craft Lightning Seuss roundup, here are a whole bunch of Dr. Seuss crafts to get you started!


Seuss Craft Lightning

Craft Lightning Seuss Edition

We’re doing an entire week dedicated to Dr. Seuss Crafts! That’s right, all week long Angie from The Country Chic Cottage and I will be sharing a different Dr. Seuss Craft each day, and every evening, we’ll be sharing a round-up of Dr. Seuss Crafts from our blogging friends! So Hop on Pop, grab your Green Eggs and Ham, and invite the Cat and the Hat over for an awesome week of crafting fun!

Horton might stop by, along with Thing 1 and Thing 2… there is no telling the amazing characters from our childhoods (and our children’s childhoods) that will stop by!

AND – we want you to join in! If you have a Dr. Seuss craft that can be made in 15 minutes or less, please add it to our Seuss link-up! We want to see your awesome Seuss crafts!


Lucky Charm Clover Necklace

Lucky Penny Necklace

Do you have a lucky penny that is begging to be made into jewelry? Or maybe you don’t, but you want to spend the afternoon looking for a penny that can become a lucky charm. Whatever your penny status, this lucky penny necklace is fun to make, and doesn’t take a lot of time. The 30 minutes for this project gets divided into two parts – dying the hearts and making the necklace.

supplies to dye wood supplies for lucky penny necklace


Supplies:
RIT dye
wooden hearts
disposable container
HOT water
Necklace Chain
Krazy Glue
Lucky Penny
Bail (necklace charm holder-thingy)

Boil your water. Add about 1/2 water to the container, and 1-2 tbsp RIT dye. I wanted my wooden hearts to have different depths of color, so I added one third of the wooden hearts, then 10 minutes later added another third, then 10 minutes after that added the last third.

preparing to dye the wood

wood in dye

After the wooden hearts soaked in the dye for 30 minutes (and 20, and 10, respectively), I drained off the liquid and set out the wooden hearts to dry. If you’d like more details on this process, check out my heart necklace tutorial.

Once the wooden hearts dried, I glued them onto the back of a penny using Krazy Glue. I decided to have Abe be the front of my necklace, but you might choose a tails-up penny. Up to you.

glue hearts in place

Once that has begun to set (about 10 seconds), add the bail to the back. Make sure you know which side is “up” on the penny before gluing on the bail, or you might find yourself with a sideways or upside-down penny.

secure hearts with glueOnce all the glue has set, string the pendant onto a chain, and you have a great lucky penny necklace!

make a lucky penny necklace

Simple Sizzix Flower

Affiliate links are used in this post.

Simple Paper Flower

Flowers are fun to make, and a craft project that you can use in a number of different ways. You can put stems on them, add them to hairclips, use them to scrapbook pages, frames, or other decor items… flowers are such a fun little craft.

So when I was given the new Sizzix Framelits Flip-Its Die, I know there was a card on the front of the package, but I saw flower potential. I might have even seen the potential for TWO flowers, but I have to wait to give you confirmation on that one… there is some classified crafting going on over here!

If you want to make one (or lots!) of these simple flowers, here is what you need:
Sizzix Framelits Flip-Its Die
Paper
Die-Cut Machine
Adhesive (I used Krazy Glue)
Buttons
Wire for stem
Pliers
Floral tape (optional)

Start by using the long die to cut into your paper. I used plain paper, but a patterned paper would look good (a stripe would be awesome here BTW). If you’ve never used a die before, the way you use them is to sandwich the die and your paper between cutting plates, then run it through your die cut (Sizzix) machine. Die cutting gives you a beautiful cut.

use sizzix die on paper

Then trim it down. I trimmed mine so that the height was about the height of one of the filigrees. You can go more or less – this is the height that determines the length of the petals, so make them as long or as short as you like.

trim down to size

Start by folding one end in at an angle.

start folding petals

Fold back and forth accordion-style, but at an angle.

continue folding to curl around

Fold all the way around.

cut off any extra petals

If you have more petals than you need to go all the way around, you can just cut them off.

krazy glue flower

Glue in place. If using Krazy Glue, remember that less is more.

glue on buttons

Glue a button to the front to act as the center. Use a button with a shank for the back of the flower, glue it in place. Then thread wire through the hole in the shank for the stem, and twist in place. Use the pliers if you need to.

You can wrap the stem in floral tape if you like, for a more finished look.

sizzix flower

DIY Wedding Table Numbers with Chalky Paint

DIY Wedding Table Numbers

I loved putting together my wedding. This was 7 years ago, and pre-blogging for me, but not pre-DIY. I did a lot of wedding crafts, one of which was the table numbers. DIY wedding table numbers are a great way to add some style to your wedding decor.

Angie from The Country Chic Cottage and I created a video sharing how we made our wedding centerpieces using paint sent to us by DecoArt. We’re using DecoArt’s Americana Chalky Finish Paints, which are perfect for these DIY Wedding Table Numbers.


We’ve been doing wedding craft videos all week long! Check them out over on Crafty Hangouts, and check out the #weddingHOA hashtag.

DIY Wedding Table Numbers with Chalky Paint