Craft Lightning – Day 5 Roundup

Craft Lightning has flown by, as it always does! We’ve had so many AWESOME fast crafts this week… Make sure to check out all the roundups… Day One, Day Two, Day Three, and Day Four. Here is Day Five!

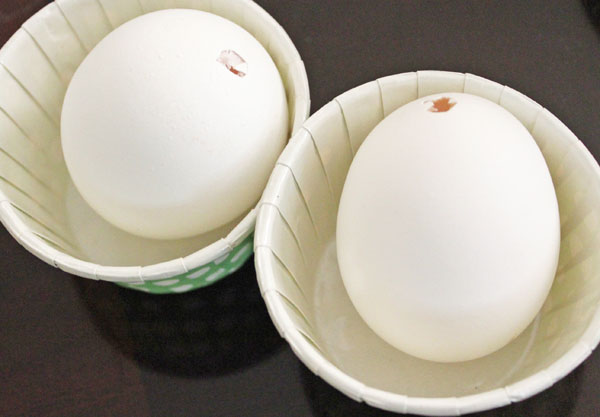
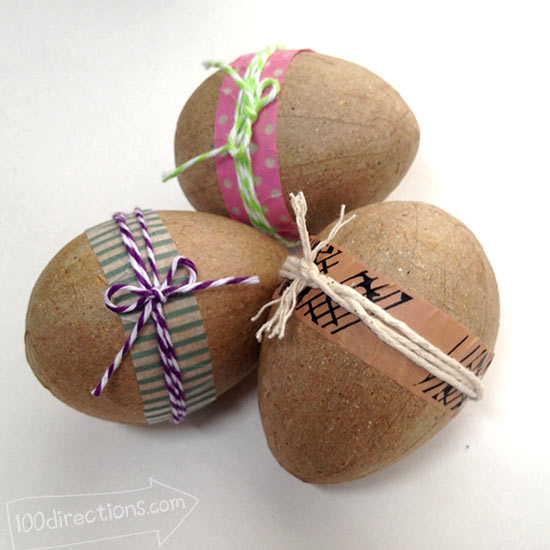
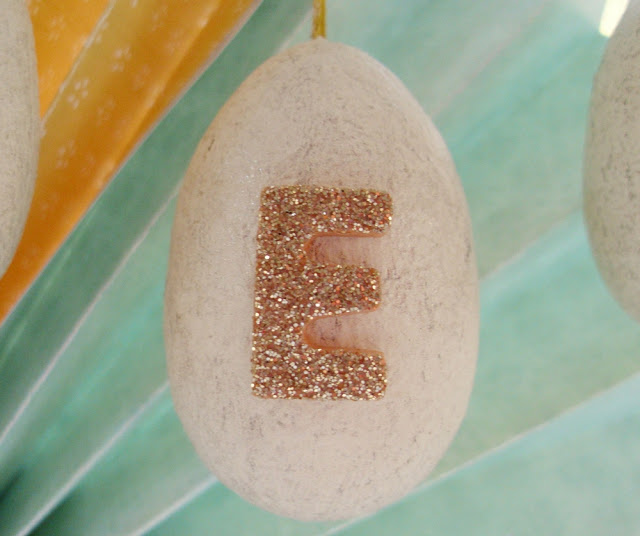
You have to see what humble beginnings these beautiful monogrammed Easter Eggs had. Seriously, I did a double-take! They turned out so classy and beautiful!

Monogrammed Easter Egg - The Shed Blog

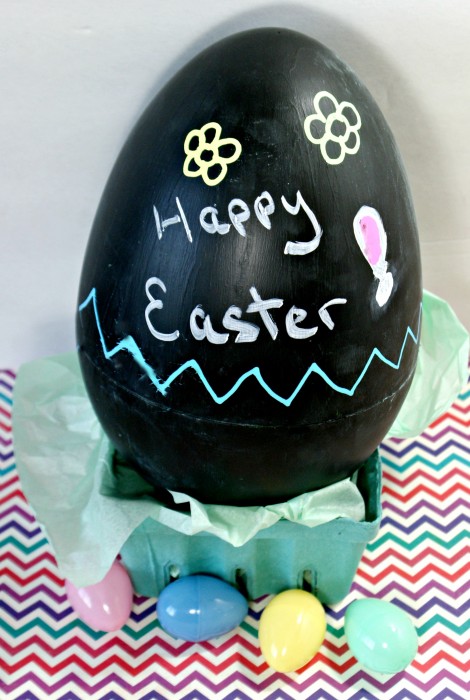
Clever Pink Pirate had the clever idea (see how I did that, clever, huh?) of painting a giant egg with chalkboard paint.

Giant Chalkboard Easter Egg - Clever Pink Pirate

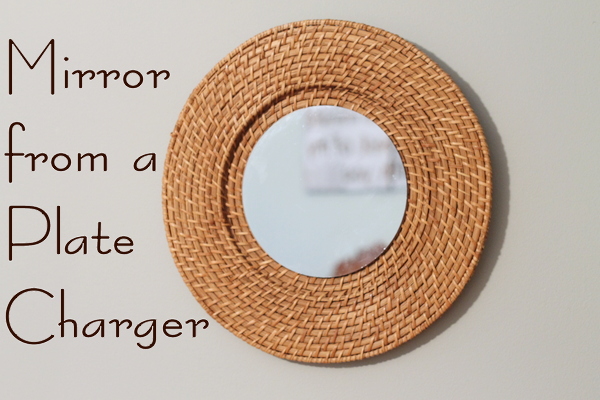
My “partner in craft” for this series, Angie from The Country Chic Cottage, has a woven mirror knockoff that will blow your mind… and then make you wonder why YOU never thought of that!

mirror from a plate charger-the country chic cottage

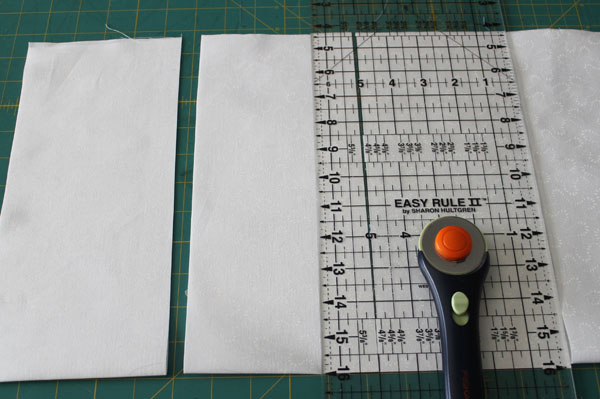
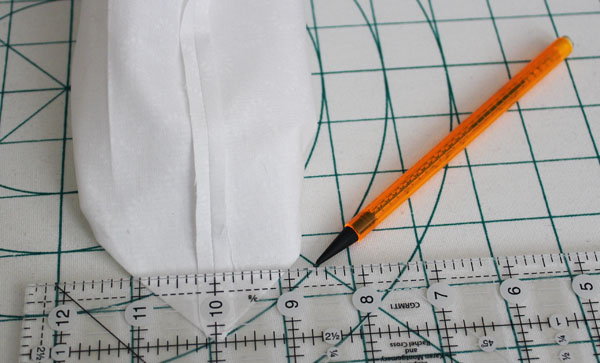
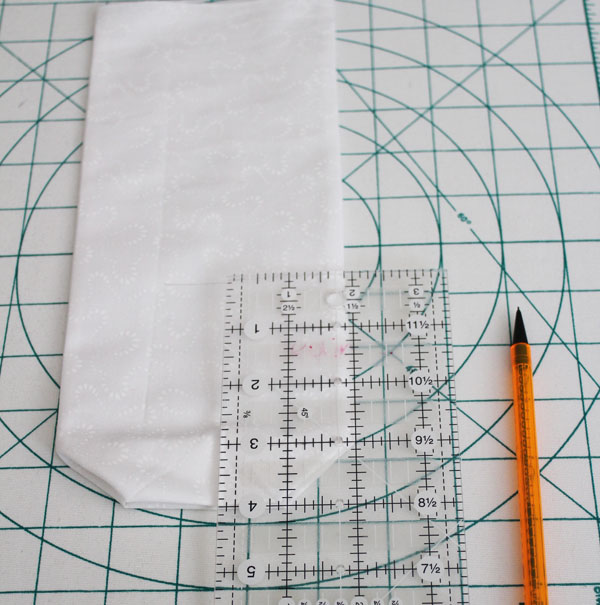
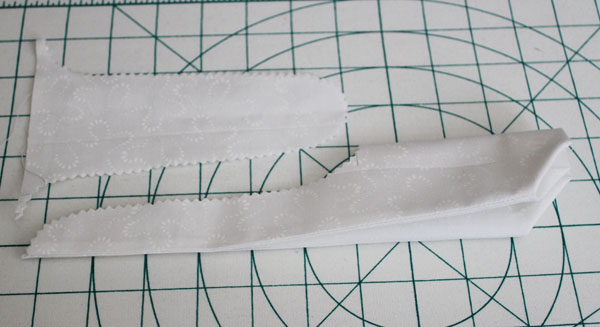
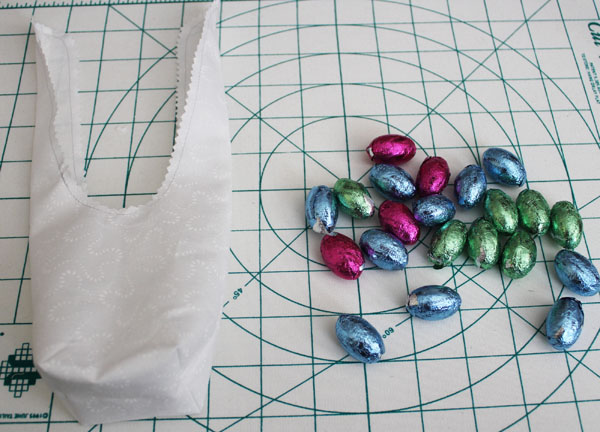
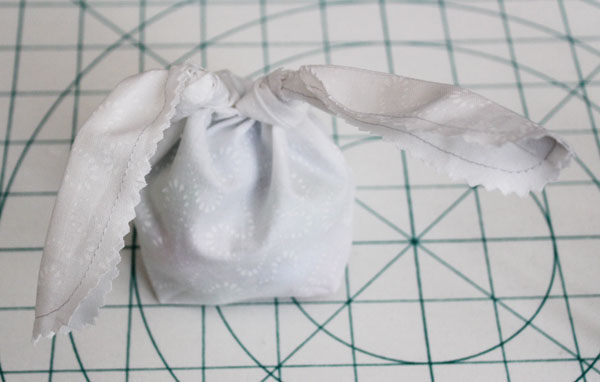
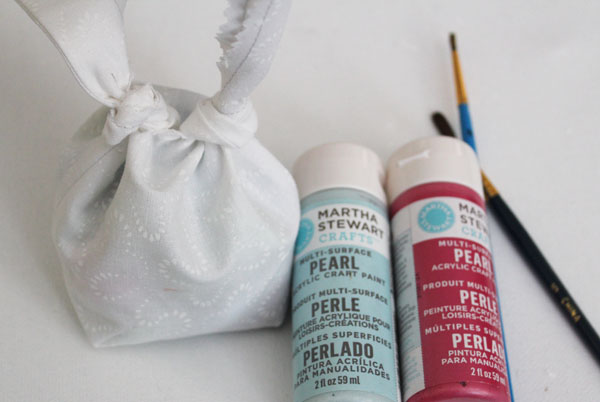
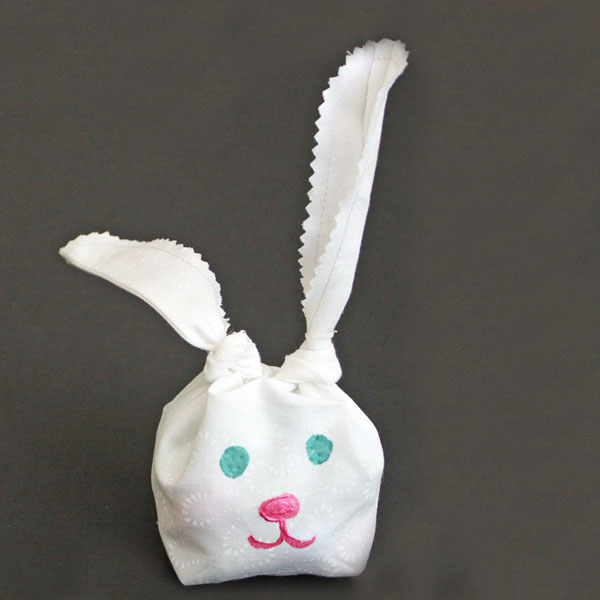
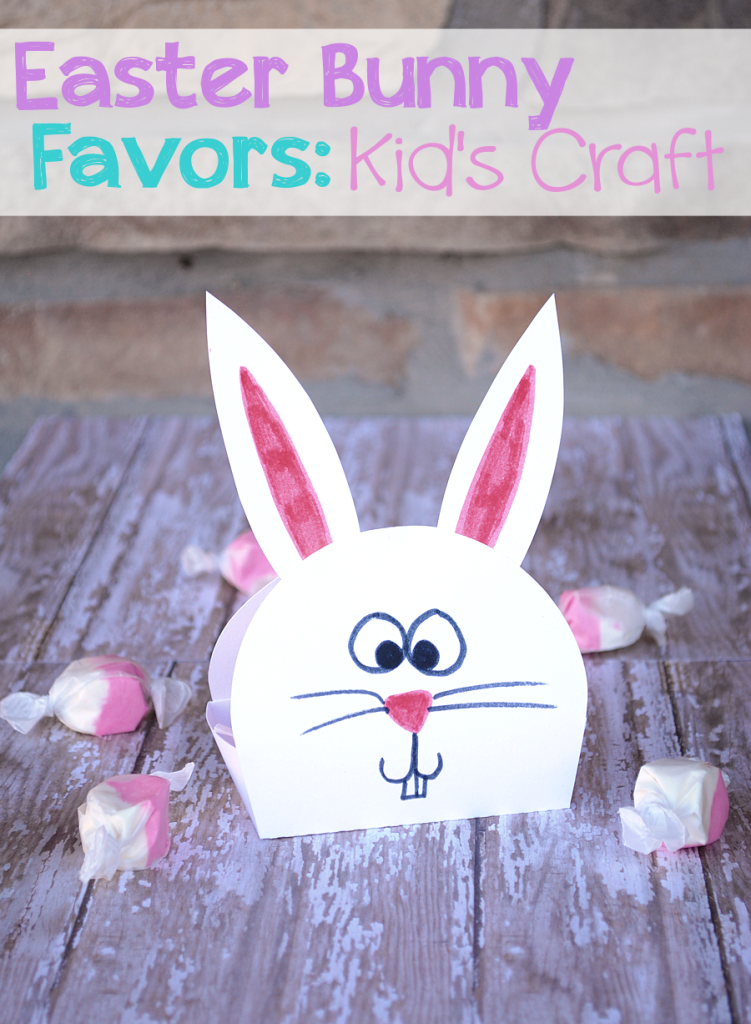
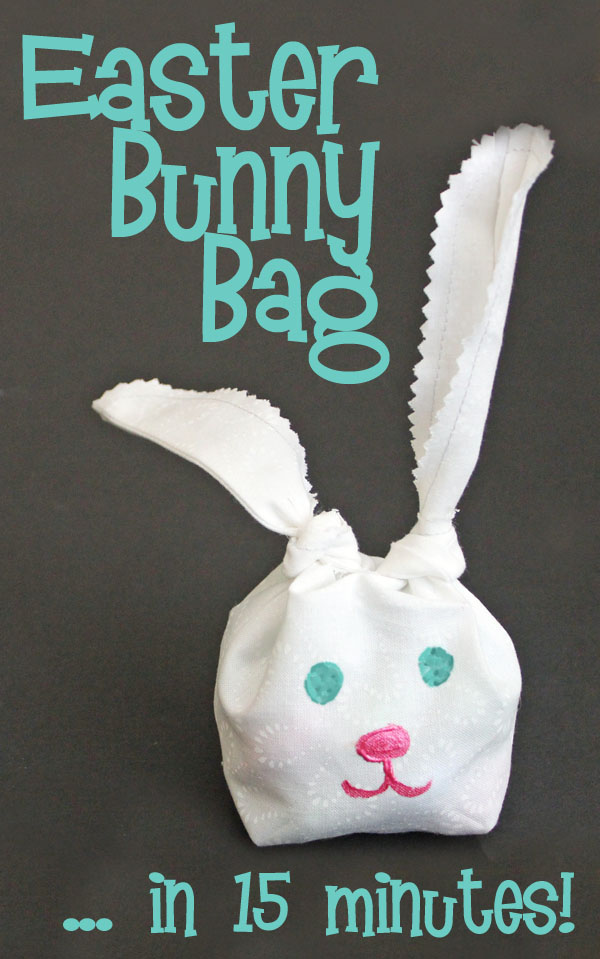
I made a simple and fast knotted bunny bag that would be a great addition to any Easter basket or Easter table.

Easter bunny bag in 15 minutes on 30 minute crafts dot com!

That’s it for Craft Lightning Spring Edition! I hope you enjoyed these crafts as much as we enjoyed sharing them with you! Make sure to stop by often for more fast and simple quick crafting ideas… and a HUGE thanks to my co-hostess Angie from The Country Chic Cottage. It is so fun for me to do these weeks with her!

15 Minute Knotted Easter Bunny Bag

Easter bunny bag in 15 minutes on 30 minute crafts dot com!

Today is the last day of Craft Lightning Week! I partnered with Angie from The Country Chic Cottage to share with you crafts that can be done lightning fast – in just 15 minutes! On Monday, I shared a simple no-sew pillowcase applique. On Tuesday I showed you how to make a statement with my Daffodil Banner. On Wednesday, I shared my no-sew felt carrots. Yesterday, I overcame my fear of glitter with a less mess method for covering Easter eggs in glitter.

Today I’m sharing with you one more super fast Easter project… this quick and easy Easter Bunny bag! I’ll show you how you can whip one of these up in 15 minutes… but let me warn you, they’re addictive!

To make your own Easter Bunny bag, you need:

Fabric (solid or white-on-white print is well)
Scissors or Rotary Cutter and ruler
Sewing machine
Pinking shears (zigzag scissors)
Fabric Paint
Candy or other filling

Start by cutting a strip from the fabric. My strips are 5″x24″. You only need one strip per bunny bag.

cut fabric strip

Put the right sides of fabric together, folding to make it 5″x12″ and stitch up the long sides, leaving the top open. Fold the fabric so that one corner is poking out, lining up the fold on the bottom with the seam, and mark 1″ up from the corner (see the picture below). Stitch on this line. Repeat with the other corner.

mark corners for stitching

Turn the bag right side out, fold flat, and put a mark 4″ up from the bottom, about mid-way between the side seams.

make a mark four inches from bottom

Fold in half with the line facing out, and cut from the top down to the bottom using pinking shears (the zigzag scissors) to shape the ears.

cut ears with pinking shears

Optional: I stitched around the top opening to help the fabric keep it’s shape. You can skip this step if you like.

put candy in the easter bunny bag

Fill the bag with candy, then tie the ears. You can tie them together in a double knot, or individually like I did.

tie knot in ears of easter bunny bag

With the fabric paint and a paintbrush, add eyes, a nose, and mouth.

paint on eyes and mouth

That’s it, your Easter bunny is done! Now go make an entire warren of rabbits!

Fabric Easter Bunny Bag in 15 minutes

Craft Lightning – Day 4 Roundup

The week has been flying by, and it is already day FOUR of our Spring Craft Lightning week! I can hardly believe it!! If you’ve missed any of it, you really should go back and check out Day One, Day Two, and Day Three for these awesome Lightning Fast Crafts… crafts that can be done in 15 minutes!!

Washi tape is awesome for fast crafting. It is already sticky (no need to spend time adding glue) and comes in so many colors and patterns! Rhonda over at Mrs Greene made these super cute Washi Tape Pendants!

Washi Tape necklace at mrs Greene

Angie from The Country Chic Cottage, who is my “partner in crafting” for these fun fast craft weeks, covered peeps in chocolate. Which is so awesome, it bears repeating. She covered PEEPS in CHOCOLATE, people!! Yum!!

Chocolate Covered Peeps Marshmallow Pops- the Country Chic Cottage

I tested my personal boundaries, and found a (mostly) non-messy way to work with glitter. These glitter eggs are fun, fast, and won’t be shedding all over the house!

Glitter eggs (or anything) with a lot less mess using this technique!

Tomorrow is the last day of Craft Lighting Spring Edition… and there has been so much awesome crafting this week that I’m not sure if I can say that we saved the best for last… but I can certainly say that there is much more awesome on the way!!

Less Mess Glitter Eggs

Glitter eggs (or anything) with a lot less mess using this technique!

This week is all about fast spring crafts, because I’m doing a week of Craft Lightning projects with my friend Angie from The Country Chic Cottage. Craft Lightning crafts can be done in 15 minutes or less. Which is a challenge. Today I decided to challenge myself even further – by using glitter.

That may not sound like a big challenge if you don’t know me. But those who know me know that I hate glitter. It gets everywhere and there is no getting rid of it. So, I decided to try a less mess way of adding glitter to crafting to see if I could start a tepid relationship with glitter. That’s where these “less mess” glitter eggs come in. You’ll see what I mean…

If you want to make your own less mess eggs, here is what you need:
Eggs (with the middle blown out – we’ll talk about that)
Ultra Fine Glitter (I used EK Success brand)
Small disposable cup
Mod Podge
Paint Brush
Skewers

If you haven’t already blown the center out of your eggs, it is easy to do. When making something that uses eggs (cookies, pancakes, whatever), don’t crack the egg as normal. Instead, using a pin, poke several holes in one end of the egg. Then insert the pin and pry up the shell a little. Keep doing this until you have a small hole, maybe 1/4″ in size.

blown out eggs

Do the same thing with the other side, but this time make sure the bottom of the egg is over a bowl. Once you have your second hole, put your lips over the egg and blow into the hole at the top… and the egg insides will be pushed out of the bottom hole and into your bowl! Rinse out the inside of your egg with some water, and you’ve got a useable eggshell!

Once you have your shells collected, it is time to decorate them… with glitter! I played around with the perfect “formula” for getting a good glitter paste. Add 1 part Mod Podge to about 1.5 parts glitter, and stir well. You should get something about the consistency of grout, which is perfect for single-coat coverage. And with fast crafting, we want everything to get covered in a single coat.

mix the mod podge with glitter

Using your paintbrush, apply the glitter paste. This will be a LOT less messy than if you put glue or Mod Podge on the egg, and then rolled it in glitter. In this picture, you’ll see that my mixture is thinner, so I’m not getting full coverage. With a nice thick mixture, you’ll get full coverage… it will feel more like you’re pushing it around than painting it on.

paint glitter mod podge onto eggs

Once you’ve painted your egg with the glitter and Mod Podge mixture, put a skewer through the two holes and allow to dry.

dry eggs on a skewer

That’s it! You could give the eggs a coat of Mod Podge to seal them, but they really don’t need it… the glitter stays on the egg, doesn’t get on your table! And, if you get any of the glitter mixture on your hands, just let the Mod Podge dry a little, and peel it off – practically no mess at all!

less mess making glitter eggs when you use Mod Podge this way

I might be able to like glitter again…

Make sure to check back this afternoon and tomorrow for more lightning fast crafts!

Craft Lightning – Day 3 Roundup

Oh my, what a busy day! I’ve been working on so many fun things over here… a few of them are still secret, but some I can share! Today was the second installment of a 3-part series I’m doing with my friend Jamie from CRAFT and fellow quilter Tami of The Enchanted Desert Quilter. We’re breaking down the process of making a t-shirt quilt! I’m also putting together my presentation for the SNAP Conference where I’ll be speaking with my friend Colleen about Google+! And I’m working on a fun series for April… and some more secrets… stay tuned!

And all this in the middle of our Spring Craft Lightning Week! Which is perfect. Because Craft Lightning is all about FAST crafting. FIFTEEN minutes or less. I love it. Here are the amazing Craft Lightning posts from today!

Over at Crazy Little Projects, you’ll find the instructions and pattern to make this ADORABLE bunny favor! Great for kids, but would also be fun to put at the table for an Easter brunch (I haven’t been a kid for more years than I care to count, but I still LOVE a fun favor bag)!

Easterbunnyfavors-Crazy Little Projects

Do you like washi tape? How about Baker’s Twine? At 100 Directions, you can play with BOTH of these craft staples to make these fun washi tape and baker’s twine wrapped eggs. Simple and awesome.

washi-tape-twine-easter-eggs-jen-goode-signed

My partner in crime for these lightning fast crafting weeks, Angie, came up with yet another fun and fast craft. She wrapped avocados for fun easter decor. Edible easter decor? YES PLEASE!Easter Avocado Centerpiece-The country Chic Cottage


I whipped up some no-sew felt carrots. I love my sewing machine, but there are times when whipping out the glue gun is just as satisfying! But don’t tell my quilting friends that, m’kay?

No Sew Felt Carrots are made with a glue gun!

We have two more days left of our lightning fast crafts… I can’t wait to share tomorrow’s project with you!

No Sew Felt Carrot

No Sew Felt Carrots are made with a glue gun!I love to sew, and try to spend some time behind my sewing machine every day… but sometimes a no-sew project is the best fit. These felt carrots are quick and easy to make with a glue gun… and anyone can do it!

This project is my third 15-minute craft this week… all week long Angie from The Country Chic Cottage and I are sharing lightning fast crafts that can be done in 15 minutes or less! Yesterday I shared a fun daffodil banner, and the day before I did a no-sew decorative pillowcase.

supplies for no sew fabric carrotHere’s what you need to make your own no-sew felt carrot:

Orange Felt
Green Felt
Scissors
Glue Gun
Batting or Polyfil stuffing
Ribbon of your Choice


Fold your orange felt in half, and cut into long carrot-shaped triangles. They don’t have to be perfect, but make sure that you make them wide enough at the top to stuff them! Folding the felt in half before cutting is an easy way to have two pieces with a similar size and shape.

Put hot glue on the two long sides of one of your triangles, then carefully put the other triangle on top.

cut triangle and add glue

Cut a piece of green felt (mine was roughly 8″x6″), and cut slits into the long side to make a fringe. My cuts are about 1/2″ to 3/4″ apart. They don’t have to be perfect.  Make sure that you don’t cut all the way to the end – leave about an inch at one end.

cut fringe into large rectangle

Put a line of hot glue on the uncut portion of your green felt, and roll it up. Put some stuffing into your carrot shape, making sure to get it all the way to the bottom point.

roll up carrot top

Put hot glue around the base of your green carrot fringe, and put it into the top of your stuffed carrot. carefully mold the carrot around the green fringe.

glue top into base of carrot

While the glue is still warm, tie with a ribbon. You can add a bow, but I just did a double knot and then trimmed my ends.

add ribbon to top of carrot

That’s it! A super easy no-sew carrot! If you want to see another no-sew and super simple carrot, Angie did a button carrot yesterday that is also no-sew and super easy! Come back later today for a roundup of fun and lightning fast 15 minute crafts, and all day this week we’ll be sharing quick crafts that can be done in 15 minutes or less!

quick and easy no-sew fabric carrots!

Craft Lightning – Day 2 Roundup

I love quick crafting – that is why I have a blog entirely dedicated to 30 minute crafts! And it is so fun when my friend Angie from the Country Chic Cottage get together for lightning fast crafts! We put on this week to challenge ourselves to craft in FIFTEEN minutes or less… and then we convince our friends to play along with us! Today’s 15 Minute Craft Lightning projects are AWESOME!

Cyn from Creative Cynchronicity shares this fun and fast paint technique. Getting all these layers of color really should take more than 15 minutes… but she shows you how to put it all together in less than 15 minutes!

Faux copper Enamel Technique - Creative Cynchronicity


Erin from My Very Educated mother made these super simple bird’s nests out of… paper bags! I can’t believe how easy these are, and that you can whip one up with supplies you probably already have on hand!

paper bag bird nests - my very educated mother


Angie made a super cute button carrot! Buttons are hot right now (though I can’t think of a time when buttons weren’t hot), and this carrot is so much fun!

button carrot - the country chic cottage


I made this spring Daffodil banner that I just LOVE!

15 Minute Daffodil Banner

Remember to come back every day this week for more lightning fast crafts… and if you want to share your fast crafts with us, you can add them to the Craft Lightning Linky!

See you tomorrow!

Daffodil Spring Banner

15 Minute Daffodil Banner

Spring is here! I have friends who are surrounded by snow… but in Vegas, spring has sprung! This daffodil banner is the perfect way to bring some of that spring indoors (even if there are still patches of snow outdoors). I whipped up my banner in 15 minutes, it was that quick and easy.

This is the second project I’m doing as part of Craft Lightning Week. Craft Lightning Week is a whole week of crafts that take 15 minutes or less. I partner up with Angie from The Country Chic Cottage, and we each share a new super-fast lightning craft each day. And then we get our friends in on the fun and have them share their 15 minute crafts… which we share with you each afternoon in a Craft Lightning roundup! So make sure to come back this afternoon so that you can see what everyone else has been up to!

This daffodil banner was inspired by this chipboard banner over at Mod Podge Rocks. I loved the idea, and gave it my own spin!

daffodil banner suppliesHere is what you need to make your own:
Chipboard shapes
White Paint (yellow would work, too)
Paintbrush
Mod Podge
Decorative Cupcake Liners
Connie Crystal Gems
Ribbon
Hot Glue


I started by giving the chipboard flowers a quick coat of paint. I didn’t worry about perfect brushstrokes, since the chipboard will just be in the background. I took about a minute per shape adding paint, and painted a total of 5 flowers.

paint chipboard

Since the layer of paint was thin, and the Las Vegas air very dry, the first chipboard shape was already mostly dry when I finished painting the last. I put a layer of Mod Podge on the bottom of each cupcake liner, then pushed it down into the middle of the dry, painted chipboard flower. I repeated this with each flower.

Attatch liners to chipboard

I measured my ribbon, putting a mark 18″ from one end, then adding a mark every 12″ for the flowers. I left 18″ on the other end, and then cut my ribbon. I then tied each flower in place on one of my marks by threading the ribbon through the hole, and tying a knot.

tie ribbon to holes in chipboard

My flowers were almost done, but needed a little something extra. With a small dab of hot glue, I added a pretty crystal to the center of each blossom. The perfect finishing touch.

put crystal in place

daffodil banner square

daffodils on a banner

Make sure you check back later today for my Craft Lightning roundup… and every day this week for more lightning quick crafts!

Craft Lightning Day 1 Roundup!

I’m so thrilled to be doing Craft Lightning with my friend Angie from the Country Chic Cottage again! We like to put together these fun weeks where we share with you a new quick craft every day… and then we ask some of our blogging friends to join in! Each of these crafts requires 15 minutes or less of hands-on crafting time!

Vanessa from Tried and True created these fun mousetrap clips. How clever! I would never have thought to use a mousetrap… and I would NEVER have believed that a mousetrap could be a pretty decor piece!

mousetrap clip tried and true blog


Angie whipped up these stenciled favor bags. I love this idea! I have a couple parties coming up, and I love how simple this idea is… plus, depending on your stencil and the colors you choose, you can change up the look of the favors!

diy stenciled favor bags the Country Chic cottage


I added super-easy no-sew embellishments to pillowcases. This is a quick and easy way to customize or personalize a pillowcase for a child.No Sew Pillowcase photo

If you have a 15-minute craft, you should add it to our linky! And make sure to come back every day this week for more quick crafting inspiration!

No-Sew Quick Kids Pillowcase and Care Kit

sponsored post header

This post is also part of a week-long series of “Craft Lightning” projects – crafts that take 15 minutes or less. Check back later today, and all week long, for more Craft Lightning ideas!

No Sew Pillowcase photo

Recently, I was asked to participate in the Colgate Champions for Kids program, and choose an organization to donate children’s Colgate toothpaste and Toothbrushes to. I knew exactly what I wanted to pick. I wanted to take those toothbrushes and toothpaste and turn them into care kits for some of the kids at the Koret Family House.

The Koret Family house is a large house on in San Francisco. I stayed there, with my aunt and young cousin when the older of my two cousins was diagnosed with Leukemia 3 years ago. When L was first diagnosed, he spent over a month in the hospital, most of that confined to one room. He was 6, very sick, and his mom stayed by his side as much as possible. But that left the younger cousin, F, at home over an hour away with a self-employed dad that needed to work. He was suddenly ripped from his mom and his very sick brother. I went up to San Francisco and stayed in the Family House with him for several weeks. Each day I was able to pull him and my son in a red wagon up the hilly streets to the hospital so that he could see his mom and brother. I was able to do laundry, cook dinner, shower, and sleep. It was like a homier version of a hotel, but without the expense. I’ve always been thankful for the small bit of normalcy that the Family House was able to provide for my 4 year old cousin while his brother was sick.

colgate easter display picTo make these care kits, I started by heading to WalMart. I needed:
Colgate Toothpaste (I chose Sponge Bob and Dora the Explorer)
Colgate Toothbrushes (again, same characters)
Fun kids cup
Pillowcases
Heat N Bond Ultra
Fun Fabric (on Hand)


Making the pillowcases was super easy. I ironed the Heat N Bond to the wrong side of my fabric, and then cut out some fun shapes.

cut flowers for pillowcase

I then peeled the paper backing off of the Heat N Bond and ironed it to one end of the pillowcase. The Heat N Bond Ultra is permanent, and will keep the fabric on through multiple washings.

iron on flowers

I folded up my pillowcase and tucked it into the kids character cup along with the toothpaste and toothbrush.

colgate care package cup toothpaste pillowcase

Then they were all set to mail! I’ll add plastic bags around the cups so that nothing shifts too much in shipping. Normally, I bring reusable bags to the store, but every now and then I forget, and end up with plastic bags that always seem to pile up! I like using them as padding when packing boxes.

Colgate Care Package

I love that these kits will help give some normalcy to some kids who find themselves at the Family House. When you or your sibling is sick, and you find yourself in a strange place far from home, it is nice to have some fun things that can be “yours”. Though the house provides linens, a fun pillowcase made by someone who knows how tough it can be, with some new toiletries, might make the stay feel more like a fun adventure. Thanks, Colgate, for being committed to Bright Smiles, Bright Futures… and to kids everywhere.

If you would like to learn more about the Champions for Kids program, you can “like” Colgate on Facebook, or follow them on Twitter.

Disclosure: I am a member of the Collective Bias® Social Fabric® Community. This shop has been compensated as part of a social shopper insights study for Collective Bias® Colgate and Champions for Kids #cbias #SocialFabric